Overview
Project Maintenance; standard Treeview path: CMiC Field > File Maintenance > Project Maintenance
The Project Maintenance screen is used to create and edit project records within CMiC Field. These options are tied to CMiC Field security privileges which must be assigned to the user before they can create or view projects. Assignment of Create, Edit, and Delete privileges for a project must be done in the CMiC Field Security screen. For more information, see Field Security.
All important project information can be stored on this screen, which is broken into separate tabs. It is also possible to add attachments such as project overviews or bid documents directly to the project.
Security
Project Maintenance; standard Treeview path: CMiC Field > File Maintenance > Project Maintenance
The Project Maintenance screen can be launched from the Project link at the top of the Treeview or via the File Maintenance sub-menu. Users require the following security role privileges in order to access the screen:
-
Program Access: Users must be assigned program access in order to access the Project Maintenance screen.
-
Menu Access: Users must be assigned menu access to access the Project Maintenance screen via the File Maintenance sub-menu (standard Treeview path: CMiC Field > File Maintenance > Project Maintenance). Without this privilege, users can still access the Project Maintenance screen via the Project link (if they have the required program access privilege).
For more information, please refer to CMiC Field - Security Roles.
Contract Types
![Pop-up launched from the [Contract Types] button on the Project Maintenance screen.](../../../../Resources/Images/CMiC_Field/FIELD_ContractTypeMaintenance1.png)
Pop-up launched from the [Contract Types] button on the Project Maintenance screen
After a project has been saved, the [Contract Types] button will be displayed. Pressing this button will launch the Contract Types Maintenance screen pop-up window, where contract types can be defined at the project level. By default, company-level settings will be populated but changes can be made at the project level as required.
To learn more about how contract types are initially defined in this screen at the system level, refer to Contract Type Maintenance.
NOTE: The Contract Type Maintenance screen can be launched at the system level and at the project level. When it is launched from the Project Maintenance screen using the [Contract Types] button, it is being opened at the project level. To confirm, the project name will be displayed in the pop-up window. When it is launched from the Treeview under the File Maintenance menu, it is being opened at the system level. To confirm, the company name will be displayed in the pop-up window.
Project Information

Enter the company, security group, project code, project name, and project control code. The Project Control Code field should be set to "ALL" if not being used; otherwise, select an already existing project.
NOTE: The fields in this section need to be completed and saved before the remaining tabs on this screen become enabled. Until these fields are saved, only the General tab is available.
Closing/Reopening Projects
Users can close, create, delete or edit projects in the Project Maintenance screen once they have been assigned the appropriate security privilege. The privilege is assigned within the Security node of CMiC Field at the user or role level.
When a project is closed, no accounting transactions are created – it is only a status change.
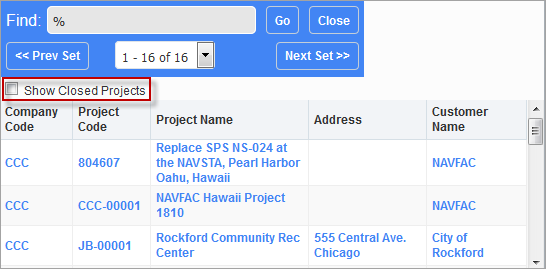
In the LOV for default project, the user can choose to see closed projects by checking the ‘Show Closed Projects’ checkbox in the LOV:
Once a project has been marked as closed, the [Reopen Project] button becomes enabled. When the project is reopened, it again becomes editable.
![Screenshot of Project Maintenance with [Reopen Project] button highlighted.](../../../../Resources/Images/11_File_Maintenance/Project_Maintenance_15.png)
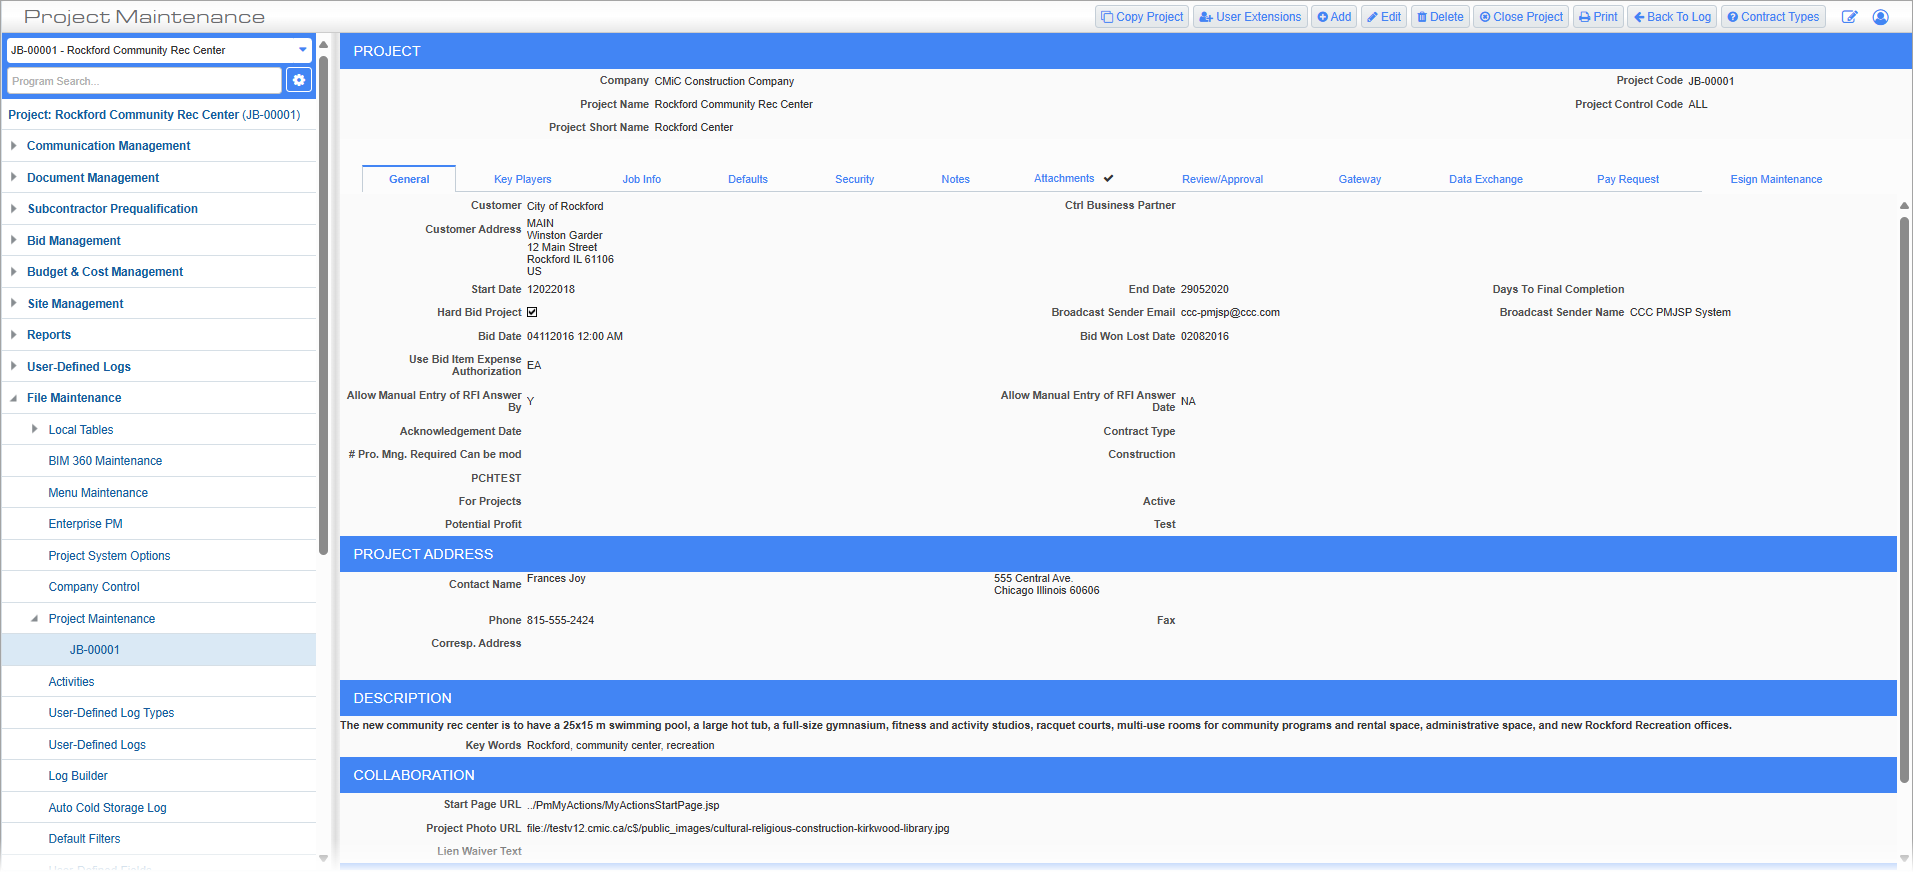
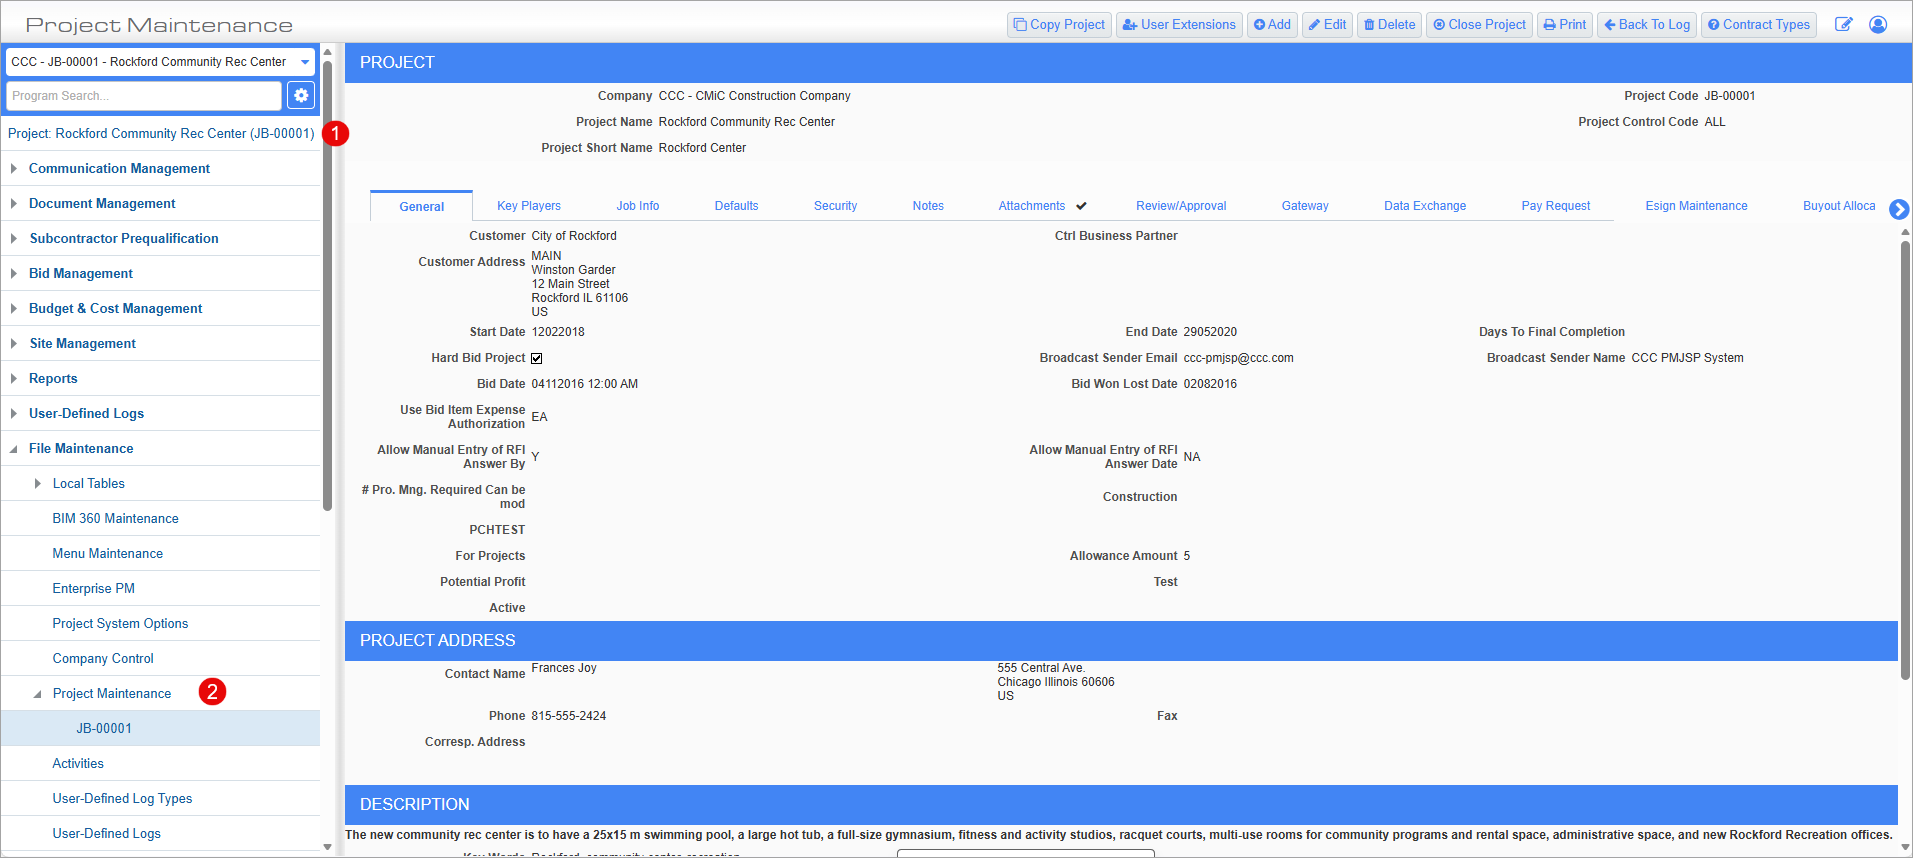
General – Tab
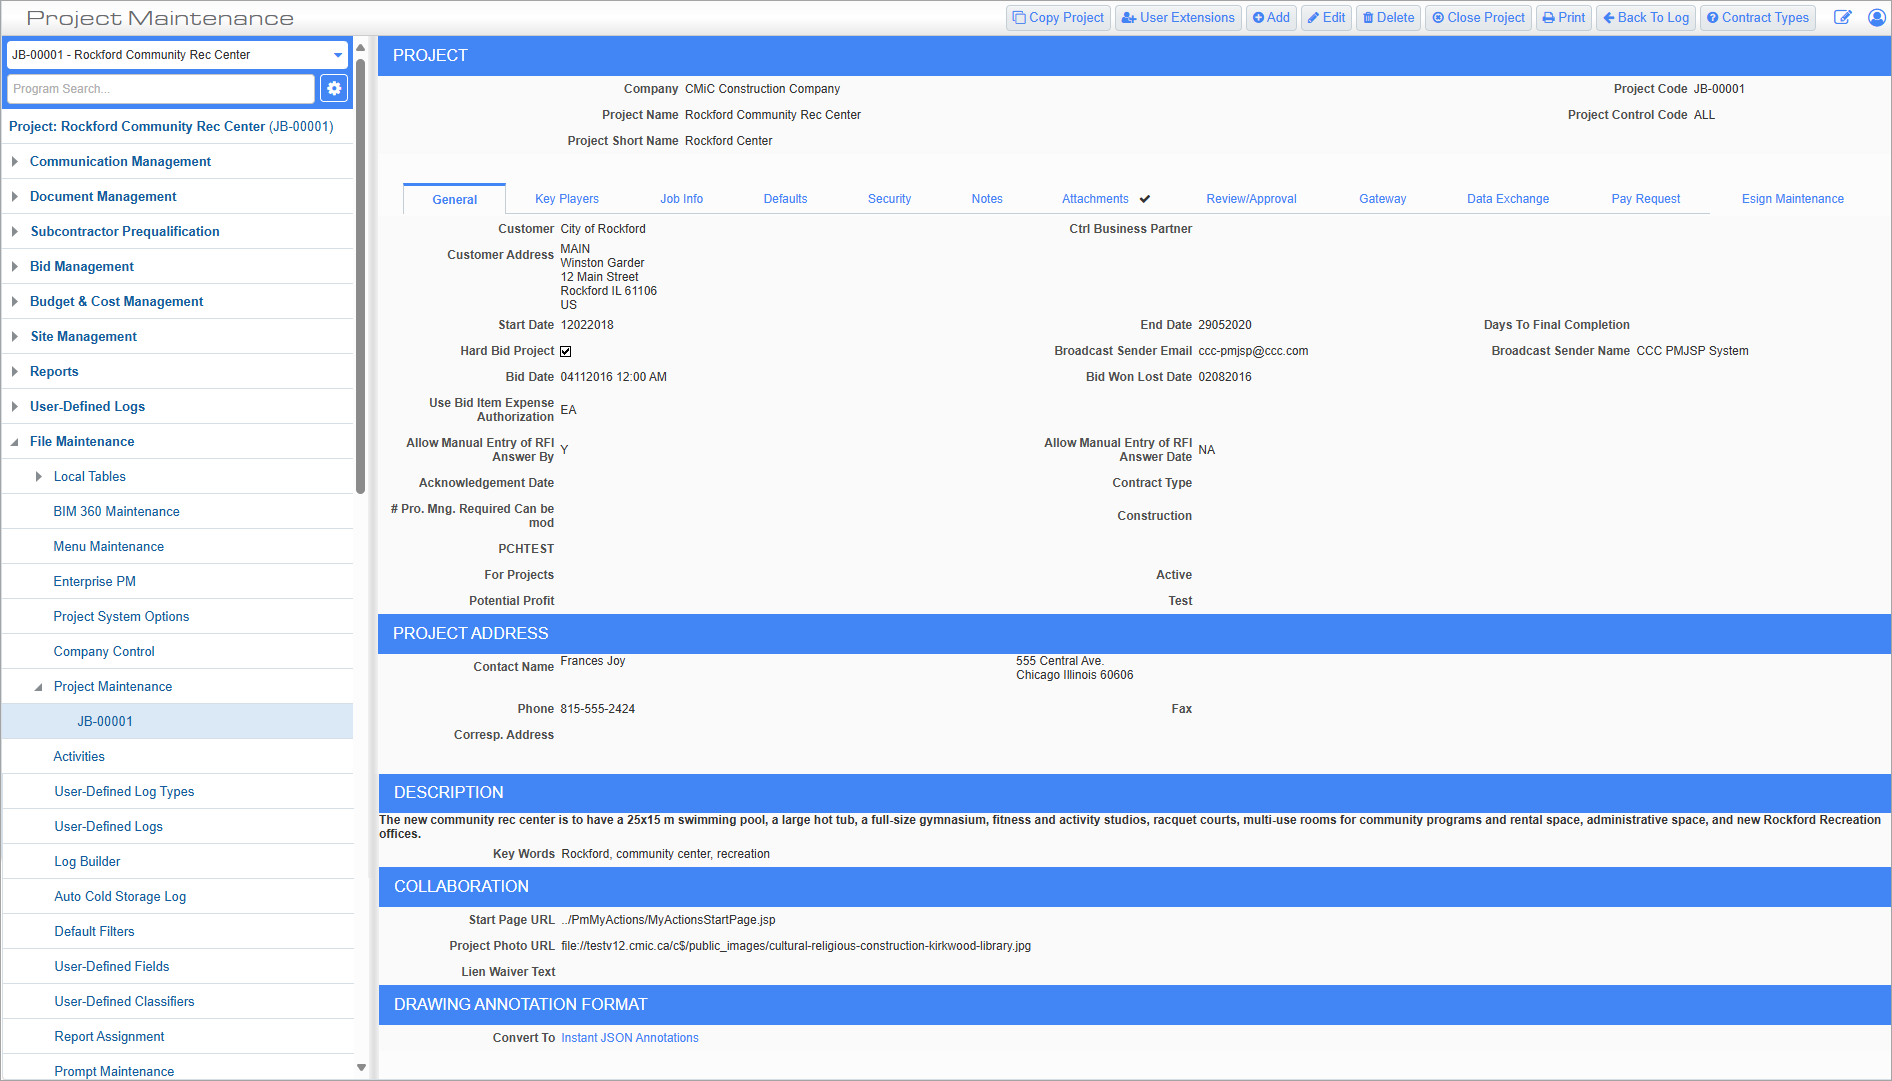
Project Maintenance; standard Treeview path: CMiC Field > File Maintenance > Project Maintenance – General tab
Customer
Enter/select the customer code. If the 'Automatically Create Bid Job for a New Project' box is checked in the Job Costing module (found on the Job Costing - Job Cost Control File - Jobs - Tab), then the Customer field is mandatory and the Terms field is updated from the customer record.
Customer Address
Enter/select the main address for the customer.
Start Date, End Date
Enter the estimated start and end dates for the project.
Hard Bid Project – Checkbox
This checkbox is used with subcontracts and subcontract change orders when using single and aggregate project limits in the Subcontractor Pre-qualification module. Checking this box bypasses any pre-qualification requirements on the job when creating a contract.
Bid Date and Bid Won/Lost Date
If the bid process is ongoing, enter the date and time of the bid here. Otherwise, if the project has been won, enter the information here for reference purposes only.
Bid Job Department, Bid Job Effective Date
These fields are only available for new projects when the 'Automatically Create Bid Job for a New Project' box is checked in the Job Costing module (found on the Job Costing - Job Cost Control File - Jobs - Tab) and the ‘Store Cost Code Projection’ box is checked in the System Data module (found on the System Data - System Options - Projects - Tab). The Job Info tab of this screen will be updated with the bid job department and the effective date information once the project is created.
Broadcast Sender Email, Broadcast Sender Name
The Broadcast Sender Email field is used to enter the email address for the user who will be sending Invitation to Bid (ITB) or Request for Quotation (RFQ) broadcasts to project bidders.
The Broadcast Sender Name field is for entering an alias which will show in the ITB or RFQ email, and will populate the From field.
Use Bid Item Expense Authorization
This field is used to indicate that a PCI linked to a bid item must be posted before the bid item can be purchased as a buy out item. For new projects, the value of this field is inherited from the field of the same name found on the Bid Management – Tab of the Company Control screen.
Allow Manual Entry of RFI Answer By, Allow Manual Entry of RFI Answer Date
When these fields are set to "Y" , the user can enter in the RFI Answer By and Answer Date fields, regardless of security settings.
When set to "N", the fields are closed to user input but the default rules (privileges, field security) apply.
When set to "NA" (not applicable), the fields are open to user input but the rules for related privileges /field security apply.
The settings of these fields at the CMiC Field - Company Control file level are inherited by any new projects and can be overridden (standard Treeview path: CMiC Field > File Maintenance > Local Tables > Project Control – Defaults tab).
NOTE: Project roles are different than CMiC Field roles. Project roles do not define which programs or privileges the user has within the application, rather they define what type of action the user can take on existing data, and what data they can see within the system. For example, the project role privilege ‘No RFI Answer Entry’ allows a user to apply a sort of field security, but on the project role level. The idea is that either field security is used for those fields, or the project role privilege, not both.
If the project role privilege is "N", the Answer By/Date fields are open. If the project role privilege is "Y" the Answer By/Date fields are read-only.
For Projects
Enter any additional project information in this field.
[Workflow] – Button
The [Workflow] button is used for approval of the project, provided the underlying workflow is defined. It is controlled by the project role ‘Workflow Button – Project’ privilege.
Project Address
In this section, enter the contact within the organization to whom correspondence about this project should be directed. This is often, but not necessarily the project manager. Also, ensure that the mailing address for the project is correct. If you leave the address blank, the project address will be assumed to be your company address.
The Correspondence Address field is available for use if the company has various offices. If a correspondence address is entered, it will dictate which address is shown on some project management correspondence, whether the company address or the office address.
Description (Project Description)
Enter the project description. The description can be up to 200 alphanumeric characters. This is a long text field where you can type or cut and paste a long description about the project.
The Key Words field allows the user to enter look-up words that can later be used to search for projects with those words. For searching, the words are typed in the Search field that is located above the Treeview menu.
Collaboration
Start Page URL
To set an image, program or dashboard to be displayed when a project is initially launched, enter the URL in this field.
The maximum length of the URL is 2000 alphanumeric characters.
For example, you may want the My Actions screen to appear when the project is initially loaded:
../PmMyActions/MyActionsStartPage.jsp
Or you may want to add your company’s home page:
https://cmicglobal.com
NOTE: Any website URLs must begin with “https://”. The start page URL won’t display if another site has already embedded the URL, unless your browser settings have been pre-configured to handle this situation. If this happens, your browser may suggest opening the start page URL in a different tab. Users should consult with their company’s IT department to learn more about what settings must be configured to display embedded sites. This field does not apply to the Construct PM app.
This field takes precedence over the Start Page URL field on the General tab of the Project System Options screen. Changes made to this field will only apply to the current project, whereas the Start Page URL field on the Project System Options screen applies globally to all projects.
Project Photo URL
To set a project photo to be displayed when the My Actions screen is launched, enter the project photo’s URL in this field. The maximum length of the URL is 2000 alphanumeric characters.
Project photo URLs must be publicly accessible and allow their content to be displayed in a content pane (some servers may be set to prevent this). In addition, the URL’s file path must end in “.jpg” for the photo to be properly displayed.
When a project photo URL is entered in this field, the photo will appear in the My Actions screen when it is initially loaded in CMiC Field and it will also be displayed on the Home screen in the Construct PM app.
Lien Waiver Text
Any lien waiver text entered in the –tab of the Company/Project Control screen will default here but can be updated as required.
Drawing Annotation Format
NOTE: This feature will be available in Patch 22.
This section displays the current annotation type of the project and allows users to convert the project's annotations from one format to another. For example, users can convert from XFDF to Instant JSON formats or vice versa as required.
NOTE: The conversion process may take several hours depending on the number of annotations. To avoid disruptions, this process should be performed during off-hours when users are not active and no new annotations are being added.
Convert To
Press the link in this field to convert the annotations.
NOTE: Please ensure all annotations are correctly displayed after the conversion is complete. Do not move, modify, or create new annotations until the changes look satisfactory. If there are any issues, this will ensure that converting back will not cause issues with any newly modified or created annotations.
BIM Project Mapping
This section relates to the BIM 360 module. Building Information Modeling (BIM) has been incorporated into CMiC Field using the Autodesk BIM integration tool to present and manage 3D models to support decision makers in communicating design, construction and operational changes to their projects. These changes are created in CMiC through Requests For Information (RFI) and Potential Change Items (PCIs). For more information, please refer to the CMiC BIM 360 guide.
Mapped BIM Project
Allows the user to select the Autodesk project that the current project is to be mapped to. This field is editable based on a BIM collaboration privilege.
Default Change Order Type
This field is used to set the PCI Type for BIM 360, but can be overridden in the BIM 360 Maintenance – Mappings screen (standard Treeview path: CMiC Field > File Maintenance > Local Tables > BIM 360 Maintenance).
Key Players (Assignment) – Tab
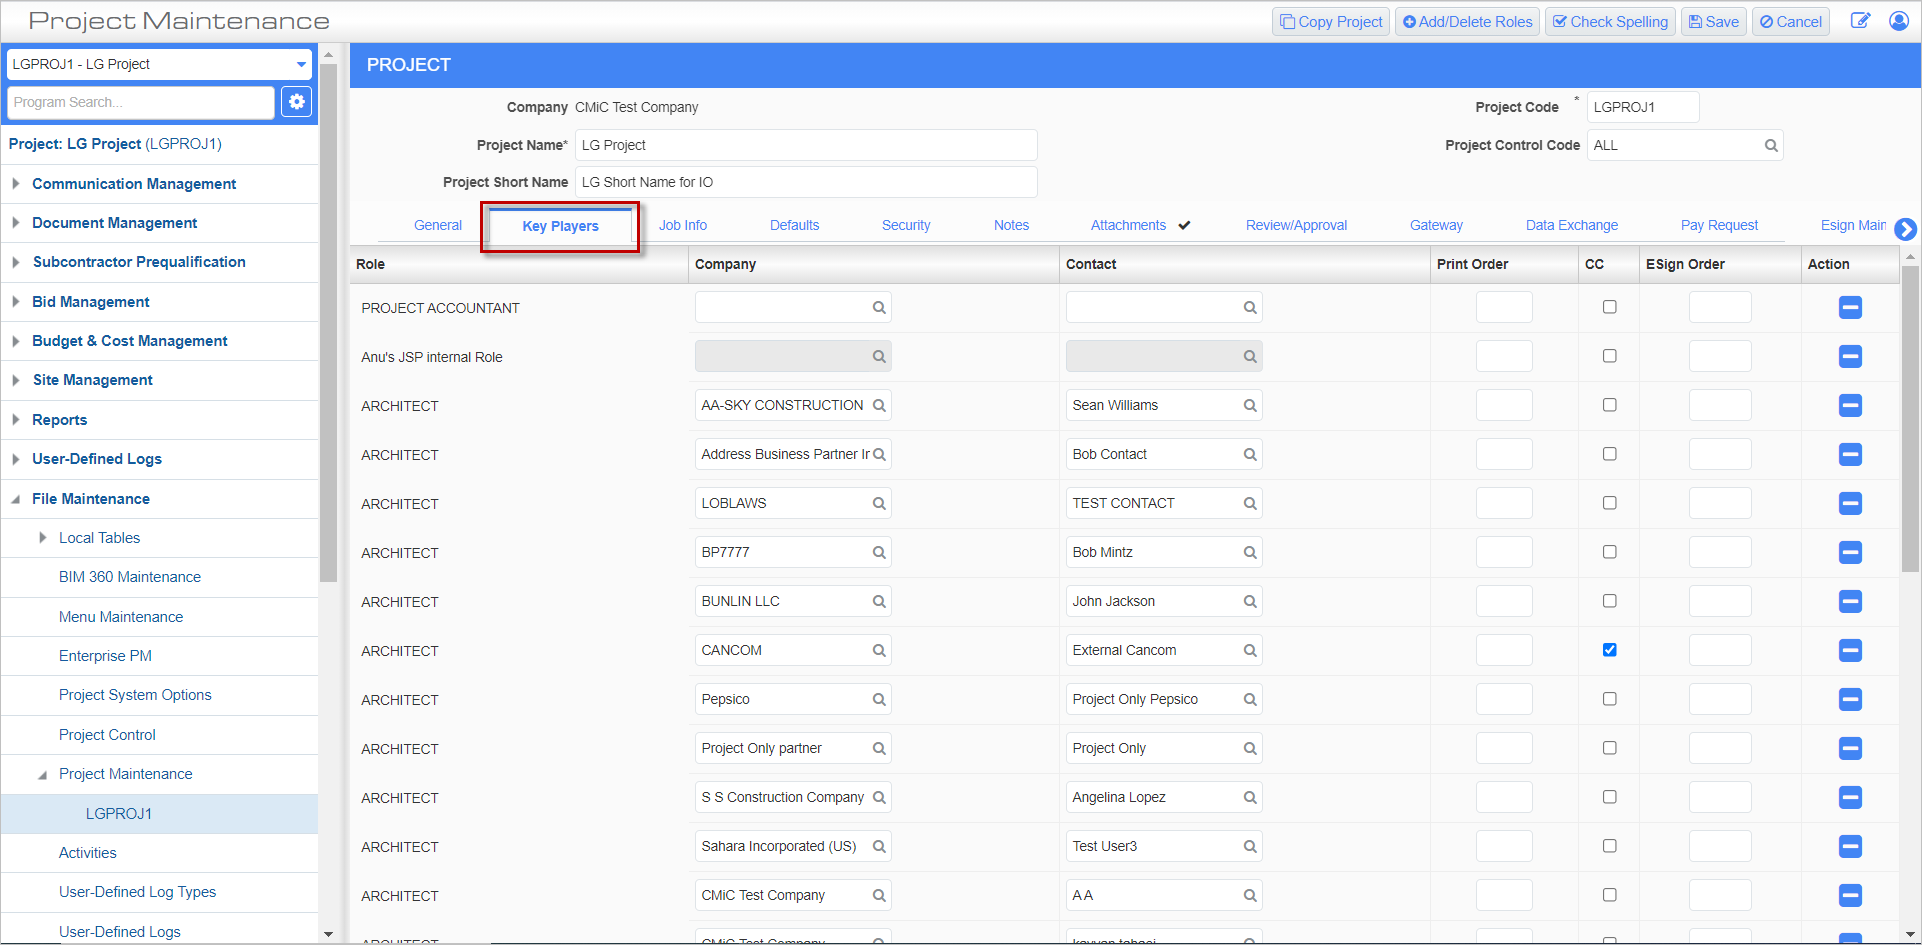
Standard Treeview path: CMiC Field > File Maintenance > Project Maintenance – Key Players tab
This tab can be used to automatically attach contacts to object records in CMiC Field via Key Player roles. Attaching a contact in this way includes them on all documentation for those objects. Key Player roles are set up on the Project Roles screen by creating a new role and checking the 'Key Player' box. As many Key Player roles can be defined as required.
NOTE: When a system contact is assigned to a project via a Key Player role, the 'Collab User' box is automatically enabled on the Project Contact Detail tab of the CMiC Field - Project Contact Directory screen.
To add or delete a new Key Player role, press the [Add/Delete Roles] button. Users can add PM roles that do not have the ‘Key Player’ box enabled, and this will apply to the current project only. Similarly, a PM role with the ‘Key Player’ box checked can be removed from the current project.
NOTE: The Key Players tab displays all the PM roles with the ‘Key Player’ box enabled. There may be multiple lines for the same key player role if it is assigned to multiple contacts. For more information, please refer to CMiC Field - Project Contact Directory.
Role
This field defaults from the Project Roles screen.
Company, Contact
Enter/select the user being assigned to the role and the company for which they work.
Print Order
Enter the order that the roles should appear on any documentation.
CC – Checkbox
Check this box to automatically include the role on any object record to which it is attached. This applies to the following objects: communications, RFIs, issues, transmittals, punch lists (classic version), FWDs (after saving a new record), notices, and OCO transmittals.
ESign Order
Set the order for any DocuSign signers here.
Key Players and Form Letters
There are four special Key Player roles used in Form Letters as replacement fields. When a Form Letter with these special Key Player roles is generated for a project, the information about the key players associated to the special Key Player role is printed.
The following are the codes for these four special Key Player roles:
-
ARCH (Architect)
-
MNGR (Project Manager)
-
OWNER (Owner)
-
SUPER (Site Supervisor)
Multiple contacts can be assigned to any Key Player role. However, if multiple contacts are assigned to any of these 4 special Key Player roles, when printing a Form Letter that uses them, more than just one version of the Form Letter will be generated.
Example: Project with 2 MNGR, 3 OWNER, 3 ARCH and 0 SUPER roles assigned produces 18 Form Letters: 2 versions, each printed 9 times.
To prevent more than one version of a Form Letter from being printed, create and use additional codes for these 4 special Key Player roles, such as: MNGR_1, MNGR_2, ARCH_1, ARCH_2.
Key Players & Alerts
Alerts have been created for the following special Key Player roles. The key players assigned these special Key Player roles will receive alerts.
These alerts are set up using the Define Simple Alerts screen in the System module.
Accounting Role Alerts in PM
The PM role code must be “ACCOUNTING” (case sensitive).
In the Define Simple Alerts screen (program: SDALRTMT), and under the Alert Type section, select “Batch Posted” and click the corresponding [Create] button to add the alert type to the Alert Instances section. Next, click [Set Params], and in the pop-up, enter “ACCOUNTING” in the PM Role field and ensure the ‘Receive E-mail’ box is checked.
The system has an alert routine to automatically send an email to the person that has been identified as being the contact for the Accounting role on a project. Posting of a subcontract/change, subcontract void, owner change and potential change item will trigger the email alert.
SC Change Without Owner Change Alerts
In the Define Simple Alerts screen (program: SDALRTMT), and under the Alert Type section, select “Subcontract Change without Owner Change” and click the corresponding [Create] button to add the alert type to the Alert Instances section. Next, click [Set Params], and in the pop-up, enter the PM roles to receive the alerts and ensure the ‘Receive E-mail’ box is checked.
The system will send an alert e-mail to the specified PM roles when there has been a SC Change Order entered where there is no Owner Change Order associated. This link between the SC Change Order and the Owner Change Order will be validated via the PCI table.
This alert will be sent if the SC Change Order has no related PCI or no Related Owner Change Order.
The text of the alert message will indicate if the PCI is missing or if the Owner Change Order is missing.
Job Info – Tab
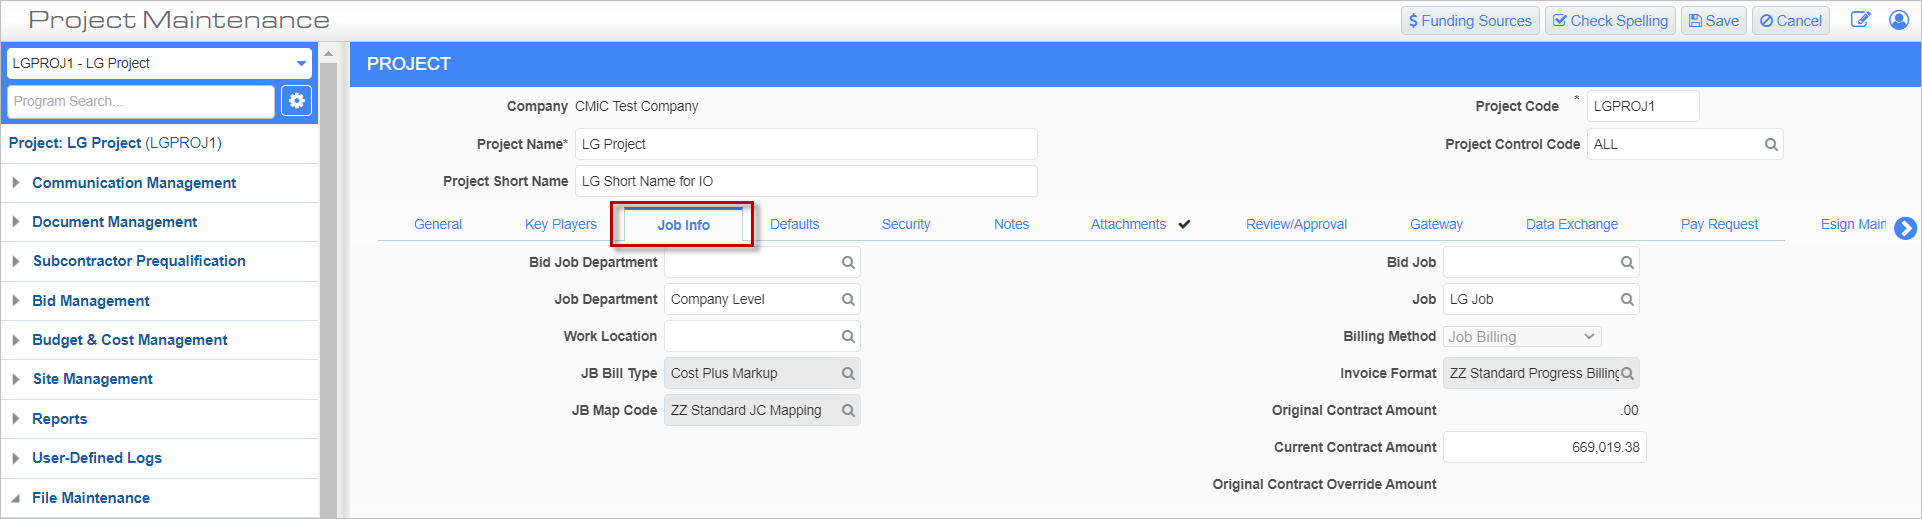
Standard Treeview path: CMiC Field > File Maintenance > Project Maintenance – Job Info tab
This tab is used to enter job details.
Original Contract Amount, Current Contract Amount, and Original Contract Override Amount
The latter is only used in Owner Change Orders (OCO) if the 'OCO Override' box is checked on the project.
-
If a job is not associated with the project, the Original Contract Amount field can be updated at any time.
-
If a job is assigned to the project, the Current Contract Amount field will be updateable and will adjust the Original Contract Amount field with the same amount until the job is started.
-
If a job is created from the project, the Original Contract Amount on the project will be copied to the job.
-
If the Original Contract Amount on the job is updated, it will update the Original Contract Amount on the project.
-
When the job is started, the Current Contract Amount field on the project can be updated at any time.
NOTE: This field is not editable once the job is started in the Project Maintenance screen in the Job Costing module, but can be updated via the Job Setup screen. For more information, please refer to Job Costing - Job Setup - Job Detail - Tab .
-
If the 'Use Original Contract Amount Override on OCO' box on the project is checked, when an OCO is posted it will lock down the box and the Original Contract Override Amount so that neither field can be updated.
-
If the 'Project End Date Updateable' box on the Company Control file is unchecked, when an OCO is posted, it will also lock down the Project End Date.
[Funding Sources] – Button
This button is used to access the funding source for a job assigned to a project. This is only available for projects that have an actual job. The funding sources should already be set up in the Funding Source Maintenance screen (standard Treeview path: CMiC Field > File Maintenance > Local Tables > Funding Source Maintenance).
![Example of pop-up window launched from [Funding Sources] button on the Project Maintenance – Job Info tab.](../../../../Resources/Images/11_File_Maintenance/Project_Maintenance_12_609x543.png)
Example of pop-up window launched from [Funding Sources] button on the Project Maintenance – Job Info tab
Click the Add Source link to select sources from the LOV. Once a funding source is selected, a percentage can be entered for that funding source. An amount will then be calculated based on the total budget of the job. The [Close] button will return the user to the previous screen.
Defaults – Tab
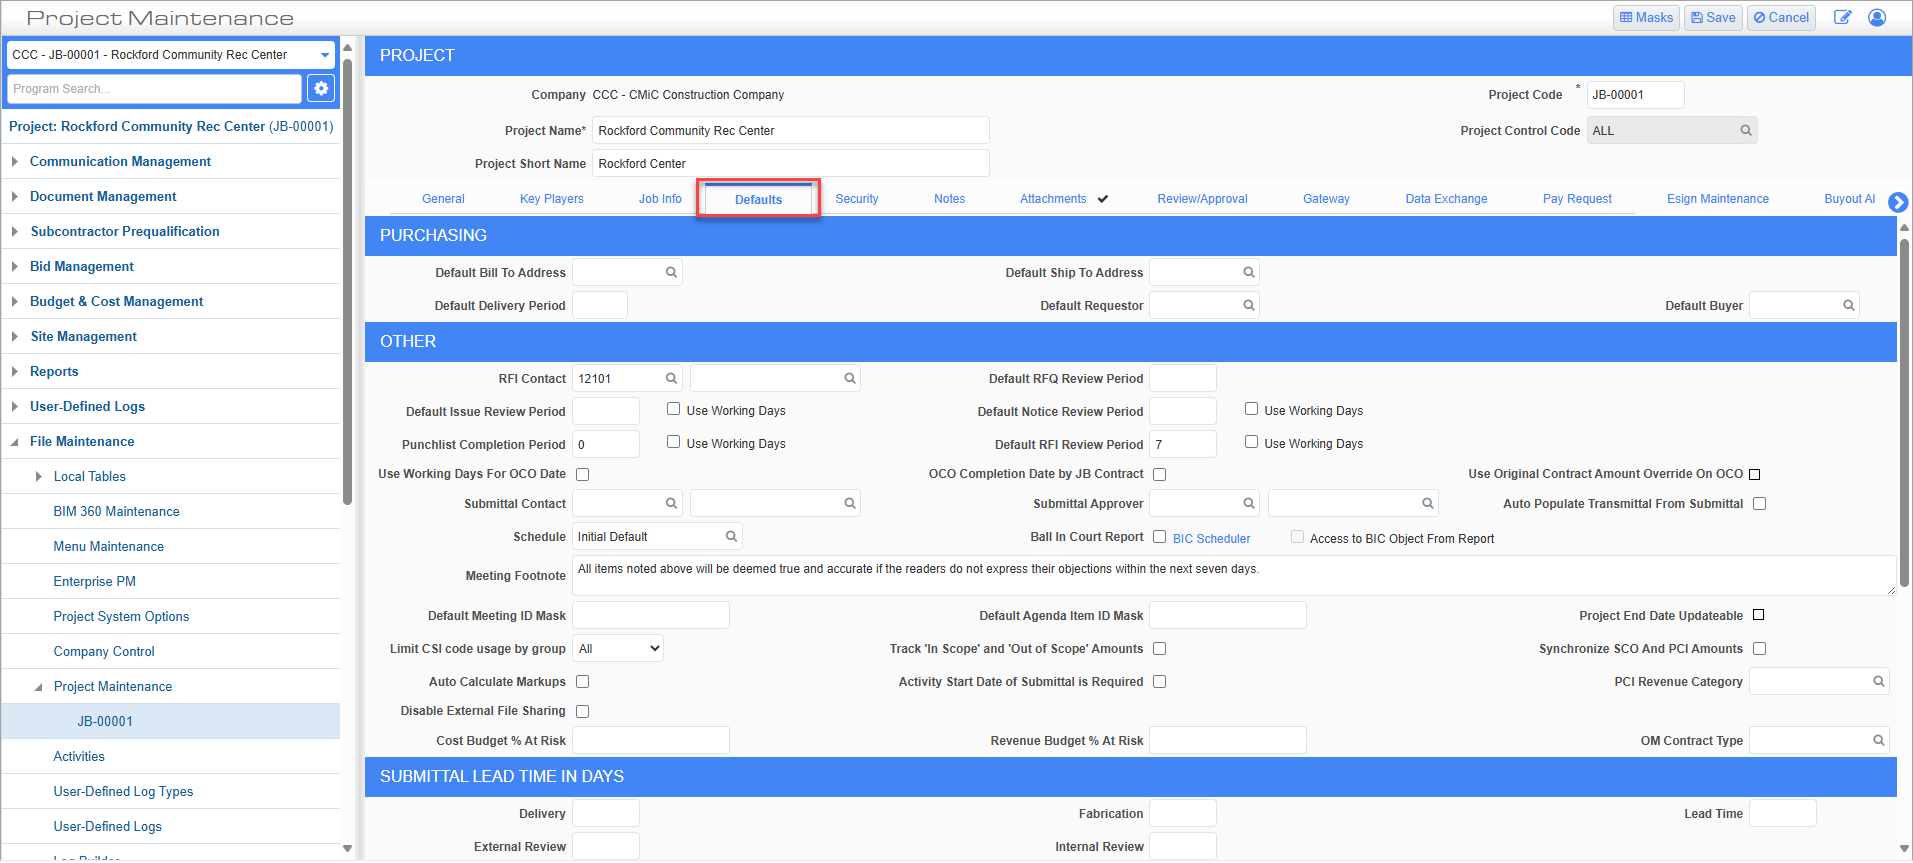
Standard Treeview path: CMiC Field > File Maintenance > Project Maintenance – Defaults tab
This area contains items used in the PM system that can be customized by project.
[Masks] – Button

Example of pop-up window launched from [Masks] button on the Project Maintenance – Defaults tab
This button is used to set code masks at the project level which override those masks set at the company level on the Company Control screen. Auto-numbering allows for project-specific mask codes. New projects will default with company level masks, but they may be changed for any project through this button.
Mask
Enter the mask code here. The first half of the mask relates to the object being numbered and is the same for all auto-numbered objects. The second half is the number of that object, the length of which is determined by the number of asterisks. Either enter a code manually or link it to the object type directly by using the codes shown below.
c=Company Code, p=Project Code or j=Job Code, y=Year, m=Month, d=Day, *Next Available Number
NOTE: The object type code can be linked to the object type (for example, RFIs can be auto-numbered according to their RFI type codes, projects according to their project codes, and so on) which allows for easier identification and organization of object records within CMiC Field log screens.
NOTE: The Submittal Number mask applies to both Submittals (Classic) and Submittals. Changes to this mask will affect how submittal numbers are generated in both CMiC Field and Construct PM.
Allow Override – Checkbox
Check this box to allow the user to change the automatically generated number prior to saving the object record.
Sequence Within Project – Checkbox
Sequencing within a project is set by the individual items. To select this option, check the ‘Sequence Within Project’ box for the particular object type to have the auto numbering sequenced within the project.
Include Partner Abbreviation in External RFI ID – Checkbox
Check this box to include partner abbreviations in the RFI numbers for RFIs generated by external users. By default, this box is enabled. If checked, the partner abbreviation code is included in the RFI auto-numbered code when the From contact is the Partner contact. If unchecked, the general project mask is used.
For example:
The following example demonstrates how an RFI mask is generated when the 'Include Partner Abbreviation in External RFI' box is checked/unchecked.
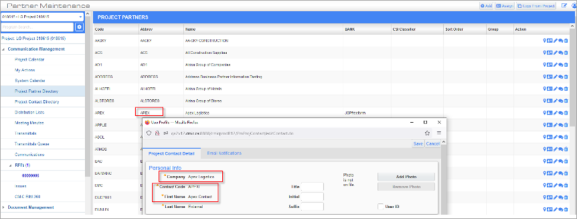
The screenshot above shows an example of a Project Partner record for an external partner.

If the 'Include Partner Abbreviation in External RFI' box is checked in the Masks pop-up window, and an RFI is created where the From contact is the external partner (as shown in the screenshot above), notice how the partner abbreviation code is included in the RFI auto-numbered code.
If the 'Include Partner Abbreviation in External RFI' box is unchecked in the Masks pop-up window, and an RFI is created where the From contact is the external partner (as shown in the screenshot above), notice how a general project mask is used.
Include Partner Abbreviation in External Transmittal ID – Checkbox
Check this box to include partner abbreviations in Transmittals generated by external users.
Ball in Court Report – Checkbox
Check this box to run the Ball in Court report nightly. This will include every project in the report. For more information, please refer to CMiC Field - Ball in Court Report
BIC Scheduler
Press this link to launch the Ball in Court Scheduler. This option allows users to select report recipients and customize the printing schedule. This button is enabled in Edit mode and users require the 'Ball in Court Report Scheduler' privilege to be set to "Unrestricted" to view this field. For more information, please refer to Running Report via Ball in Court Report Scheduler.
Access to BIC Object From Report – Checkbox
Check this box to create a link in the report to the BIC object.
Purchasing
In many cases, the purchasing of materials through the use of POs will require the materials to be shipped directly to the job site or job storage location, and the invoice for the PO to be shipped directly to your regional office. The project may also have its own requestor and buyer. All these settings for Purchase Orders can be entered under the Purchasing section.
Default Bill To Address, Default Ship To Address
Enter the Bill To and Ship To Address codes. These codes will have already been defined via the Address Maintenance screen in Global Tables and represent alternate addresses for your company.
Default Delivery Period
Enter the expected number of days between ordering and receiving the materials.
Default Requestor, Default Buyer
Enter the default requestor and buyer for this project.
Other
RFI Contact
Enter the default RFI contact information.
Default RFQ Review Period
The Default RFQ Review Period is added to the Sent Date to automatically update the Due Date in the RFQ tab of Potential Change Items (PCIs). If the default value is null at the project level, then the system will then check the company-level default (on the PM Control). The Due Date that is calculated is based on the Project Calendar working days.
Punch List Completion Period
Enter the default number of days for the completion of a punch list item. This number is the standard for most punch list items and can be overridden in the Punch List screen.
Default RFI Review Period
Enter the standard RFI (Request for Information) Review Period that you want to try to adhere to for this project. This again can be overridden at the time of entry.
Use Working Days – Checkboxes
‘Use Working Days’ checkboxes indicate whether working days should be used for the determination of a number of dates: RFI Required Date, Punch list Schedule Completion Date, OCO Date, Issue Due Date, Notice Due Date, and Submittal Schedule Dates.
The checkbox values for RFI, Punch list, Issue, Notice and Submittals default from the Company Control - Defaults tab, but can be overridden at the project level.
OCO Completion Date by JB Contract – Checkbox
Check this box to override the Original Completion Date was field in the Summary section on the Change Numbers tab of the Owner Change Order screen. The system will use the end date defined in the End Date field on the Billing Items tab of the Contract Entry screen in the Job Billing module.
NOTE: The JB contract must be entered in the JB Contract field in the Owner Change Order screen for the end date value to be defaulted from the JB contract.
Submittal Contact
Enter a submittal contact (partner and contact code) to default in the To field when sending a submittal via I/O email.
Submittal Approver
Enter a submittal approver (partner and contact code) to default in the Approved By and Returned By fields in a submittal. The Submittal Package screen will also populate the specified default approver in the Approved By and Returned By fields.
Meeting Footnote
Enter a unique footnote to be used on all Meeting Minute reports. The system will automatically default the standard corporate footnote, but you may alter it at this point.
Track ‘In Scope’ and ‘Out of Scope’ Amounts – Checkbox
By default, this box is unchecked. When checked, the In Scope Amount and Out of Scope Amount fields will be displayed in the PCI Details screen.
The sum of these two amounts must match the PCI Billing Amount of the PCI. Field security can be applied to these two fields if necessary.
These items are purely for custom reporting purposes. The idea is that they are used to record how each PCI affects an original budget that is tracked outside of CMiC (or stored in a custom pricing column in bid items).
-
In Scope Amount represents the portion of the billing value which was included in this external budget. In other words, even though it is an increase to the revenue budget in CMiC, that item was included in the offline budget so there would be no change.
-
Out of Scope Amount represents the portion of the billing value which was not included in the external budget. In other words, this increase to the revenue budget in CMiC will also increase the offline budget.
In order to ensure that these fields are used, the system requires that every PCI line with a billing value be allocated as either ‘in scope’ or ‘out of scope’. This is why the application forces in scope + out of scope = billing value.
Synchronize SCO and PCI Amounts – Checkbox
The default value of this box is initially set in the Change Management Control File (SC tab), but can be overridden here.
When the box is checked on the project, if a PCI is created, any subcontract change order associated with the PCI detail line will not allow editing of the Amount that is passed from the PCI to the subcontract change order. Additionally, the PCI Final Amount is not updated by any T&M Allowance amounts updates.
If the subcontract change order Amount is modified, that amount is passed back to the PCI detail line Final Amount. If the subcontract change order is posted while linked to a PCI line detail, the Final Amount for that PCI line is locked.
Activity Start Date of Submittal is Required – Checkbox
If checked, activity start date of submittal is required (standard Treeview path: CMiC Field > Document Management > Submittals).
PCI Revenue Category
When the value is set for the project, PCI detail records created using any category other than the designated Revenue Category will have the Billing Qty, Billing Price and Billing Amount suppressed (i.e., these values will be zero). For the PCI detail lines using the Revenue Category, the Billing Qty, Billing Price, Billing Amount will be determined in the standard way (i.e., the rightmost-value from Estimated, Quoted and Final).
Auto-Populate Transmittal from Submittal
By default, this box is unchecked. When checked, it ensures that the content and actions from the submittal is populated into the transmittal that is created from it.
The following outlines the updates that will take place.
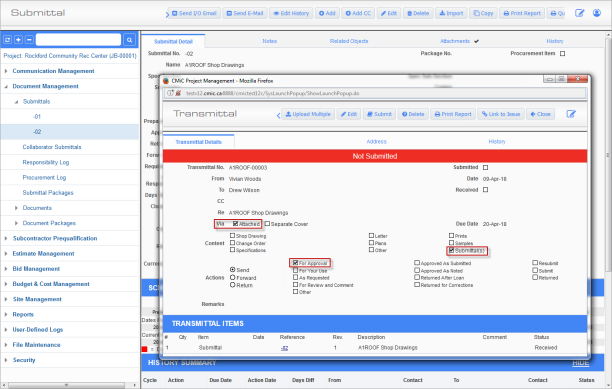
When the Submittal Action is ‘Sent’:
i) The Via checkbox is checked for ‘Attached’.
ii) The Content checkbox for Submittal(s) is checked.
iii) The Actions checkbox ‘For Approval’ is checked. See screenshot below.
NOTE: If the Transmittal Content area is not visible in the Transmittal pop-up window, ensure you have checked ‘Show Transmittal Contents’ on the Company Control screen (standard Treeview path: CMiC Field >File Maintenance > Company Control – Defaults tab).
The Via and Content settings are kept in the resulting transmittal when the collaborator [Returns] or [Forwards] the transmittal. The Action can be manually updated to an appropriate setting.
When the Submittal Action is Forwarded:
i) The Via checkbox is checked for ‘Attached’.
ii) The Content checkbox for Submittal(s) is checked.
iii) The Actions checkbox value ‘Approved as Submitted’ for the new transmittal is the same as for the Actions checkbox in the previous transmittal [Return] from the collaborator.
Cost Budget % At Risk, Revenue Budget % At Risk
These values may have automatically populated from the Defaults tab of the Company Control screen but can be overridden, as needed. If entered, the risk percentages will default to the PCI Projection screen (standard Treeview path: CMiC Field > Budget & Cost Management > PCI Projection) but can be overridden there as well.
If a PCI is pending and unposted, the value is populated from the Project Maintenance screen. If a PCI is approved but remains unposted in a period, then upon refresh, the defaulted or overridden risk percentage will be retained. Only newly created PCIs with a status of "Approved" and unposted, when included in a PCI Projection period, will have the risk percentage automatically set to zero. A PCI posted in the current period is not shown in the PCI Projection report. If a PCI is posted in a future period, it is considered as a pending PCI (even if the status is "Approved").
For more information, please refer to Contract Forecasting - PCI Projection.
OM Contract Type
Enter/select a contract type. This value defaults from the Delivery Method field on the General tab of an opportunity but can be overridden. This value will determine the buyout allocations at the project level as seen in the Buyout Allocations – Tab.
Submittal Lead Times In Days
Define the project submittal process lead times. These are defaults when entering a submittal but can be overridden.
PCI Detail Classifiers
Define the PCI detail classifiers. These will appear on the scrolling line of Potential Change Items and can be overridden.
Copy From Previous Daily Journal Defaults
Define the Daily Journal defaults to be used when copying from one journal to another.
'Phase Units' must be selected if the phase units from the Units Complete tab are to be copied. The default value is taken from the company level but can be overridden.
Security (Project Security) – Tab
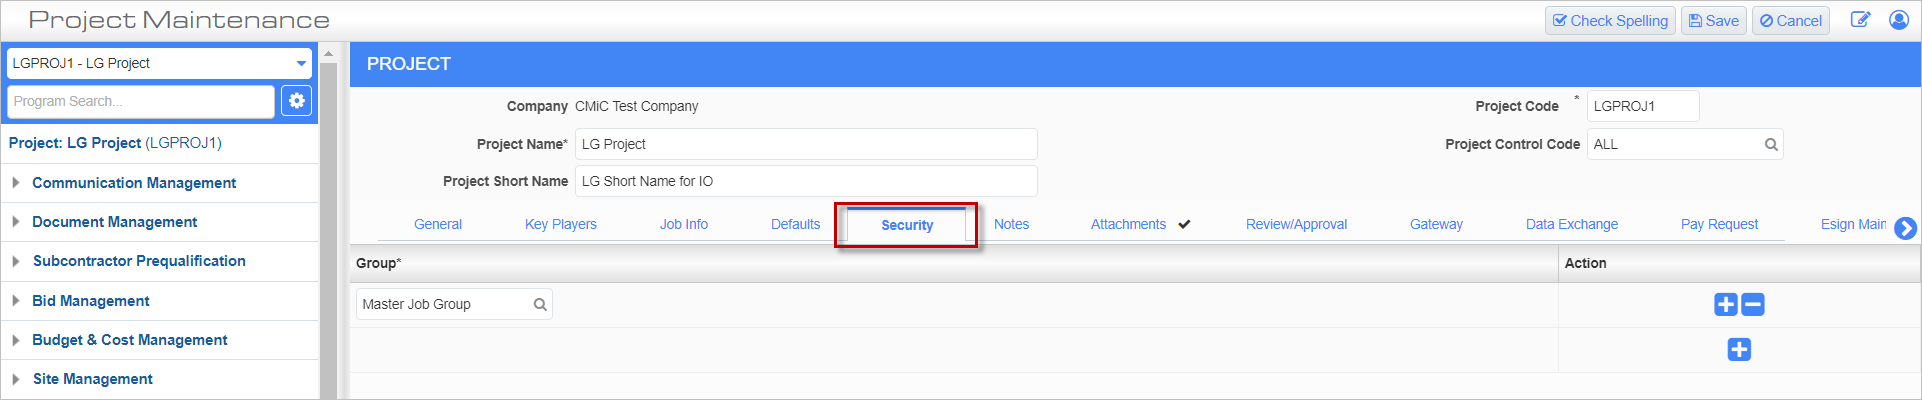
Standard Treeview path: CMiC Field > File Maintenance > Project Maintenance – Security tab
The Security tab displays the Job/Project Security groups that apply to this project and associated job.
NOTE: Users can only add security groups if they belong the same security group. Security groups are assigned in the
Notes – Tab
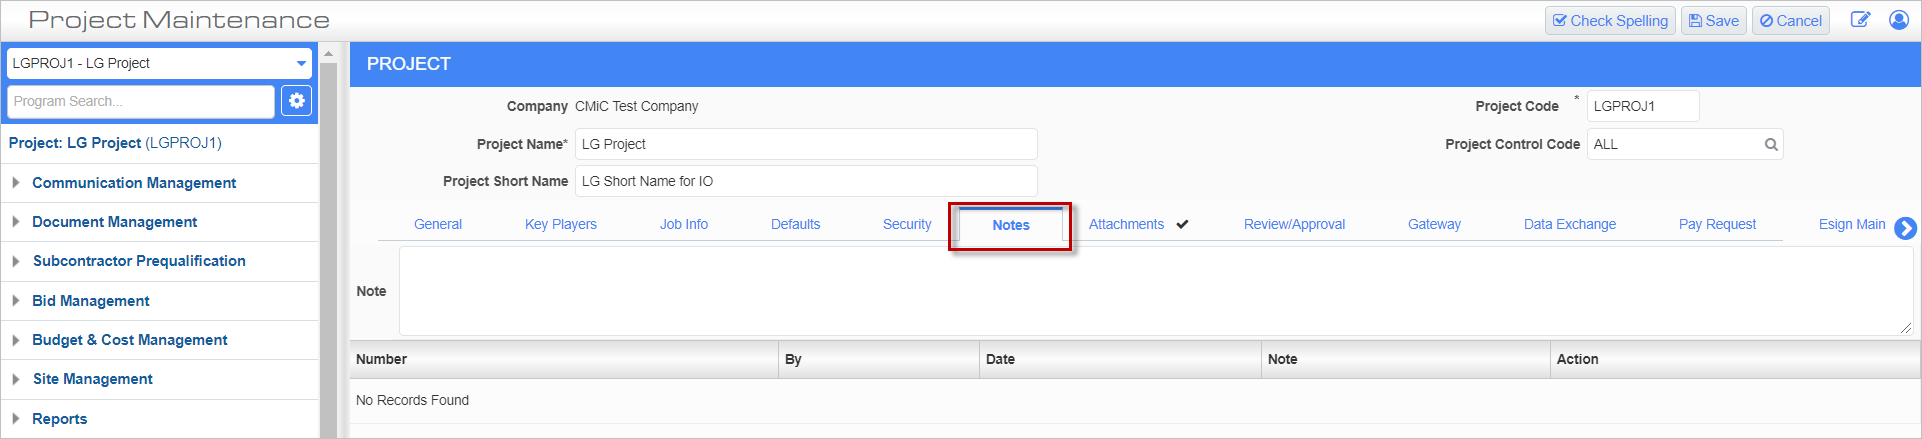
Standard Treeview path: CMiC Field > File Maintenance > Project Maintenance – Notes tab
To add a new note, click on the [Add Note] button to open a text area where the note text can be entered. Any notes already entered will display a checkmark next to the title of the Notes tab.
Enter the text of the note, then press the [Save] button to save the note.
Notes entered via the Notes tab can be deleted by the user who created the note by using the Delete icon next to the note.
For more information on adding notes, please refer to Notes, Attachments, and Documents.
Attachments – Tab
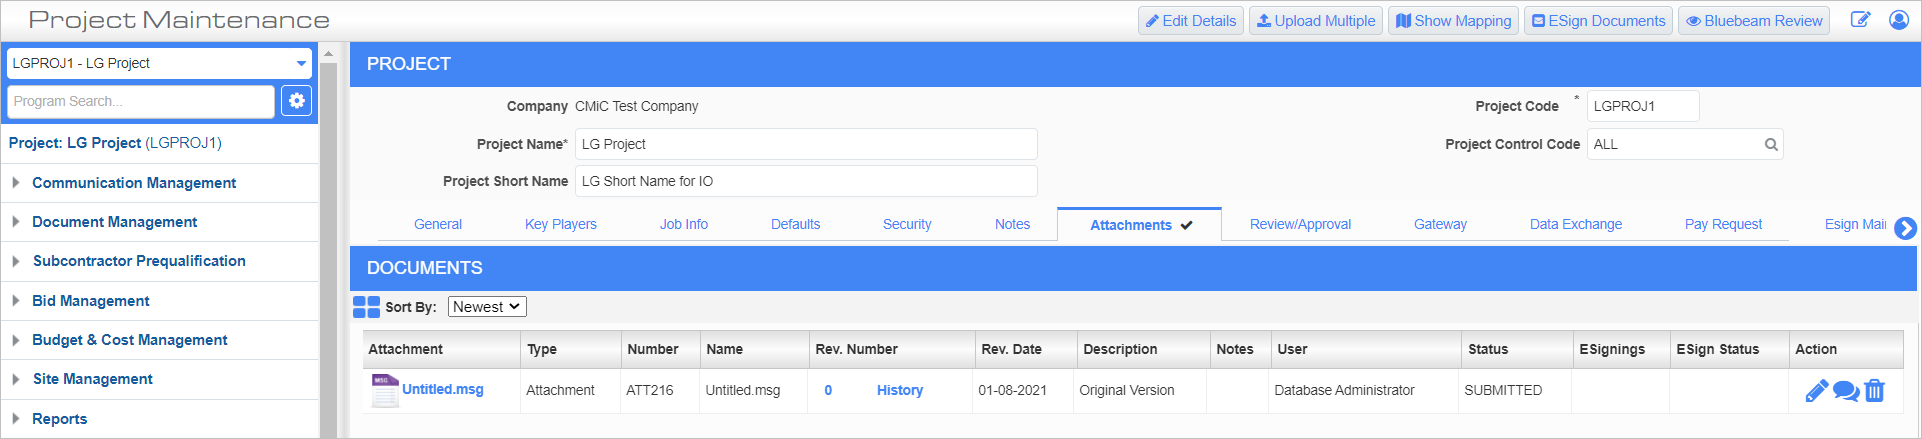
Standard Treeview path: CMiC Field > File Maintenance > Project Maintenance – Attachments tab
The Attachments tab is used for the assignment of various project-related documents to a project.
The [Upload Multiple] button is used to upload new document(s) and the [Edit Details] button is used to add existing documents that reside in the Document Management repository.
For more information on adding attachments, please refer to Notes, Attachments, and Documents.
Review/Approval – Tab
The Review/Approval tab appears if CMiC Workflow is being used with the Subcontract screen. It works in conjunction with the [Workflow] button. The [Workflow] button in the Subcontract screen is used to establish integration between CMiC Field and Workflow, if the appropriate workflows are configured for subcontract approval.
For more information, please refer to Subcontract Integration with Workflow.
Gateway – Tab
This tab is used for the CMiC Collaborate functionality. For details, please refer to the CMiC Collaborate guide.
Data Exchange – Tab
This tab is used for the CMiC Collaborate functionality. For details, please refer to the CMiC Collaborate guide.
[Sync Data] – Button
Press this button, which also appears in the Pay Request tab of this screen, to push system-level data and setup information needed to run the Data Exchange and Pay Request applications. This button is only available after a project has been published and is disabled after completing a data push.
Pay Request – Tab
This tab is used for the CMiC Collaborate functionality. For details, please refer to the CMiC Collaborate guide.
E-Sign Maintenance – Tab
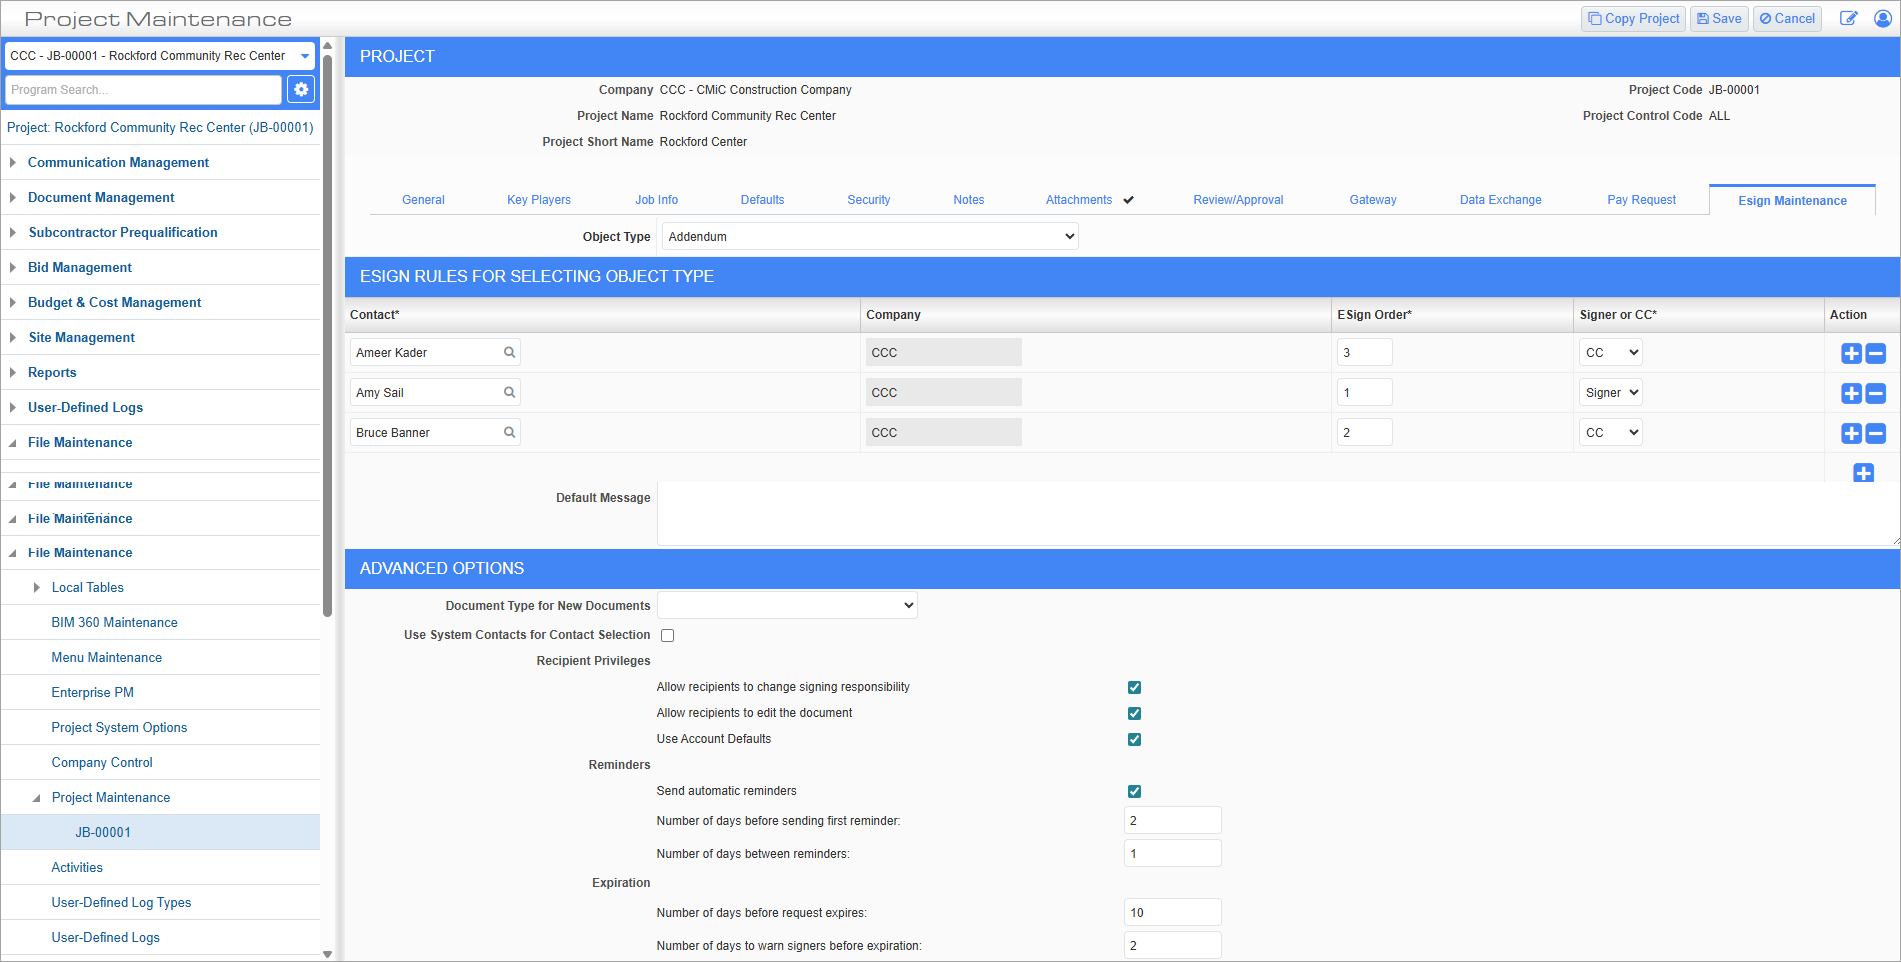
Standard Treeview path: CMiC Field > File Maintenance > Project Maintenance – E-Sign Maintenance tab
This tab is only applicable to users who use the DocuSign feature. It allows users to set default signers and CC recipients for DocuSign by project and PM object type, eliminating the need to select the same individuals each time a specific document type is sent. For more information, refer to DocuSign Integration - Default Signers.
User Defined Fields (UDF) – Tab
The UDF tab will appear for the project only when the associated Opportunity also has UDFs in its UDF tab.
Buyout Allocations – Tab
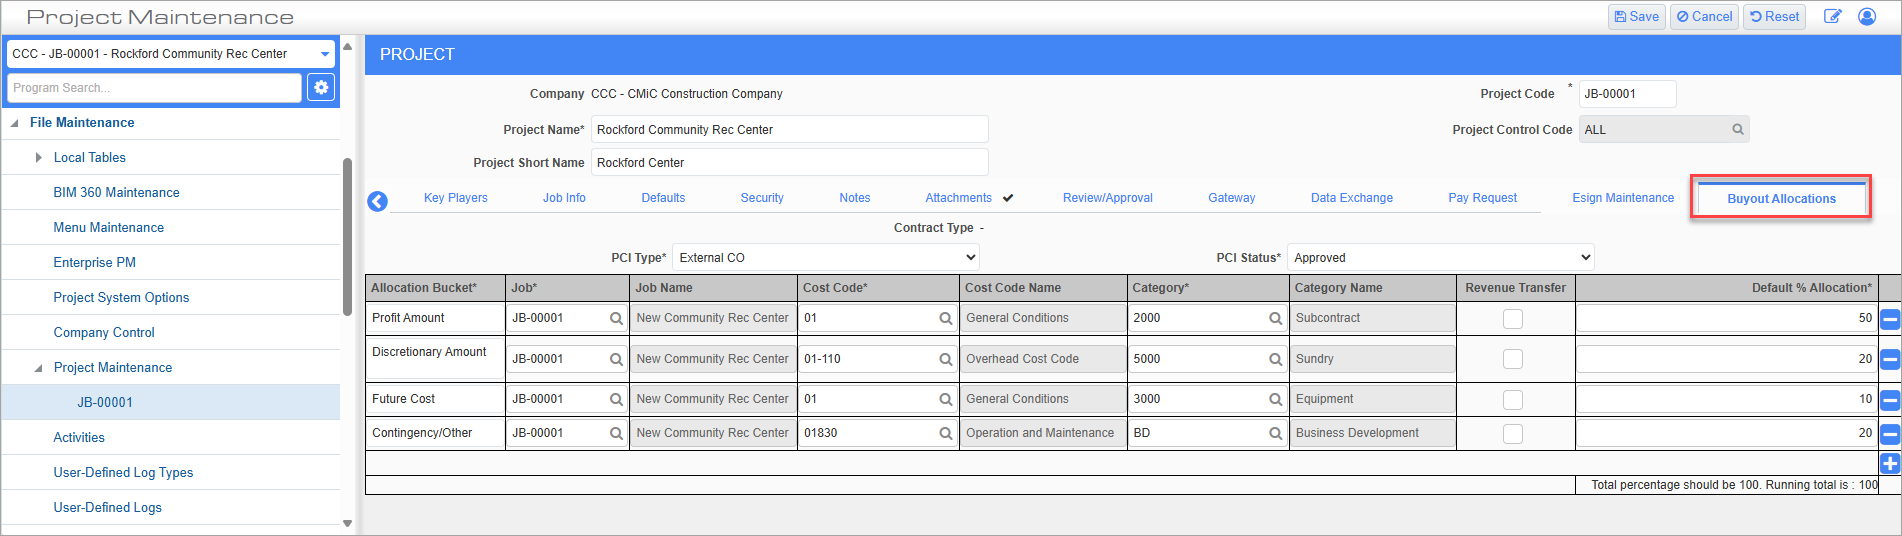
Standard Treeview path: CMiC Field > File Maintenance > Project Maintenance – Buyout Allocations tab
This tab is enabled when the 'Enable Buyout Allocation' box is checked on the Bid Management – Tab on the Company Control screen.
The contract type set in the OM Contract Type field on the Default tab will determine the buyout allocation details and default the data from the company level data set up in the Buyout Allocations – Tab on the Company Control screen. Use the [Edit] button to set the specific details (e.g., job, cost code, category, etc.) as required for the project.
NOTE: The details established at the company level in the Company Control's Buyout Allocations – Tab will automatically default to the project level, with the option to modify them at the project level as needed. When a new project is created, the Project Maintenance's Buyout Allocations tab will inherit the allocation details from the company level. Users are not required to access the Buyout Allocations tab for these details to be inherited, as this process occurs automatically. It is important to note that any changes or overrides made at the project level will not affect the company level details.
Field security can be applied to the fields on this tab, if necessary (standard Treeview path: CMiC Field > Security > Role Maintenance – Project Control).
Contract Type
This field is disabled on the Project Maintenance screen.
PCI Type
Select an active PCI type from the drop-down list. PCI types are maintained in the Maintain PCI Types screen in the Change Management module in Enterprise. For more information, please refer to Change Management - PCI Types.
PCI Status
Select a PCI status from the drop-down list. PCI statuses are maintained in the Change Management module in Enterprise. For more information, please refer to Change Management - PCI Status Codes.
Allocations Table
Press the Plus icon ( ) to add allocations to the table.
NOTE: If no allocations are defined at the project level, the [Buyout Allocation] button will be disabled on a subcontract's SOV line, regardless if allocations are defined at the company level. For more information, please refer to CMiC Field - Subcontract Schedule of Values.
Allocation Bucket
Enter a free-form name for the allocation as per the company's business needs.
Job, Job Name
Enter/select a controlling job code or sub-job code to update these fields from "*" for all jobs
Cost Code, Cost Code Name
Enter/select a cost code.
Category, Category Name
Enter/select a category code.
Revenue Transfer – Checkbox
Check this box to set the allocation as a revenue transfer.
Default % Allocation
Enter a default percentage allocation. The total percentage for all lines in the table should be 100. A running total is displayed at the bottom.