Overview
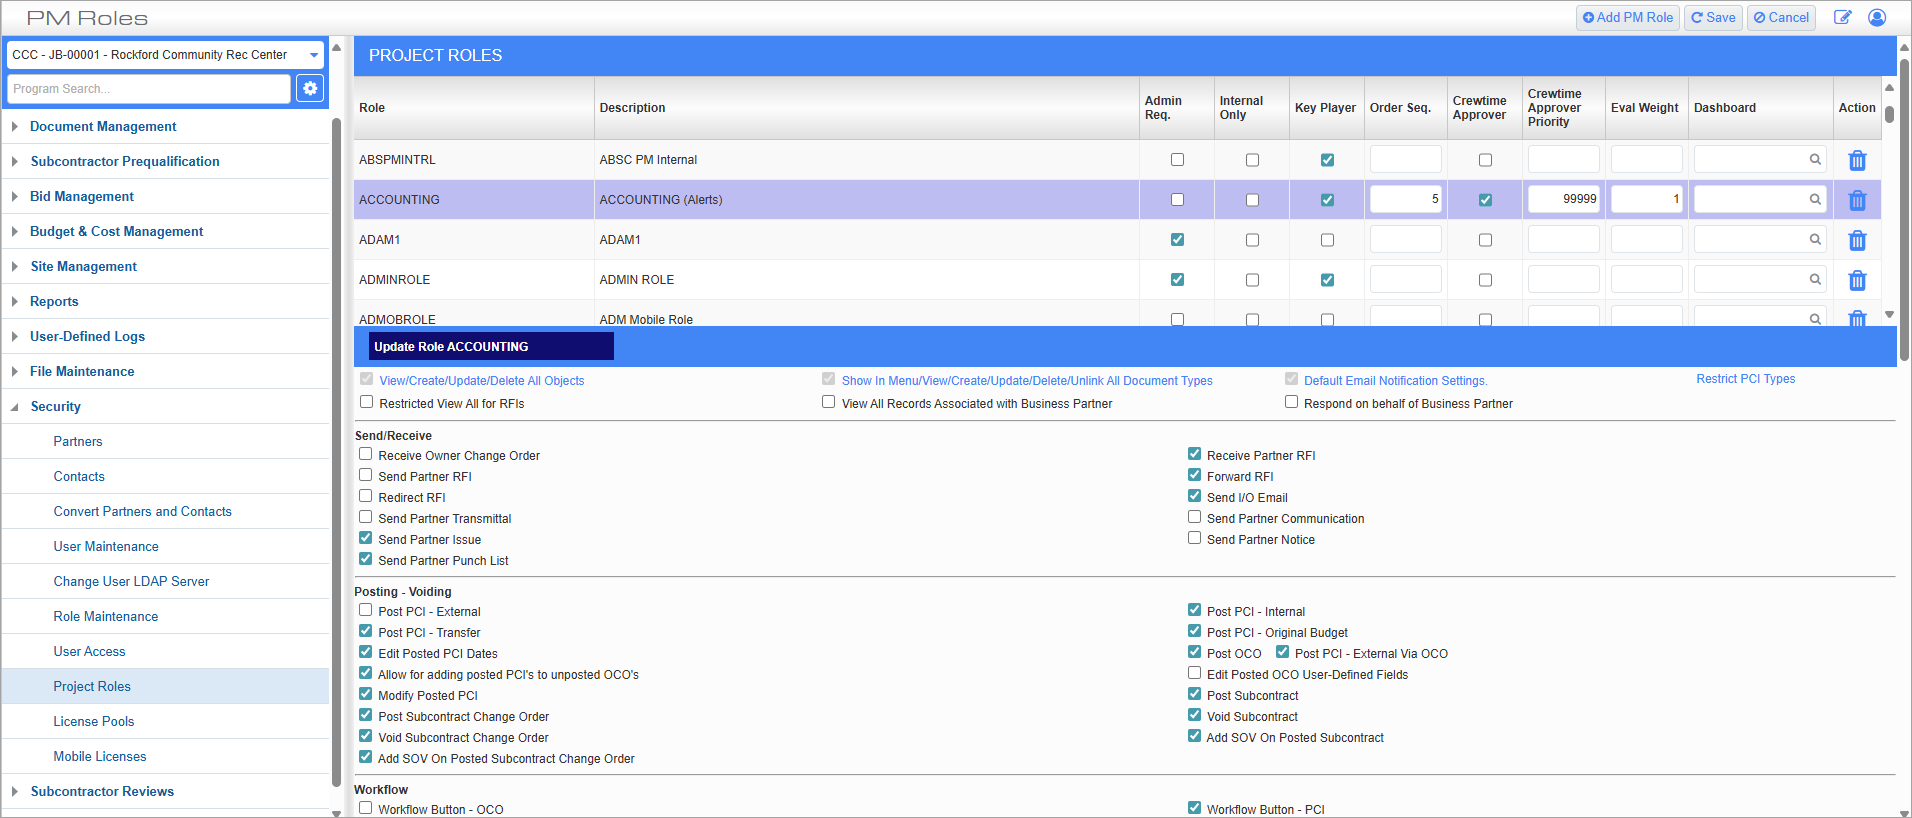
PM Roles; standard Treeview path: CMiC Field > Security > Project Roles
Project roles differ from security roles in that project roles do not define which programs or privileges the user has access to within the application. Rather they define what type of actions the user can take on existing data, and what data they can see within the system.
Creating a Project Role
To create a new Project Role code, press the [Add PM Role] button.
Project Roles
Role, Description
Enter the Project Role code and description for the role.
Admin Req. – Checkbox
Check this box to only allow administrators to assign this project role to other users or contacts. A user has administrator status if the ‘Admin’ checkbox is checked for their given security role on the Role Maintenance screen (standard Treeview path: CMiC Field > Security > Role Maintenance). If this box is unchecked, users without administrator status will not be able to view administrator-required project roles in any project role LOV.
Internal Only – Checkbox
If a project role has this box checked, the role can only be assigned to internal users (i.e., C-type). For example, any roles with the ‘Internal Only’ box checked will be visible in the Project Role field’s LOV for C-type contacts but not for P-type contacts in the System Contact Maintenance screen and the Project Contact Maintenance screen.
Key Player – Checkbox
Check this box to indicate a key player role. Key players can be assigned to projects on the Project Maintenance screen (standard Treeview path: CMiC Field > File Maintenance > Local Tables > Project Maintenance – Key Players tab).
Assigning a user as a key player is a way of automatically including specific parties on documentation such as transmittals.
Order Seq.
If the ‘Key Player’ box is checked for a project role, then enter the order sequence for the role in this field.
Crewtime Approver – Checkbox
Check this box to allow users with this project role to approve timesheets entered for their project.
Crewtime Approver Priority
If the ‘Crewtime Approver’ box is checked for a role, then enter the priority with which this role approves timesheets.
NOTE: These E-Time approver settings only take effect if the ‘Project Manager’ box is checked in the Access Code Detail screen in the E-Time module. Otherwise the authority to approve E-Time timesheets is based on previous E-Time approval rights.
Dashboard
Enter/select a dashboard for the selected project role to use as the project's start page.
Dashboards can also be set up as the project's start page in the CMiC Field - Project Maintenance and CMiC Field - Project System Options screens, and the hierarchy is as follows: the Project Roles setup takes precedence, then Project Maintenance, followed by Project System Options.
NOTE: To view the dashboard, the user must be a project contact and have an Enterprise security role assigned to the BI dashboard. For more information, please refer to Assign Roles to Dashboards – Dashboard Security.
Role Privileges
This section can be used to assign specific privileges to the project role.
View/Create/Update/Delete All Objects – Checkbox
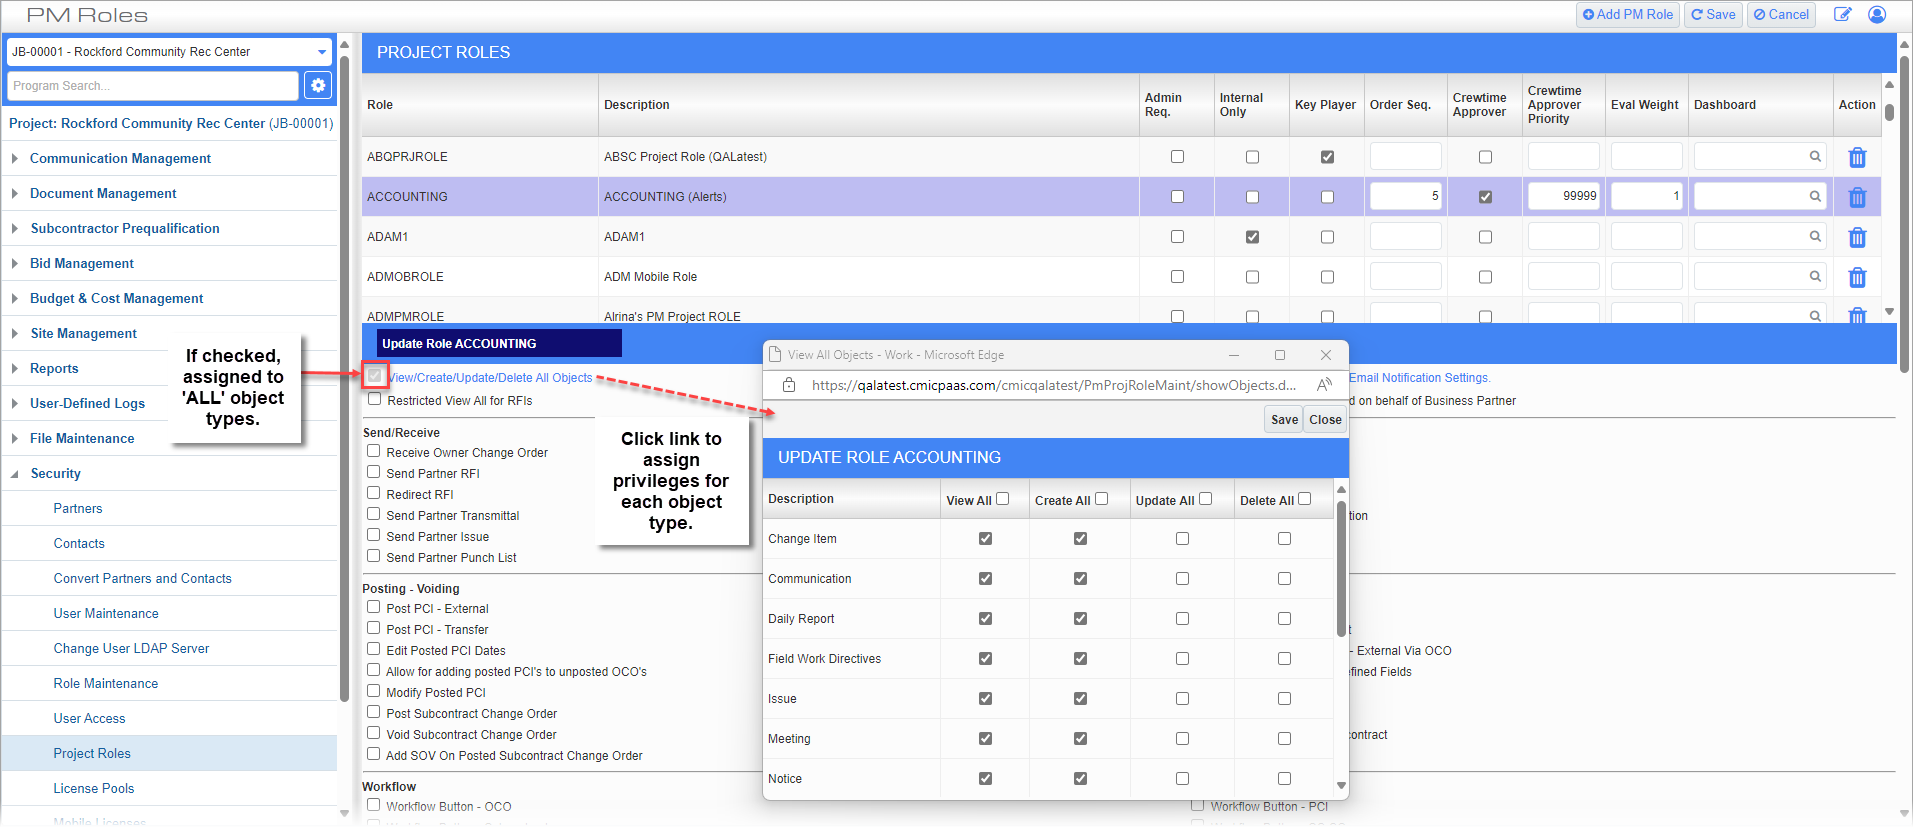
Example of options for assigning privileges to Object Types
This checkbox can be checked to give the selected project role view, create, update, and delete privileges to all objects. Press the blue link to bring up the pop-up window shown above.
Show in Menu/View/Create/Update/Delete/Unlink All Document Types – Checkbox
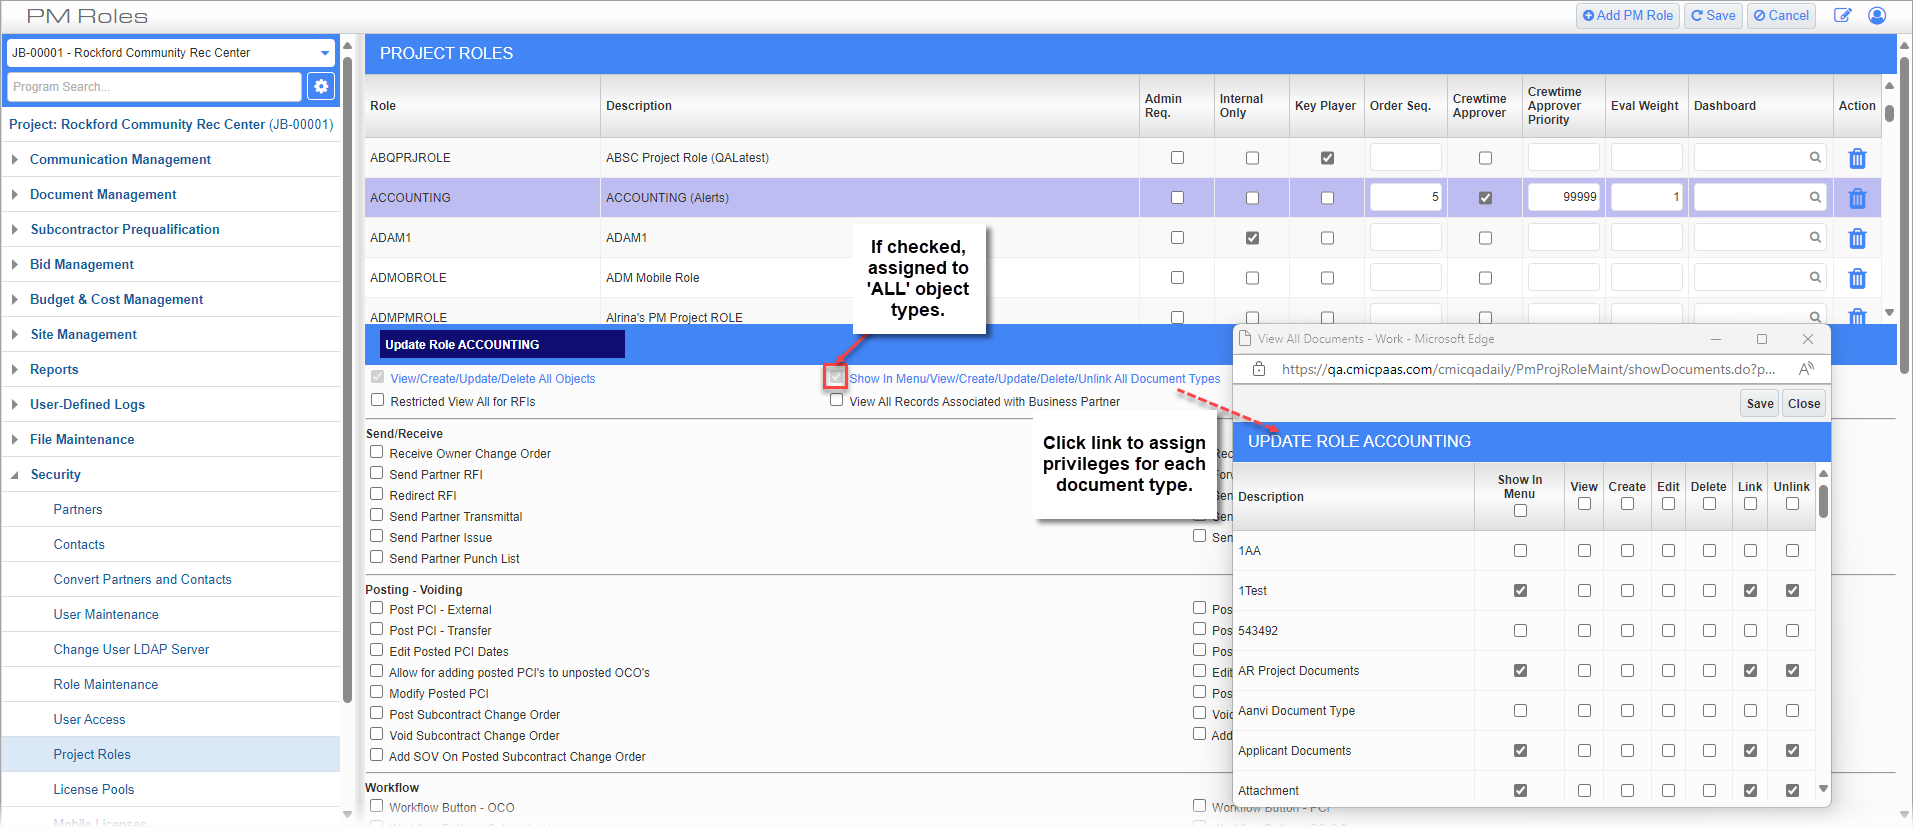
Example of options for assigning privileges to Document Types
This pop-up window will display all Document Types that have been created in Project Management. From here, the user can specify Document Types other users may view, create, edit, or delete for the selected role.
The Link/Unlink checkboxes allow users to link or unlink (i.e., remove using the  icon) an attachment to/from any object such as RFIs and Meeting Minutes.
The ‘Show in Menu’ box allows the user to indicate whether a particular Document Type will be shown in the Treeview for users with the selected project role.
NOTE: To access attachments within Enterprise and CMiC Field screens, users must be assigned a valid PM Role that includes the appropriate attachment configurations. This role-based setup does not provide access on a per-project basis. Instead, it is a prerequisite for enabling attachment functionality across both Enterprise and CMiC Field modules.
View All Records Associated with Business Partner – Checkbox
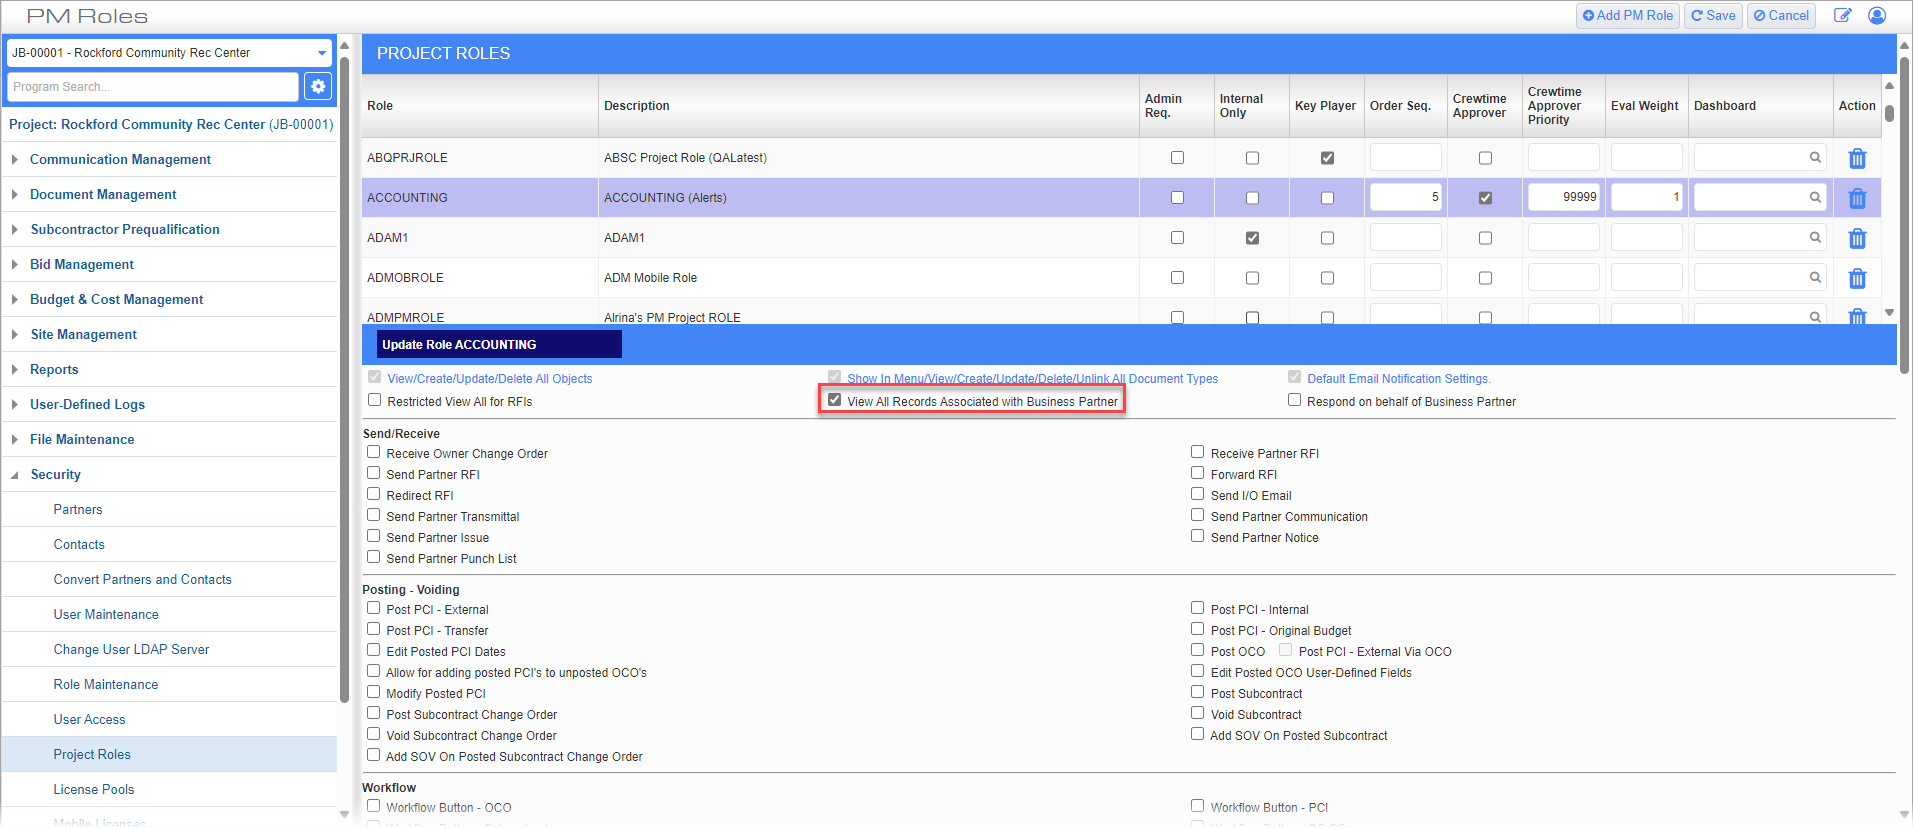
This checkbox determines whether users can see all submitted records addressed to contacts under the same business partner as the user (i.e., all records addressed to other contacts at the same company as the user). When checked, if another user is the To-contact or the CC-contact, it gives the user the privilege to view the record and see all submitted records created by users under the same business partner.
If a user does not have the 'View All' privilege for specific objects under the View/Create/Update/Delete All Objects privileges set, they will still be able to see all the records created for their business partner with this privilege.
NOTE: The 'View All Records Associated with Business Partner' checkbox only applies to the following PM objects: RFIs, Submittals, Issues, Daily Journals, Punch List Items, and Project Checklist records.
Default Email Notification Settings – Checkbox
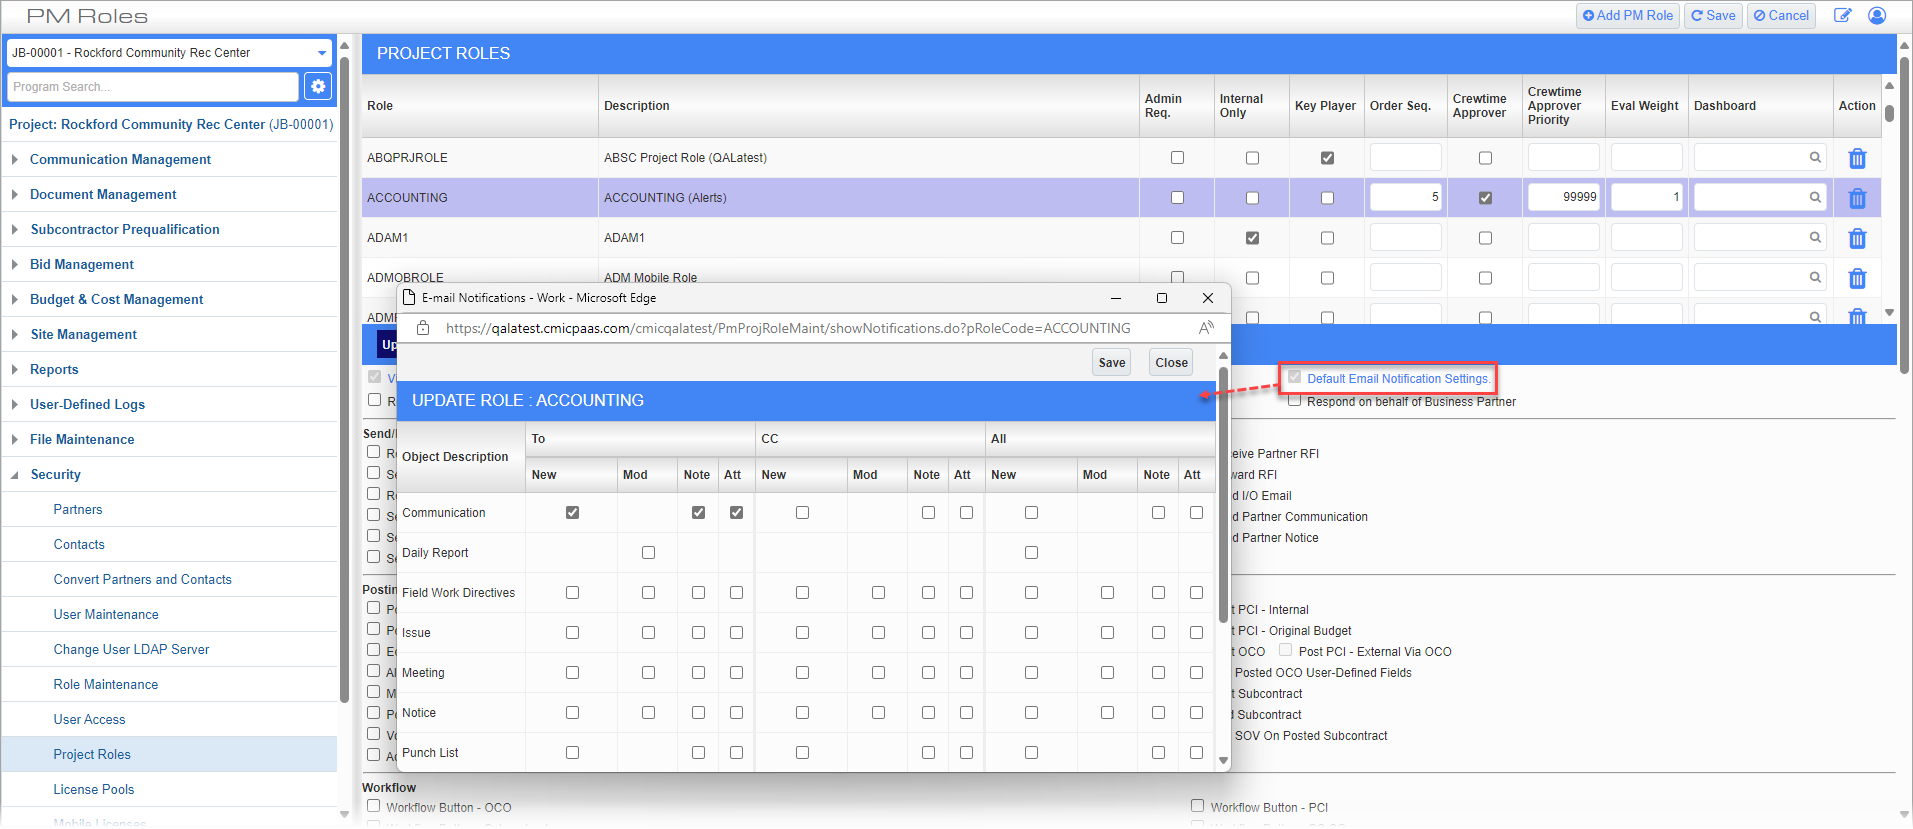
Pop-up window launched from the Default Email Notification Settings link
Click on the link to open the Email Notifications pop-up, where role-based email notification options can be set.
Checking this box selects all forms of email notifications for the user. Once this box has been checked, it becomes grayed out and cannot be unchecked. As such, it is recommended that users select their desired notifications from the pop-up rather than checking this box.
When a project role is assigned to a project contact, the default email notification settings from that role will be inherited by the contact.
The email notification settings for a contact are not changed automatically if the settings are modified at the project role level. To copy project role email notification settings to a contact, unassign the existing role and reassign the modified role.
To learn more about how the checkboxes are used on this screen, refer to E-mail Notification Settings. For more information about using PM notifications, refer to CMiC Field - Project Management Notifications.
Respond on behalf of Business Partner – Checkbox
Check this box to allow users to respond on behalf of others at the same company on records where they are currently the responsible contact.
When checked, users can select a status, enter notes or attachments, and complete reviews on behalf of the responsible contact. For more information, please refer to Review Response.
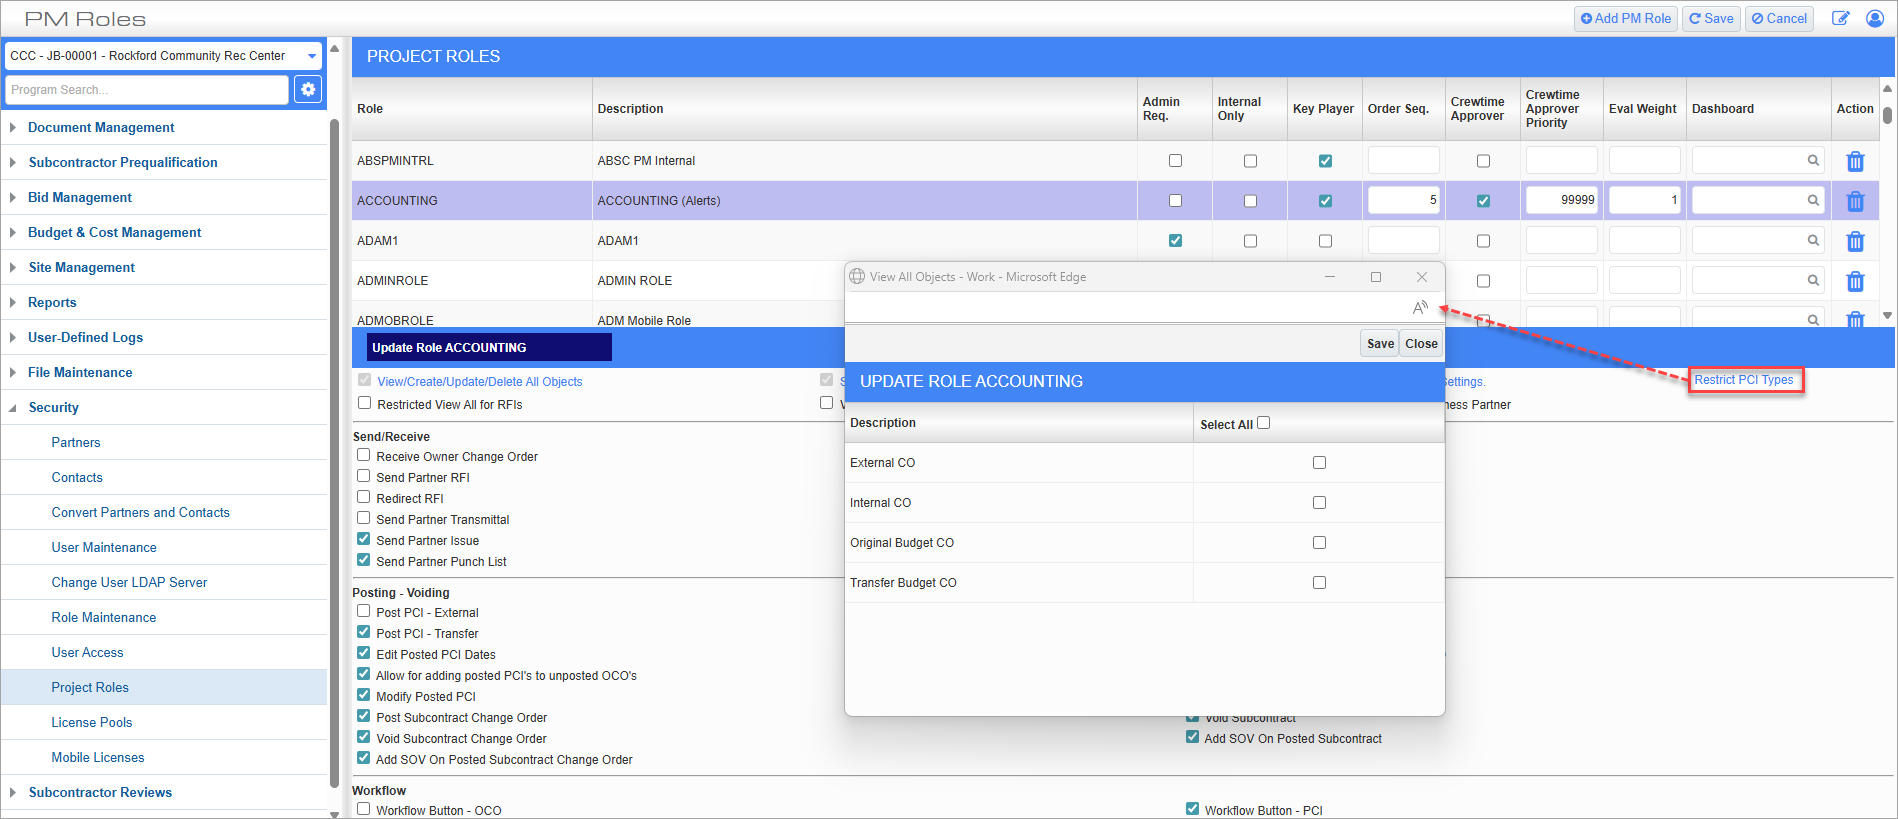
Pop-up window launched from the Restrict PCI Types link
Press this link to restrict access to PCI types for the selected project role. This feature allows users to limit the PCI types to those that are necessary for the project. Once the PCI types are selected in the pop-up window, they will no longer appear in the Type field's drop-down list on the PCI Detail – Tab of the Potential Change Items screen. However, existing PCIs will still maintain their PCI type.
NOTE: The Restrict PCI Types link does not restrict access to PCI types on the Owner Change Orders, Company Control, and System Options screens.
The PCI types available for selection are maintained in the Maintain PCI Types screen in the Change Management module. PCI types with the ‘Exclude from LOV’ box checked will not be available for selection in the Restrict PCI Types pop-up. For more information, please refer to Change Management - PCI Types.
The default value for the PCI types in the Restrict PCI Types pop-up is unchecked for all PM roles (new and existing).
NOTE: When two roles are assigned to a user and a PCI type is restricted for only one role, the PCI type will not be restricted for the user and will be available in the PCI Type drop-down menu.
Other
Non-Project CCs – Checkbox
Check this box to allow users to CC corporate contacts that are not assigned to the project. When unchecked, the system will remove non-project contacts from the CC list when sending objects. (e.g., a non-project contact that was selected using the 'All Contacts' checkbox option from the LOV).