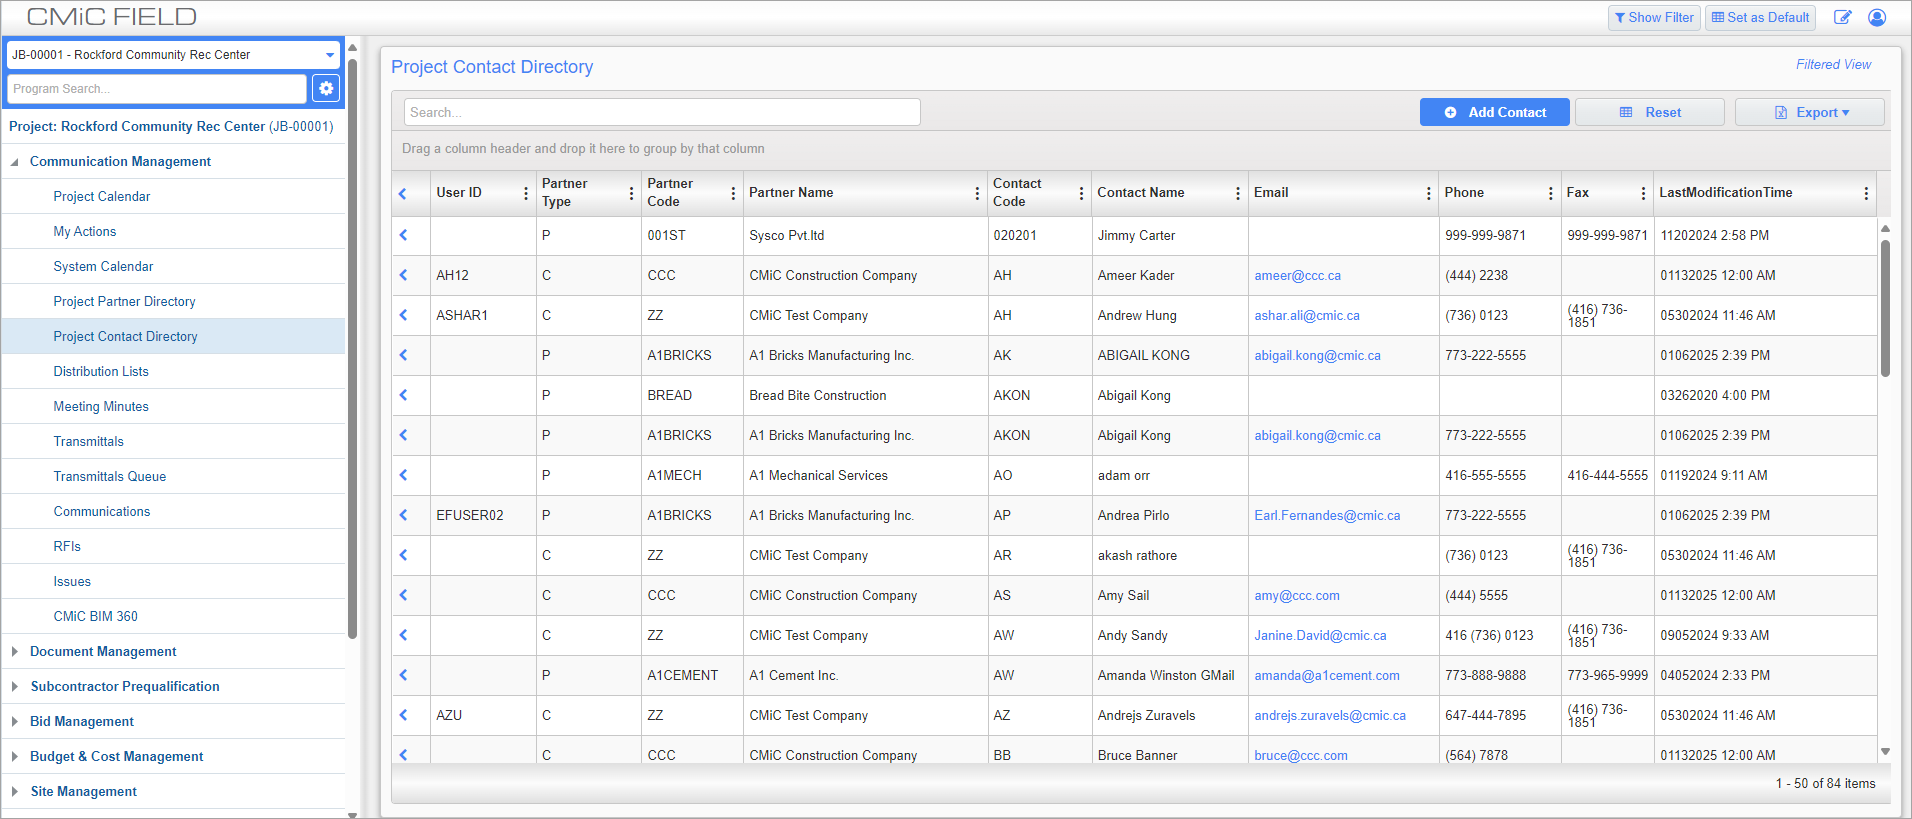
Project Contact Directory; standard Treeview path: CMiC Field > Communication Management > Project Contact Directory
The Project Contact Directory contains all the information regarding contacts associated with the user project. Press the blue link provided by the Contact Name column to view more contact information including their picture.
The contact information may be exported to Microsoft Outlook by clicking the [Export] button. Only those users assigned the ‘Logs (Contacts) - Show Outlook Export/Import Buttons’ privilege have access to this button.
This screen is like the User Profile screen discussed earlier in the manual. Depending on your security, you may be able to add and edit project contacts via this screen. In Edit Mode, the user may update the standard contact information as well as the Contact PM Role, Password and Security Roles. Field security can be added to the contact name in the Project Contact Directory. These fields should still be updateable when accessed via the Project Partner Directory.
NOTE: If a contact was previously assigned to a project through the Project Contact Directory and later marked as inactive (i.e., by unchecking the 'Active Contact' box), the system will not allow the contact to be re-added. Instead, the contact must be reactivated.
PM Role Privilege to Disallow Users From Creating Company Contacts

The privilege highlighted above is located in the Maintenance section of the PM Project Roles screen (standard Treeview path: CMiC Field > Security > Project Roles). Checking this box stops the user from being able to add new project contacts to type C companies, meaning they can only add existing project contacts for type C companies by selecting them from the Contact field.
NOTE: The 'Disallow Users From Creating Company Contacts' privilege only applies to the Project Contact Directory screen. Contacts created in the Contacts screen at the system level (standard Treeview path: CMiC Field > Security > Contacts) and contacts created in the Contact Management screen in the Opportunity Management module (standard Treeview path: Opportunity Management > Contacts) do not use this privilege.
If the user tries to add new C-type contacts with this privilege assigned to their PM Role, a message will be displayed and the user will be required to select a contact from the Contact field instead. On selection of the contact code, it will back-fill the company/partner of the selected contact code (i.e., act as if the company code was not entered and left blank).
Project Contact Detail – Tab
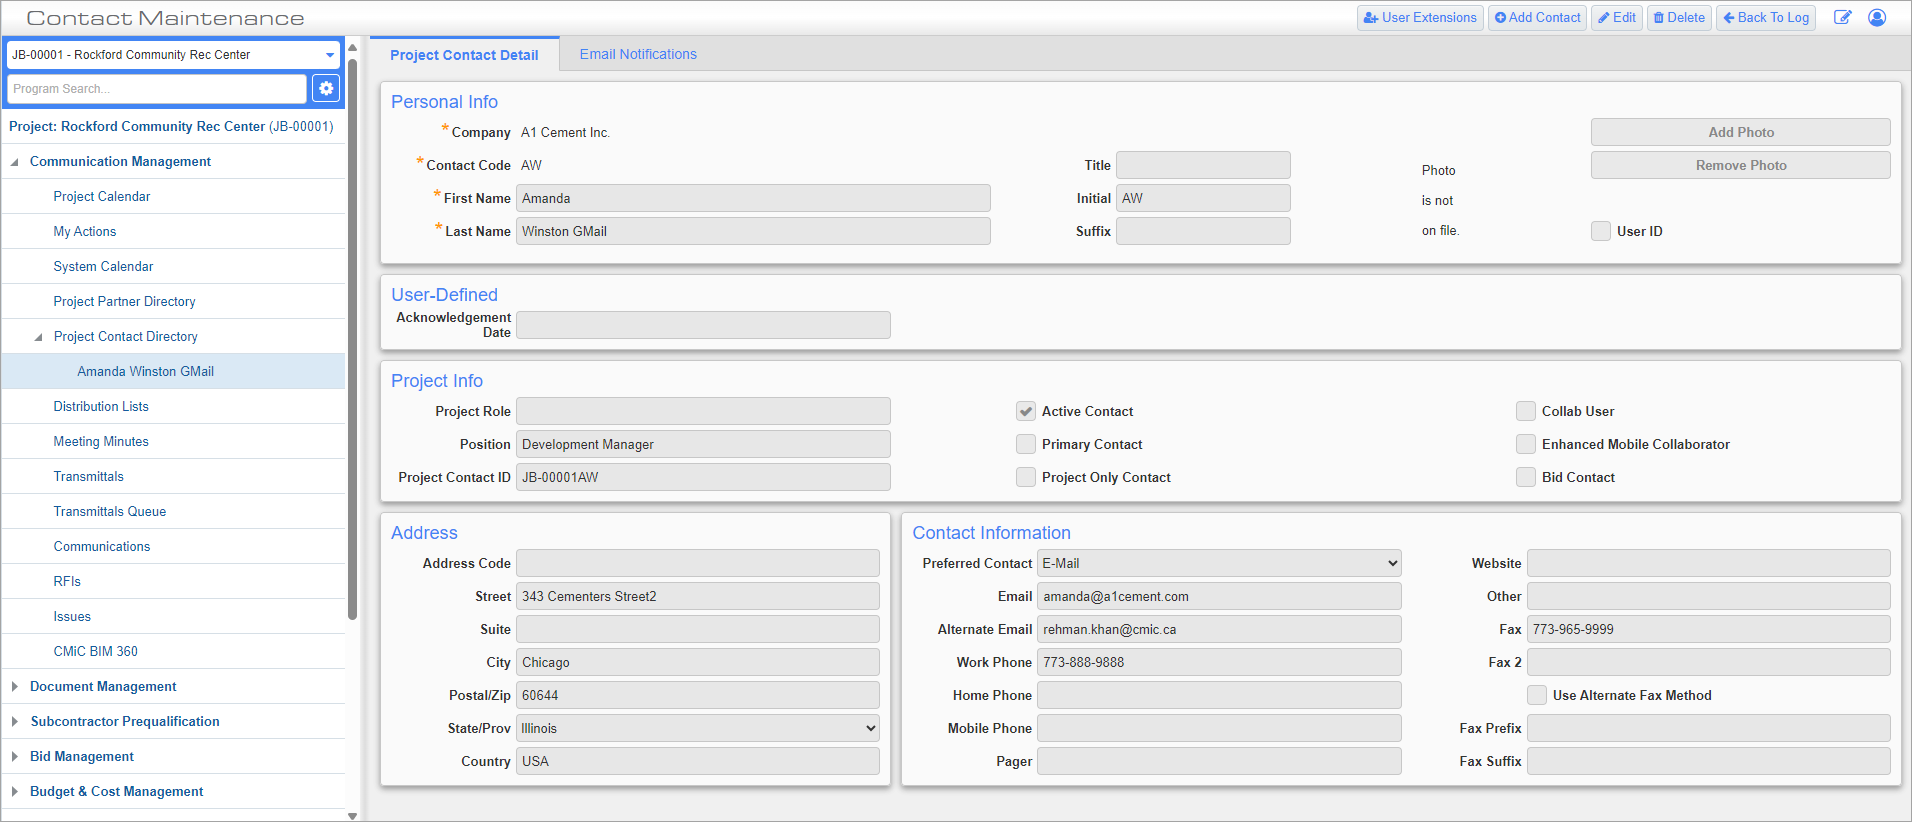
Project Contact Directory; standard Treeview path: CMiC Field > Communication Management > Project Contact Directory – Project Contact Detail tab
Company
Select the company from the company field. The company type selected here determines what contacts are listed in the Contact Code field. The type is either “Partner” or “Company”.
Address and contact details for the selected company may default into the Address and Contact Information sections of the screen. These details are defaulting from the Company record in the General Ledger module (standard Treeview path: General Ledger > Setup > Maintain Companies).
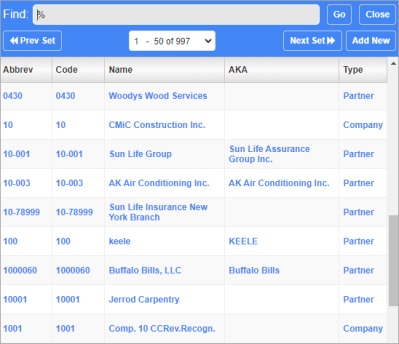
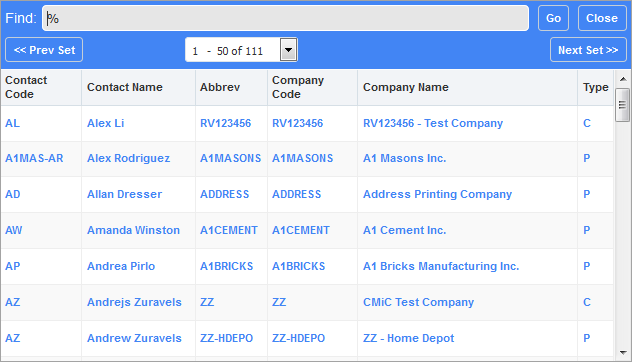
Contact Code
Example of the pop-up window launched from Contact Code field when Company field is left blank – both C and P-type companies are listed
If a C-type company is chosen in the Company field, all contacts from C-type company are shown in the Contact Code field.
NOTE: Users without the ‘Add Contacts To Company’ privilege are not permitted to add a new contact to a C-type company.
If a P-type company is chosen in the Company field, only contacts belonging to this partner would be listed in the Contact Code field.
If the Company field is left blank, all active contacts in the system would be listed, regardless of the company type.
![Screenshot of Contact Maintenance screen with Contact Code field with [Assign] button highlighted.](../../../../Resources/Images/CMiC_Field/CMiCField_ContactMaintenanceProjectContactDetailContactCode_943x197.png)
Example of Contact Code field with security assigned
Field security and the project role 'Disallow User From Creating Contacts For a Company' can be used alone or in combination to configure additional security options for this field. They provide a more controlled approach to creating a new contact, as they only allow you to pull from the existing system contacts under the selected company. For example, if field security for "Contact Code (via Project Contact Directory)" is set to "Read-Only", then a contact code cannot be created and an existing one must be assigned using the [Assign] button. Pressing this button launches the Contact List pop-up window, where a contact code can be selected. The First and Last Name fields will default a name but can be updated as required.
If the PM role 'Disallow User From Creating Contacts For a Company' is checked, then an existing contact code must be selected and the First and Last Name fields will default a name but they will be read-only.
If both of these security options are enabled, then a contact code must be assigned using the [Assign] button and the First and Last Name fields will default a name which will be read-only.
User ID – Checkbox
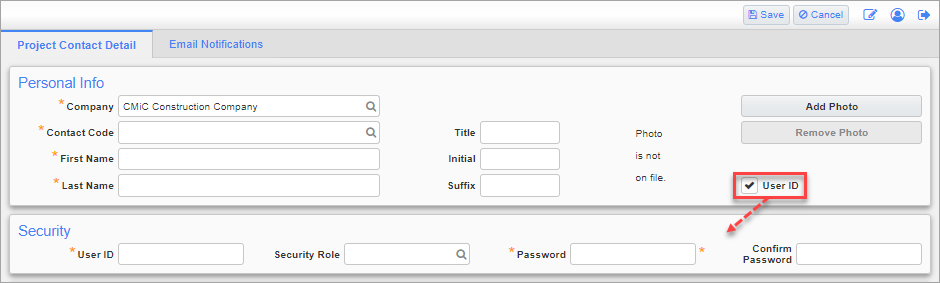
A user ID is required for any project contact who will need to log into CMiC Field/Construct PM. Without a user ID, records can be assigned and correspondences can be sent to the contact, but they will be unable to log into the system and view the records directly.
When the 'User ID' box is checked, a Security section will be displayed, as shown in the screenshot above. This is where additional security fields must be completed. Enter a user ID, security role, and password for the project contact being created.
The following characters are not permitted in the User ID field
/:*?!"\'\\<>|#%=()&^$@,;{}[]+
NOTE: When a project contact is created to be invited to Collaborate Gateway, a user ID does not need to be populated during contact creation. Upon sending a Gateway invitation, a user ID will be created for the project contact.
Project Contact ID
When adding a project contact, this field is automatically populated with the values from the Project Code and Contact Code fields.
Primary Contact – Checkbox
This checkbox sets whether or not the contact should be the primary contact for the project. When addressing meeting minutes, subcontract, or submittals under the current project, the primary contact's information will be auto-populated in the contact fields.
Project Only Contact – Checkbox
This checkbox is used to create one-time contacts directly on a specific project. If the 'Project Only Contact' checkbox or the 'Project Only Contact (On The Fly)' checkbox is checked on the Defaults tab of the Company Control screen, then by default this box will be checked here.
When a new project contact is being created, the 'Project Only Contact' box can be checked, regardless of the partner type. The exception is if the screen is called from within the Project Partner screen for a project-only partner, in which case it should be checked and disabled. The box can’t be updated while editing project contacts but can when the screen is in Add mode.
When a corporate contact is selected from the LOV, the box is automatically unchecked and disabled.
NOTE: This checkbox can’t be disabled once the Contact record is saved. To remove the project-only state of the Contact record, you will need to convert the contact using the CMiC Field - Convert Partners and Contacts screen.
Bid Contact – Checkbox
If the 'Bid Contacts by Company' box is checked on the General tab of the Project System Options screen, then this box will be unchecked and disabled, as bid company information is being set at the system contact level. If the 'Bid Contacts by Company' box is unchecked in the Project System Options screen, then the 'Bid Contact' checkbox will be enabled. If checked, this contact will default for all the bidding functions, and will be automatically pulled into Invitation to Bid when selecting a partner.
Collab User – Checkbox
This checkbox is used to control project access for external collaboration users. When a partner contact is set up with a collaboration user, this checkbox must be enabled at the project contact level for the user to have security access to this specific project. If this box is unchecked, the project contact will be used as a contact only and they will not have login collaborative access to the specific project.
This checkbox is not used for login access for internal type company users. Job/project security is used for internal users and this security access is assigned in the User Maintenance screen in the System Data module.
NOTE: When a system contact is assigned to a project via a Key Player role on the CMiC Field - Project Maintenance screen or via the [Assign To Project] button on the CMiC Field - Contacts screen, the 'Collab User' box will be automatically enabled.
Additional Fields for Project Contact with Associated Employee Number

Example of additional fields for Project Contact with Associated Employee Number on Project Contact Detail tab
The following fields only apply to a project contact that has an associated employee number to which field security can be applied:
-
Estimated Start Date
-
Estimated End Date
-
Actual Start Date
-
Actual End Date
-
‘Employee Assigned’ – Checkbox
Email Notifications – Tab
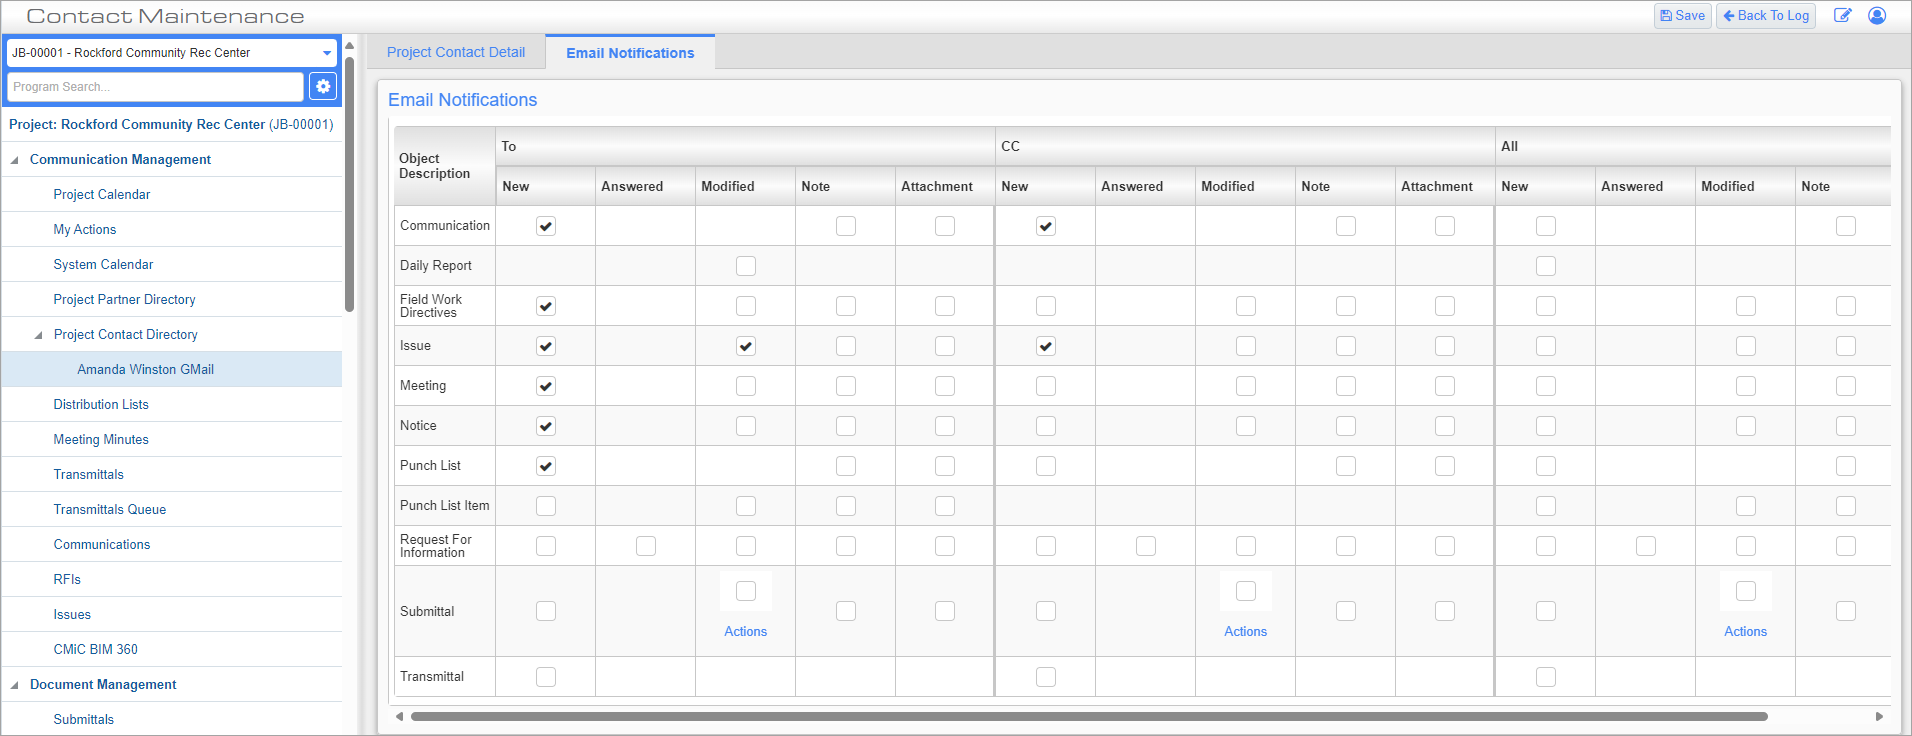
Project Contact Directory; standard Treeview path: CMiC Field > Communication Management > Project Contact Directory – E-mail Notifications tab
This screen can be used to set when a contact should receive emails regarding changes to the project. For example, as above, a contact could decide to receive an email when sent a new field work directive but not when they are CC'd on one. To receive notifications for when the contact is either the To or CC'd party, check the corresponding box in the All section.
To learn more about how the checkboxes are used on this screen, refer to E-mail Notification Settings. For more information about using PM notifications, refer to CMiC Field - Project Management Notifications.
Win/Lose Bid and Updating Project Contact Id for I/O Email
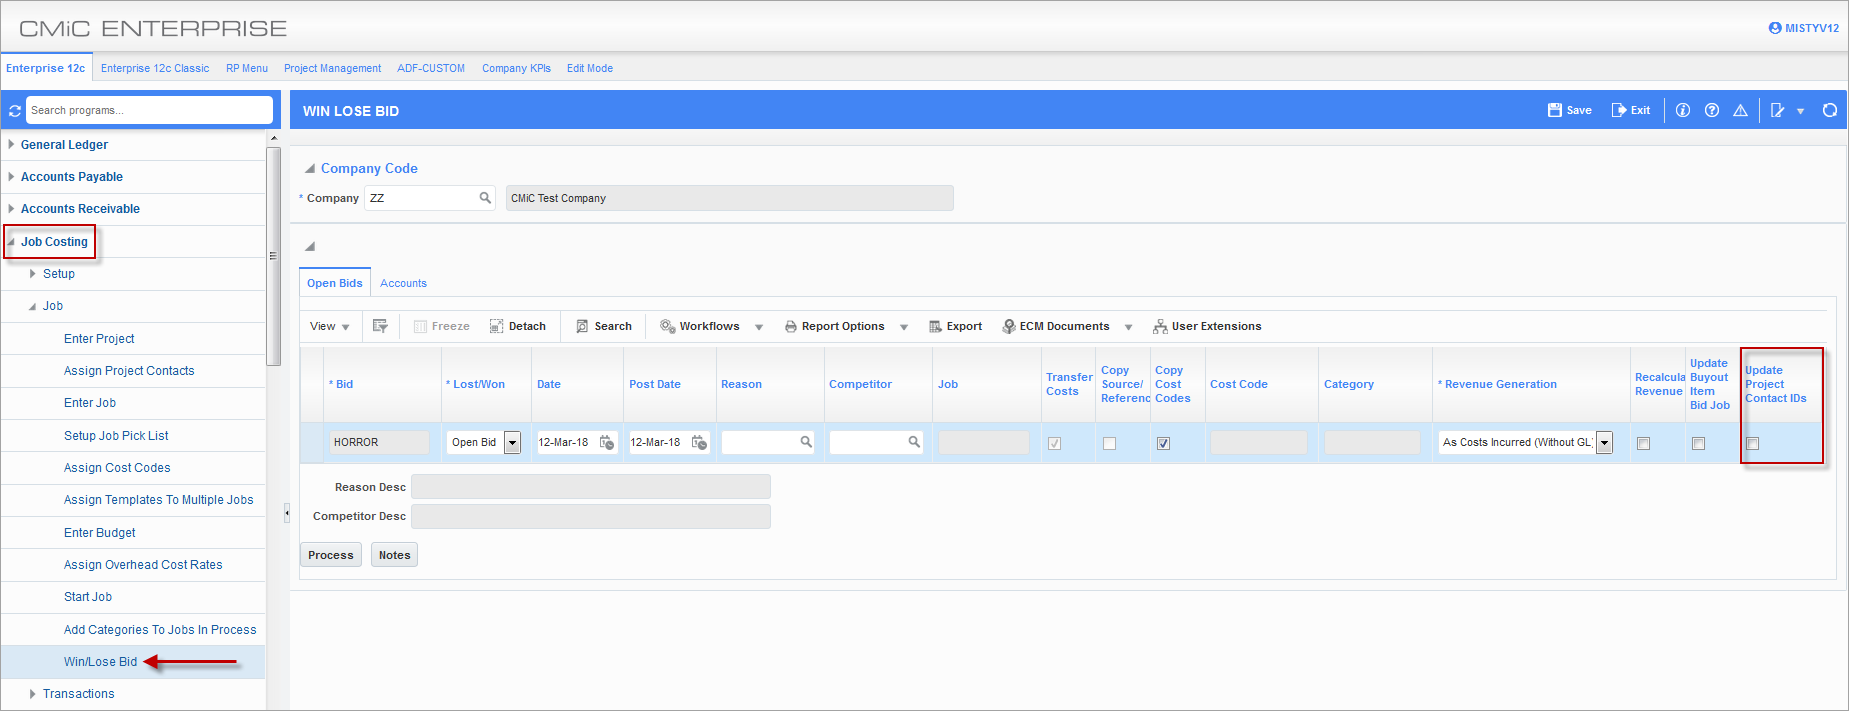
Pgm: JCBIDPRO – Updating Win/Lost Status on Bid Jobs; standard Treeview path: Job Costing >Job > Win/Lose Bid
When the ‘Update Project Contact IDs’ box is checked as shown above, all project contact IDs on the associated project are updated with the new job code entered in the Actual Job field of the Win Lose Bid screen. This is done to ensure any I/O emails sent reflect the new project code. This box is unchecked by default.
NOTE: If there are any unprocessed I/O emails in the I/O inbox which are for the contacts where project contact ID has changed, an error will occur. It is not feasible to make the programming modification address these outstanding I/O emails with the old project contact ID.
Selecting/Using Contacts
Selecting Multiple Contacts
CMiC Field programs allow the selection of multiple contacts at one time and the selection of a distribution list when selecting CCs. The CC Contact LOV available on all CC contact fields defaults to project contacts, but it can be switched to a distribution list by changing the radio button at the top of the list.
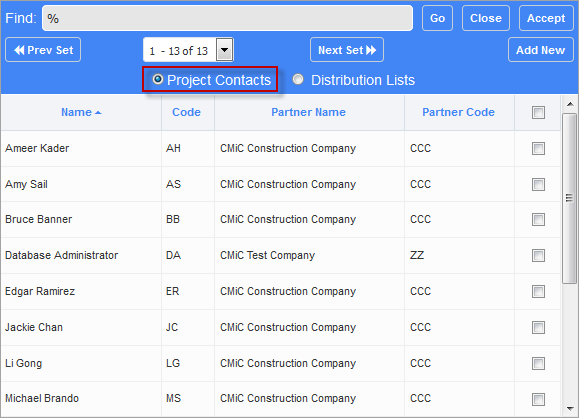
If ‘Distribution Lists’ is selected, then the data will change to display like below:
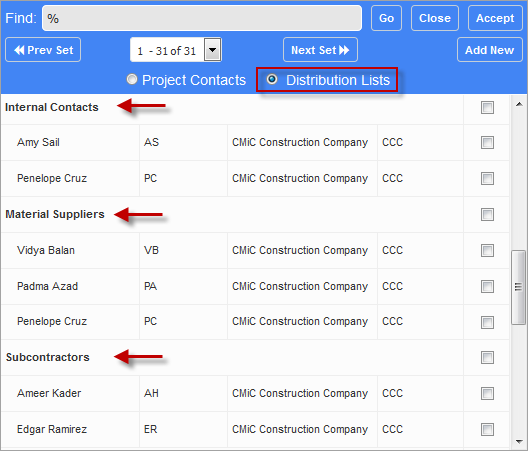
When using this mode, if the user checks the box against the Distribution List group name, then all contacts within the distribution group are added. The user may also select individual contacts by checking the box directly against the name.
Adding Contacts On-The-Fly
The To fields on all programs allow internal users with the appropriate privileges to add a project contact on-the-fly. Field security can be applied to the PM Role field in the Add Contacts On-The-Fly screen (standard Treeview path: CMiC Field > Security > Role Maintenance – Programs/Project Contact).
On any To contact field the LOV displays as below.

To add a new contact, press the [Add New] button. This will open the screen shown below.
The contact being added can be one of three types: a new contact for an existing project partner, or an existing contact for the partner but not yet assigned to the project or a new partner and therefore new contact for the project.
To add a new contact for an existing project partner:
-
Select the ‘Use Existing Partner’ node under the partner.
-
Select the correct partner code from the Partner Code field.
-
Move to the Contact area and select the ‘Add New Partner’ node.
-
The screen displays an area to enter standard contact information, the contact code and first and last names are the only required data.
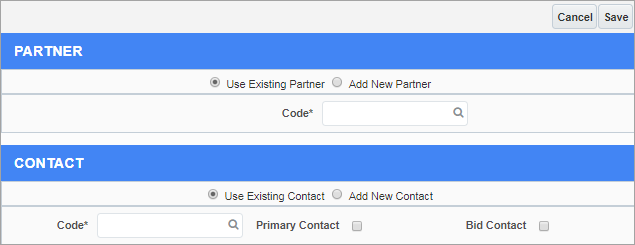
To add existing contact for the partner not yet assigned to the project:
-
Select the ‘Use Existing Partner’ node under the partner.
-
Select the correct partner code from the Partner Code field.
-
Move to the Contact area and select the ‘Use Existing Partner’ node.
-
Select the required contact from the Contact Code field.
-
Update the ‘Primary’ and ‘Bid’ checkboxes as required.
To add a new project contact:
-
Select the ‘Add New Partner’ node under the Partner section to display the screen again as shown below:
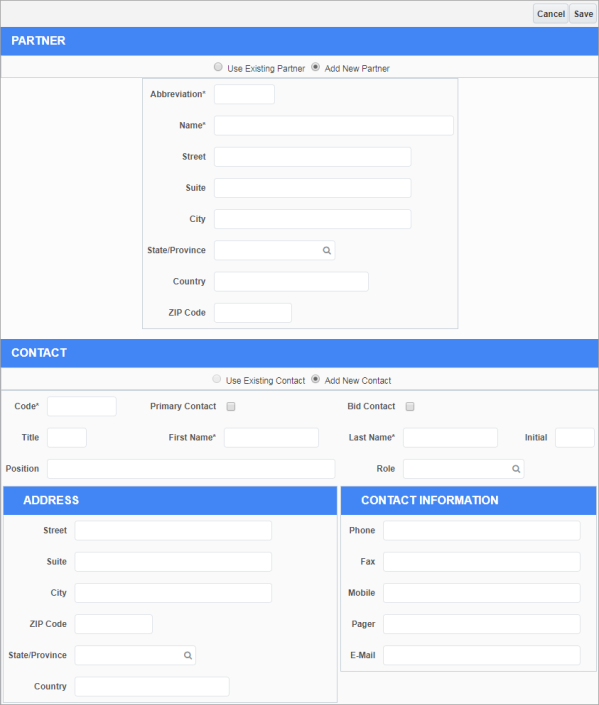
-
Enter the partner information. The Partner Abbreviation and Name fields are the only required fields.
-
Enter the contact information in the Contact section.