
Pgm: JCJOBFM – Job Setup; standard Treeview path: Job Costing > Job > Enter Job – Job Detail tab
Job Code, Name
If the 'Use Automatic Job Numbering' box was checked in the JC Control screen, then this field will not be available. Otherwise, enter a unique code for the job or sub-job being defined. This field is 10 characters and the description field is 60 characters.
[Workflow Lookup] − Button
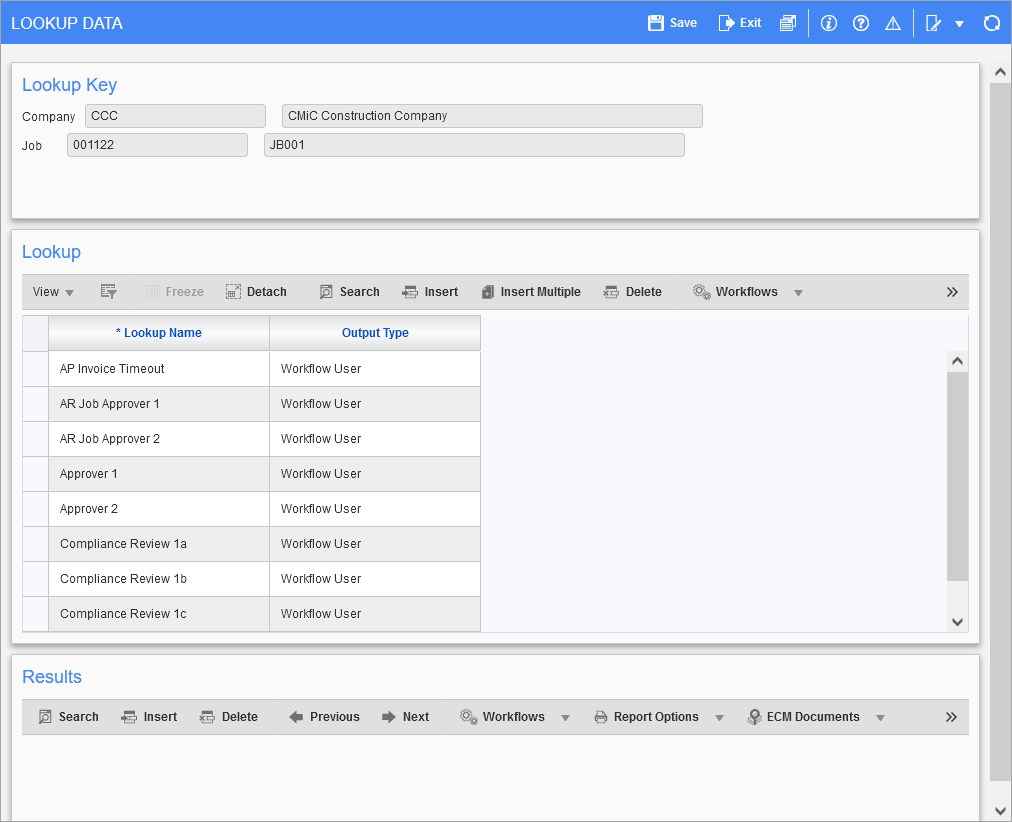
This button is hidden by default and can be added via the Lite Editor if needed. When clicked, the Lookup Data pop-up window opens and users may select a lookup and assign approvers as needed. This lookup data is normally maintained on the Resource Lookup Rules screen found in the Setup sub-menu of the Workflow module.
Control Job
Controlling jobs allow budget, cost, and change order amounts for individual jobs to be grouped together for reporting purposes. If the job being defined is a sub-job then enter its controlling job code in this field, otherwise leave the system default of "All".
Bid Job − Checkbox, Bid Date
Bid jobs allow budgets and costs to be entered, but do not allow billing. The purpose is to track the cost of the bidding process. Once it is determined whether the bid has been won or lost, the bid may be closed, or transfer the bid to a regular job. If this job is a bid job, check this box and enter the date on which the bid is due.
Refer to Job Costing - Working with Bid Jobs for further details.
Status
This display value shows the current status of the job. "Pending" identifies a job that has not been started, “In Process” shows a job that has been started, and “Closed” shows that the job has been closed.
Billing Method
When creating a new job, there are two options: “Job Billing” and “Manual AR”.
Job Billing is a billing system that allows for many different types of billing such as cost plus, budget plus, milestones, and others. In addition, it is fully integrated to Job Costing and has the ability to use minimum time, surcharges, and overtime rules.
The Manual AR invoice method means that the job is invoiced manually directly from the Accounts Receivable module. The details of the invoice are user defined.
Progress billing and time and materials billing are provided for backwards compatibility only. These two options can only be used on new jobs that are defined as a sub-job of a job that already has this billing method.
Contract
This is the Job Billing’s billing contract code. A billing contract can be shared by multiple jobs/sub-jobs. This field will default to the job code but it can be changed to any 10 character code. If the job being entered is a sub-job then this field will probably need to be changed to be the same as the controlling job. The LOV on this field will show the controlling job’s contract code if the job is a sub-job.
If the job is defined as “Manual AR”, this field will be blank and any contract code entered will be ignored.
Valid
This field identifies if the job has all required user extensions entered (valid) or if there are mandatory user extensions against the JCJOB table that have not been entered. All jobs are displayable in the Enter Job screen, and this status is updated on creating or updating the job. Jobs must be redisplayed/re-queried to see the updated status after entering/removing values for the user extensions.
NOTE: This relates only to user extensions that are both mandatory and assigned to the JCJOB table.
Customer
Select the customer to be billed for the job. The customer must have already been set up in the Accounts Receivable module. If the job being entered is a sub-job, this field will default to the customer assigned to the controlling job. This is a mandatory field unless the billing method is “Manual AR”.
The terms code and taxes associated with the customer will automatically be defaulted into the job.
If the job being defined is for quarry production, it does not require a customer and it should be defined with the billing type of "Manual AR".
[Update Customer] − Button

This button is used to update the Customer field for this job record, its corresponding invoices, and contract. A confirmation message will be displayed, as shown above.
Project Manager, Contact Name
If the 'Project Manager Is Mandatory On Job' checkbox is checked in the Job Costing Control File screen then this field will be required, otherwise it is optional.
-
The LOV for this field is restricted to company (C type) contacts that have the PM role defined on the Job Billing Control screen. If the PM role is null on the Job Billing control setup the LOV will show all company contacts.
-
If a job was created via the CMiC Field module, then the job PM manager will populate from the key player on the project with the same role as specified in the Job Billing Control screen as the PM role. If the JB PM role is null or there is no such key player, the PM manager on the job setup will be left as null.
-
When the Job Billing contract is created the PM information – partner, type, contact code, and full name will populate. If the Job Billing contract has both controlling and sub-jobs the PM contact information will be from the controlling job only.
-
If the PM is changed on an existing job, it will not lead to the change of the department or work location if those fields were not null at the time of the change.
-
If the 'JB Contract Project Manager is Synchronized with Job PM' checkbox is checked on the Job Costing Control File screen, then the project manager can only be changed in the Jobs tab. It cannot be changed in the Job Billing Contract screen. Once the information is entered in the Jobs tab of the Control File screen, the PM contact information will update in Job Billing contract with the partner, type, contact, and full name.
Cost Code Template
This field is used to specify a default cost code template.
Cost code templates are managed in the Cost Code Template Maintenance screen (standard Treeview path: Job Costing > Setup > Local Tables > Cost Code Template).
Automatically Apply Template to Job − Checkbox
If a template is specified in the Cost Code Template field, check this box for the specified template to default to the Use Cost Code Template field on the Assign Job Cost Codes screen. The cost codes from the template will automatically be assigned to the job.
Terms
Terms codes define the rules for calculating the due dates, retainage, and discount amounts for invoices.
The terms code entered here is used by manual AR invoicing if the job code is entered on the invoice header (unless there are specific overrides for discount and retainage on the customer record). If this field is left blank the customer terms code is used. This terms code is also used as the default when the Job Billing contract is created. This field will automatically default to the terms code associated with the customer.
Location
If default taxes have been applied to a location code they will be defaulted from the location onto this screen, where they can then be modified if required. AP taxes will show under the AP Taxes tab and AR taxes will show under the Job Billing tab. If AR taxes have been defined at both the customer and location, the location AR taxes will take priority.
This field can also be utilized by the Purchase Order module to determine the ship to address for any purchase order written against this job.
[Assign Ship to Addresses] – Button
This button is available by default and when clicked, it launches the Job Alternate Ship to Address screen. For more information, see Job Costing - Job Setup - Job Detail Tab - Job Alternate Ship To Address.
Warehouse
If the Inventory module is being used, and warehouses are defined for jobs, this is where the inventory warehouse is matched to the job. A warehouse location is required if the job being defined is to be used for quarry production. This is not a mandatory field.
Refer to the Inventory - R12 for more information on warehouses.
Accounting Method
When setting up a job, the system allows for the specific selection of the accounting method used on this particular job. The accounting method will default from the Control File screen, but may be modified on a job-by-job basis.
For more information, please refer to Job Costing - Accounting Methods.
Default Department
If the 'Mandatory Default Job Department' checkbox was checked in control the default department is required at this stage. Otherwise, entering a department is optional. If a department is entered here, it overrides the control file department codes.
If the 'Job Work Location Defaults From Employee Home Department' checkbox is checked on the Job Costing Control File screen, then the department will default from the employee set up of the project manager. When the project manager’s home company is different from the job company an error will be given and you will be asked to select a new department from the LOV of the job company.
Revenue Generation
There are two revenue generation methods available, the value for this field will default from the control file, but you may change it if required.
For more information, please refer to Job Costing - Revenue Generation Methods.
Market Sector
In Job Costing’s Control File, when the 'Market Sector Is Mandatory On Job' checkbox is checked, during the setup of a new job, users must enter a market sector for the customer against the job. If a customer is defined with one or many market sectors, then as soon as the customer code is entered, the market sector and the description fields will be auto populated. If there are many market sectors associated with the business partner, then the one alphabetically on top of the list will be used to populate the field. Users are allowed to override the field, by choosing a different market sector from the LOV.
If the checkbox is unchecked, then the field is no longer mandatory on the Jobs tab of the Control File screen. However, users can choose any market sector of their choice from the LOV. In this case, even the market sector may not have been associated with the customer at all.
Estimated Start Date, Estimated End Date
These fields are used by job level time phased budgeting to determine the length of the job in periods. If job level time phased budgeting is not used, these fields are for reference only.
The Estimated Start Date field may default to the system date if the JC Control File screen has the 'Estimated Start Date Defaulted to System Date' checkbox checked.
Inter-Branch Expense Category
If you wish to override the company specified inter-branch category for this specific job, you may by entering the category code here. If inter-branching is not being used leave this field blank.
Spread Rule Code
If the company control is set to use job level time phase versus detail phase/category time phasing, this field will be available to specify which GL period spread rule will apply to the costs of the job in time phased budget and forecasting.
NOTE: Detail phase/category time phasing has been deprecated.
Original Contract Amount
This is the originally entered contract amount and is not modifiable once the job has been created. The initial value entered will be automatically populated into the current contract amount when first entering a job.
If the job is a bid job created from the Opportunity Management module, when the job is won the original contract amount in the actual job gets updated with the potential revenue from the opportunity. See the 'Copy Job Original Contract Amount' checkbox on the JC Control File’s Bid Setup tab.
Effective Date
This field is enabled only when the System Options > Projects > 'Store Phase Projections' checkbox is checked.
The date entered will be considered to be the original budget start date in all of the projections.
Current Contract Amount
This is the job contract amount and is kept updated by the system during the life of the job whenever a change order is posted. If the job’s status is “Pending” then the amount entered in this field will be copied into the Original Contract Amount field and if there are posted change orders then they will be subtracted from the original amount. If the job’s status is “In Process” any amount entered in this field will not update the Original Contract Amount field. If the job’s status is “Closed”, this field is not updateable.
The Current Contract Amount field will be compared against incurred costs in the WIP Adjustment screen if the Control File is set to use “Job File” in the Contract Amount Source field.
Project Start Date
This field is enabled when the 'Store Cost Code Projection' checkbox on the Projects tab of the System Options screen is checked. When a date is entered, the costs incurred prior to this date will be ignored while calculating projections.
Original Earnings
This field is un-editable, but the actual job gets updated with the fee amount from the opportunity if any associated bid job is won.
The Projected Profit Amount in the WIP Adjustment screen will be populated with this original Earnings Value, if the Control File is set to use “Job File” in the Projected Profit Amount Source field.
Projection Threshold %
This is a percentage value which is part of a mechanism that will suppress the calculation of the straight line forecast final cost algorithm until a certain percentage of physical work (from either actual units/estimated units or input percentage of completion – as opposed to a cost to cost calculation of percent complete) is achieved. This is a default value from the JC Control File that eventually goes to the cost code level on a job and can be overridden if desired.
Equipment Max Charge Out (%)
This will be the maximum percent per piece of equipment for billing. This can be overridden at the job/class level and/or the job/equipment level in EC. If null, there is no limit.
Replacement Value Cap (%)
Enter the replacement value cap percent to be applied. If this is null, max billing will be unlimited.
NOTE: 'Use Billing Revenue Cap' checkbox must be checked in System > Setup > System Options > Assets tab for this field to be visible.
Discount (%)
Enter the discount percentage to be applied on the billing rates. If this is null, the discount applied will be zero.
NOTE: The 'Use Billing Revenue Cap' checkbox must be checked in System > Setup > System Options > Assets tab for this field to be visible.
Value Cap Cutoff
This field works in conjunction with EC. If this is null, the system will work as if there is no restriction on billing to jobs. If this is zero, then the unbilled revenue amount will always be zero. At the time of auto-charge, if the equipment is not checked for the 'Include In Value Cap' checkbox and the billing replacement value on the equipment is less than the value cap cutoff at the job then the system will create auto-charge transaction with a zero dollar unbilled revenue amount.
If the equipment is not checked for the 'Include In Value Cap' checkbox and the billing replacement value on the equipment is greater than the value cap cutoff at the job then the system will create an auto-charge transaction with the available billing rate from the Equipment Costing module. If the job has a discount percent defined then the discount will be applied to the unbilled revenue rate. The unbilled revenue amount will be calculated from the discounted billing rate.
If the billed to date charges on the job exceeds the amount calculated as [Amount = Billing Replacement Value (from equipment) × Replacement Value Cap% (from job) ], then the auto-charge transaction will be created with a zero dollar unbilled revenue amount.
Exclude Job From Charge Cap Value − Checkbox
By default, this checkbox is hidden. The Lite Editor must be used to display the checkbox on the screen. This will be enabled depending on the value of the Control Job field. If it’s set to “ALL”, then the 'Exclude Job from Charge Cap Value' checkbox is disabled. Otherwise, if the 'Exclude Job from Charge Cap Value' box is checked, charges continue to hit the sub job without capping the charge value.
[WBS Defaults] − Button
Use the [WBS] button to access the WBS (Work Breakdown Structures) pop-up window. WBS codes can be defined at the job level, or at the cost code (phase) level.
For more information on WBS Codes, refer to Using WBS Capabilities.
[Notes] − Button
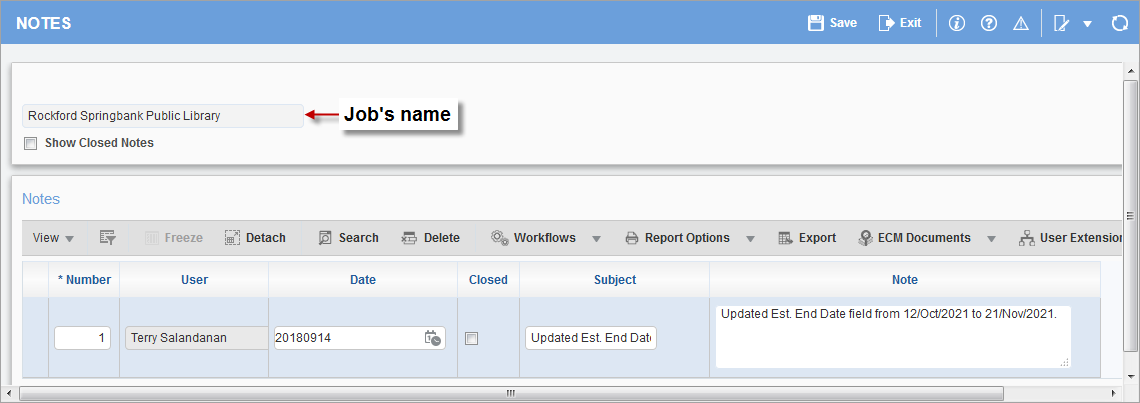
Job notes are a useful way to attach specific information to a job.
To add a note, click [Insert] on the block toolbar in the Notes section, enter the note and click [Save].
To delete a note, select the note using the selection area, then click [Delete].
[CDI] − Button
Use the [CDI] button to access the Compliance Risk Management pop-up window where users may view default compliance codes and update or select new compliance codes and assign them to the job. Users may maintain risk codes in the Job Billing module and set the required rates. For details, please see Job Billing - Risk Management Rules.