Overview
Request For Payment screen; standard Treeview path: CMiC Field > Budget & Cost Management > Request For Payment
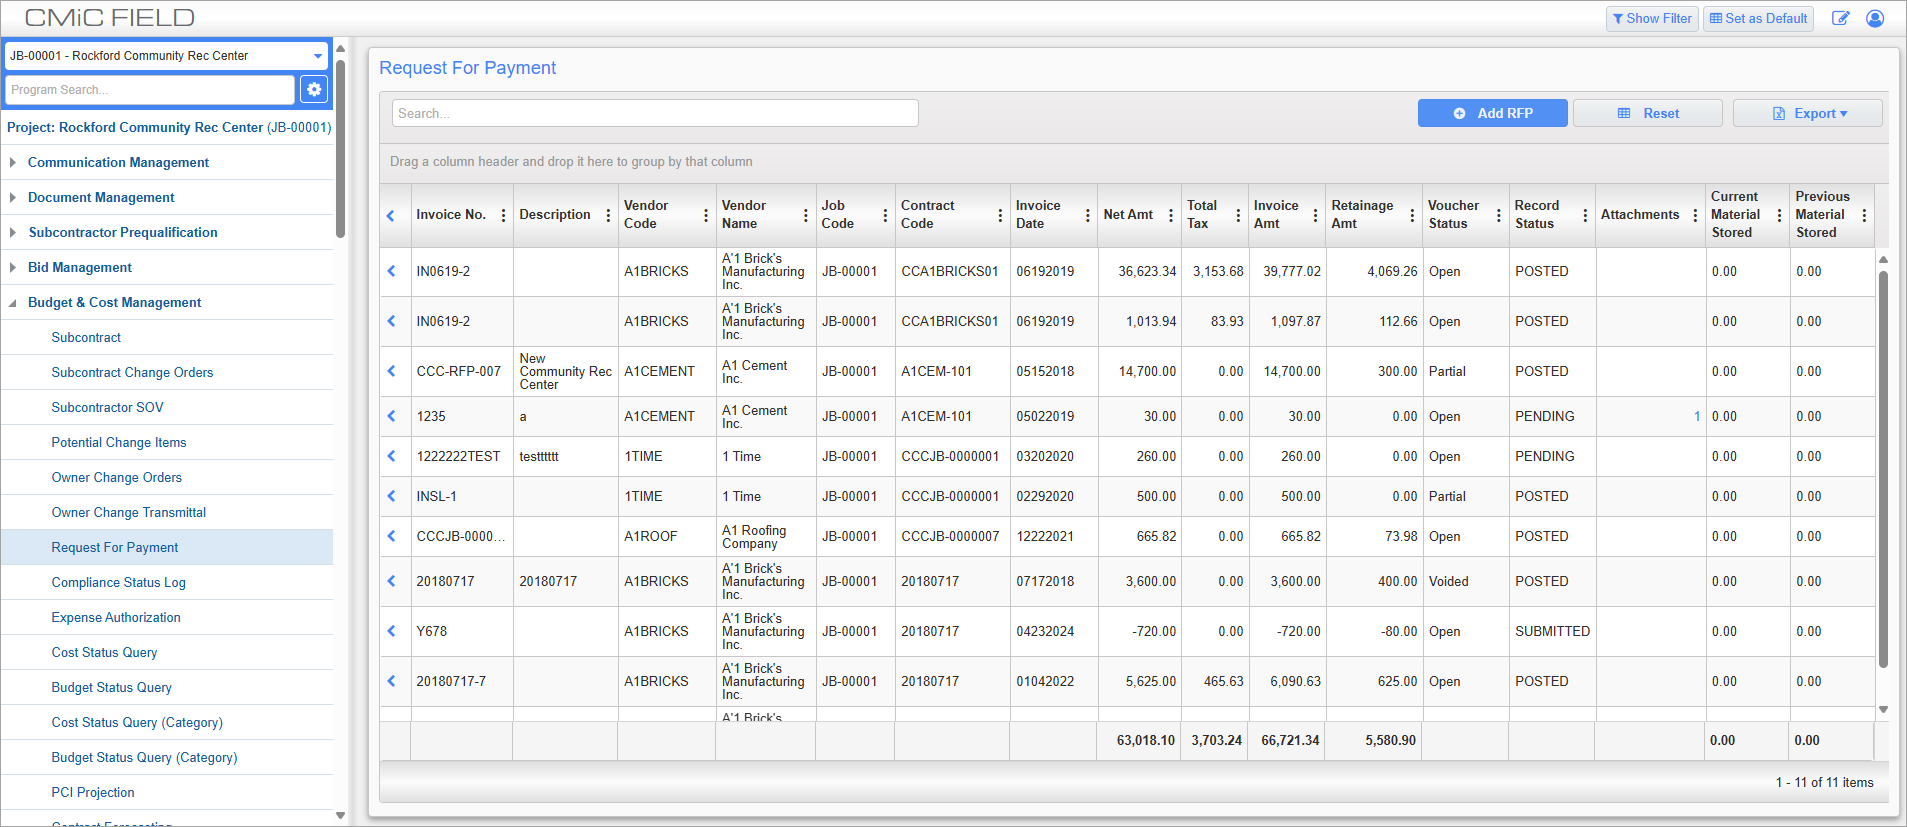
Payment requests need to be submitted as part of any project cycle. These can be entered in the Request for Payment screen.
NOTE: RFPs can be entered in CMiC Field, Collaborate, and Enterprise (in the Subcontract Management and Imaging modules).
RFP Detail – Tab
RFP Detail
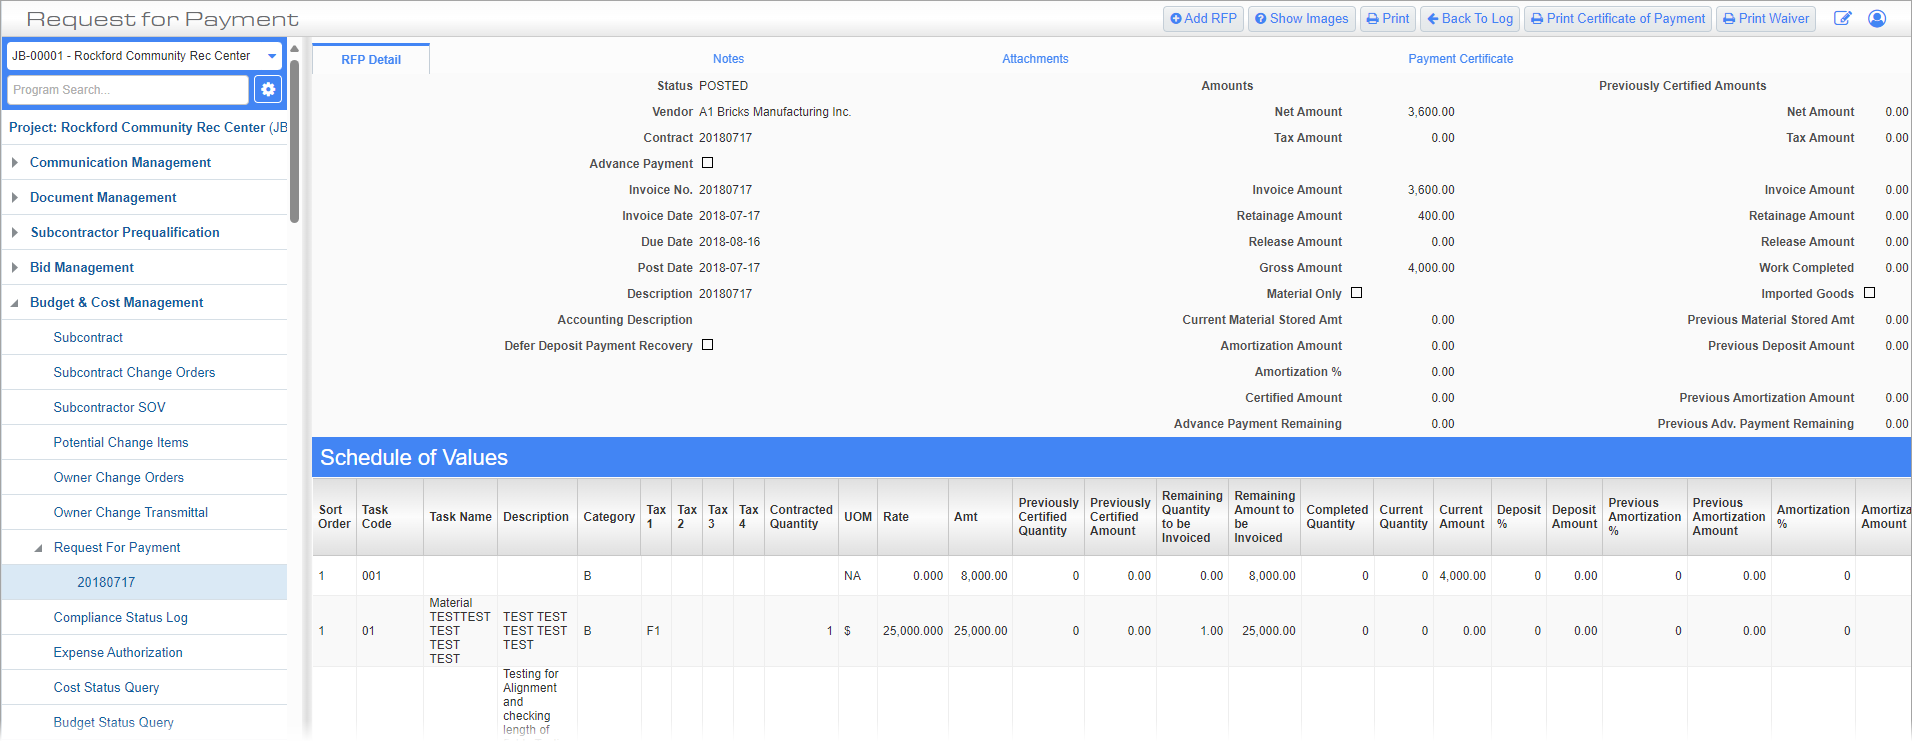
Request For Payment; standard path: CMiC Field > Budget & Cost Management > Request For Payment
To enter a new payment request press the [Add RFP] button to open the window shown above. This screen does not allow more than one open payment requisition at a time.
The [Save] button will save the payment request but won't post it to the contractor.
The [Submit] button saves the request and passes it to the contractor for approval. RFPs cannot be edited after they have been submitted.
NOTE: Read-only fields in the Header section of the Request for Payment screen may be hidden using field security. These fields have the prefix "Header" in the Security Roles screen, as shown in the screenshot below:

Security Roles; standard Treeview path: CMiC Field > Security > Role Maintenance – Assign Field Security
For more information, please refer to Assigning Field Security.
Vendor
Enter the vendor for the RFP. This will default to the user company.
Contract
Select the contract from the list of values. In most cases, there will only be one contract available. If a previous RFP has not been posted by the contractor, the contract will not be available for selection. Once the contract is entered, the Schedule of Values section will display the sum of all previous payment requests.
Advance Payment – Checkbox
This feature allows the ability to record an advance payment (deposit) against a specific vendor subcontract and then track the recovery/amortization of the advance payment through the RFP progress payments. For more details, please see the Advance Payment – Checkbox details in
Owner Payment Required – Checkbox
This checkbox is only enabled when the 'Advance Payment' box is checked. Its value is saved on the Advance Payment Voucher and is for information purposes only.
Advance Payment Amount, Advance Payment %
For more details, please see the Advance Payment Amount and Advance Payment % field details in
Defer Deposit Payment Recovery, Amortization %, Amortization Amount
For more details, please see the associated field information in
Invoice No
Enter the invoice number.
Invoice Date
Enter the date of the invoice. This will default to the current system date.
Due Date
Enter the date the invoice is due.
Description, Accounting Description
Enter a description for the RFP. The most common description is the draw number and work included until date.
Material Only – Checkbox
Check this box if the RFP is for materials only.
Imported Goods – Checkbox
Check this box if the RFP is for imported goods.
Certified Amount
This read-only field displays the certified amount for the contract.
Advance Payment Remaining
This read-only field displays the remaining advance payment (deposit) amount and is used to track the recovery/amortization of the advance payment.
Previous Amortization Amount
This read-only field displays the previous amortization amount of the advance payment (deposit) and is used to track the recovery/amortization of the advance payment.
Schedule of Values

To enter the actual completion units or amounts, move down to the Schedule of Values section. Amounts or units are entered against each line item of the contract. You may enter one of the following - given one entry, the system will calculate the others:
Completed Quantity
The total number of units completed to date.
Current Quantity
The number of units entered for the current billing.
Current Amount
The dollar value entered for the current billing.
Completed Amount
The total dollar value to date.
Total Retainage Amount
This field is read-only and displays the total dollar value retained from the contract work until work is complete.
Other editable fields on this screen include:
Retainage Amount
This field displays the calculated retainage amount for the SOV line and is calculated as: Retainage Amount = Current Amount x Retainage %.
This default is set in the Retainage % field on the Contract Defaults tab of the Subcontract Control screen. For more information, please refer to
Release Amount
The total dollar value of the retainage amount to be released to the contractor at this time.
Percent Complete
View the project's completion percentage. See CMiC Field - Down Payment and Amortization for more information.
Amortization %
View the amortization percentage.
Amortization Amount
This is a display-only field, showing the amount of deposit to be applied to the current RFP.
To Date Amortization
This field is read-only, showing the total amortized amount up to this current voucher. If there is no recovery on the current voucher, then this amount will be the same as it was on the previous voucher.
Advance Payment
For columns related to advance payment, see
Review/Approval
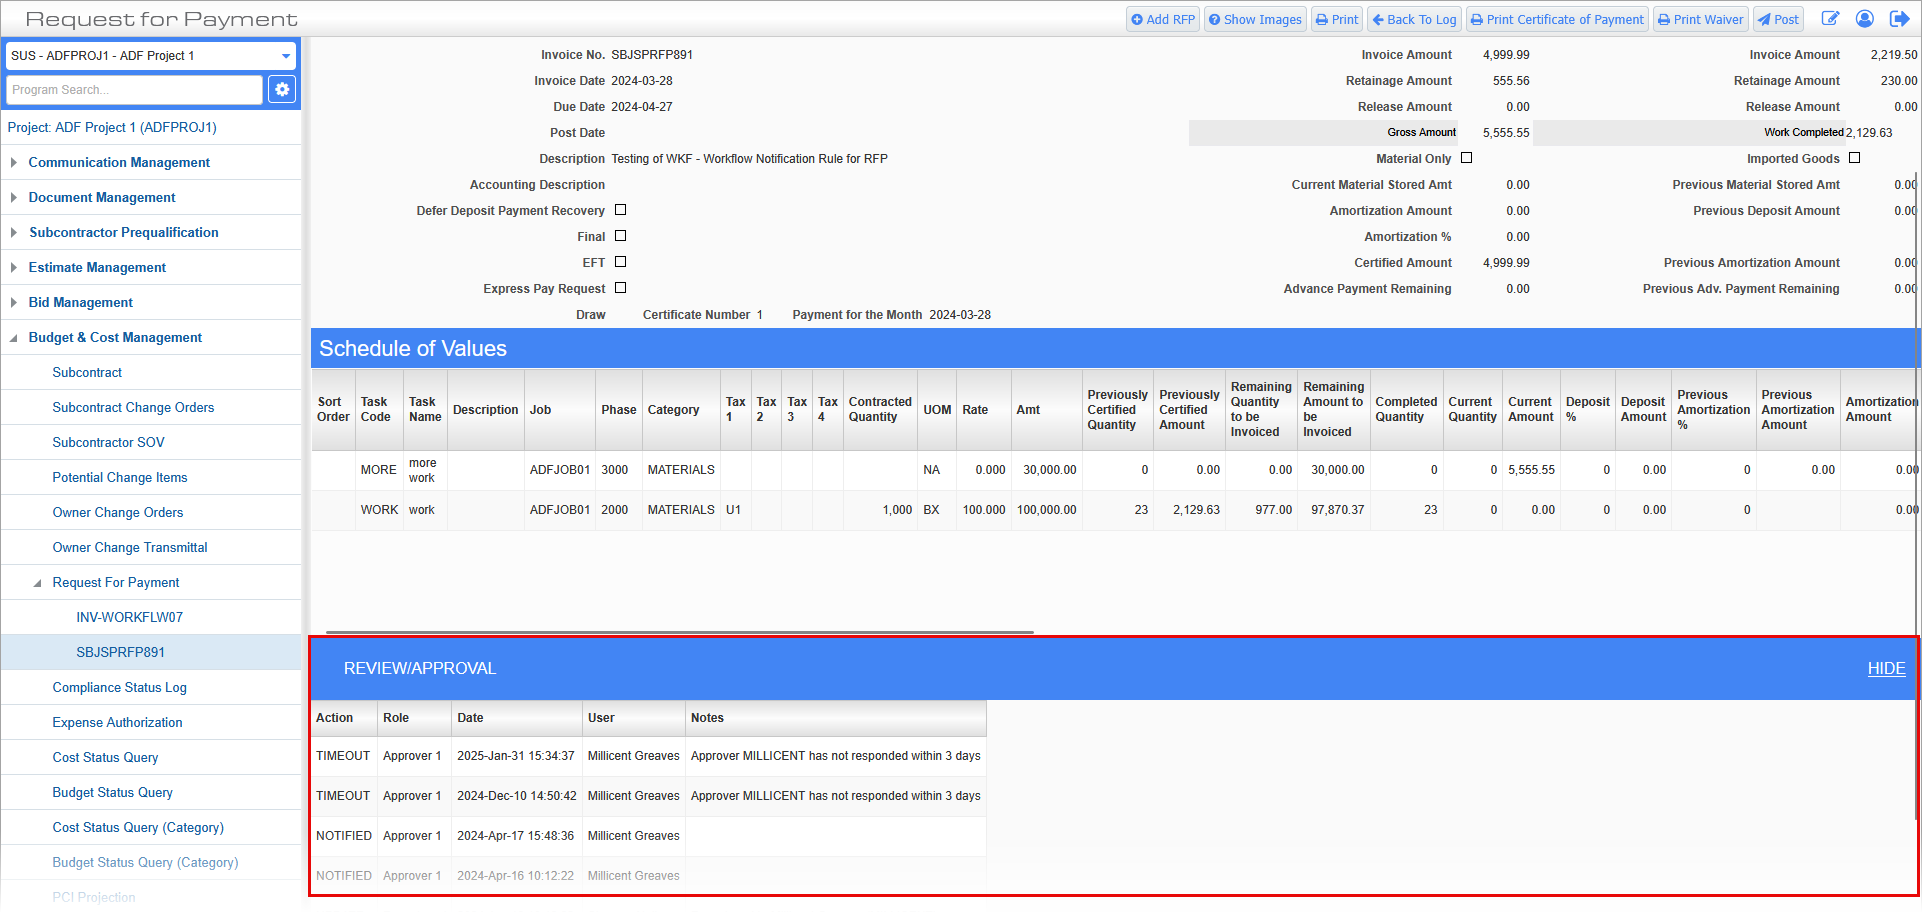
This section displays the status of the workflow approval process if Workflow is being used for approving the Request for Payment. It is display-only.
Editing an RFP
The [Edit RFP] button is available for Pending RFPs. Posted RFPs may not be edited as they have already been accepted.
Posting & Voiding RFPs
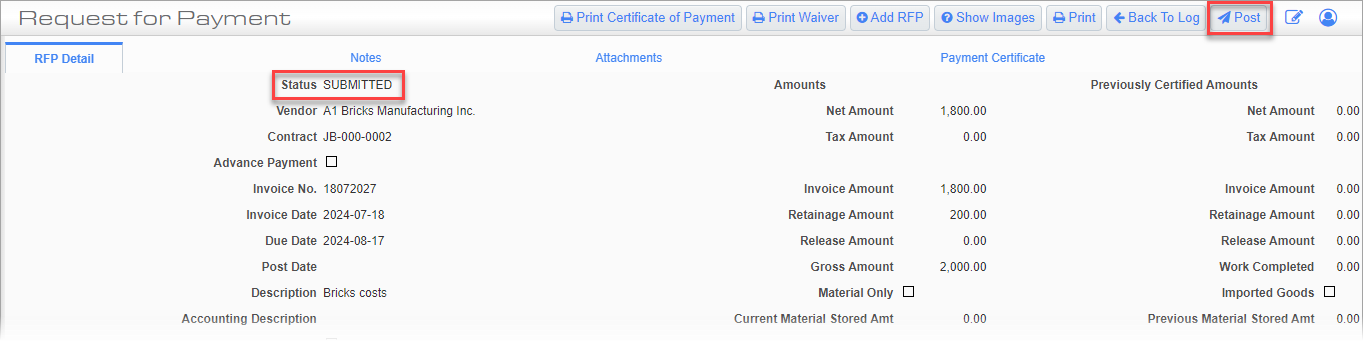
Once the RFP is submitted, the [POST] button becomes available. Posting in this screen generates the same Posting Report as in the Subcontract Management screen.
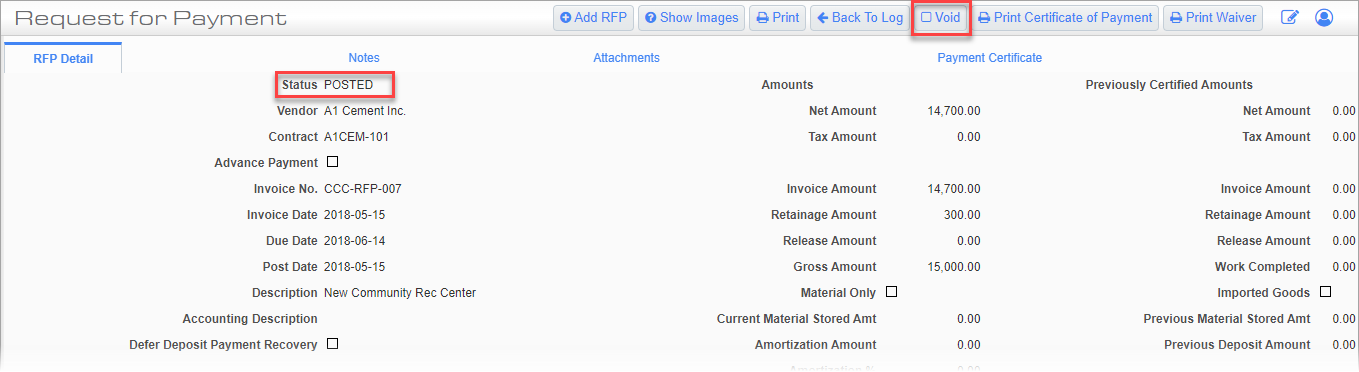
Once the RFP is posted, the [Void] button is enabled.
Copying an RFP to Imaging
This section will explain how to automatically copy RFPs from this screen to the Imaging module, along with one attachment, when they are submitted. If there is more than one attachment, only the first is copied. If there are no attachments, a dummy attachment is created.
The copied RFP has a status of Unsubmitted which allows it to be edited in the Imaging module.
First, disable the [Workflow] button in the RFP screen.
Next, on the Image Manager section of the
Imaging Control screen; standard Treeview path: Imaging > Setup > Imaging Control – Imaging Control tab
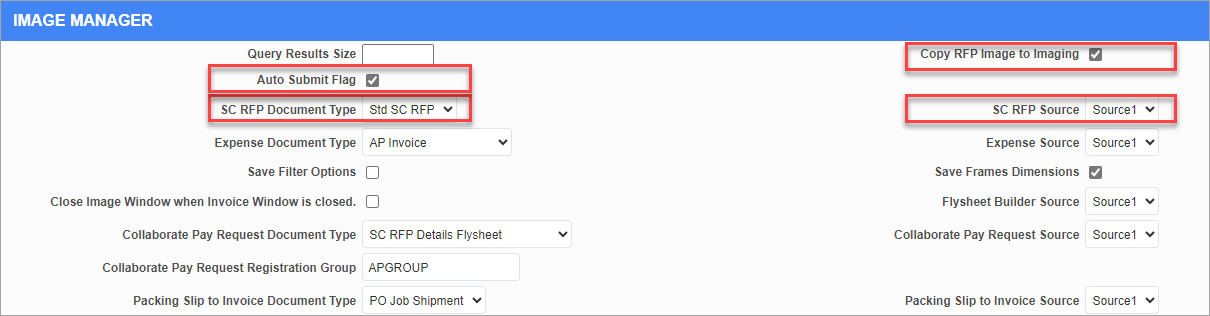
Copy RFP Image to Imaging – Checkbox
Check this box to allow the user to copy RFPs to Imaging.
Auto Submit Flag– Checkbox
This works with the ‘Copy PM RFP to Imaging’ checkbox. If both boxes are checked, pressing the [Submit] button will automatically copy the RFP to Imaging. This will automatically launch any active workflow linked to the selected Document Type.
SC RFP Document Type
Select the Imaging Document Type for the RFP copy. Only Document Types for voucher-based RFPs that have been set up to be unsubmitted will appear on this list.
SC RFP Source
This possible entries to this field depend on the selected Document Type.
Viewing an RFP Originally Entered in Imaging

Request For Payment; standard Treeview path: CMiC Field > Budget & Cost Management > Request For Payment
The [Show Images] button in the Request For Payment screen allows the user to view the Imaging RFP record that was originally entered, with the image intact.
When the SC RFP Invoice is entered in Image Manager and submitted to Workflow, it will be seen in the Request For Payment Log, and can be accessed there if desired.
Pending records will show the In Workflow banner at the top of the Request For Payment screen:
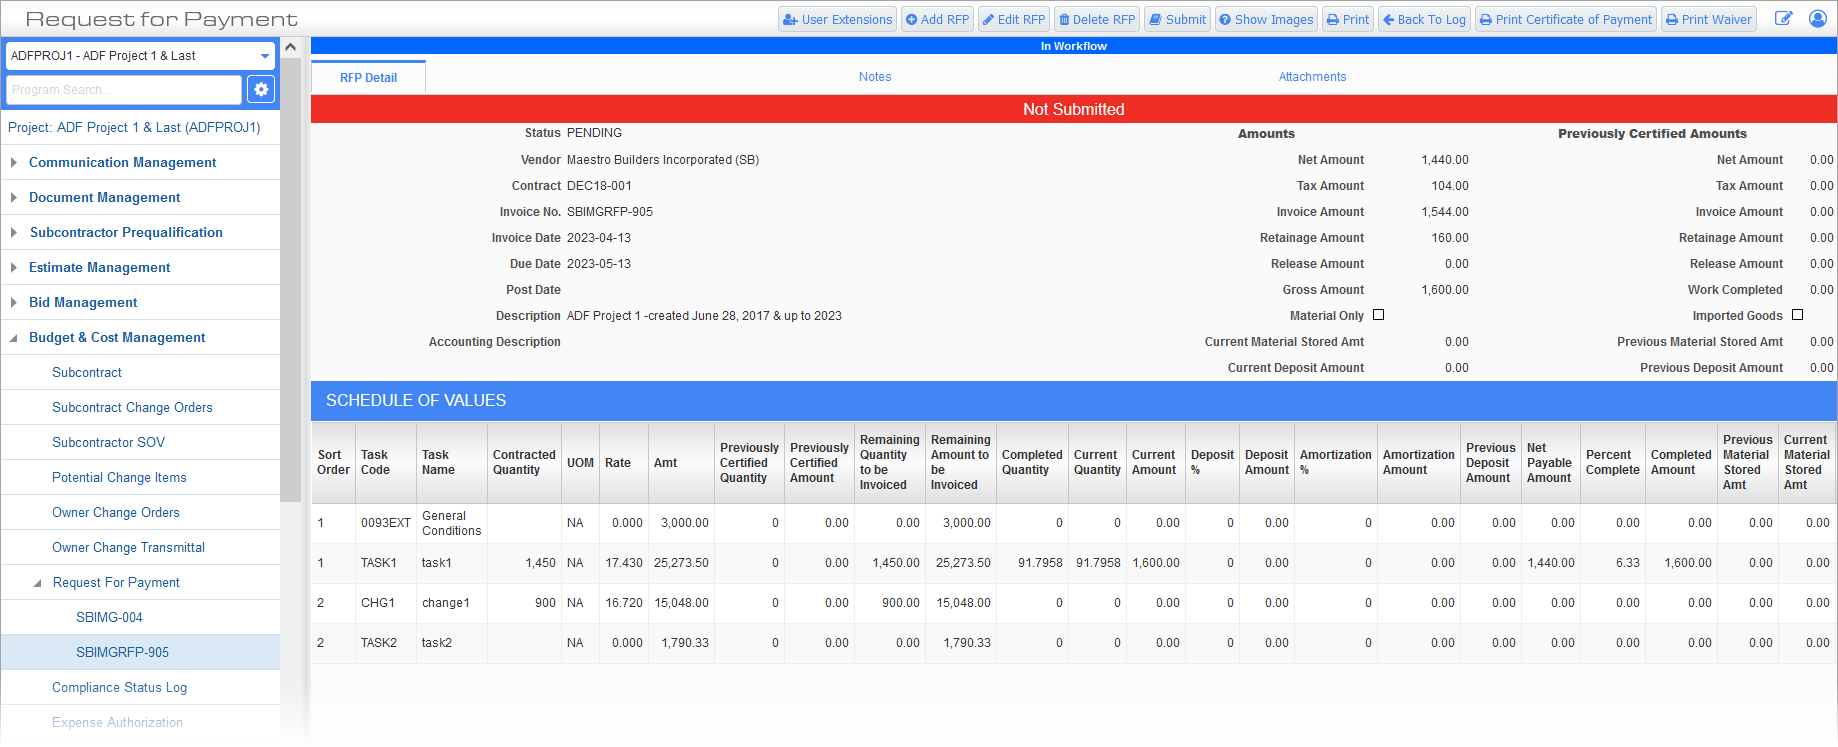
NOTE: The details and examples below are shown for a posted RFP, but apply to pending records as well.
Define the Image Search
The Image Search definition for the RFP is done in the Define ECM Searches screen which can be accessed by clicking on the [ECM Documents] button on the Block toolbar of the Enter Request for Payment screen in Subcontract Management:
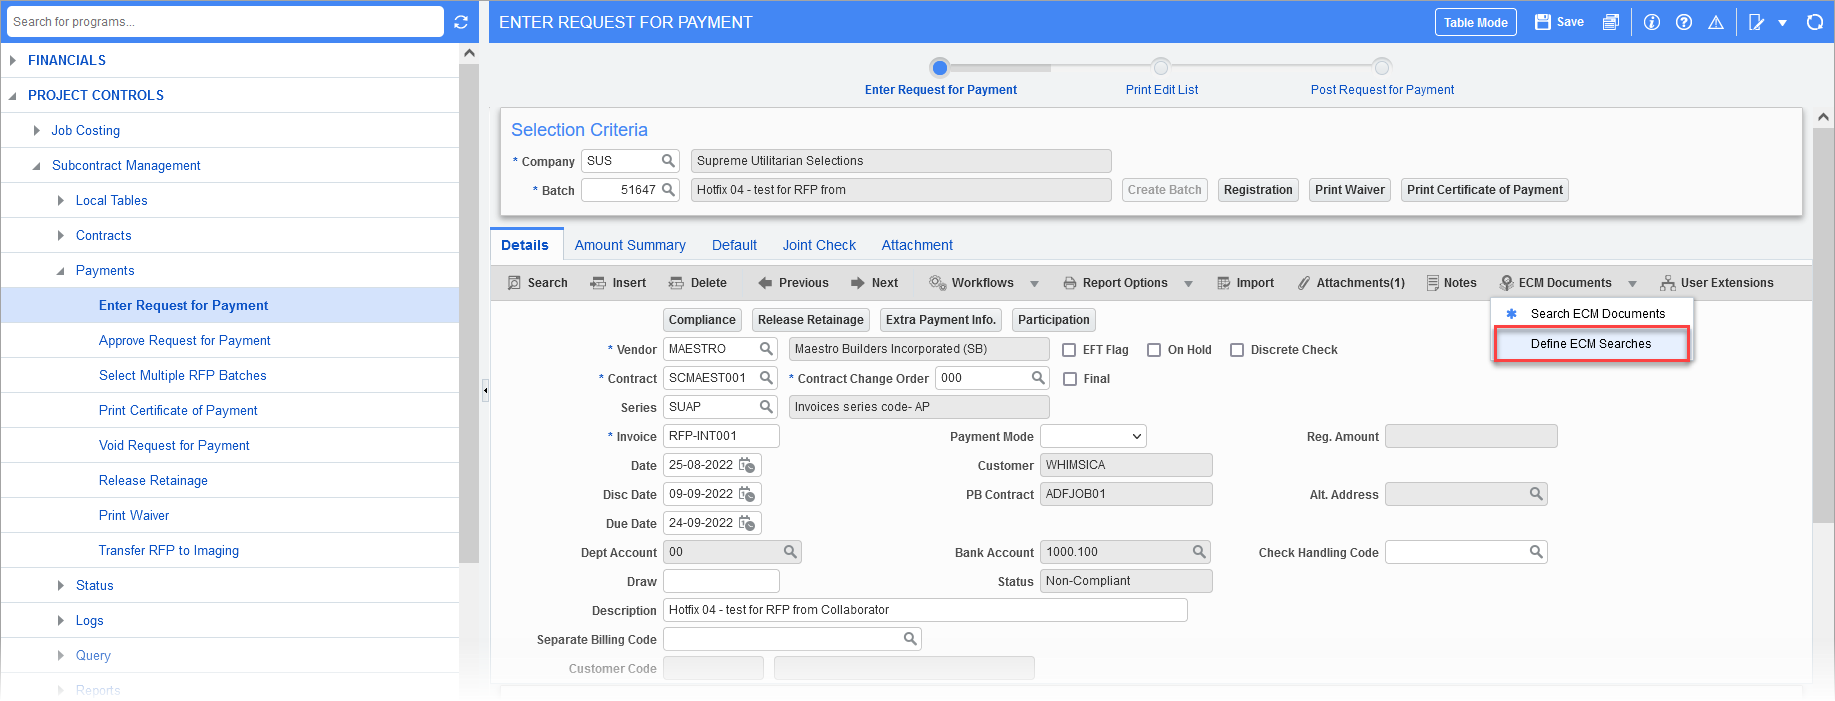
Pgm: SCPAYREQ – Enter Request For Payment; standard Treeview path: Subcontract Management > Payments > Enter Request For Payment
After clicking the Define ECM Searches option, the Image Search Setup screen opens to set up the search parameters as shown below:

Pgm: SYSSRCH – Image Search Setup; standard Treeview path: Subcontract Management > Payments > Enter Request For Payment > [ECM Documents Button] - Define ECM Searches
In the Conditions section, the values for the Data Column field are coming from the SC RFP and the values for the Data field are picked up from the flysheet data related to the Document Type that is selected in the Document Types section. The conditions in the above screenshot are only examples.
For more information, please refer to Enterprise Content Management - Define ECM Search.
Execute the Image Search
The validated search will show in the pop-up window after clicking the [Show Images] button in CMiC Field's Request For Payment screen:
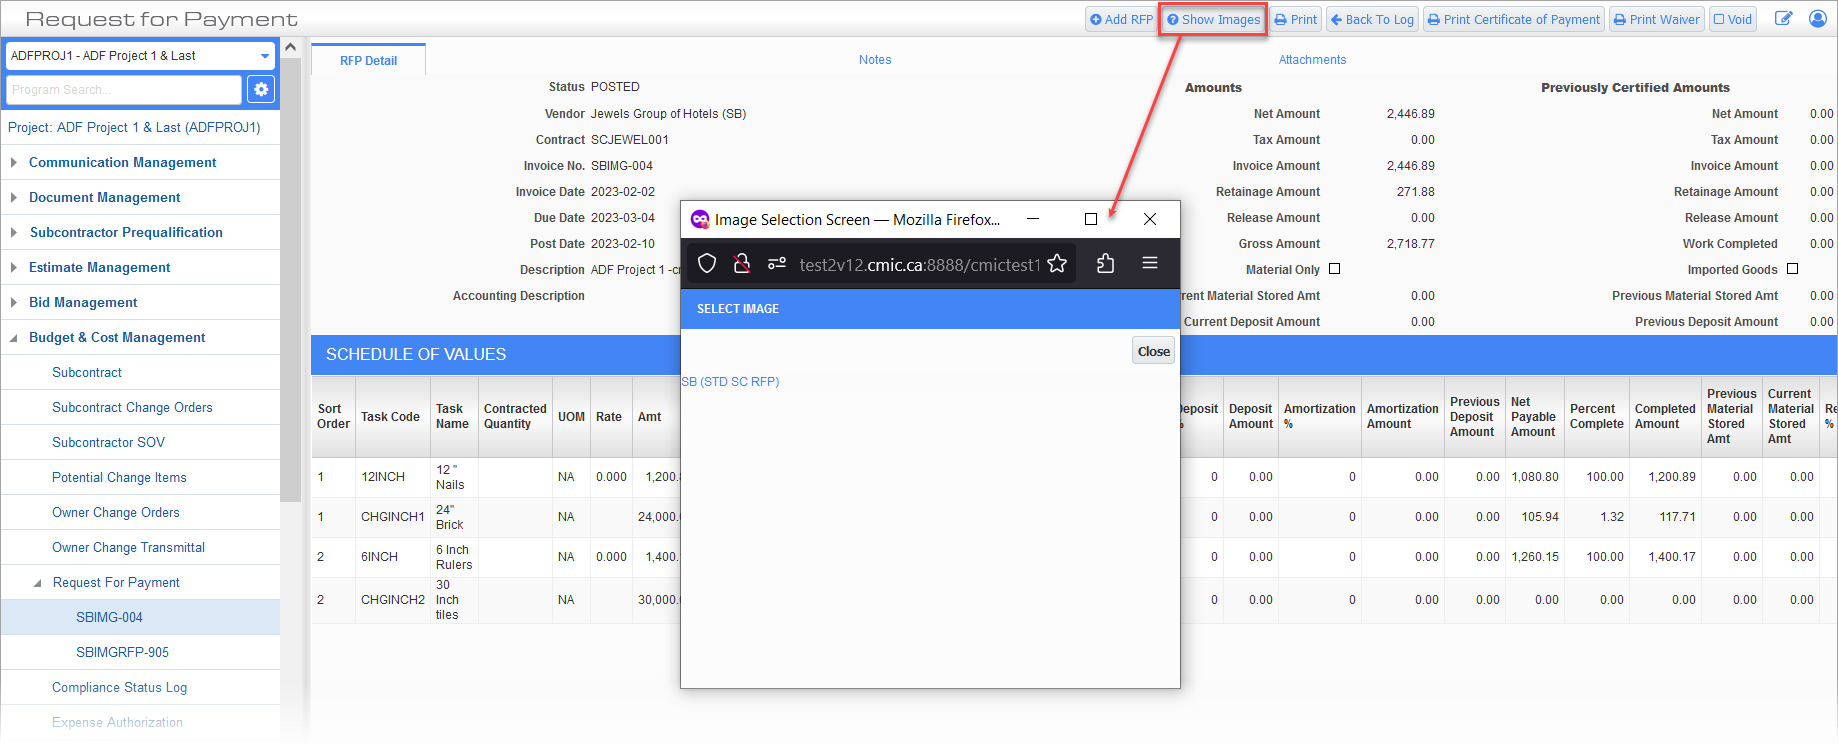
Request For Payment; standard Treeview path: CMiC Field > Budget & Cost Management > Request For Payment – [Show Images] button
Since the search is using the expected Imaging Document Type (from the SC RFP record which was originally entered in Image Manager) the search will be successful:
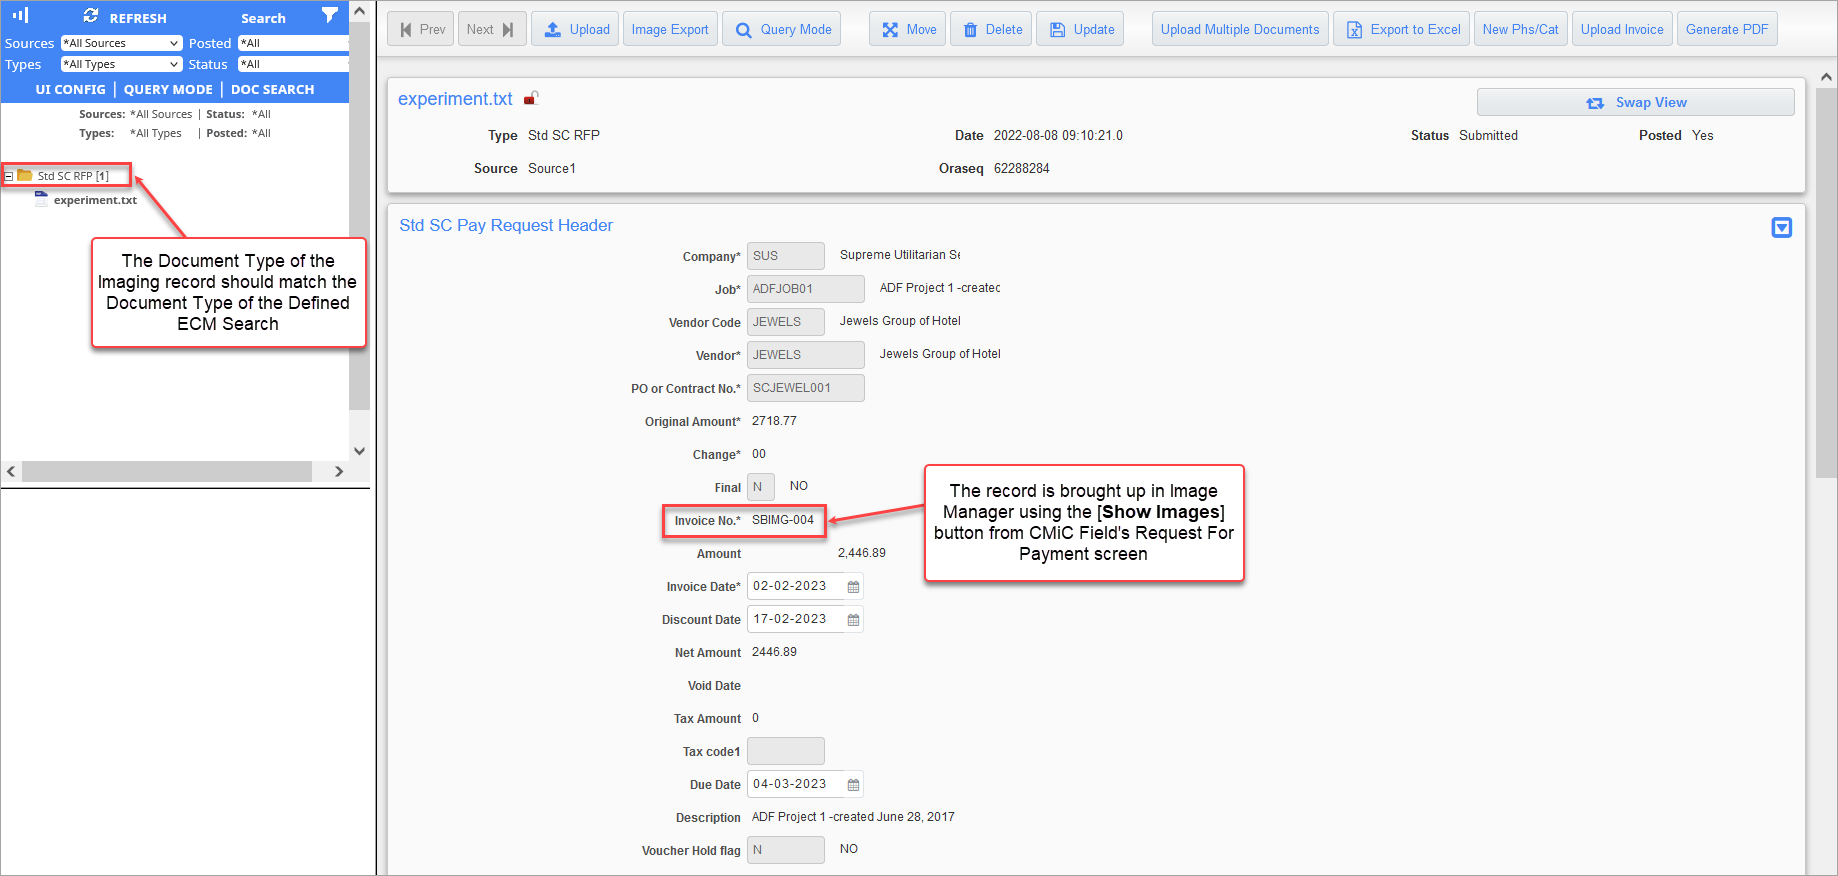
Image Manager
Printing a Certificate of Payment

The [Print Certificate of Payment] button can be used to print the Subcontractor Certificate of Payment (SC320_2). The certificate is like the standard G702/703 document, but the details are for the subcontract, and it is intended as backup documentation to be sent with the payment to the vendor.

The [Print] button can also be used to print the following certificates of payments:
-
Certificate for Pay Report: Select this option to print the Subcontractor Certificate of Payment (SC320). This invoice includes columns for previous, current, total completed, and percent completed amounts.
-
Certificate of Payment: Select this option to print the Subcontractor Certificate of Payment (SC320_2).
-
SC Invoice (Stored Material): Select this option to print the Subcontractor Certificate of Payment (SC320_MAT). This invoice is similar to the one generated from the Certificate for Pay Report option and includes a column for current stored materials.
For more information, please refer to Subcontract Management - Print Certificate of Payment.