Overview
Security Roles; standard Treeview path: CMiC Field > Security > Role Maintenance
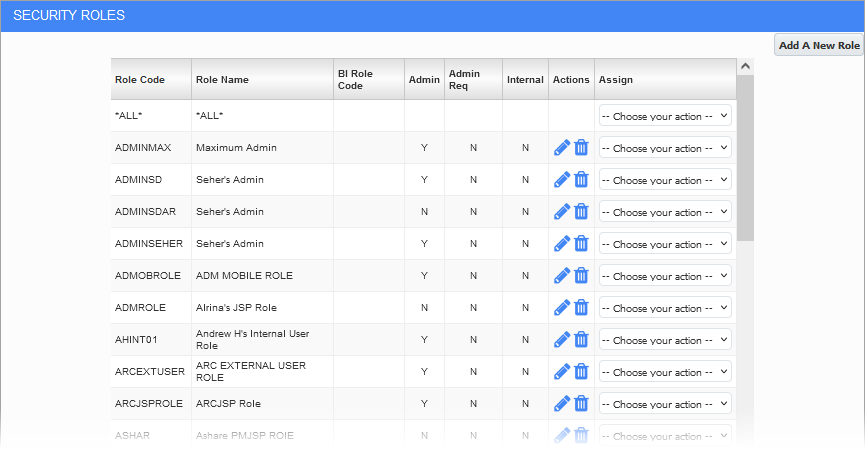
In CMiC Field, security roles determine what programs and Treeview options users have access to, as well as specific operations within those programs. Security roles can be created, managed, and assigned to users in the Security Roles screen.
Security roles are comprised of:
-
Users: The Field users assigned to the role.
-
Programs: The programs, or screens, within Field that assigned users can access.
-
Menu items: The programs which appear for assigned users in the Treeview menu on the left hand side of all screens in Field.
-
Privileges: Individual actions which assigned users may perform within Field programs.
-
Field security: The security level of individual fields within Field programs.
The Security Roles screen provides a list of existing security roles. The *ALL* role located at the top of the list is a role which every user is automatically assigned. Refer to Assigning Field Security for more information about how this role is used.
Users can be granted further access beyond their assigned security role in the User Access screen.
Actions
In log view, the Edit icon (![]() ) is used to edit the administrative fields of a selected security role. The Delete icon (
) is used to edit the administrative fields of a selected security role. The Delete icon ( ) is used to delete a selected security role.
Assign
This field's drop-down menu is used to manage a selected role's security access. Selections are available for assigning users, programs, menu items, privileges, and field security to a security role.
Creating a Security Role

Security Roles; standard Treeview path: CMiC Field > Security > Role Maintenance – Add A New Role screen (launched from [Add A New Role] button
Press the [Add A New Role] button to open the Add A New Role screen, as shown above. Press the [Add] button to save the record and return to the main screen.
Role Code, Role Name
Enter the code and name for the security role.
BI Role Code
Security roles can be linked to BI role codes, if needed.
Admin – Checkbox
Check this box to define the security role as an administrator. Users assigned to administrator roles have the following privileges:
-
They can override field security and assign roles to users to which they themselves are not assigned.
-
They can override the "Locking" settings that can be enabled through the CMiC Field - Project System Options - Locking - Tab of Project System Options and update locked records with notes and attachments.
-
They can close and re-open projects.
-
They can assign PM Roles which have been marked, 'Admin Flag Required'.
-
They can view records that are in unsubmitted/pending status created by users from a different company.
Admin Req. to Assign – Checkbox
If a security role has this box checked, then any users without the 'Admin' role checked on their assigned security role will be prevented from assigning the selected security role to other users, or making it the default role in the Gateway settings for Collaborate users.
Internal – Checkbox
If a security role has this box checked, the role can only be assigned to internal users (i.e., C-type) in the Security Role field of the Gateway tab on the Project Maintenance screen. The security role will not be available in the Security Role field’s LOV for P-type contacts.
Assigning Menu Items
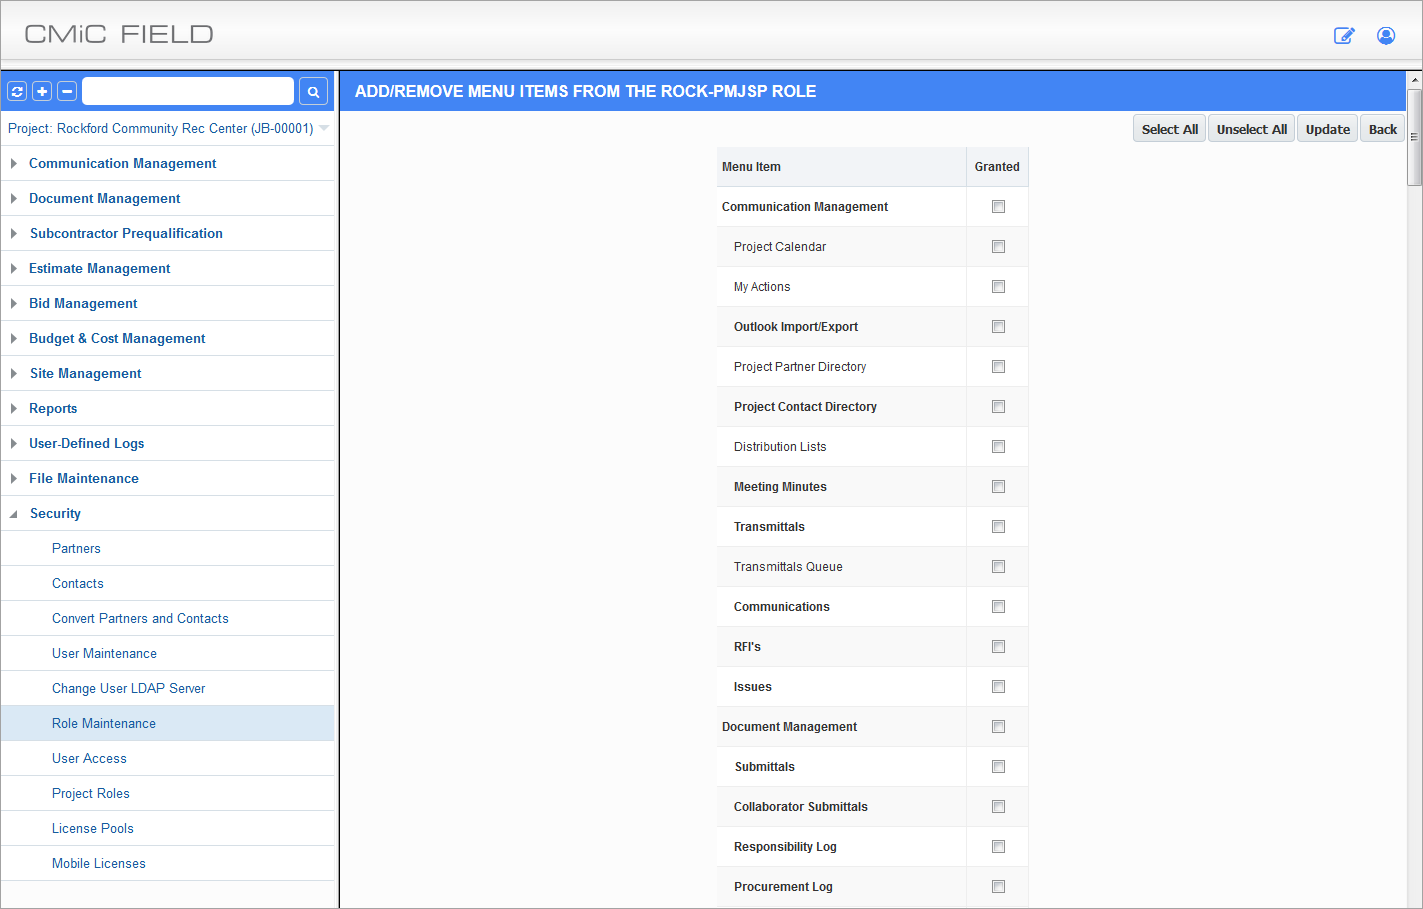
Example of Assigning Menu Items to a Role
Use the [Select All] and [Unselect All] buttons to select all or unselect all menu items at once. When complete, press the [Update] button to save the changes and return to the main screen. The [Back] button will return without saving any changes.
Granted – Checkbox
Check this box to have a menu item appear in the user's Treeview.
Assigning Programs
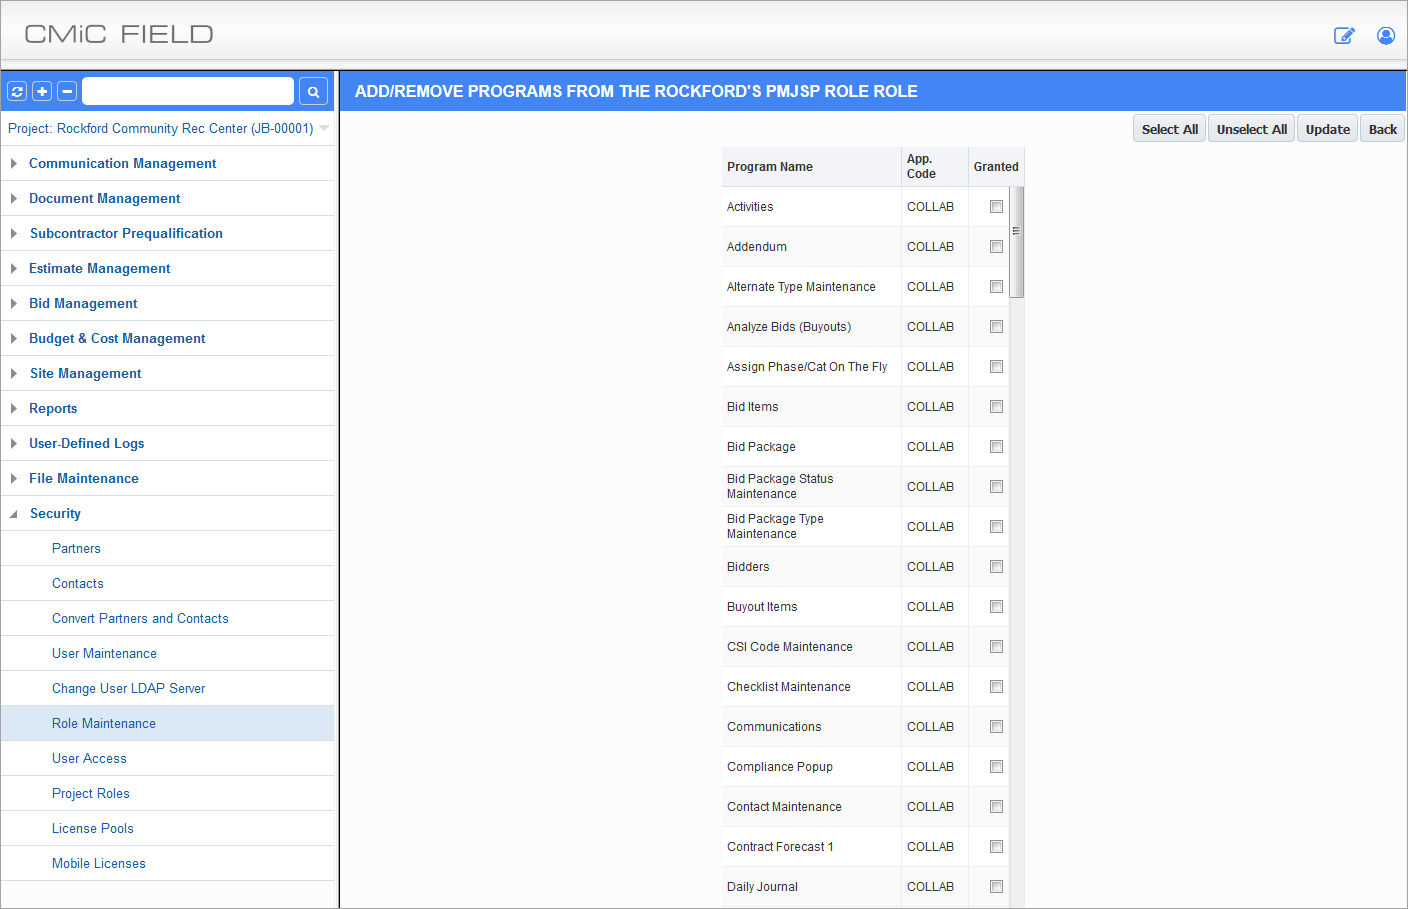
Example of Assigning Programs to a Role
After defining the Treeview structure, users should grant access to programs available within the Treeview. If a user has access to a menu item but not to the corresponding program they will be denied access to the program. Once the required programs have been checked, press the [Update] button to return to the main screen.
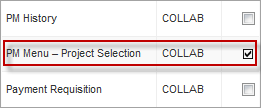
When a new role is created, access to ‘PM Menu – Project Selection’ is defaulted as checked and read-only so that the user assigned to this role will automatically have access to project selection, and no one will accidentally uncheck the program when assigning security access.
Assigning Privileges
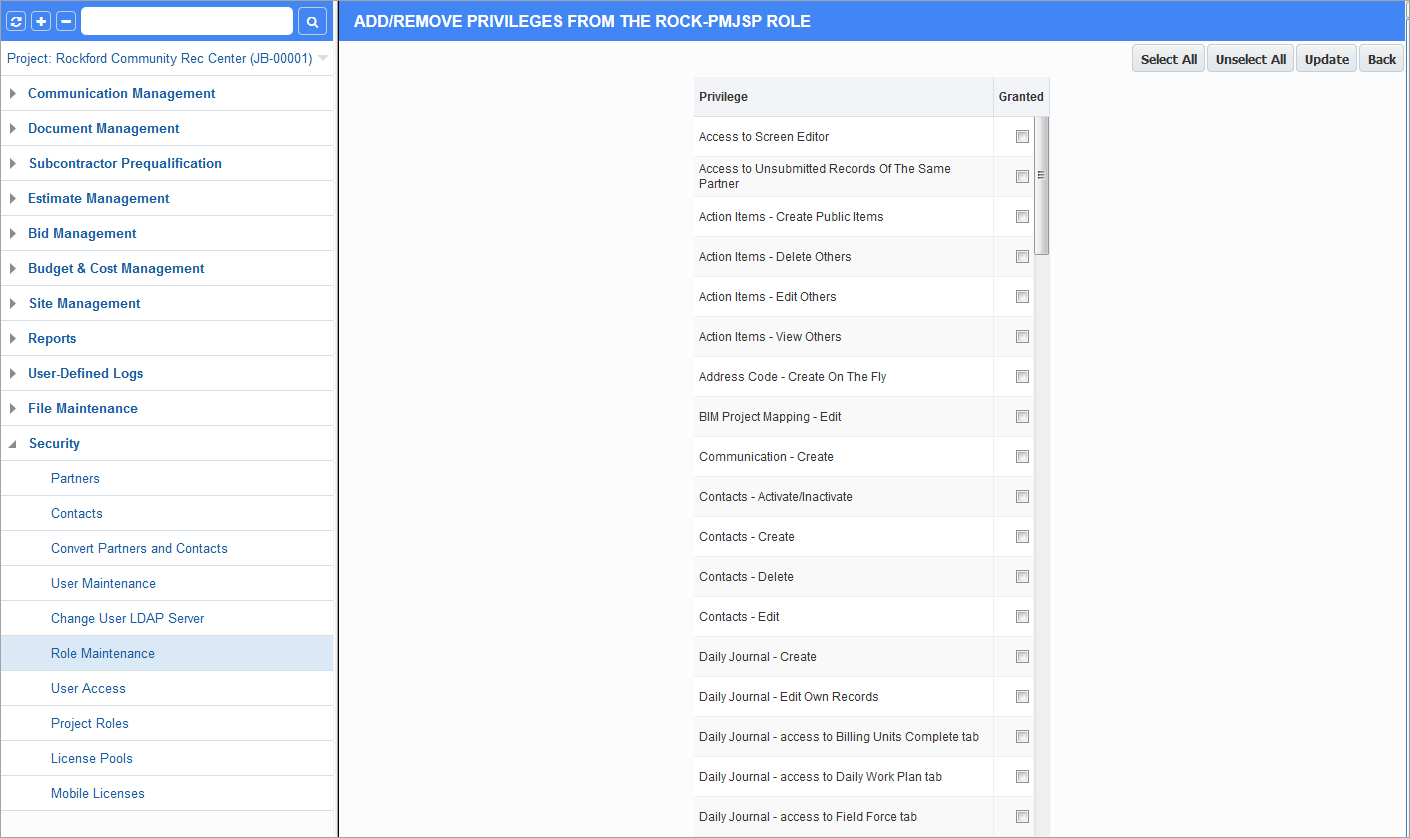
Example of Assigning Privileges to a Role
Select the required privileges and press [Update] to save and return to the main screen.
Assigning Users
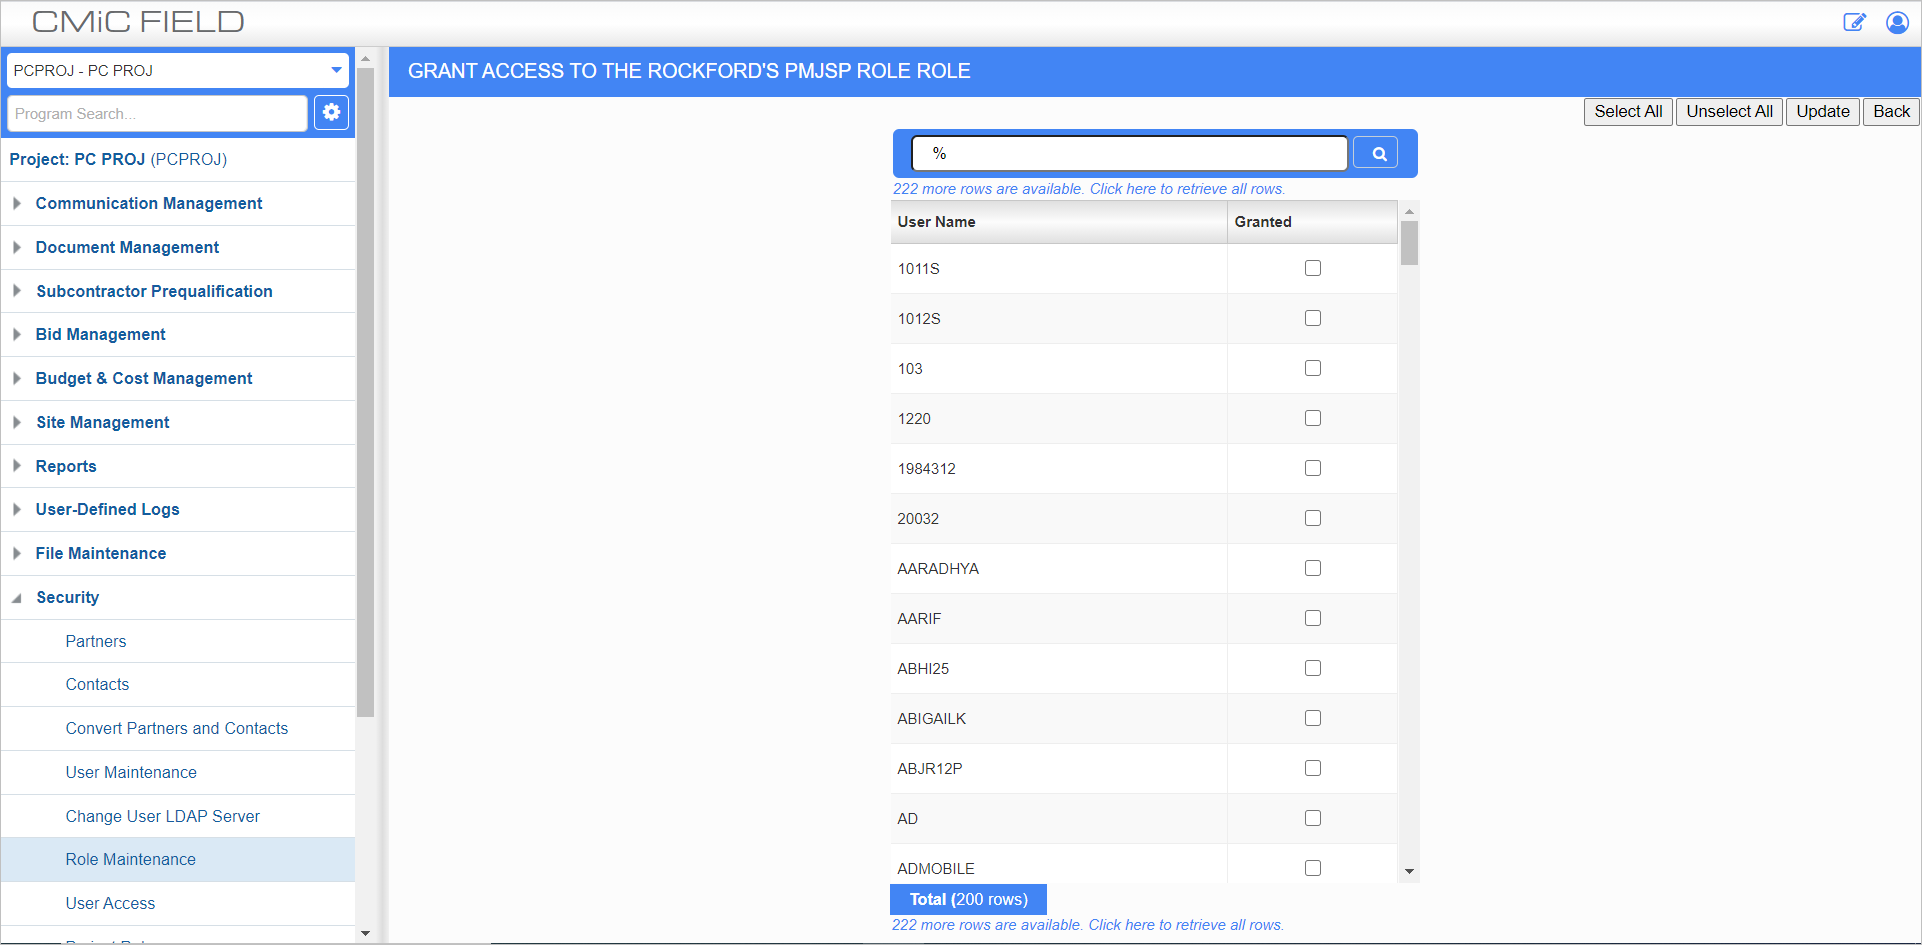
Once a role is set up it can be assigned users who will inherit all the rights of the role. To apply users, select the Assign Users option. The program will list all users. After selecting the users to apply to the role, press the [Update] button to save the changes.
Users can belong to more than one role. If they have more than one role, the system will display both roles combined when the Treeview opens. If the same program is granted twice by two roles, the 'Active' grant will be used.
Assigning Field Security
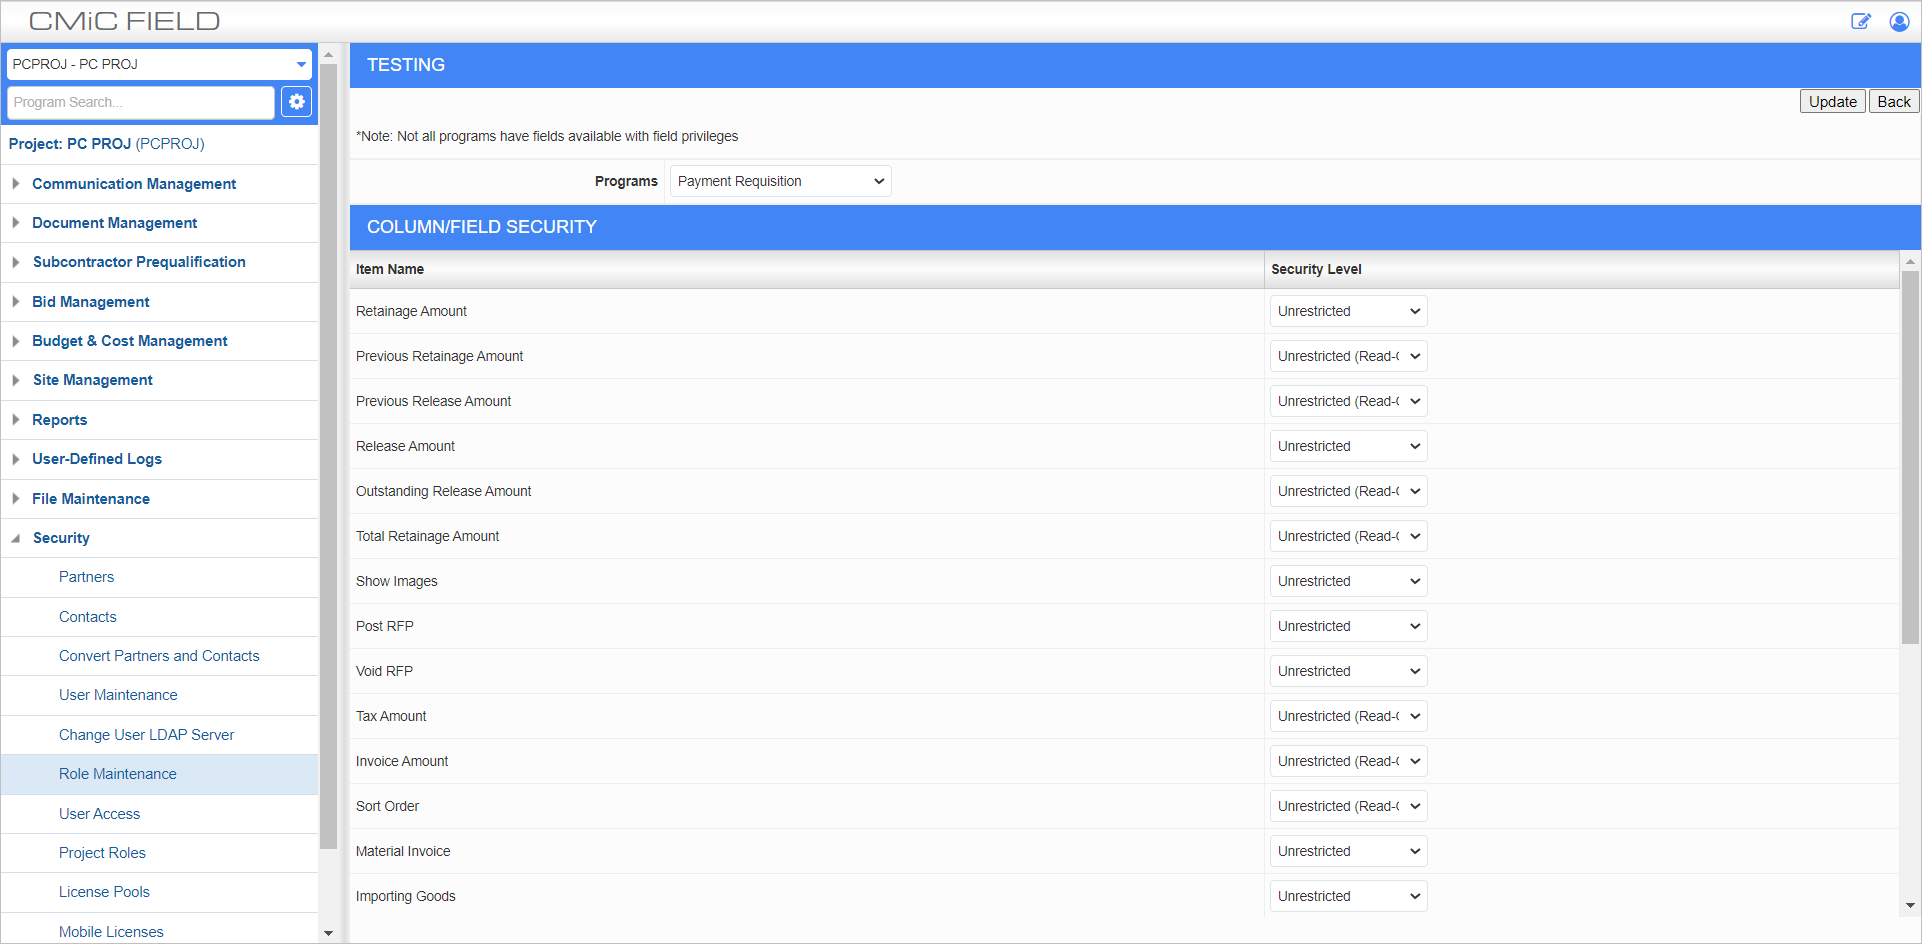
Example of Assigning Field Security to a Role
Field security is available for a large number of fields within CMiC Field. Field security is only applied at the role level, not at the individual user level.
Programs
Select a program to display its fields and columns in the section below.
Security Level
Select the security level for the corresponding field or column. Options for security levels include:
-
Unrestricted: The field is visible and can be edited.
-
Secure: The field is visible and all entered data will appear as '*'.
-
Read-only: The field is visible but cannot be edited.
-
Hidden: The field is not visible.
Setting a security level in the *ALL* role will not update all other roles. The *ALL* role is a role in itself, which every user automatically has.
The algorithm for deciding what level of field security to use on a field is as follows:
-
If you have one role, it looks at that role and applies any field security.
-
If you have more than one role, it takes the lowest security level of all the roles (i.e. if you have secured and read-only it would use the latter since it is the lower security level).
-
If there are no roles with field security applied, it looks at the *ALL* security level and applies it to the field