Pgm: HREMPLOYEEDASHBOARD – Employee Dashboard; standard Treeview path: Human Resources > Personnel > Employee Dashboard
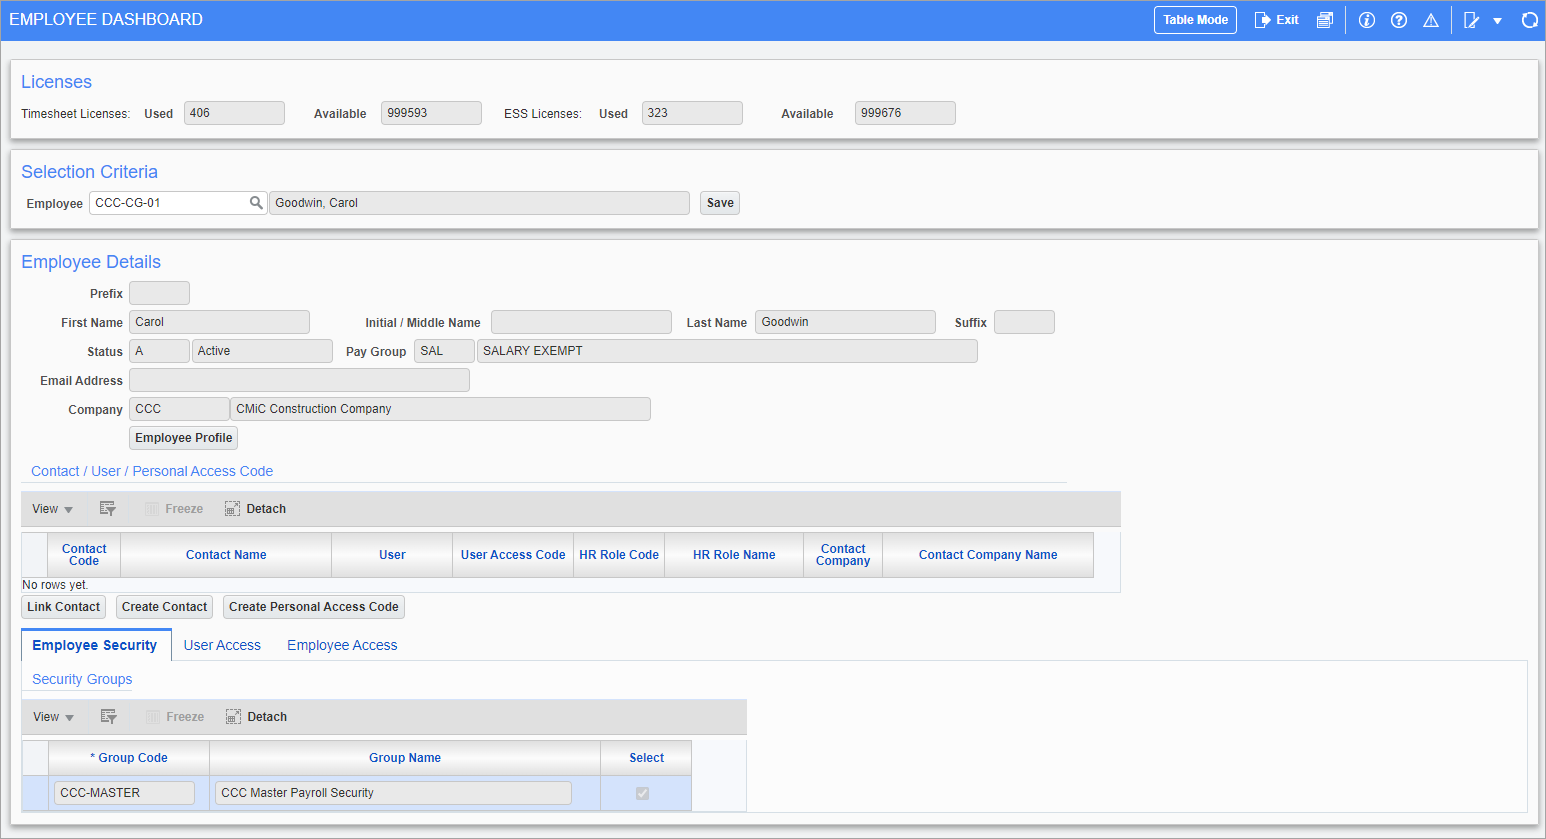
The Employee Dashboard allows admin users to access key employee information including employee security, user access, and E-time and ESS access information.
Licenses
This section displays the number of used and available licenses for the E-Time and ESS modules.
Selection Criteria
Use the Employee field to search for an employee record. Press the [Save] button to save any changes made to that record.
Employee
Enter/select an employee code.
[Save] – Button
Press the [Save] button to save any changes made to the employee record.
Employee Details
This section displays the employee's basic information, based on data entered in the Employee Profile screen.
[Employee Profile] – Button
Press this button to launch the Employee Profile screen to view detailed employee information.
Contact / User / Personal Access Code
This section shows the contact code, user, and user access code linked to the employee record. In cases where the employee already has an SSO user but no access code assigned, an access code can be manually added. In this case, the User Access Code field will only show codes that are not already linked to the employee and to which the employee has already been added in the E-Time - Access Codes Administration screen in the E-Time module. Once an access code is manually assigned to an employee it cannot be assigned to another.
Contact Code, Name
These fields are read-only and display the contact linked to the employee.
User
This field is read-only and displays the employee's SSO user code.
User Access Code
Enter/select an access code. The LOV only displays codes that are not already linked to the employee and to which the employee has already been added in the E-Time - Access Codes Administration screen in the E-Time module. Once an access code is manually assigned to an employee it cannot be assigned to another. If there are no available access codes, a new access code can be created with the [Create Access Code] button.
NOTE: The employee must be an SSO user before creating an access code.
HR Role Code
Enter/select an HR contact role. An HR role may be assigned to a user and determines the privileges and functions the user will have in Employee Self Service. HR roles are defined in the Human Capital Management - HR Role Maintenance screen of the Human Capital Management (HCM) module. The HR role is associated with the user’s contact code in order to facilitate approval of change requests in HCM.
[Link Contact] – Button
Press this button to link the employee with an existing contact/user.
[Create Personal Access Code] – Button
Press this button to create an
[Create Contact] – Button
If the employee record is not linked to a contact, press the [Create Contact] button to automatically create and link a new contact to the employee record and their company.
NOTE: The employee requires a work email to create a contact. A work email can be entered in the Address tab on the Employee History screen.
Contact Company, Contact Company Name
These fields are read only and display the contact company.
If the contact company differs from the employee company, or if the contact name differs from the employee name, the information will be highlighted as a warning, as shown in the screenshot below.

It is expected that each employee will have only one record in this section. However, due to an error in data or setup, or because an employee has multiple access codes in previous versions of the software, this may not be the case. It is recommended in these cases to manually assign only one user code and one access code linked to each employee.
Employee Security – Tab
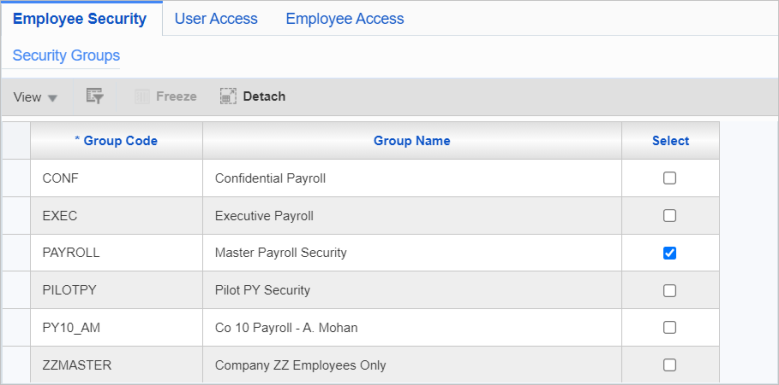
This section shows all payroll security groups and which ones are assigned to the employee. The information in this section may be edited. This information can also be edited in the Security tab of the Employee Profile.
User Access – Tab
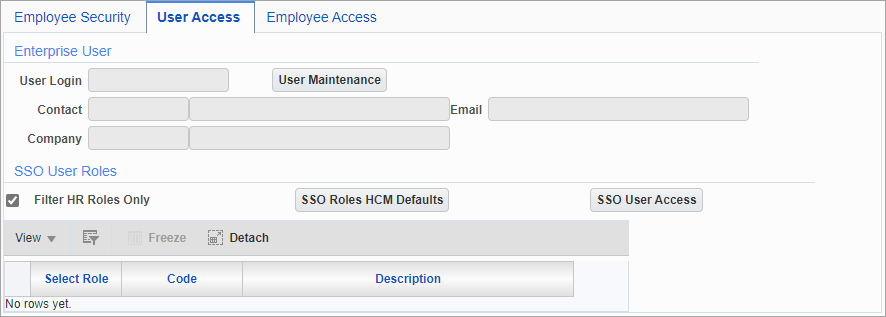
This tab displays two sections: one displaying Enterprise user details and one showing SSO user roles.
The former contains the Enterprise user information and a button to launch the System Data - User Maintenance screen.
The latter shows all portal roles available to the employee, with options to directly assign them to said employee. Check the 'Filter HR Roles Only' box to only show those roles related to HR and Payroll modules.
Press the [SSO User Access] button to launch the CMiC Field CMiC Field - User Access screen (standard Treeview path: CMiC Field > Security > User Access).
Press the [SSO Roles HCM Defaults] button to launch the SSO Roles – HCM Defaults and Preferences screen, shown below:
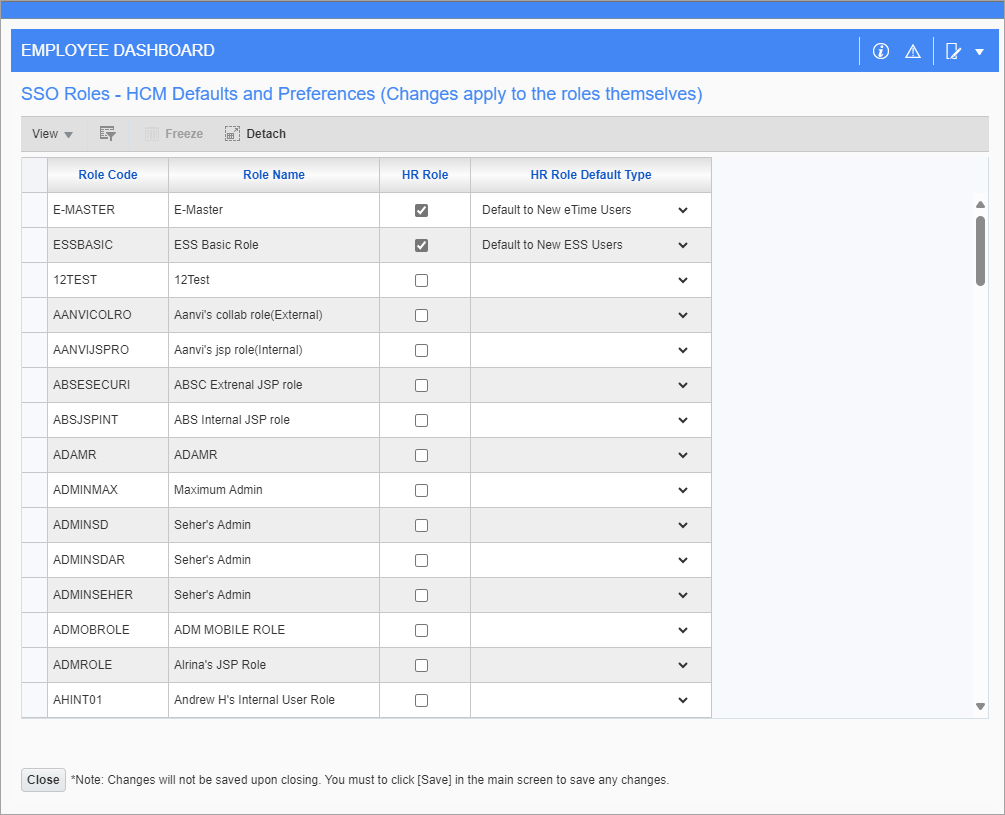
HR Role – Checkbox
Check this box to have the role appear when the 'Filter HR Roles Only' box is checked.
HR Role Default Type
Use this field to select which portal roles will be assigned to each new ESS or E-Time user.
Employee Access – Tab
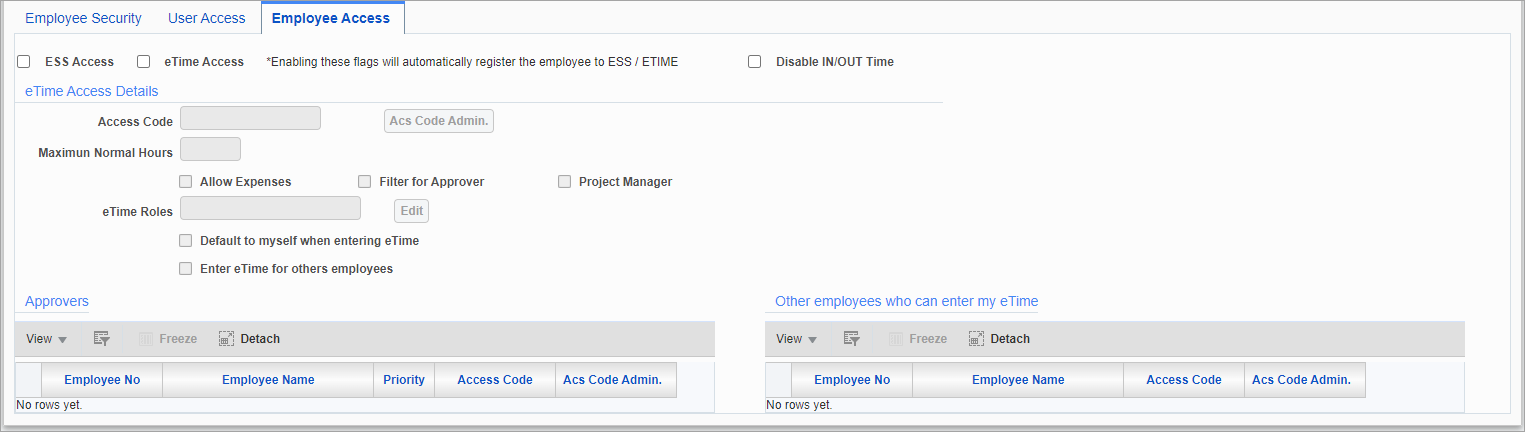
This tab shows all information related to the employee's access to the ESS and E-Time modules.
ESS Access, E-Time Access – Checkboxes
These checkboxes show whether the employee has access to the ESS and E-Time modules. Both boxes will be unchecked if the employee is not linked to a Portal contact.
Disable IN/OUT Time – Checkbox
This checkbox is used to configure access restrictions for an employee's time entries at the HR level in the Construct ESS app.
[Access Code Admin] – Button
Press this button to launch the E-Time - Access Codes Administration screen.
Maximum Normal Hours
Enter the maximum number of working hours that the employee may log in E-Time.
Allow Expenses – Checkbox
Check this box to allow expenses to be logged by the employee.
Project Manager – Checkbox
Check this box to make the employee a project manager.
[Edit] – Button
Press this button to show a list of all E-Time roles and which ones are assigned to the employee.
Default to myself when entering E-Time – Checkbox
This box is only available to employees who are not the default employee for the access code they own. Checking this box will make the employee the default employee for that access code. The checkbox will then be disabled and any change to the default employee for the access code must be done in the Employee tab of the Access Code Administration screen.
Enter E-Time for other employees – Checkbox
This box is display only and shows whether the user can enter E-Time timesheets or other employees.