Overview
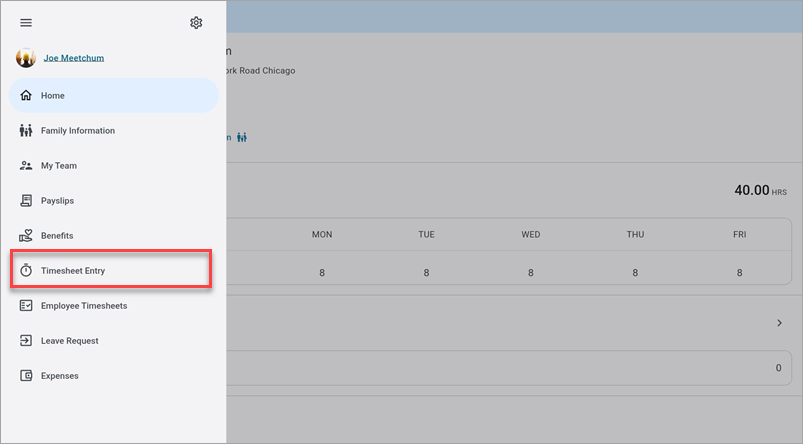
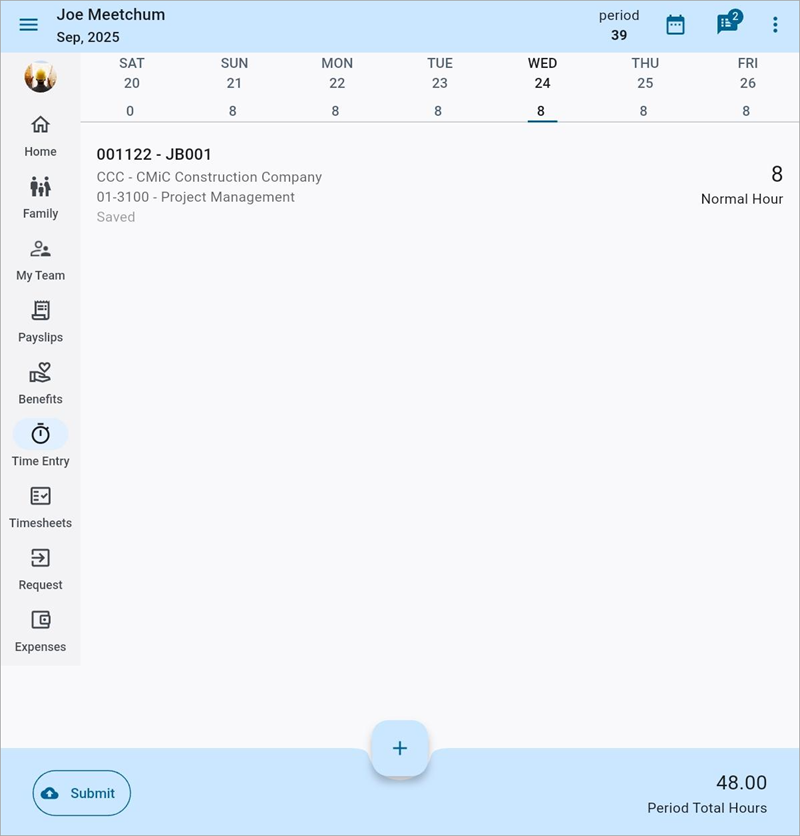
The Personal Timesheet menu option launches the Timesheet Entry screen, where users can enter, save, and submit timesheets. It allows users to efficiently log time for various activities related to jobs, equipment, work orders, and overhead, and manage their time entries, tasks, and employee time records with ease.
Timesheet Entry
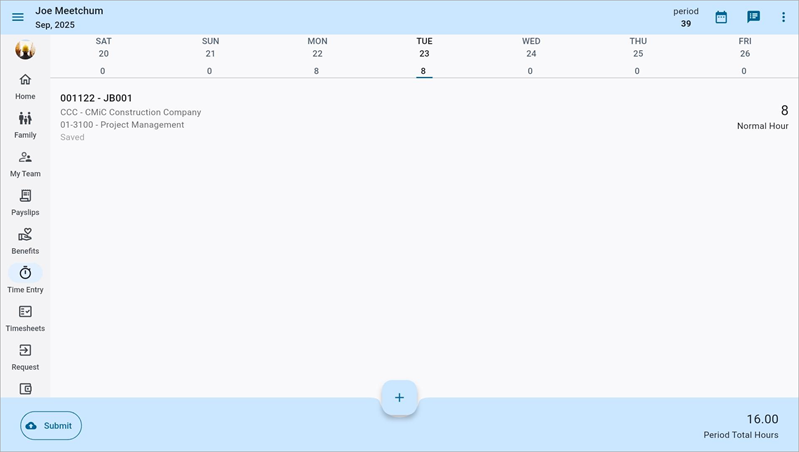
Timesheet Entry screen
Upon launching the Timesheet Entry screen, the system will automatically display the employee associated with the logged-in access code.
Users can enter time for themselves or for any employees they are responsible for. If a user has no access to other employees, they can only enter their own time.
Employee Timesheets
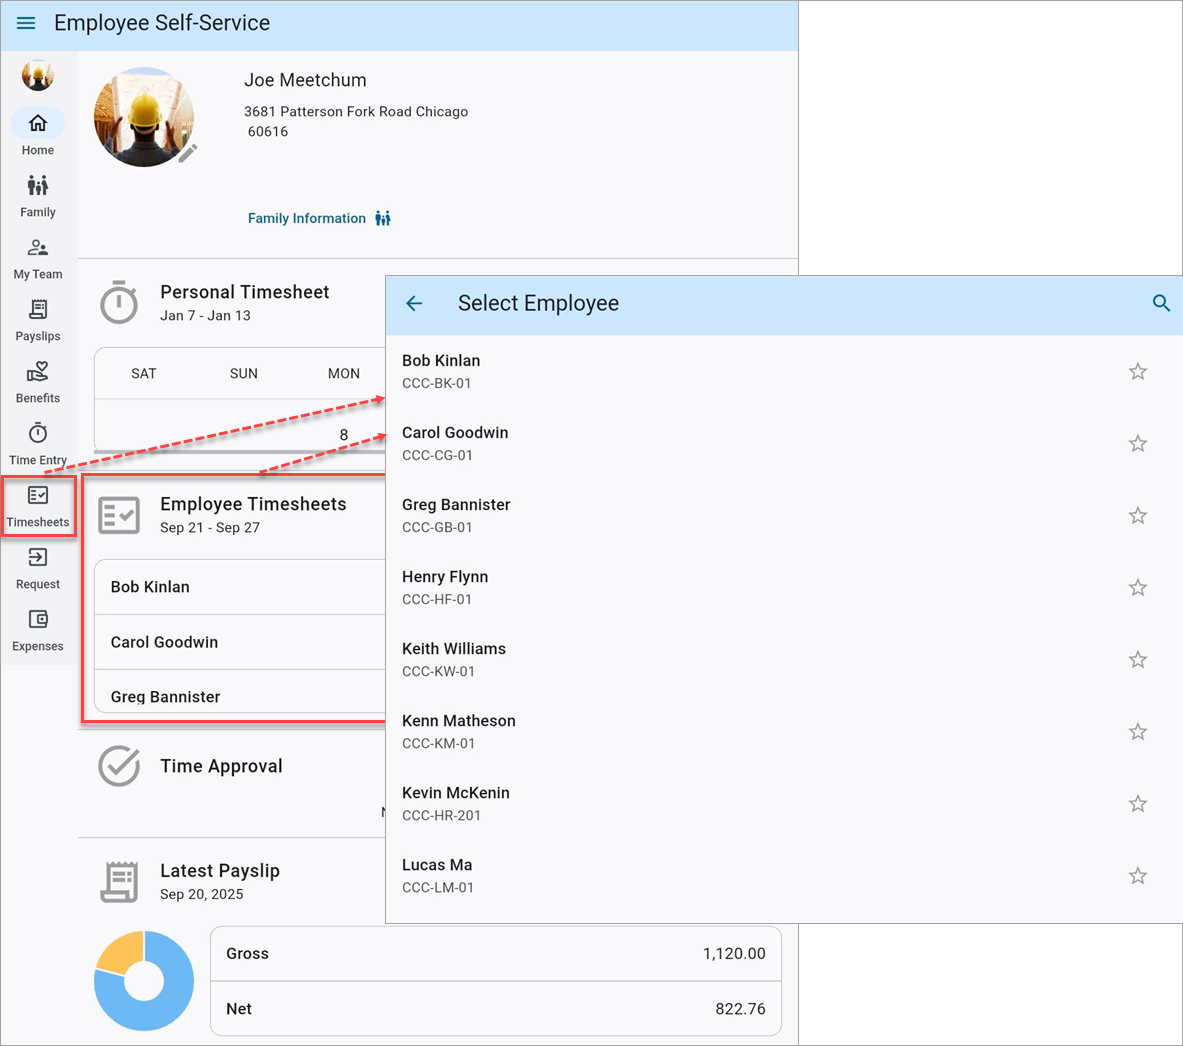
Pop-up window launched from the Employee Timesheets field
Employee timesheets can be accessed from the Home screen under Employee Timesheets, or from the Timesheets menu icon ( ), as shown in the screenshot above.
The Employee Timesheets field's List of Values (LOV) displays only the employees that the user has access to. If no other employees are linked to the user under the Employee and Pay Run tabs of the Access Codes Administration screen in the E-Time module, the LOV will only show the employee attached to the logged-in access code. This also includes the employees where the access code has access as an approver.
Refer to E-Time - Access Codes Administration for more information.
Notes
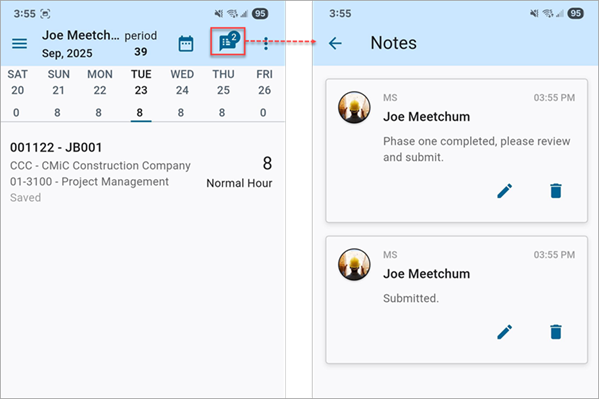
The Notes icon is used to view, add, reply, edit, and delete personal or work-related notes. Employees can edit and delete their own notes at any time and also view and reply to notes from their managers. Notes are automatically updated and accessible on both Construct ESS mobile and web upon logging in. The Notes icon will display a number badge indicating the number of notes entered for the individual employee.
Managers can view notes written by employees via the ESS Administrator - Timesheet Approval (Web) screen.
Pay Period
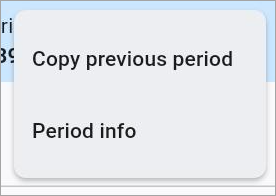
Copy Previous Period
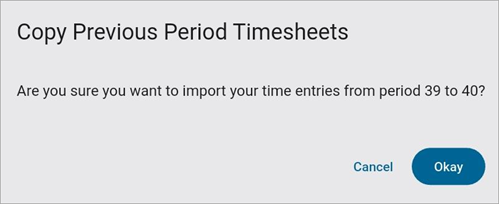
This option is used to copy time entries from the previous week to the current period.
Period Info
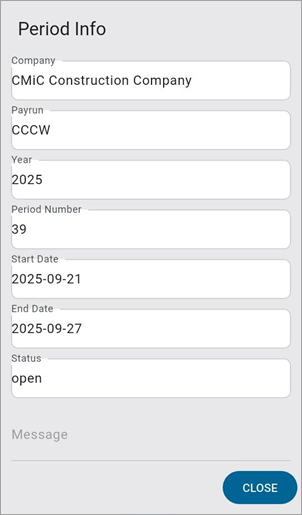
If "Period Info" is selected, the system will display the current open period from the company pay period setup, as defined in the Pay Periods screen in the US Payroll module. If not defined, the period where the current date falls will be shown.
[Submit] – Button
![Screenshot of Timesheet Entry with [Submit] button highlighted.](../../Resources/Images/ESS_App_R12/ConstructESS_TimeEntry14_v1.2.9.png)
Clicking the [Submit] button launches a pop-up window used
NOTE: Only clocked-out entries are submitted. Any in-progress tasks will not be included. For more information, please refer to Clock In/Out Time.
Entering Time
Click on the Add icon ( ) to insert a timesheet entry.
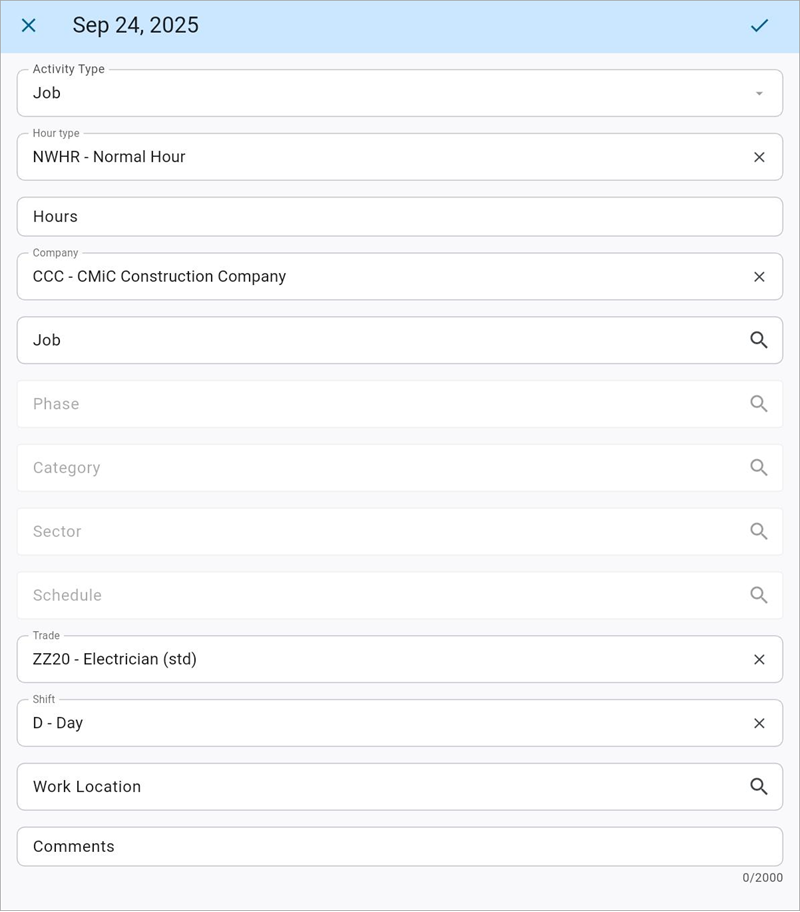
In the Activity Type field, select the desired activity type from the drop-down menu. Options available include "Job", "Overhead", "Equipment", or "Work Order".
NOTE: Users must have security permissions set in the E-Time Role Maintenance screen in the E-Time module to apply time against these activities. These permissions include the following checkboxes: Allow E-Timesheet for Job, Allow E-Timesheet for Overhead, Allow E-Timesheet for Equipment, and Allow E-Timesheet for Work Order. Refer to E-Time - Role Maintenance (E-Time Roles) for more information. To learn more about the "Equipment" and "Work Order" options, refer to Entering Time Against Equipment and Work Orders.
Select an hour type from the Hour Type field and then enter the number of hours in the Hours field.
NOTE: If using the In/Out Time Entry feature, upon selecting a specific hour type which has been flagged to validate in/out times, the interface will dynamically alter, replacing the standard Hours field with distinct fields for Time In and Time Out. Refer to In/Out Time for more information on using this feature.
Depending on the activity type selected, complete the remaining task details. The fields available depend on the selected activity type. Enter any comments in the Comments field.
NOTE: Users must have security permissions set in the E-Time Role Maintenance screen in the E-Time module to access the
When finished, press the Save icon ( ).
).
After inputting the data and saving, the time entry will be recorded against the timesheet and the details will be available on the Timesheet Entry screen.
In/Out Time
Employees can enter timesheets by entering their daily in and out times. When entering time, a clock interface will appear, allowing the employee to select the appropriate time in and time out for their work hours. The system will automatically calculate the total hours worked based on the entered in/out times.
For more information, please refer to Construct ESS - In/Out Time Entry.
Clock In/Out Time
NOTE: The Clock In/Out feature is available in Nexus 01.
Employees can record their daily work time in Construct ESS using the Clock In/Out feature. Employees can record their shift start (clock in), add or edit task details, record breaks (pause/play), switch tasks, and end their task/day (clock out).
NOTE: Clock In /Out is a mobile-only feature. This feature is not available via desktop or web browser.
For more information, please refer to Construct ESS - Clock In/Out Time Entry.
Auto Create Timesheets for Future Approved Leave Requests
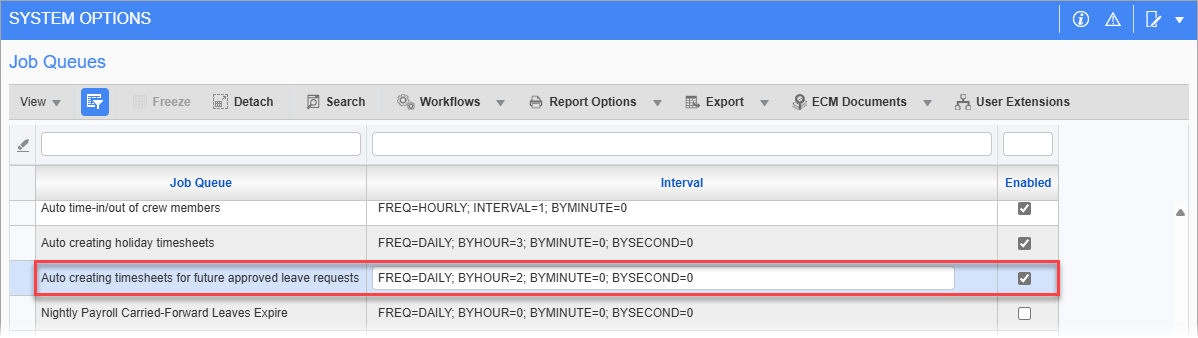
Pop-up window launched from [Job Queues] button on System Options screen; standard Treeview path: System > Setup > System Options – General tab
To populate the Timesheet Entry screen with approved leave entries, the 'Auto creating timesheets for future approved leave requests' box must be checked on the [Job Queues] button’s pop-up on the General tab of the System Options screen in the System Data module. Once the period is open, the job queue will run based on the frequency assigned and trigger the approved leave to be displayed in the timesheet.
For more information, please refer to System Data - System Options - General - Tab.