Overview
Standard Treeview path: CMiC Field > Site Management > Project Checklists
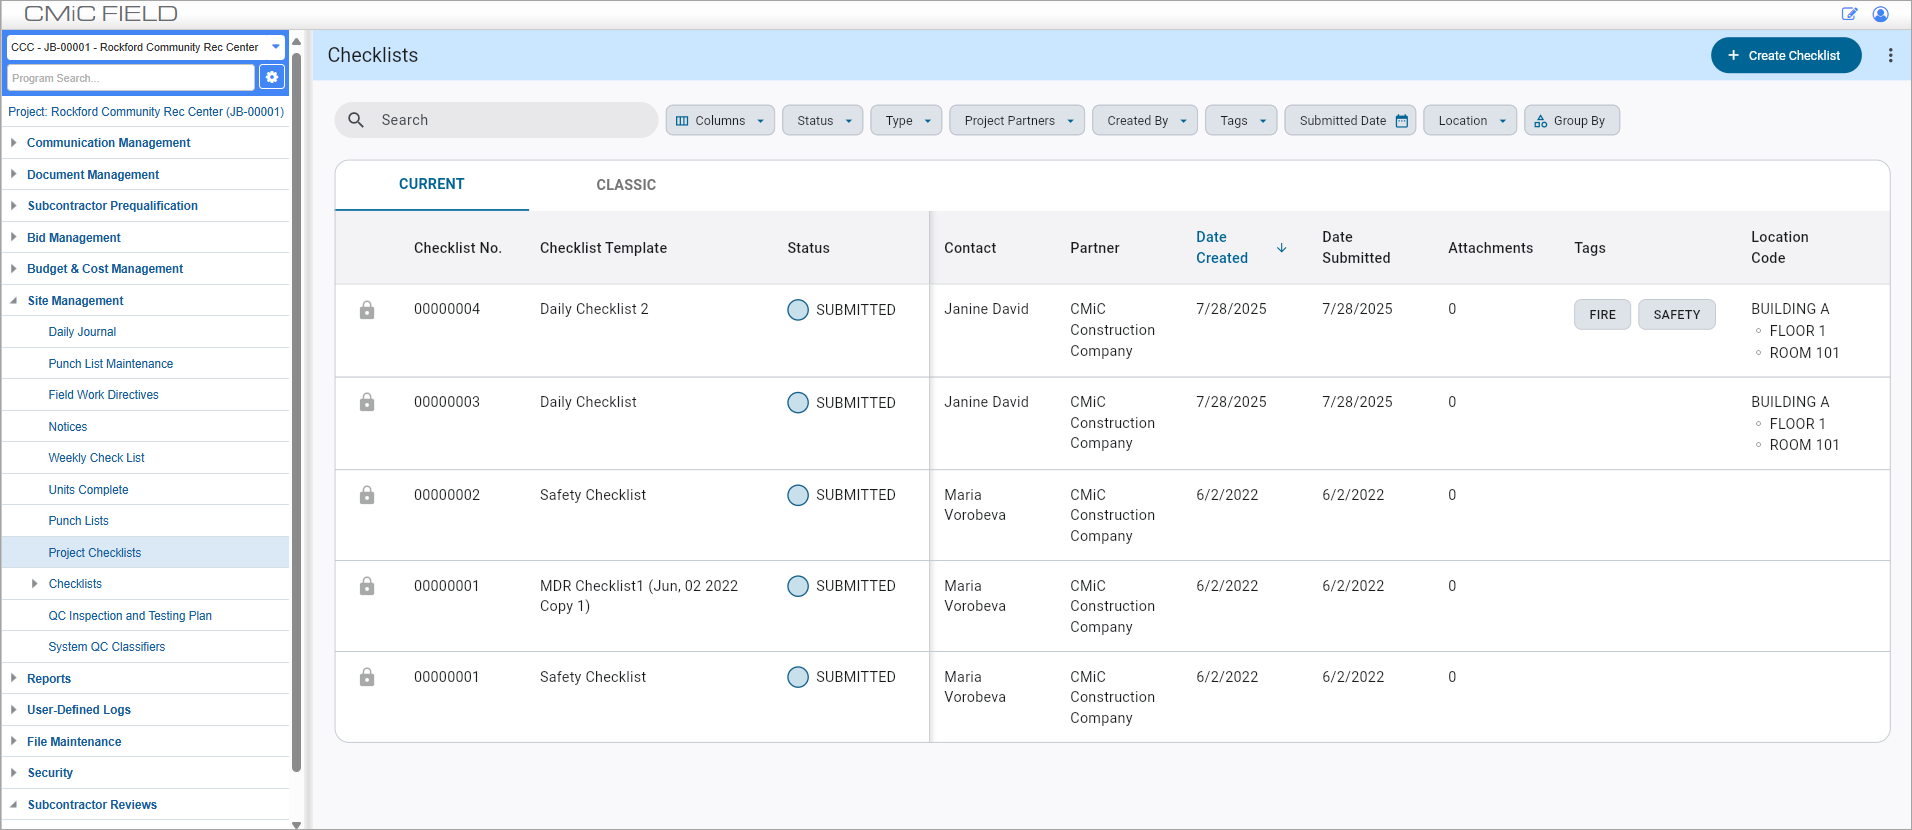
The Checklists log screen appears after the user selects
Search
NOTE: The Search feature is currently only available for the following fields: Contact and Checklist Number. Please use the available filters and Group By option as alternatives where applicable.
Sort
Press the icon that reads, "Date Created" to sort records by date created, date submitted, checklist number, or status.
Group By
Press this icon to group the log by checklist number, status, checklist template, contact, partner,date created, date submitted, or
NOTE: This option is only available on the web.
Delete
Press this link to delete the issue record from the project.
Checklist Access
In order to access the Checklists screen, users will need to be assigned menu access on their security role through Role Maintenance or directly to their CMiC Field - User Access. Users will also need to have the Create privilege for the specific checklist type they intend to execute. Template level privileges can be granted through CMiC Field - Checklist Template Maintenance.
Open the Checklists screen by selecting the
NOTE: Project checklists inherit template locks from system level checklists. If a project template is locked users cannot make any changes to the locked template. See the CMiC Field - Checklist Template Maintenance article for more information on template locking.
Creating a New Checklist
New checklists can be created by pressing the
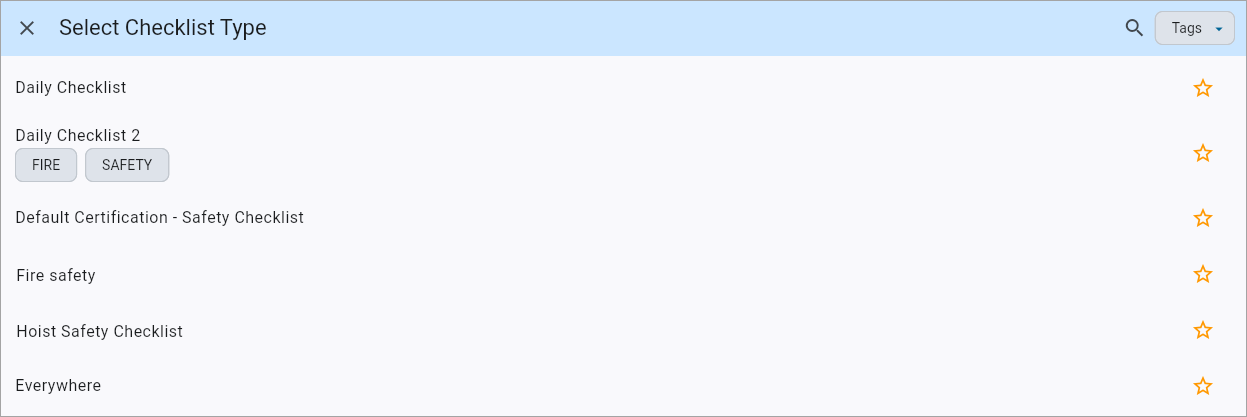
Create a new instance of a given checklist by selecting the type from the Select Checklist Type menu. Press the [Tags] button to sort and filter the checklist types by tags. For more information, please refer to CMiC Field - Using Checklist Maintenance Tags.
Note: Once a checklist has been created using a selected checklist template, that template is locked and cannot be edited. Any attempts to edit the checklist template will prompt the user to create a new branch of the template and make the changes to the new branch instead. See Checklist Template Maintenance for more information on checklist template management.
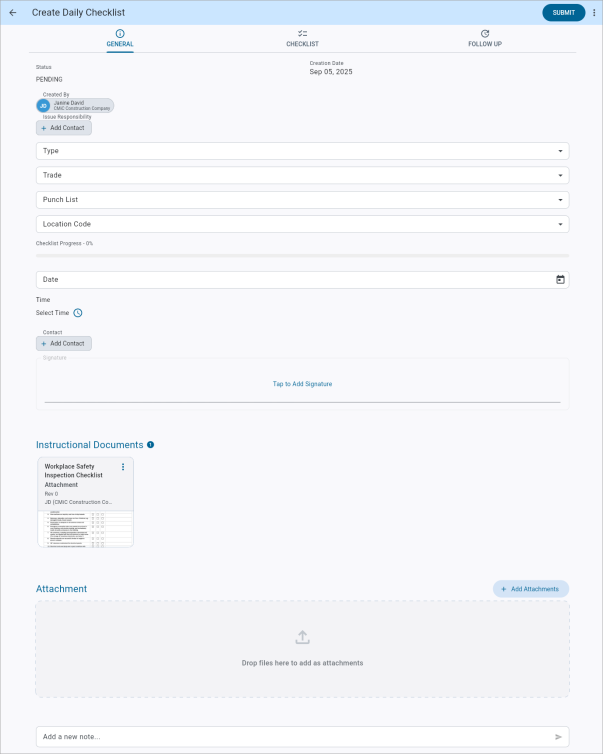
General – Tab
Standard Treeview path: CMiC Field > Site Management > Project Checklists – General tab
This tab is used to capture high-level information about the checklist. Here, users can view checklist progress, select the default issue contact and issue type, view the date the record was created and the user who created the record. This tab also allows the user to enter values for any Header-fields that have been set up for that checklist template in the
Issue Responsibility and Type
Trade, Punch List
When punch list items are allowed and defaults are set in the security settings of the checklist template, these values will be populated by default in any new punch list items that are created during the execution of the checklist record. This allows the user to quickly create punch list items related to the checklist execution. These values can be updated if required. For more information, please refer to Security Settings.
Location Code
Select a location code for the checklist. Location codes are maintained in the CMiC Field - Inspection Locations Maintenance screen.
Checklist Progress
This bar shows the percentage of checklist questions that have either a selected answer (for Radio, Dropdown, Multicheck, and Time/Date type questions) or a text entry (for Open Text answers).
Instructional Documents
This field contains documents saved to the template for reference during checklist execution. These documents are maintained in the Checklist Template Maintenance screen. For more information, please refer to Checklist Template Maintenance.
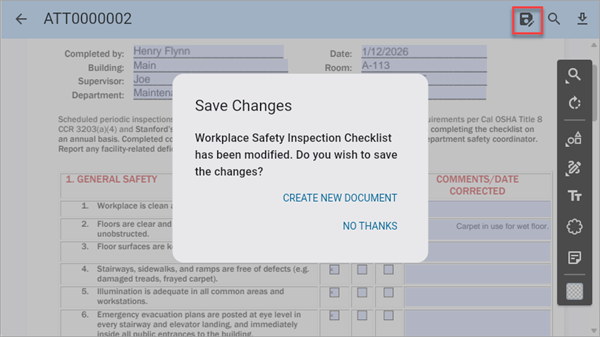
Users can view, download, and edit the instructional document (e.g., complete fillable PDFs, add text, annotations, highlights, etc.). Changes can be saved as a new document that will be available in the Attachments section on the Checklist record.
Attachments
Press the Add Attachments button in this field to add an attachment to the checklist. The user can either take a new photo with the device's camera, attach a file from the device library, or attach a document or drawing already saved in Construct PM. A counter will indicate the number of attachments on the record.
Notes
Enter any additional notes concerning the checklist here.
Checklist – Tab
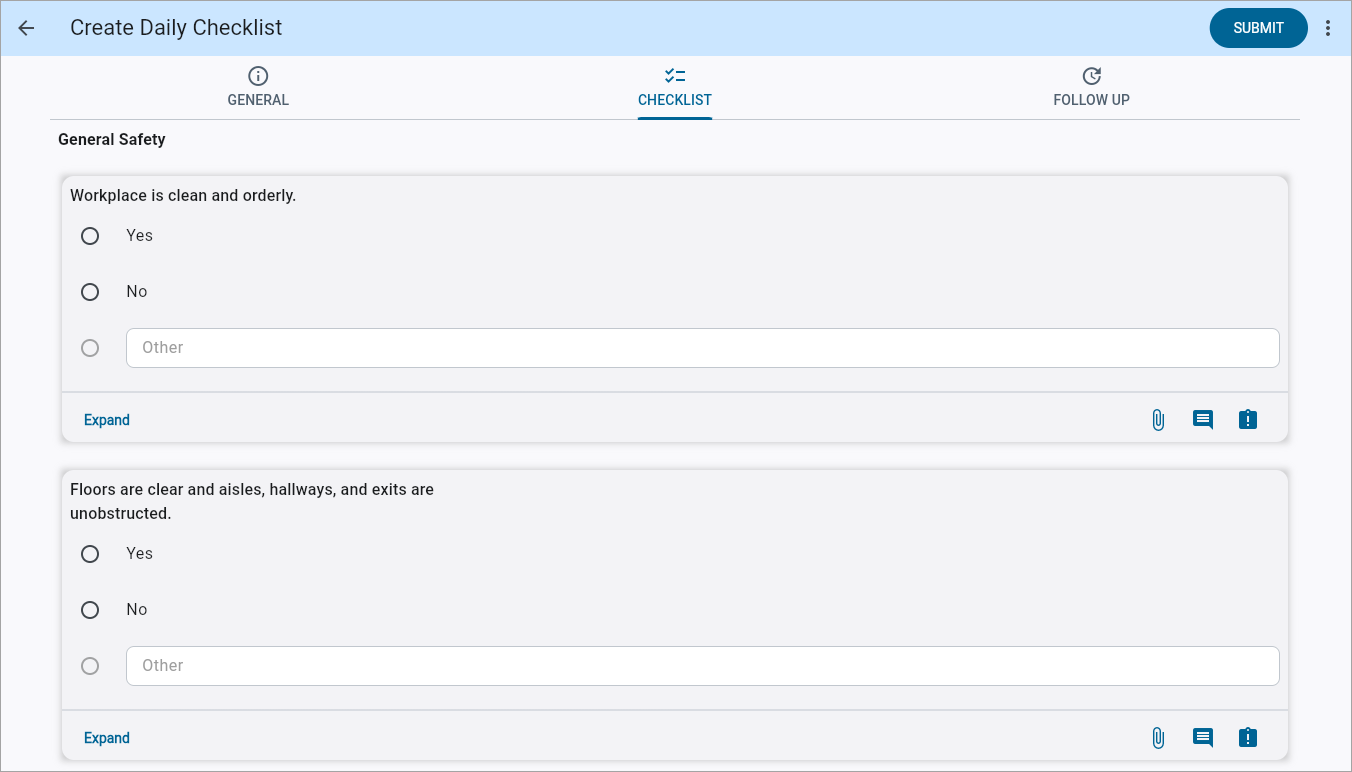
Standard Treeview path: CMiC Field > Site Management > Project Checklists – Checklist tab
This tab displays the checklist questions and is used to execute the checklist. Below each question, an Expand link and three icons are displayed: Notes (![]() ),
), ![]() ), and Attachments (
), and Attachments (![]() ).
).
Expand
Gives users a full view of all the photos, notes, and issues associated with that checklist question.
Notes
Selecting the Notes icon will pull the user into the Expanded view. Enter any additional notes concerning the checklist here.
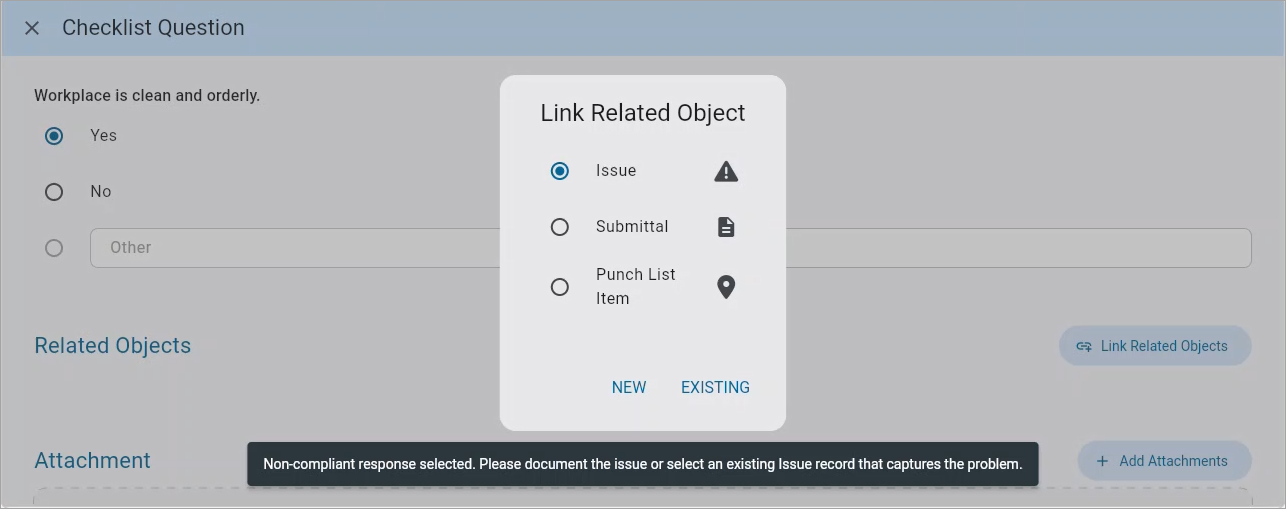
Allows the user to create and link a new
Attachments
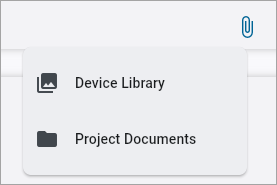
The Attachment icon will open the menu with different methods of adding attachments.
-
Device Library: Allows the user to attach photos stored on the device.
-
Project Documents: Allows the user to attach existing files to the question from the document folders they have access to on the project within CMiC.
Follow Up – Tab
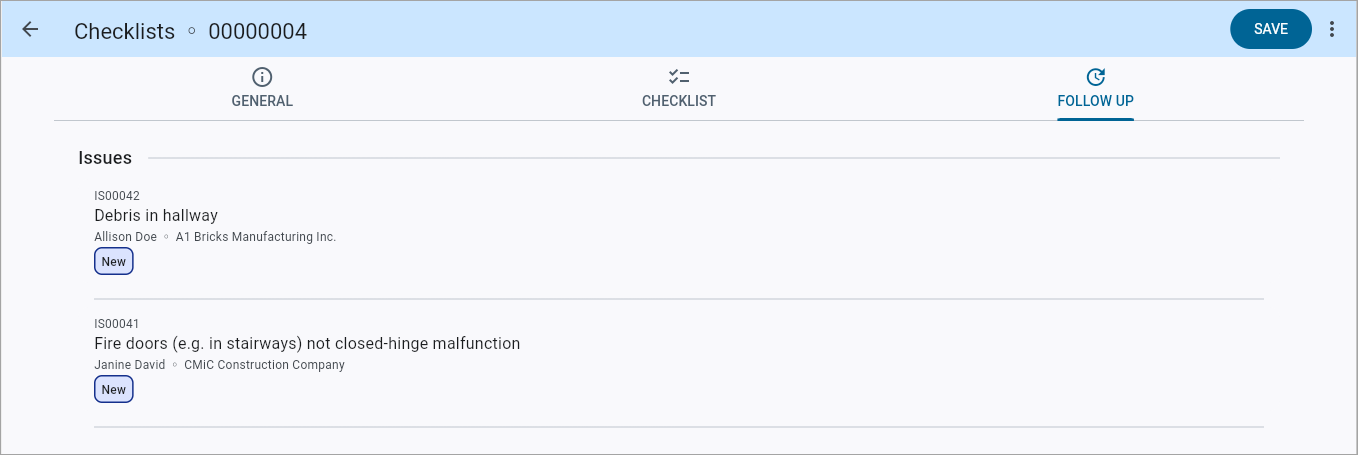
Standard Treeview path: CMiC Field > Site Management > Project Checklists –
This tab displays all the issues associated with the checklist.
When a user selects a non-compliant answer, they are forced to document it by creating a new Issue record or linking to an existing one. If the Issue Responsibility and Issue Type fields found on the General tab are filled, these values will be populated in the new issue automatically. Additional notes and photos can be added to the Issue. Please note, non-compliant responses cannot be selected without the documentation of a related issue.
Submitting a Checklist
The user can submit the checklist at any point, from any one of the above tabs, by pressing the [Submit] button. They may also save the checklist without submitting it, by selecting save from the overflow menu ( ) to the right of the submit button. It’s recommended that checklists are submitted only when satisfactorily completed, as users may not have the necessary privileges to edit the record after submission.
Reporting
To learn about how you can use your checklist data for reporting purposes, refer to CMiC Field - Creating BI Reports From Project Checklists.
Creating Checklist Reports
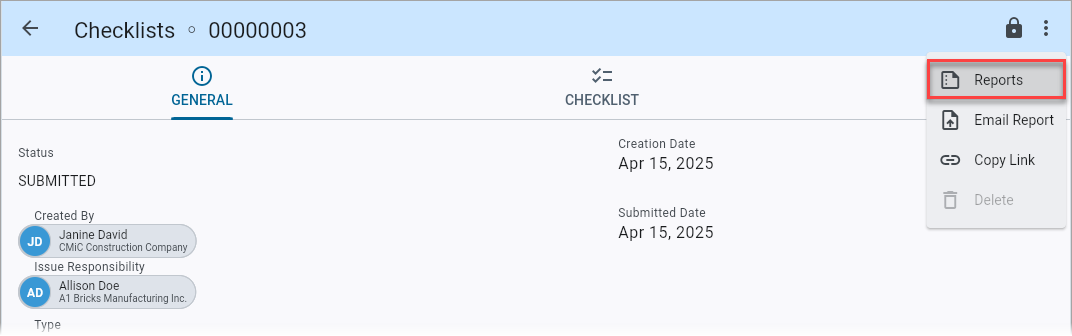
The reports printing functionality in Construct PM allows users the flexibility of printing a single report (form letter), or multiple reports (form letters) and attachments, the latter option producing a single PDF file with all the reports and attachments as pages of that file. For more information, please refer to Construct PM - Using Construct Reports .
Exporting the Checklist Log
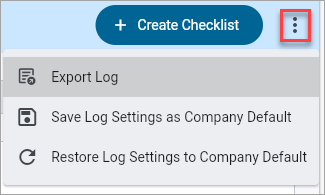
NOTE: The Export Log feature is only available on the web.
To export the Checklist log, click on the Options Menu icon () and select the "Export Log" option in the drop-down menu. A CSV file is generated which contains all items that meet the current filters applied on the Checklist log screen.