Construct PM - Using Construct Reports
Overview
Construct Reports in Construct PM allows users the flexibility of printing a single report (form letter), or multiple reports (form letters) and attachments, the latter option producing a single PDF file with all the reports and attachments as pages of that file.
The following printing options are available for RFIs, Issues,Checklists, and Daily Journals:
-
Print multiple reports as one.
-
Print standard and MIP reports (select MIP templates).
-
Embed attachments within a merged report.
-
Print report to email.
-
Send report and/or attachments as download links.
-
Print report to cold storage.
-
Download report to device library
Process
This process describes how to build, sort, and create a report. In this example, a report is created for an RFI record.
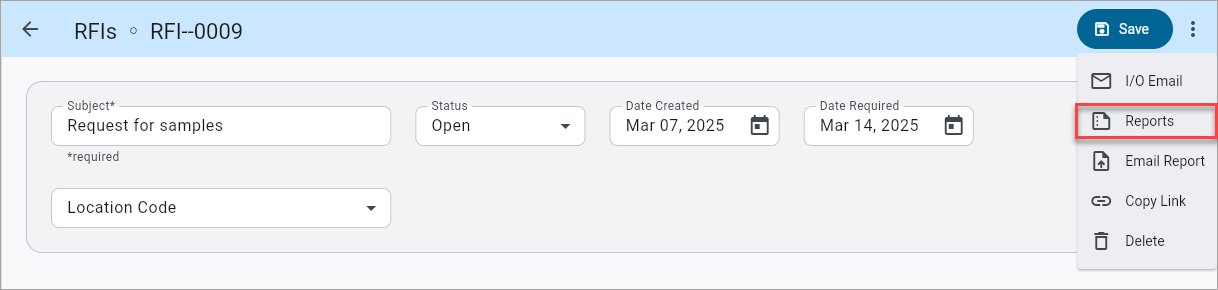
Step 1: Select the "Reports" menu option.
Construct PMRFI with menu
Click on the Menu icon ( ) and select "Reports".
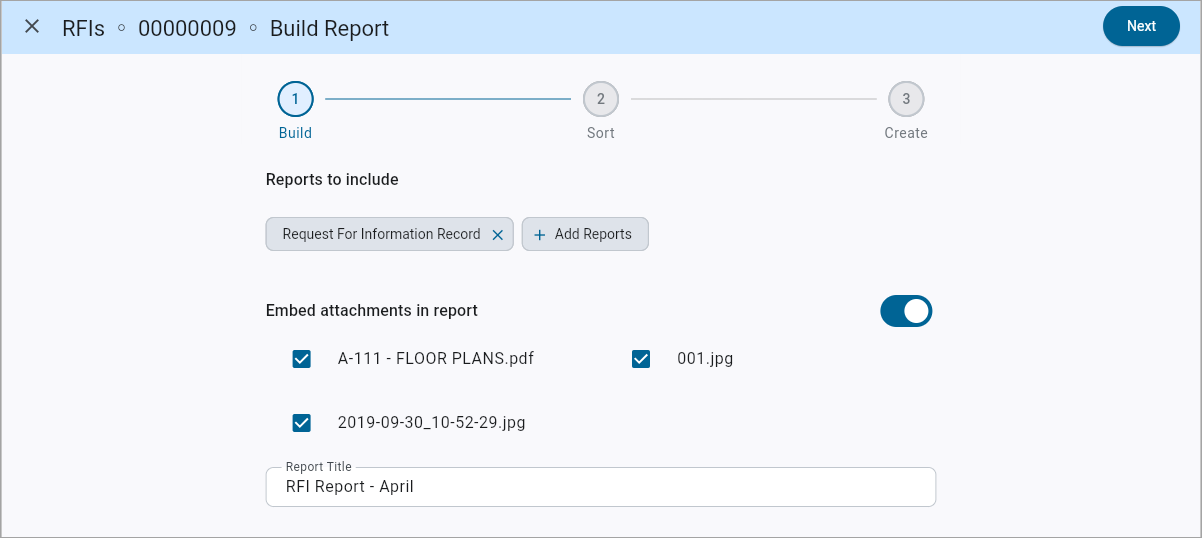
Step 2: Build Report.
Reports – Build Report node
Select standard, custom, or MIP reports and/or attachments in the Build Report node.
[Add Reports] – Button
Press the [Add Reports] button to launch the Reports pop-up to select one or more reports to include. Users can also select a template from the drop-down for an MIP record.
Embed attachments in report – Toggle
Select this toggle to view and select attachments to embed in the report.
NOTE: This toggle is only enabled if there are existing attachments on the record.
Report Title
Enter the report title.
[Next] – Button
When done, press this button to move to the next node.
Step 3: Sort Report.
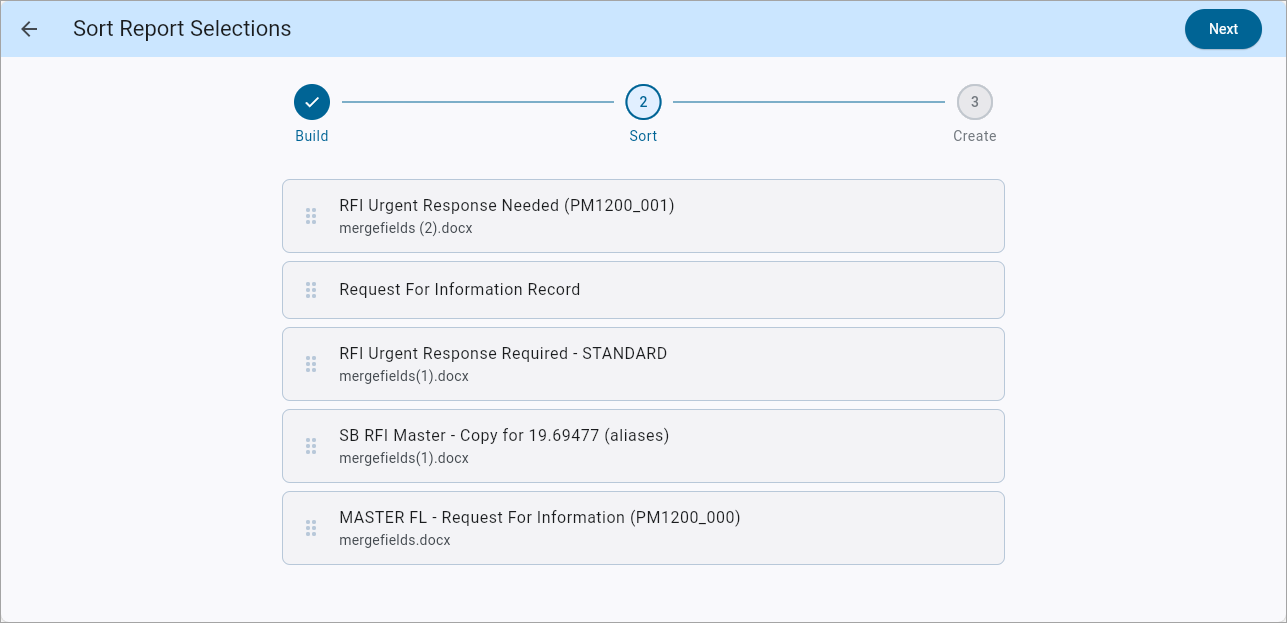
Reports – Sort Report Selections node
The Sort Report Selections node is available when multiple items are selected. Click and drag a report or attachment to re-position it before printing. The order of printing is from top to bottom. When done, press [Next].
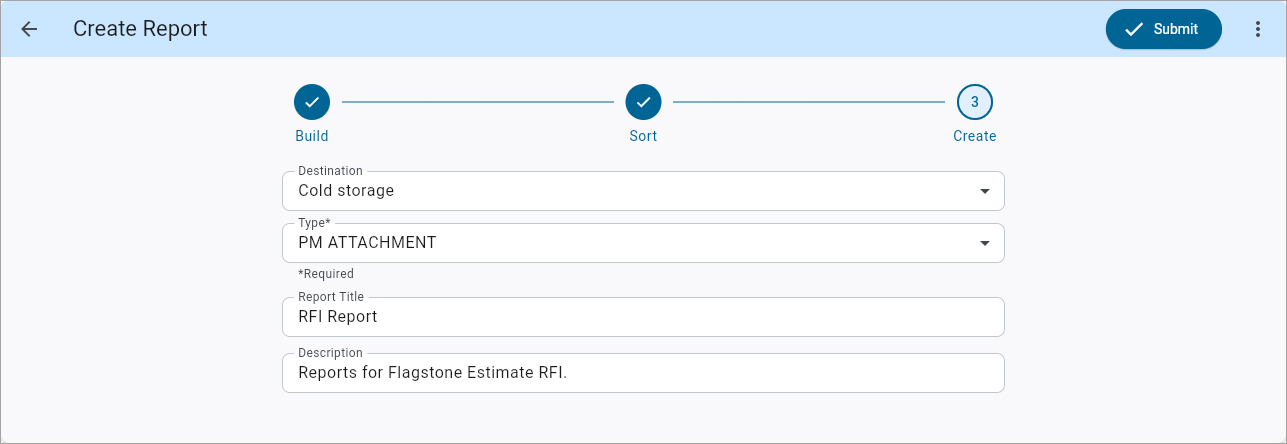
Step 4: Create Report.
The Create Report screen allows users to select one of the following printing destinations for the report: "Email" or "Cold storage"
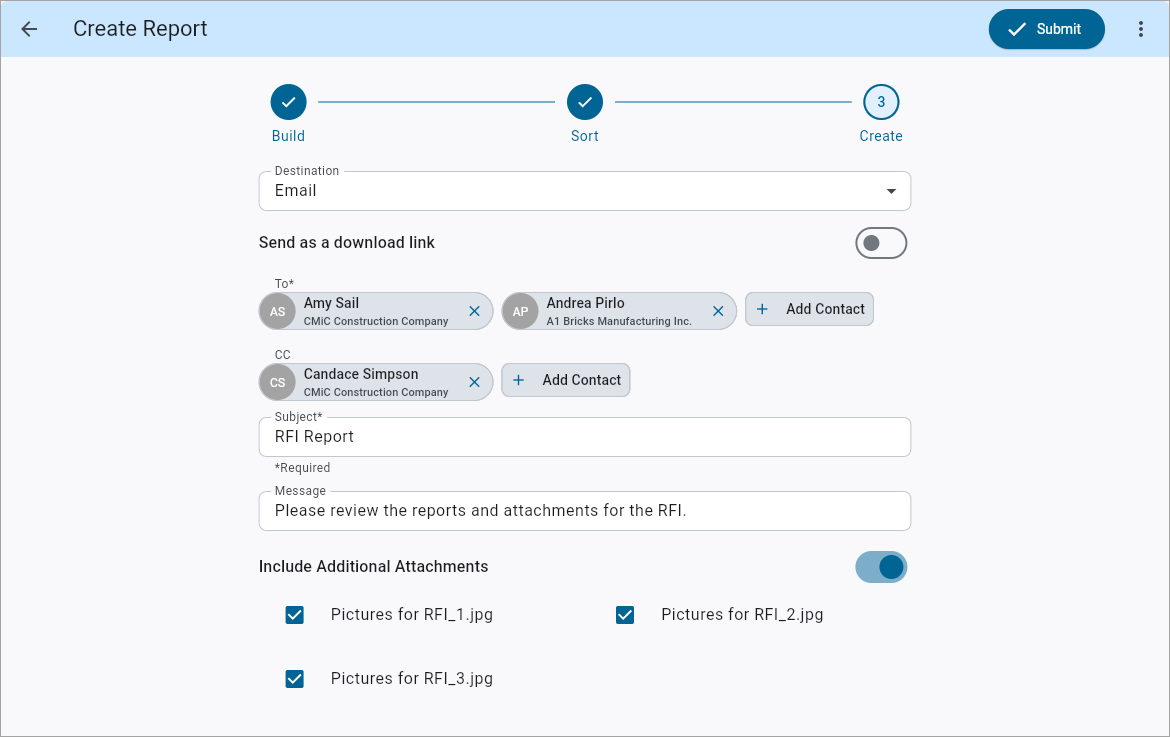
Create Report node with "Email" destination selected
Select this option from the Destination field to send the report via email as an attachment or as a download link.
Send as a download link – Toggle
Select this toggle to send the report and/or attachments as download links.
NOTE: The download link will expire within seven days.
To, CC
Press the [Add Contact] button in these fields to select one or more contacts from the LOV
Subject
Enter the subject of the Email in this field.
Message
Enter a message for the Email.
Include Additional Attachments – Toggle
Select this toggle to view and select attachments to include in the Email. Selected items will be sent as email attachments separate from the merged report. To include attachments in the merged report, use the Embed attachments in report toggle in the Build Report node.
If the Send as a download link toggle is enabled, these attachments will be sent via a download link instead.
NOTE: This toggle is only enabled if there are existing attachments on the record.
[Submit] – Button
Press this button to submit and create the report.
Examples
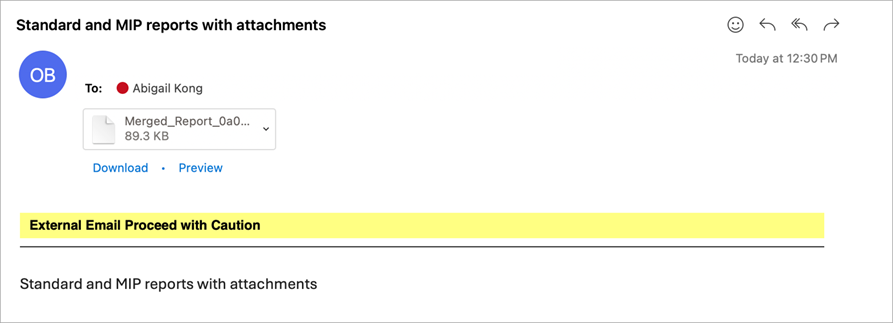
Email with attached report.

Email with download links for report and additional attachments.
Cold Storage
Create Report node with "Cold Storage" destination selected
Select this option from the Destination field to save the report to cold storage. The report will be attached to the PM record and can also be found in the PM folder in Image Manager that is registered to cold storage. The report will be available in the Attachments section of the record.
Type
Select the document type.
NOTE: Users must select a document folder that starts with "PM" and that is registered to cold storage (e.g., “PM Attachment”).
Report Title
Enter a title for the report.
Description
Enter a description for the report.
[Submit] – Button
Press this button to submit and create the report.
Example
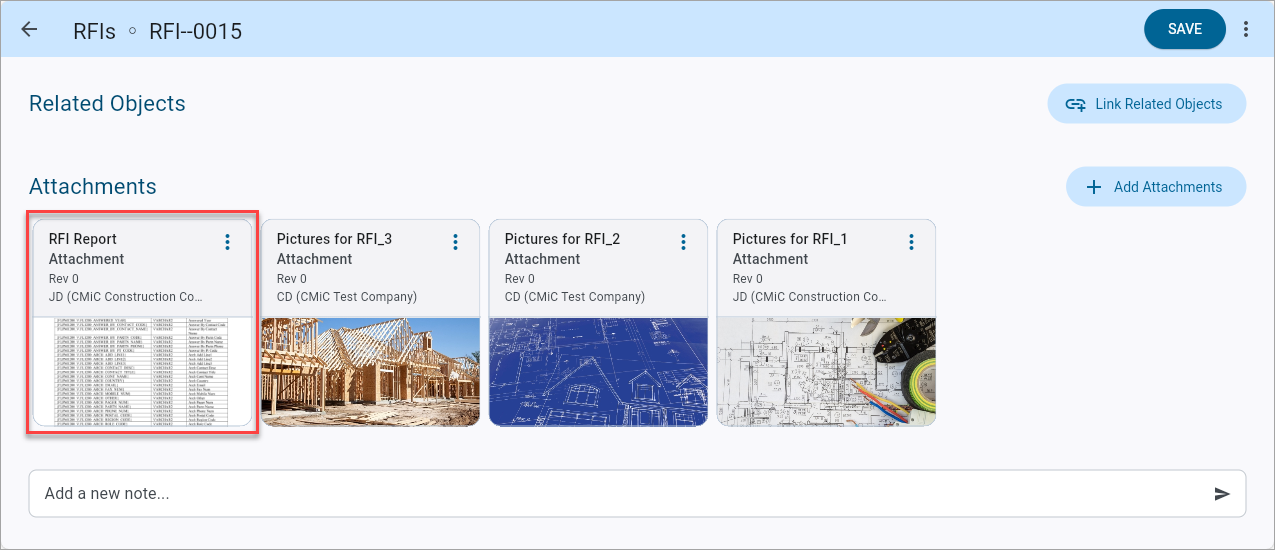
Attachment section of record with added report
Download
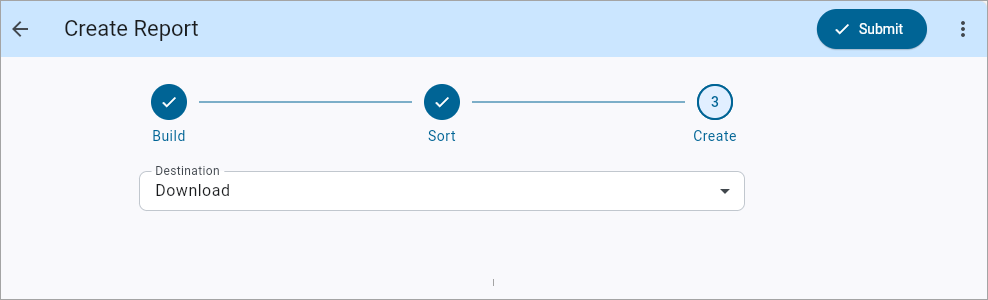
Create Report node with "Download" destination selected
Select this option from the Destination field to download the report. The download option on web will launch a download to the browser and save the merged reports to your device. On mobile devices, the download will save the merged report to your device library and a snack bar will indicate success or failure of that download.
[Submit] – Button
Press this button to submit and create the report.
NOTE: The "Download" option is currently unavailable and has been temporarily removed. This functionality will be available as of Nexus 01 and later.