Overview
The Journal screen can be used to record the day's activities on the job site. This information can be used to explain costs or justify project delays.
Journal Log
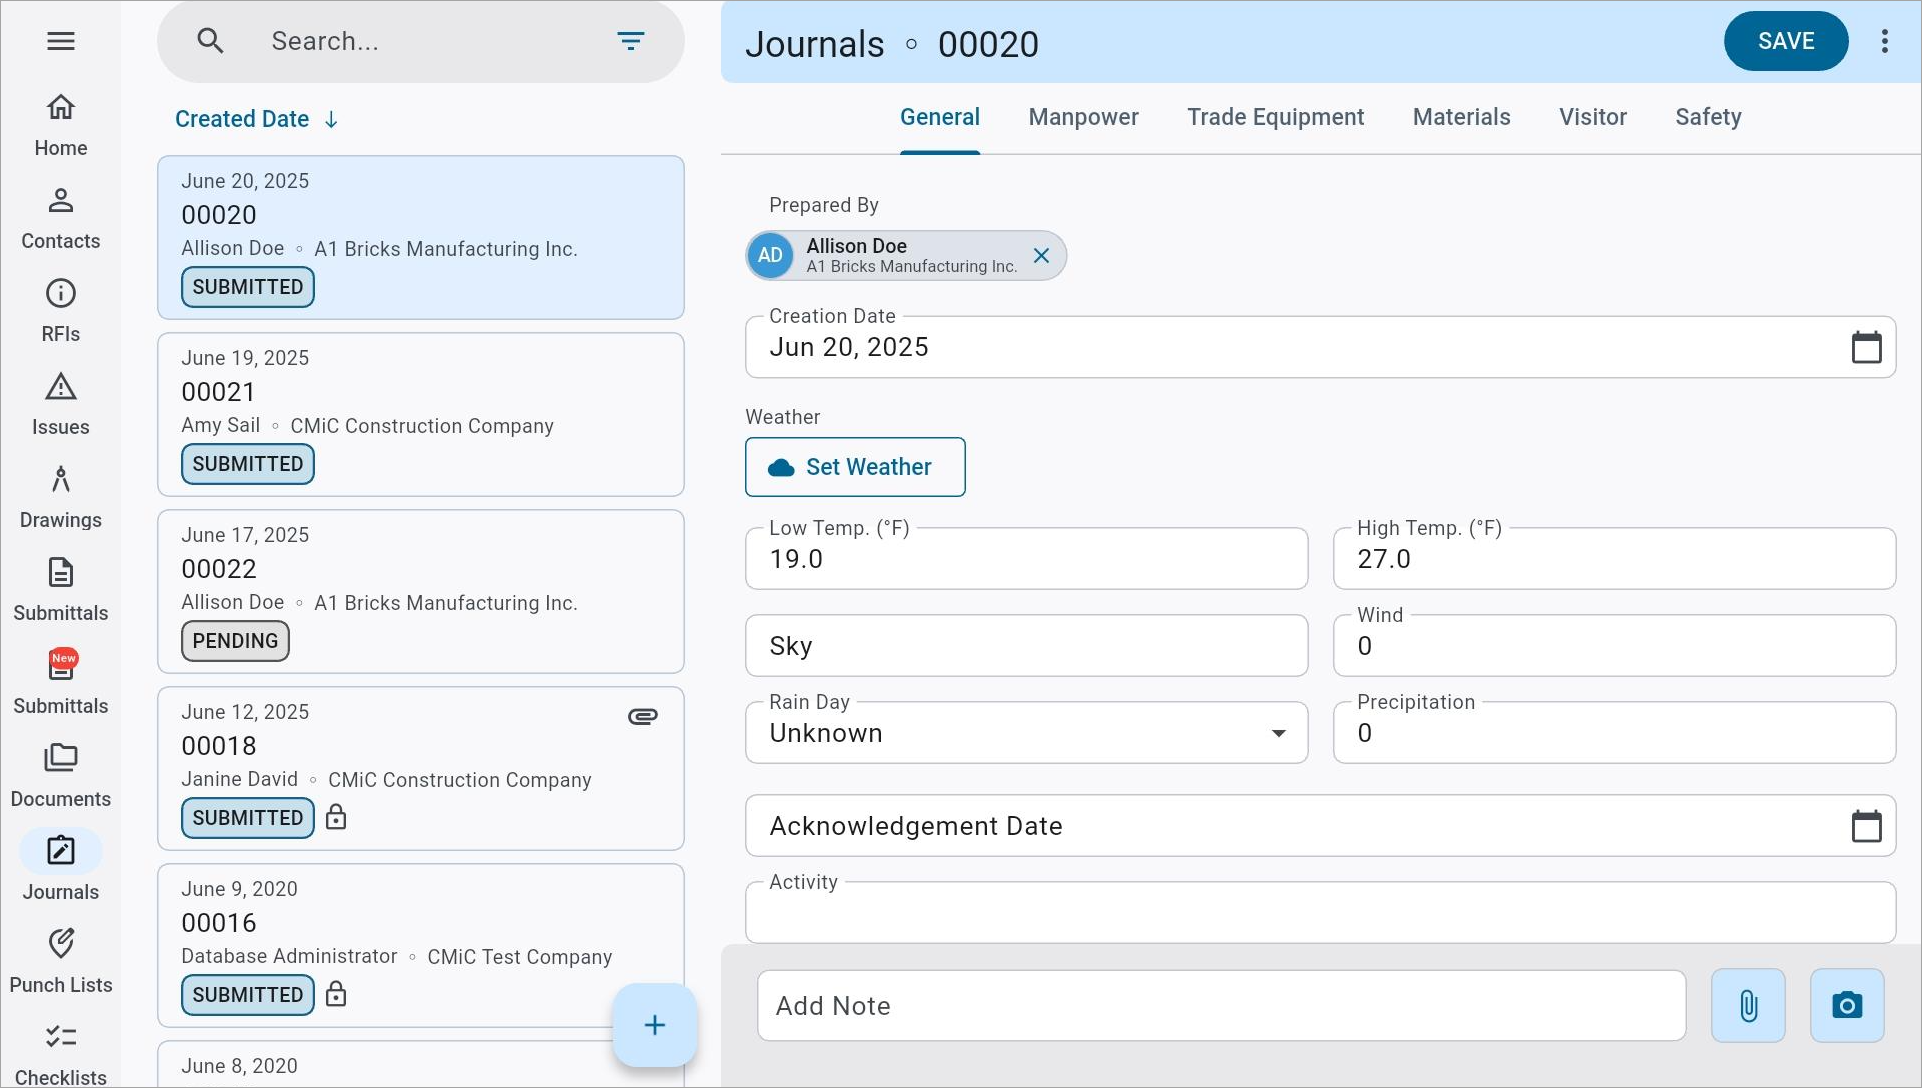
The Journals log
The Journals log is what appears after selecting Journals from the main menu. To view a journal record, select it from the menu on the left hand side. Journals are labeled by their journal number, creation date, and the user that prepared the record.
NOTE: Journal numbers are automatically assigned upon the creation of an journal record and cannot be edited from Construct PM.
The user may edit journals found in this screen, assuming they have the relevant security privileges enabled (please see the Security section for more details). Once the journal has been edited press [Save].
Search
Press the Filter icon (![]() ) in the search bar to filter the search results. Issues can be filtered by author (prepared by), rain day, and status.
) in the search bar to filter the search results. Issues can be filtered by author (prepared by), rain day, and status.
NOTE: The Search feature is currently only available for the following fields: Journal Number and Prepared By. Please use the available filters and Group By option as alternatives where applicable.
Sort
Press the icon that reads "Creation Date" to sort journals by record number or creation date. Press the arrow next to the sort option to sort in ascending or descending order.
[Group By] – Button
Press this button to group the log by journal number, date, author (prepared by), low temperature, high temperature, or precipitation. Press the arrow to sort the results in ascending or descending order.
NOTE: This option is available via the Search bar for mobile devices.
Creating a New Journal
General – Tab
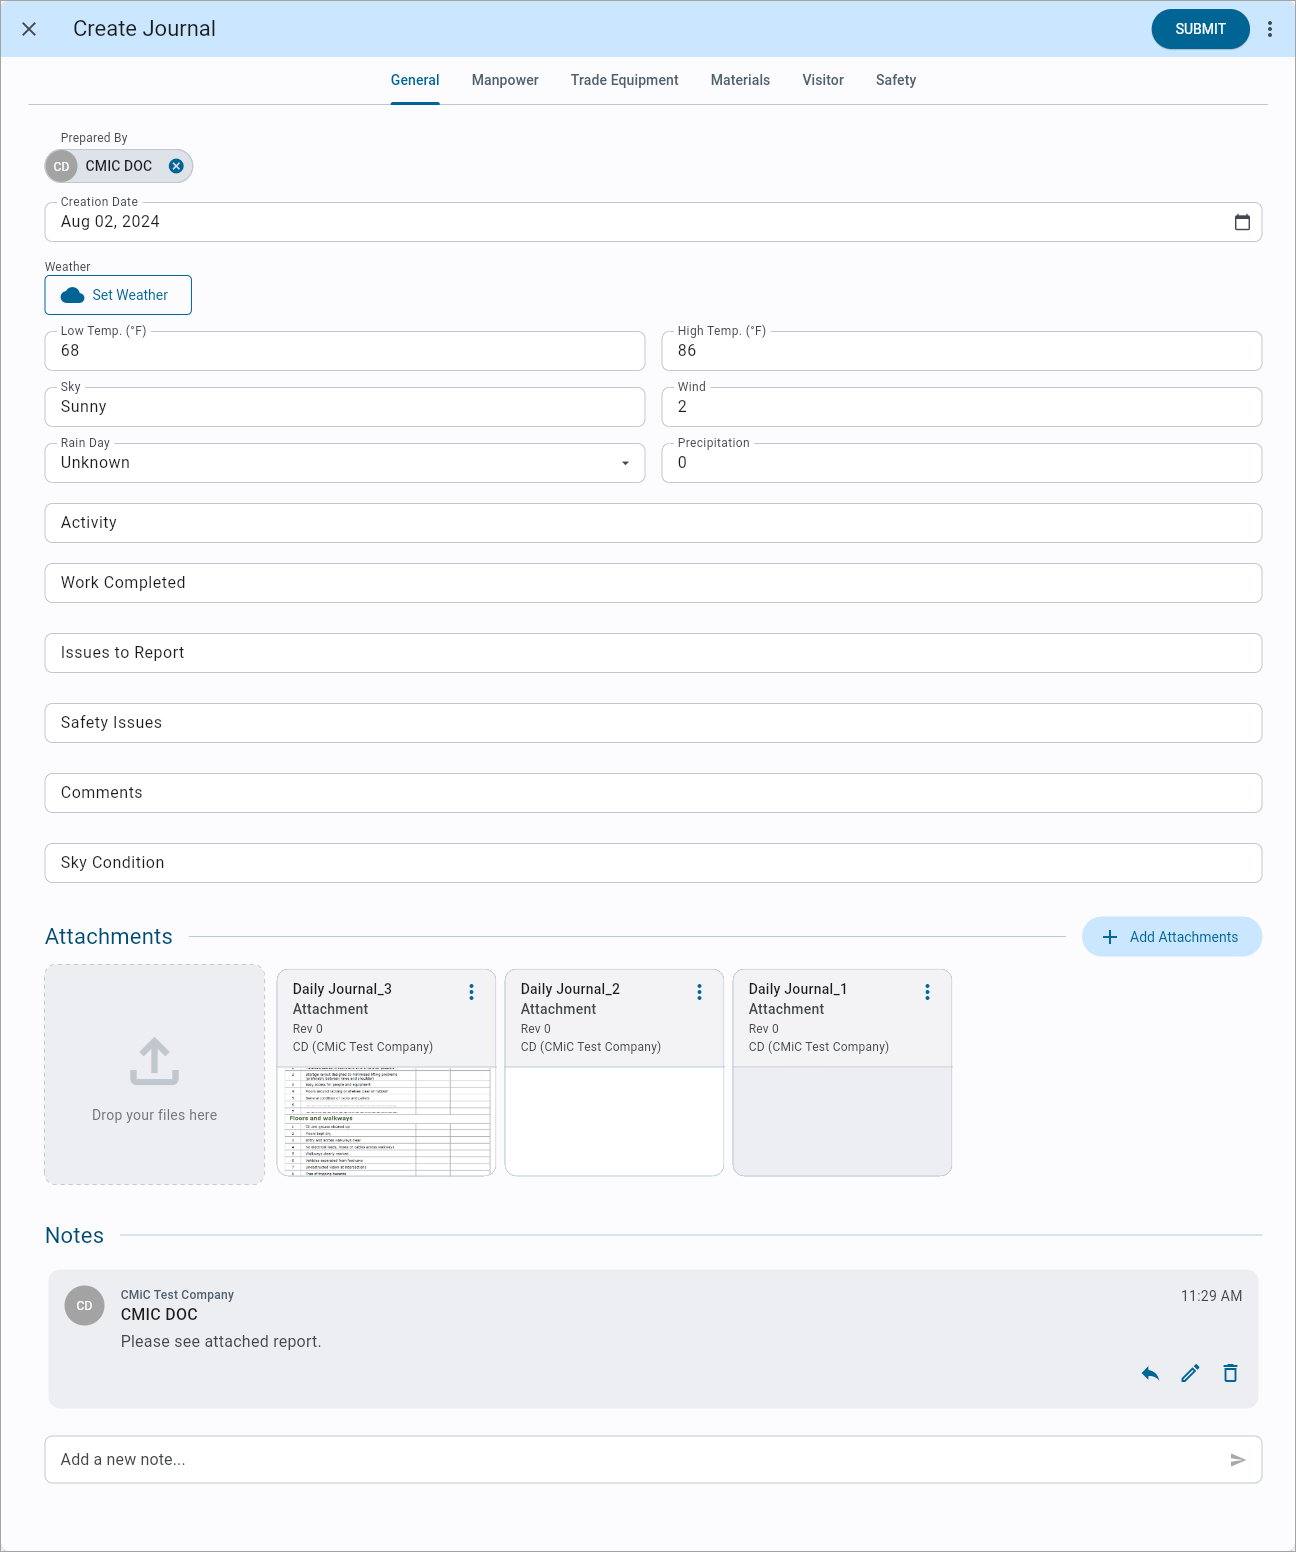
The General tab of the Create Journal screen
Prepared By
Select the contact preparing the journal entry. This field will default to the currently logged in user.
Creation Date
Select the date of the journal entry. This field will default to the current device date.
Weather
Enter the weather on the work site for that day. Edit the individual weather fields, or default the weather based on the project address and the date of the journal entry by pressing the [Set Weather] button. Real-time weather data is provided by Weatherstack.
NOTE: To use the Set Weather feature, a country must be entered in the Country field for the project address on the CMiC Field - Project Maintenance screen in CMiC Field. Without this, the Set Weather feature will not be able to retrieve the relevant weather information. The unit of measure for temperature will also be based on the selected country. If the project address references US/USA/United States, Construct PM will default to Fahrenheit, otherwise it will default to Celsius. If the Country field is empty, the system will default to "North America" and differentiate between the US and Canada using zip codes and postal codes.
Activity
Enter the daily activity.
Work Completed
Enter the work completed by the end of the day.
Issues to Report
Enter any problems or delays that affected any activity.
Safety Issues
Enter any safety issues to report.
Comments
Enter any comments about the day's activities.
Sky Conditions
Enter any sky conditions that affected the day's activities.
Attachments
Press the [Add Attachments] button in this field to add an attachment to the journal entry. The user can either take a new photo with the device's camera, attach a file from the device library, or attach a document or drawing already saved in Construct PM. A counter will indicate the number of attachments on the record.
Notes
Enter any additional notes for the journal entry here.
Manpower – Tab
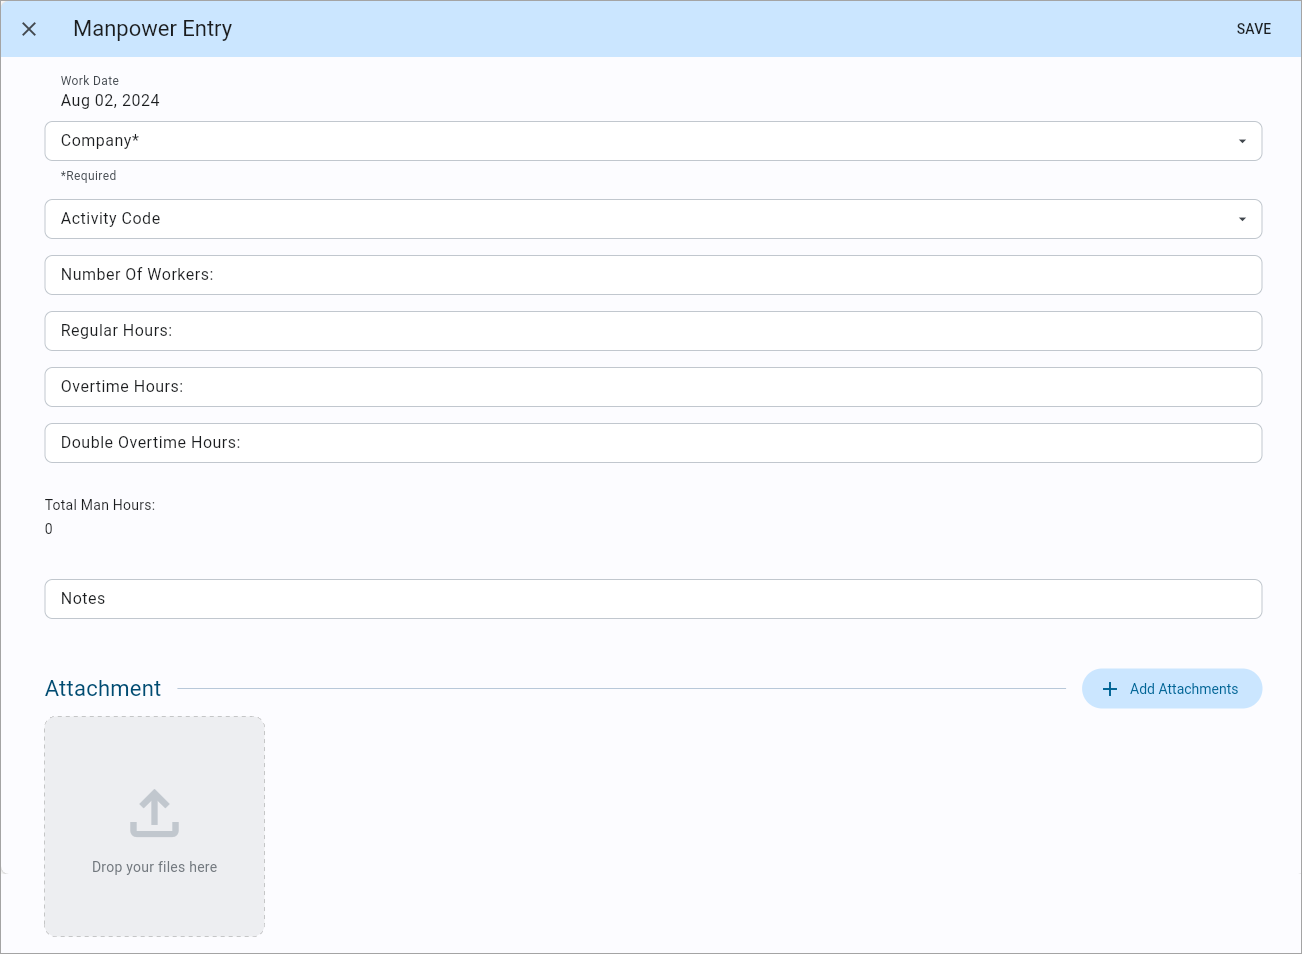
The Manpower tab of the Create Journal screen
This tab can be used to enter hours worked on the project. A summary of all previously entered hours appears by default. Press [Add Entry] to add a new manpower entry.
Company
Select the company for which the work was performed.
Activity Code
Select the activity code for the work performed.
Number of Workers
Enter the number of workers.
Regular Hours, Overtime Hours, Double Overtime Hours
Enter the number of regular, OT, and DOT hours worked by the workers. The sum of these hours will be displayed in the Total Man Hours field.
Trade Equipment – Tab
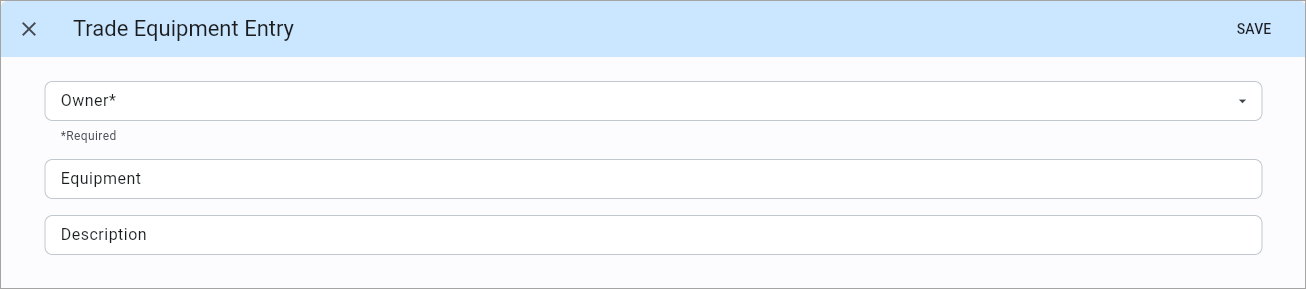
The Trade Equipment tab of the Create Journal screen
This tab can be used to enter the types and quantity of equipment used or rented by subcontractors. A summary of all previously entered trade equipment appears by default. Press [Add Entry] to add a new trade equipment entry.
Owner
Select the project partner to whom the trade equipment belongs.
Equipment, Description
Enter the name and description of the trade equipment.
Materials – Tab
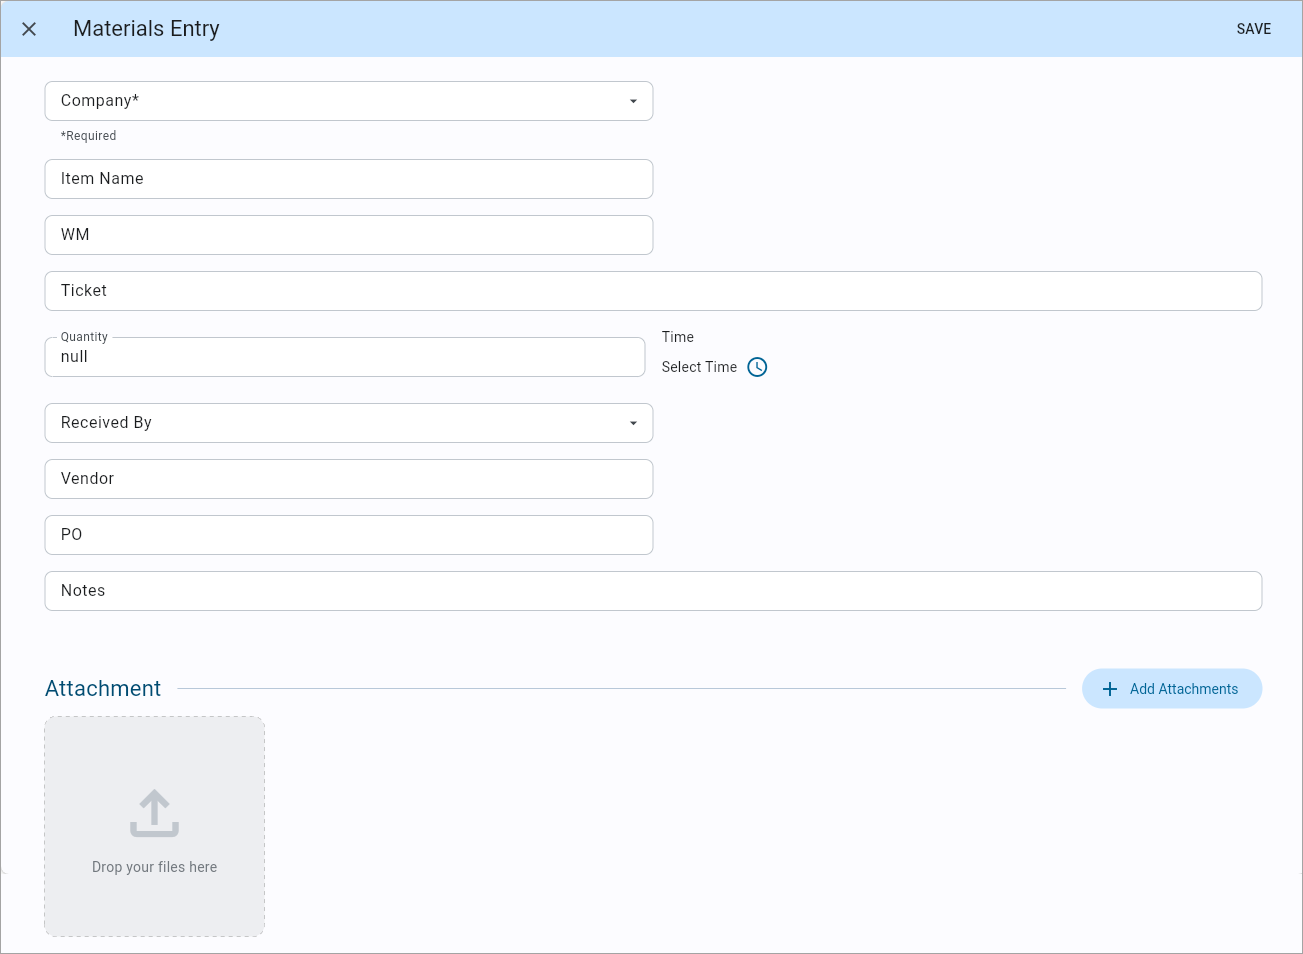
The Materials tab of the Create Journal screen
This tab can be used to enter any materials used for the project. Press [Add Entry] to create a new materials entry.
Company
Select the company using the material
Item Name
Enter the material name.
WM
Enter the weight measure of the material.
Ticket
Enter the ticket number of the material.
Quantity
Enter the amount of the material used.
Time
Press the clock icon to select the amount of time for which the material was used.
Received By
Select the contact who received the material.
Vendor
Enter the vendor that provided the material.
PO
If the material has a purchase order number, enter it here
Notes
Enter any additional notes for the material and its use here.
Visitor – Tab
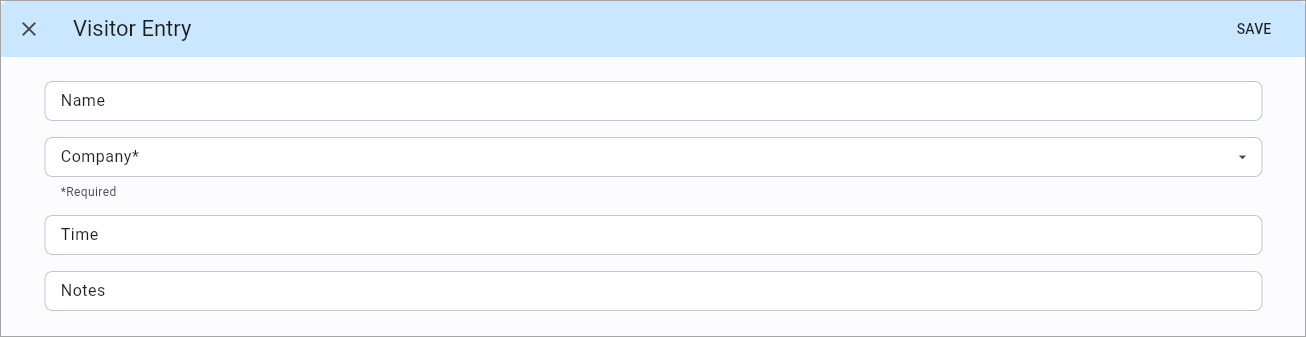
The Visitors tab of the Create Journal screen
This tab can be used to log any visitors to the work site.
Safety – Tab
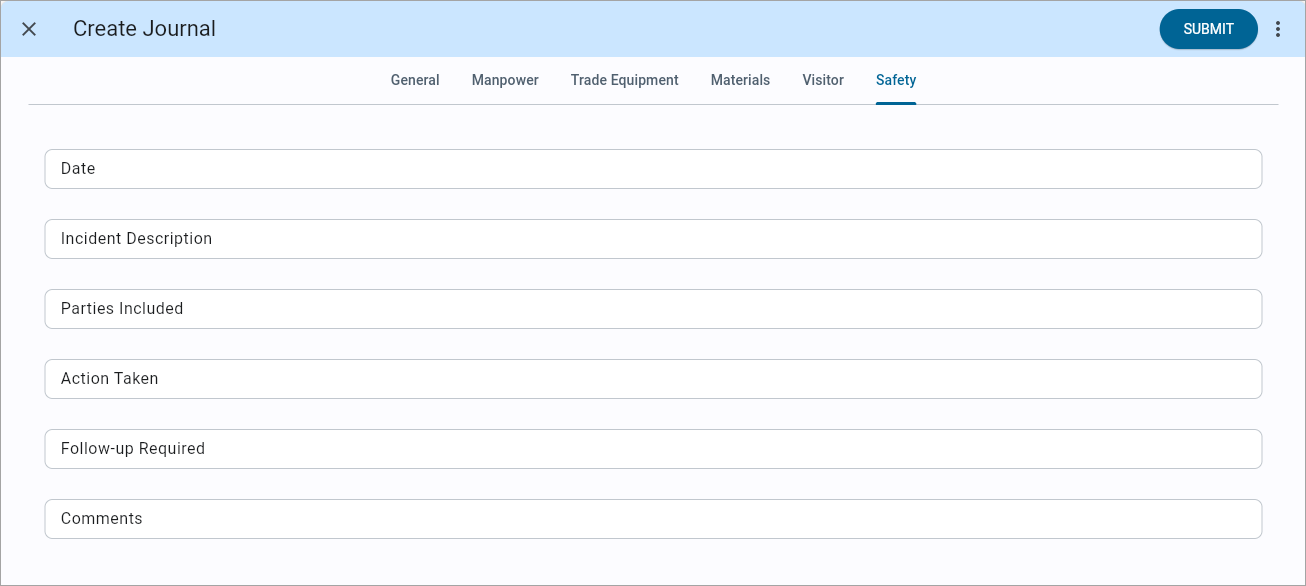
The Safety tab of the Create Journal screen
This tab can be used to enter any relevant safety notes for the journal entry. Enter all relevant safety information and press the [Save] button.
Emailing a Journal Report

A Journal report can be generated in various formats and shared via email. These formats are described in more detail in Types of Reports. To share a report, click on the Journal Menu icon ( ) and select the "Email Report" option in the drop-down menu.
NOTE: The Email Report feature requires the user’s Enterprise security role to have the ‘Report User’ flag enabled. For more information, please refer to System Data - Define Roles.
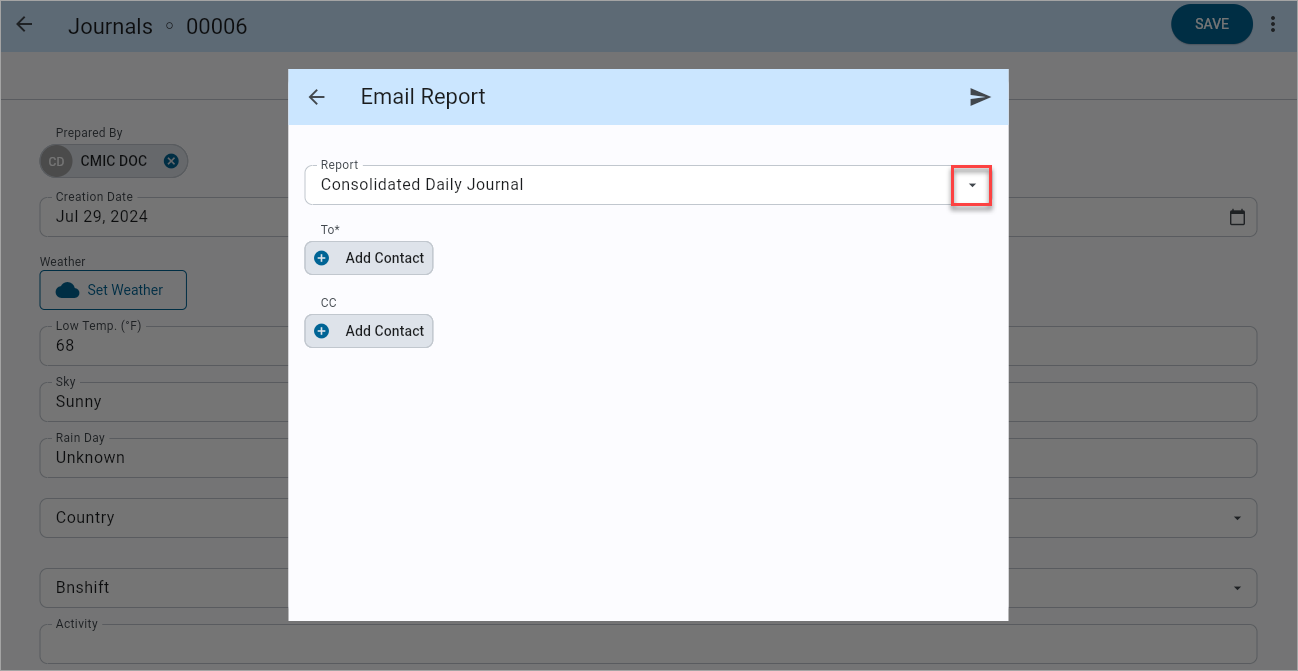
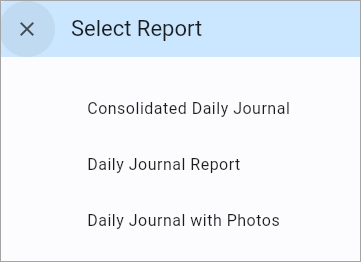
In the Email Report pop-up window, click on the Select icon (![]() ) in the Report field to choose the desired report type.
) in the Report field to choose the desired report type.
Next, use the To and CC fields to select the contacts who will be the recipients of the report.
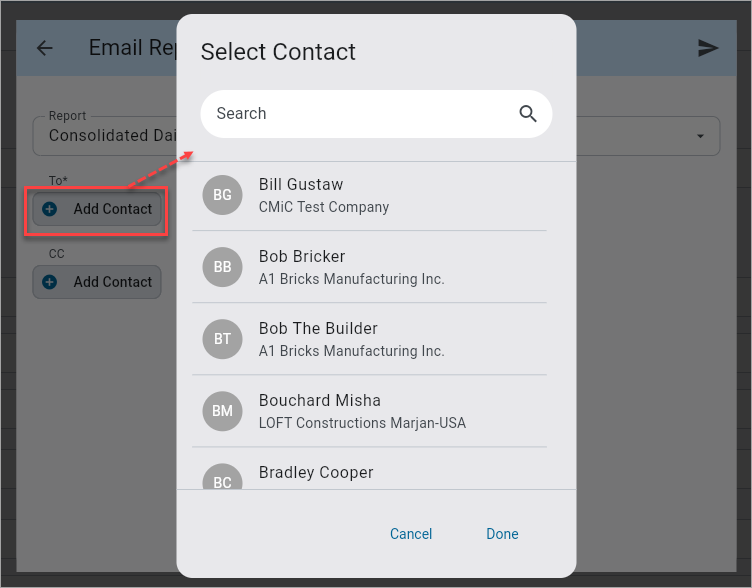
When finished selecting contact(s), press [Done].
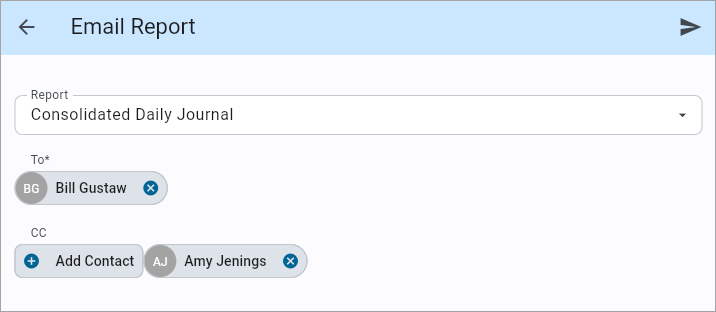
Once recipients are selected, click on the Send icon (![]() ) to email the chosen report to the recipients.
) to email the chosen report to the recipients.
Types of Reports
The report types available to be generated from the
NOTE: The report's logo is maintained in the Company Logo field on the Company Setup screen in the General Ledger module.
Daily Journal Report
The Daily Journal Report creates a summary of the daily journal with all notes included.
Consolidated Daily Journal
The Consolidated Daily Journal creates a consolidated summary of the Daily Journal.
Daily Journal with Photos
The Daily Journal with Photos creates a consolidated summary of the Daily Journal with photos.
Creating Journal Reports
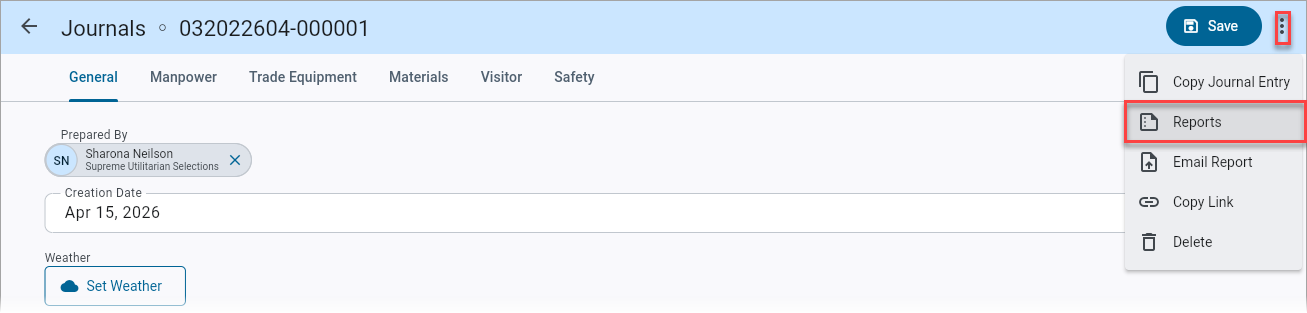
The reports printing functionality in Construct PM allows users the flexibility of printing a single report (form letter), or multiple reports (form letters) and attachments, the latter option producing a single PDF file with all the reports and attachments as pages of that file. For more information, please refer to Construct PM - Using Construct Reports .
Copying a Journal Entry
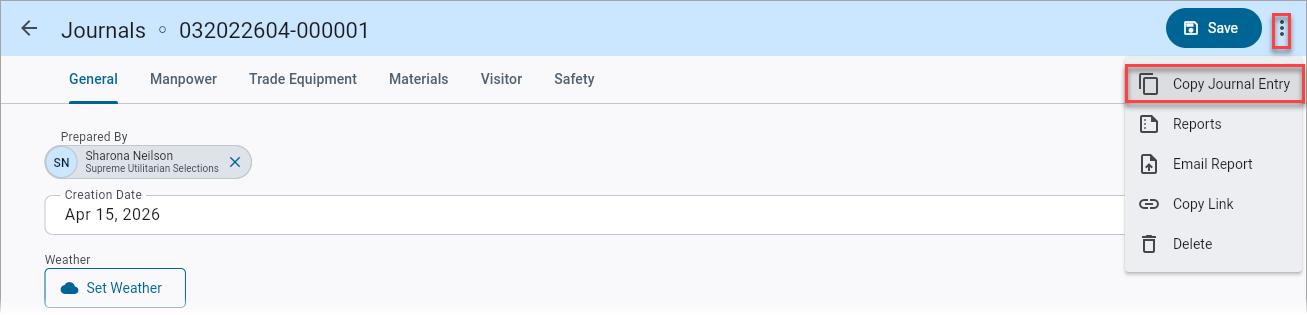
Select "Copy Journal Entry" from the menu to copy details to a new journal record.
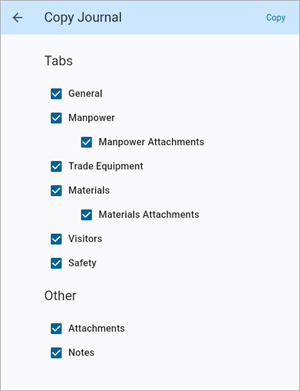
The Copy Journal screen allows users to choose which tabs they want to copy and also includes the ability to copy notes and attachments. The details will be copied into a new journal entry.
NOTE: This feature is only available for copying journal entries to/from the same project.
Locking a Journal Entry
Submitted Daily Journal records can be automatically locked after a user-defined period of time (days) from the daily journal date. A lock icon (![]() ) will indicate the record's locked status. The lock overrides any privileges (Update all, etc.) except for users that have been assigned an Admin role in CMiC Field - Security Roles.
) will indicate the record's locked status. The lock overrides any privileges (Update all, etc.) except for users that have been assigned an Admin role in CMiC Field - Security Roles.
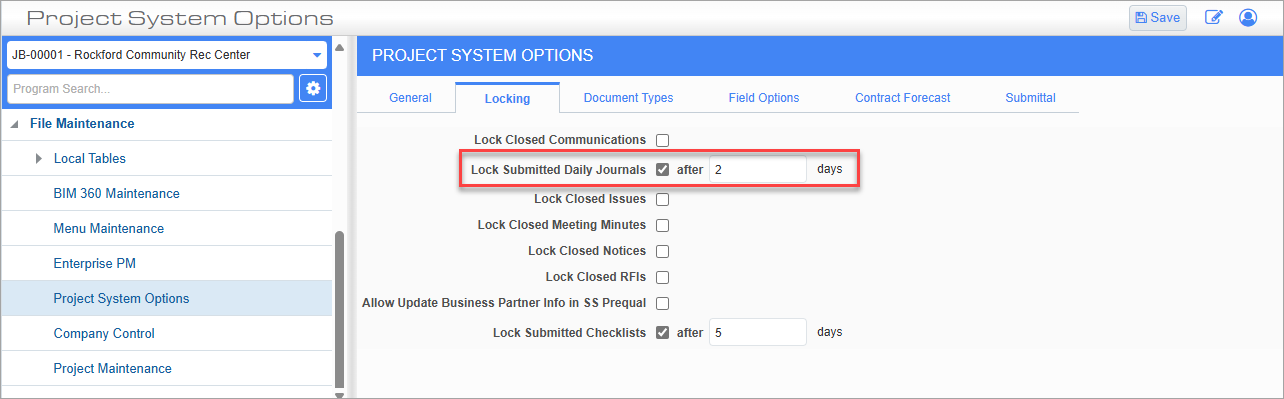
Project System Options; standard Treeview path: CMiC Field > File Maintenance > Project System Options – Locking tab
This feature is controlled by the 'Lock Submitted Daily Journals' checkbox on the CMiC Field - Project System Options - Locking - Tab. To immediately lock the daily journal upon submission, enter "0" days.
Exporting the Journal Log
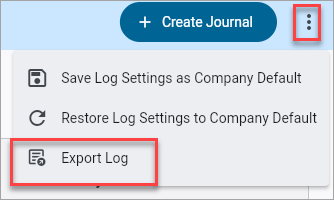
NOTE: The Export Log feature is only available on the web.
To export the Journal log, click on the Options Menu icon () and select the "Export Log" option in the drop-down menu. A CSV file is generated which contains all items that meet the current filters applied on the Journal log screen.
Preserve Log Settings

Users have the ability to preserve their last log settings, including filters, sorting, and grouping. Once applied, these settings will be maintained, allowing users to switch between modules without needing to reapply them. This feature works across all device types, ensuring consistency on both Web and Mobile platforms.
Admin users with the 'Logs - Set Default Log Configuration' security role privilege can set a company-level default log by selecting the “Save Log Settings as Company Default” option in Menu options (see Security) . This default will be applied to all users. However, users can still adjust their logs as needed, and any changes made will be preserved when they return. Additionally, users can reset their log settings at any time to the company default by selecting the “Restore Log Settings to Company Default” option. If no company default is set, this will reset the log to the application's default view.