Overview
The Issues screen can be used to enter any problems encountered with the project. Issues may be reported internally or externally.
Issues Log
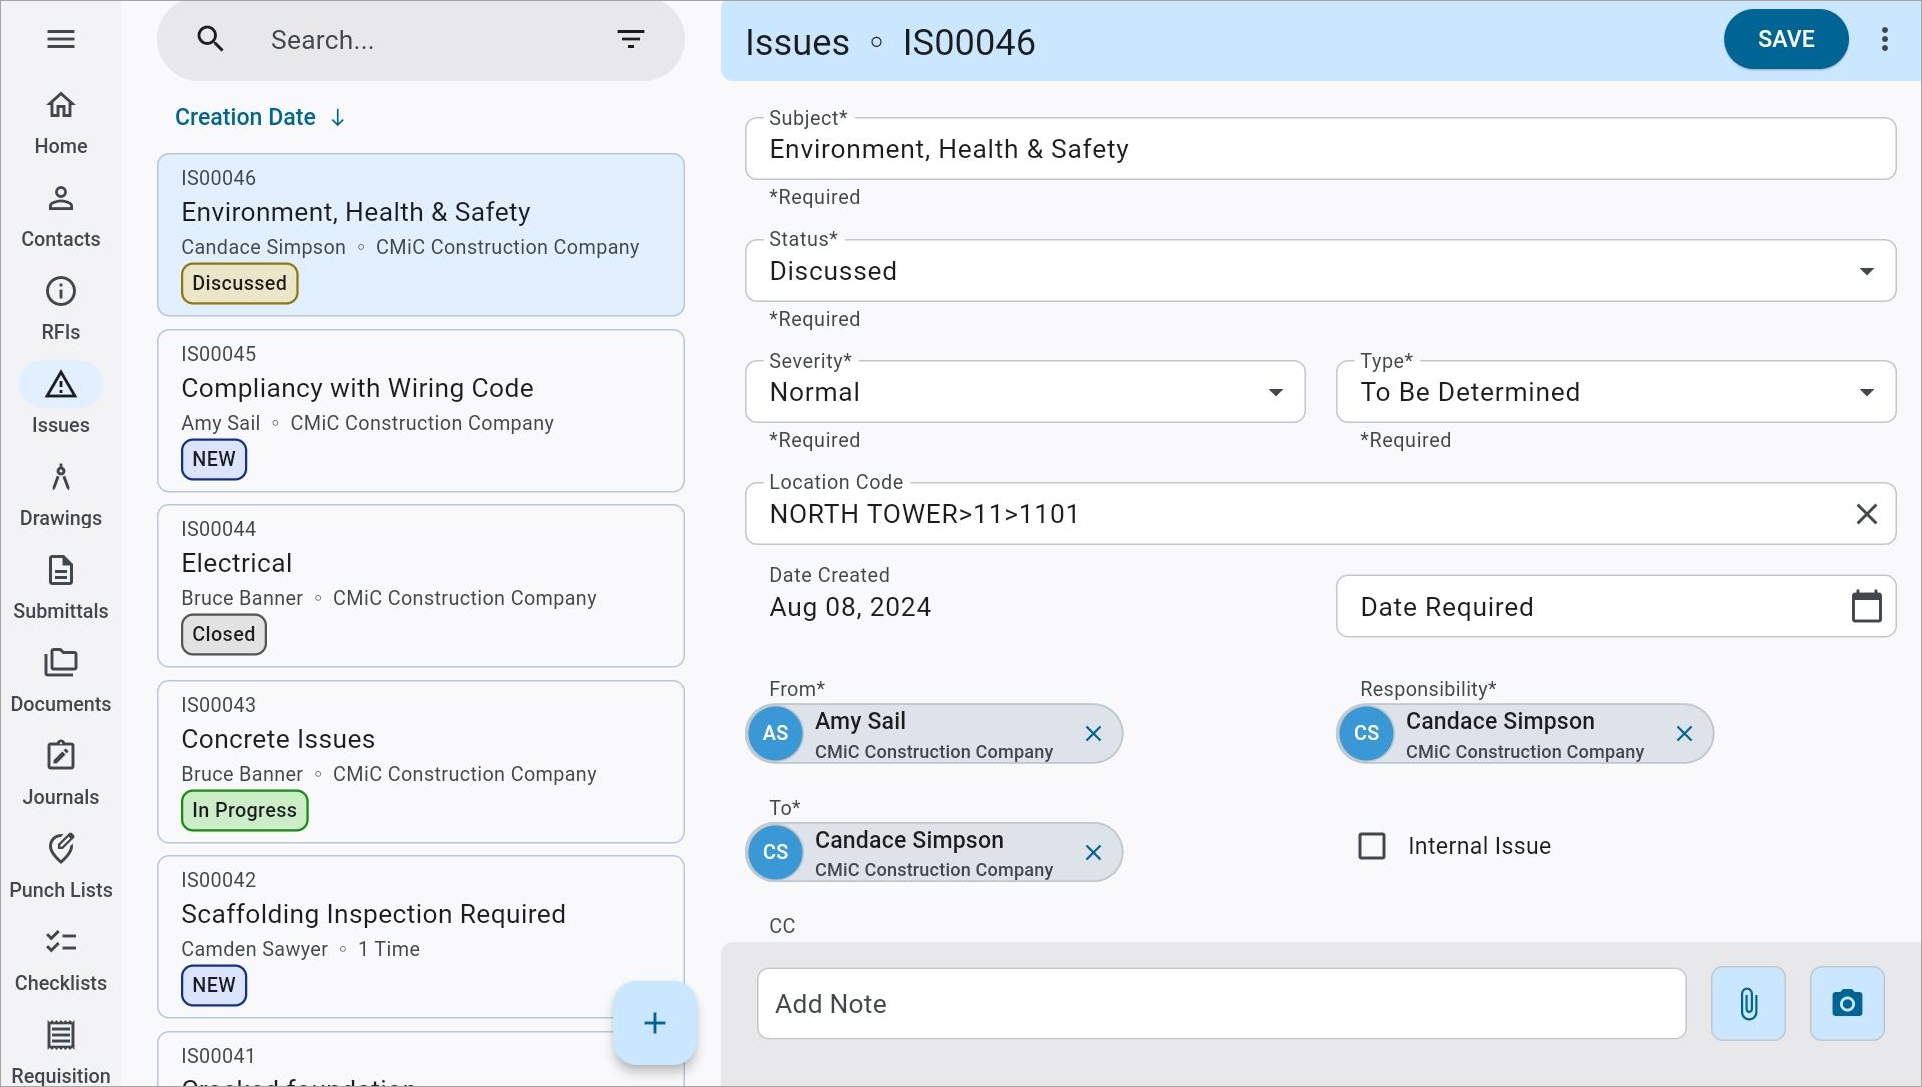
The Issues Log screen
The Issues log is what appears after selecting Issues from the main menu. To view an issue, select it from the menu on the left hand side. Issues are labeled by their issue number, subject, and status.
NOTE: Issue numbers are automatically assigned upon the creation of an issue record and cannot be edited from Construct PM.
The user may edit issues found in this screen, assuming they have the relevant security privileges enabled (please see the Security section for more details). Once the issue has been edited press [Save].
Search
Press the Filter icon (![]() ) in the search bar to filter the search results. Issues can be filtered by status, severity, type, and location code.
) in the search bar to filter the search results. Issues can be filtered by status, severity, type, and location code.
NOTE: The Search feature is currently only available for the following fields: Issue ID and Subject. Please use the available filters and Group By option as alternatives where applicable.
Sort
Press the icon that reads "Creation Date" to sort issues by record number, creation date, due date, or status. Press the arrow next to the sort option to sort in ascending or descending order.
[Group By] – Button
Press this button to group the log by creation date, from contact, responsibility, status, severity, or due date. Press the arrow to sort the results in ascending or descending order.
NOTE: This option is available via the Search bar for mobile devices.
Delete
Press this link to delete the issue record from the project.
Emailing an Issues Report
An Issues report can be shared via email. To share a report, click on the Issue Menu icon (![]() ) and select the "I/O Email " or "Email Report" option in the drop-down menu.
) and select the "I/O Email " or "Email Report" option in the drop-down menu.
I/O Email
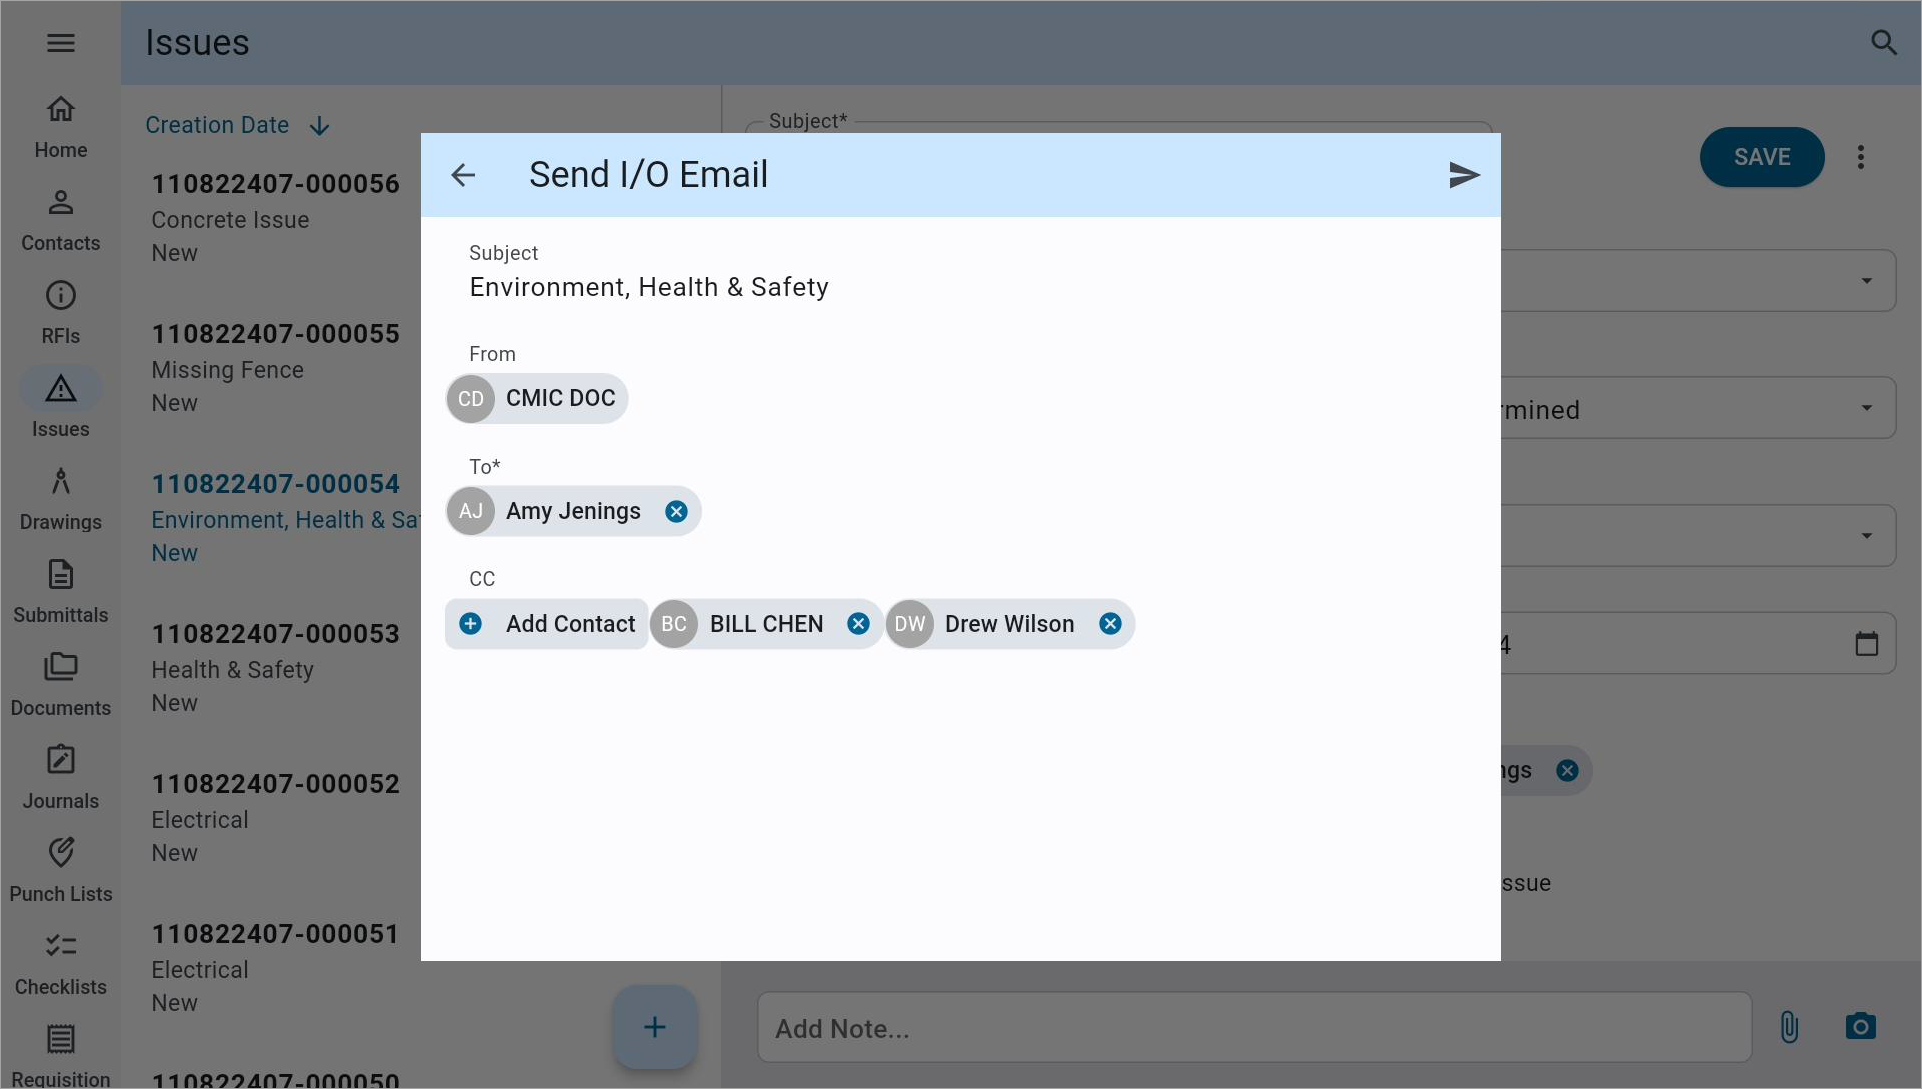
The I/O Email screen
Press the I/O Email icon to bring up the above screen. From here users can send I/O emails regarding the issue. The From, To, and CC fields default from their entries in the issue record.
Email Report
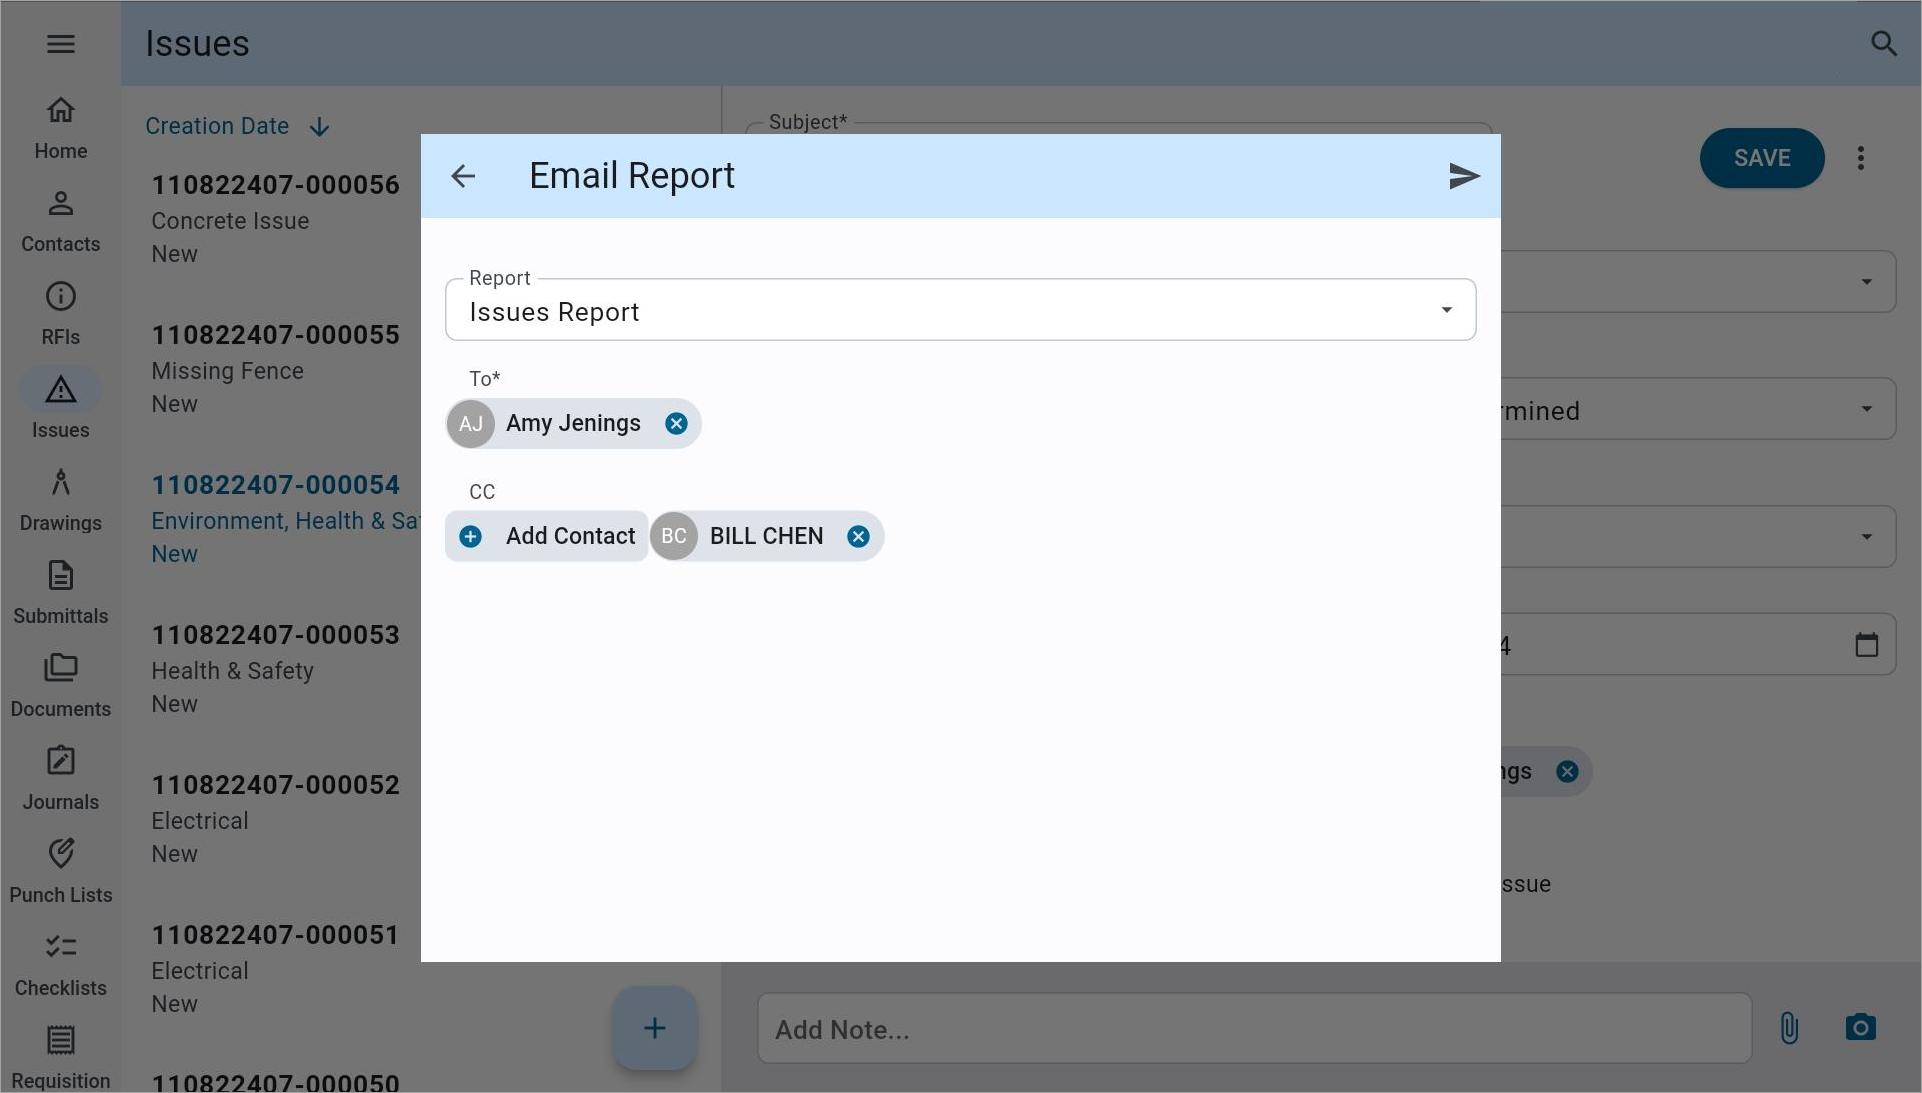
The Email Report screen
Press the Email Report icon to bring up the above screen. From here, users can send emails containing an issues report.
NOTE: The Email Report feature requires the user’s Enterprise security role to have the ‘Report User’ flag enabled. For more information, please refer to System Data - Define Roles.
Creating Issue Reports

The reports printing functionality in Construct PM allows users the flexibility of printing a single report (form letter), or multiple reports (form letters) and attachments, the latter option producing a single PDF file with all the reports and attachments as pages of that file. For more information, please refer to Construct PM - Using Construct Reports .
Creating An Issue
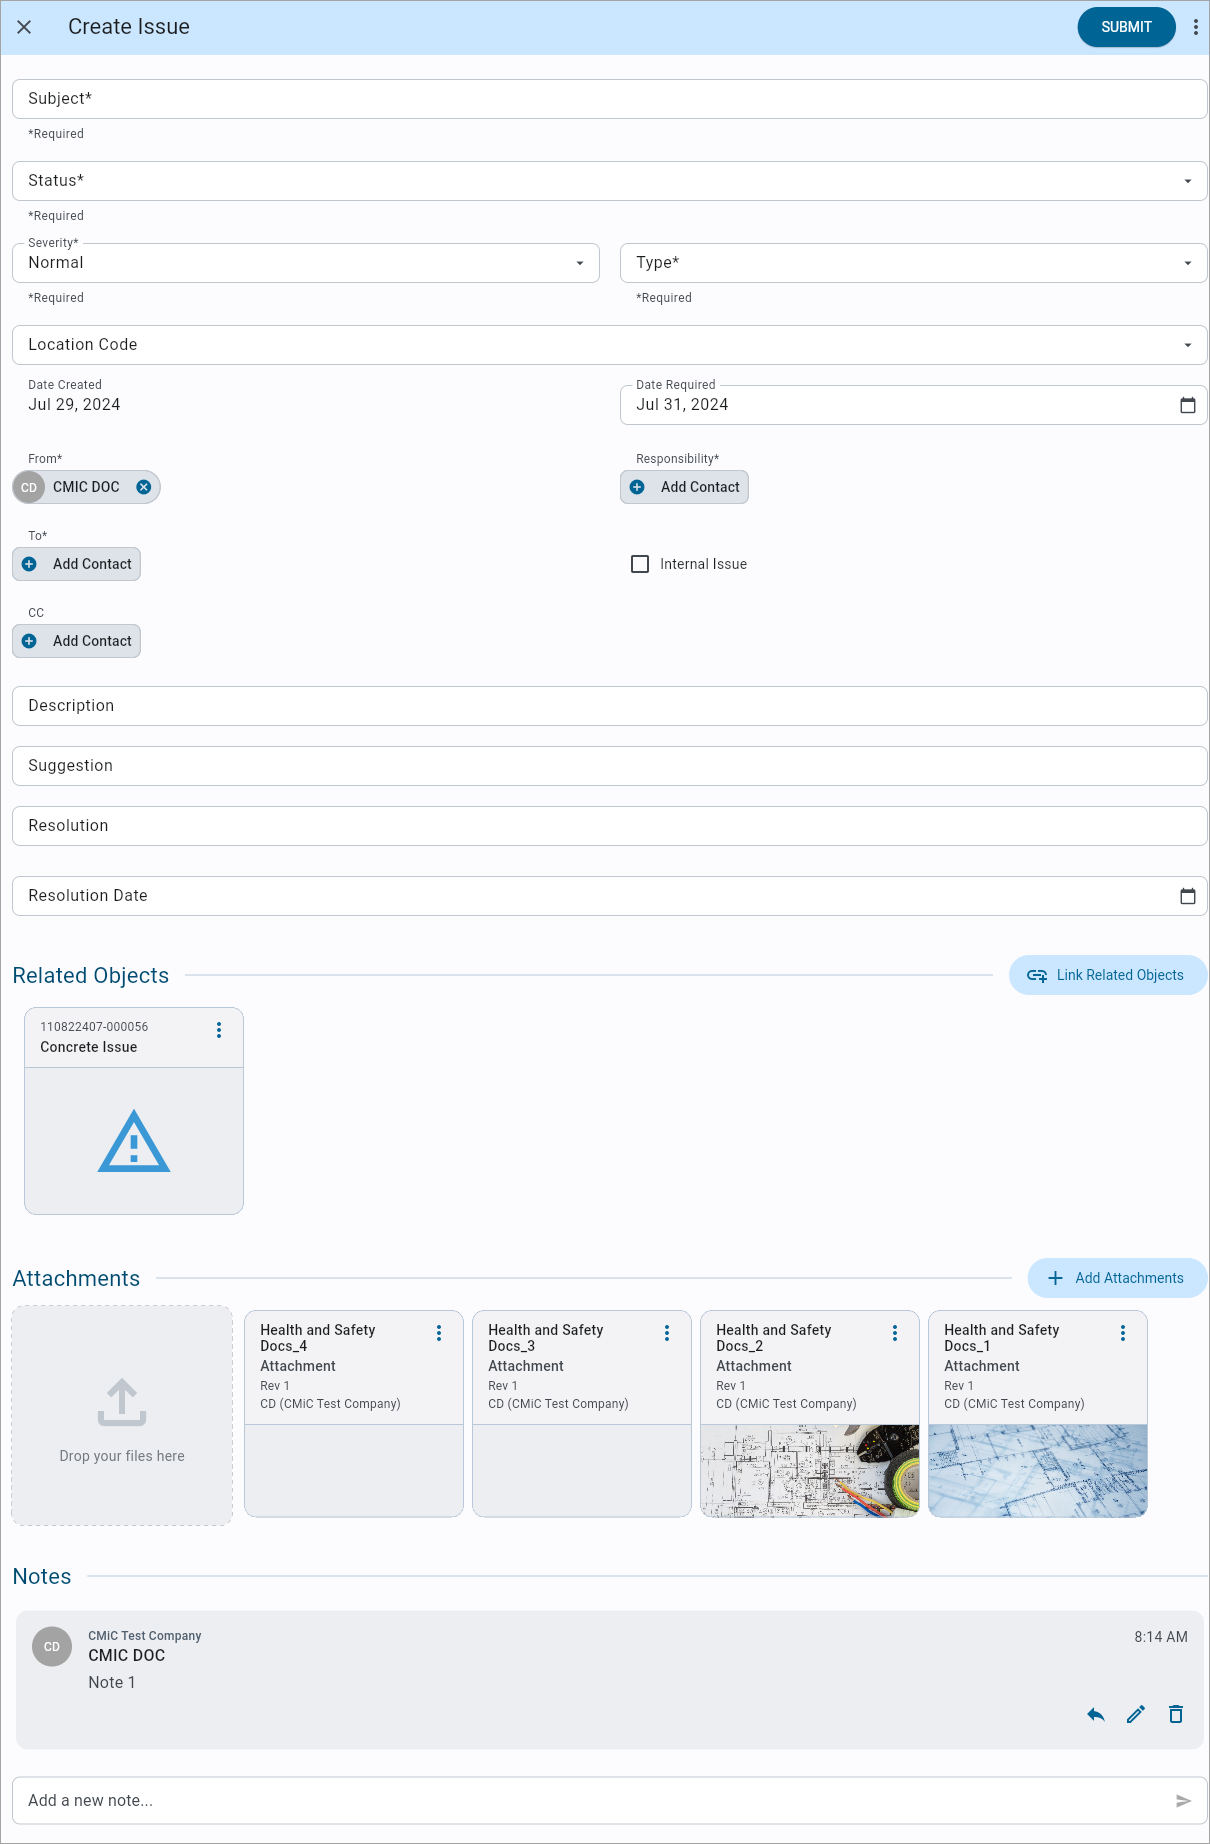
The Create Issue screen
To create an issue from within Construct PM, press the Plus icon at the bottom of the Issue log screen. Enter the issue's information, then either press [Submit] to send the issue record to the chosen parties or save the issue as a draft to return to it later.
Details – Tab
Subject
Enter the subject of the issue.
Status
Select the current status of the issue. Issues can be closed, in progress, new, open, or discussed. The status options available in the LOV are managed in the Maintain Data Process screen on the Issue Status node in the System Data module. For more information, refer to
Severity
Select the severity of the issue. An issue's severity can either be immediate or a matter of days.
Type
Select the type of issue being entered.
Location Code
Select the location on the jobsite. Locations codes are maintained in the Inspection Locations Maintenance screen in CMiC Field. For more information, refer to CMiC Field - Inspection Locations Maintenance.
Date Created, Date Required
The Date Created field is the current date by default. Enter the date by which a resolution to the issue is required.
From
Enter the user from who the issue will be sent after pressing [Submit]. This will default as the currently logged in user, although it can be changed if the user has the "Create" Project Role box checked (see the Security section for more details).
Responsibility
Select the contact responsible for resolving the issue.
To, CC
Select who to send the issue and who to CC.
Internal Issue – Checkbox
Check this box to limit access to internal users (i.e., C-type users ). When checked, only internal users will be able to view/interact with the issue.
NOTE: This checkbox is only available for C-type users.
Description
Enter a full description of the issue.
Suggestion
Enter a suggested resolution for the issue.
Resolution
Enter how the issue was resolved.
Resolution Date
Select the date the issue was resolved.
Related Objects
Press the [Link Related Objects] button in this field to link another Construct PM object to the issue record. This object can be an RFI, punch list item, or another issue.
Attachments
Press the [Add Attachments] button in this field to add an attachment to the Issue record. The user can either take a new photo with the device's camera, attach a file from the device library, or attach a document or drawing already saved in Construct PM. A counter will indicate the number of attachments on the record.
Notes
Enter any additional notes concerning the issue here.
History – Tab

Construct PM Issues - History tab
The History tab displays all existing trackable activities.
Batch Editing Issue Records
Users can perform a batch edit by selecting multiple records and updating them simultaneously. The Batch Edit option is a time-saving feature as, instead of manually editing each record separately, updates can be applied to a selection of records in a single action.
NOTE: Batch editing is only available on the web.
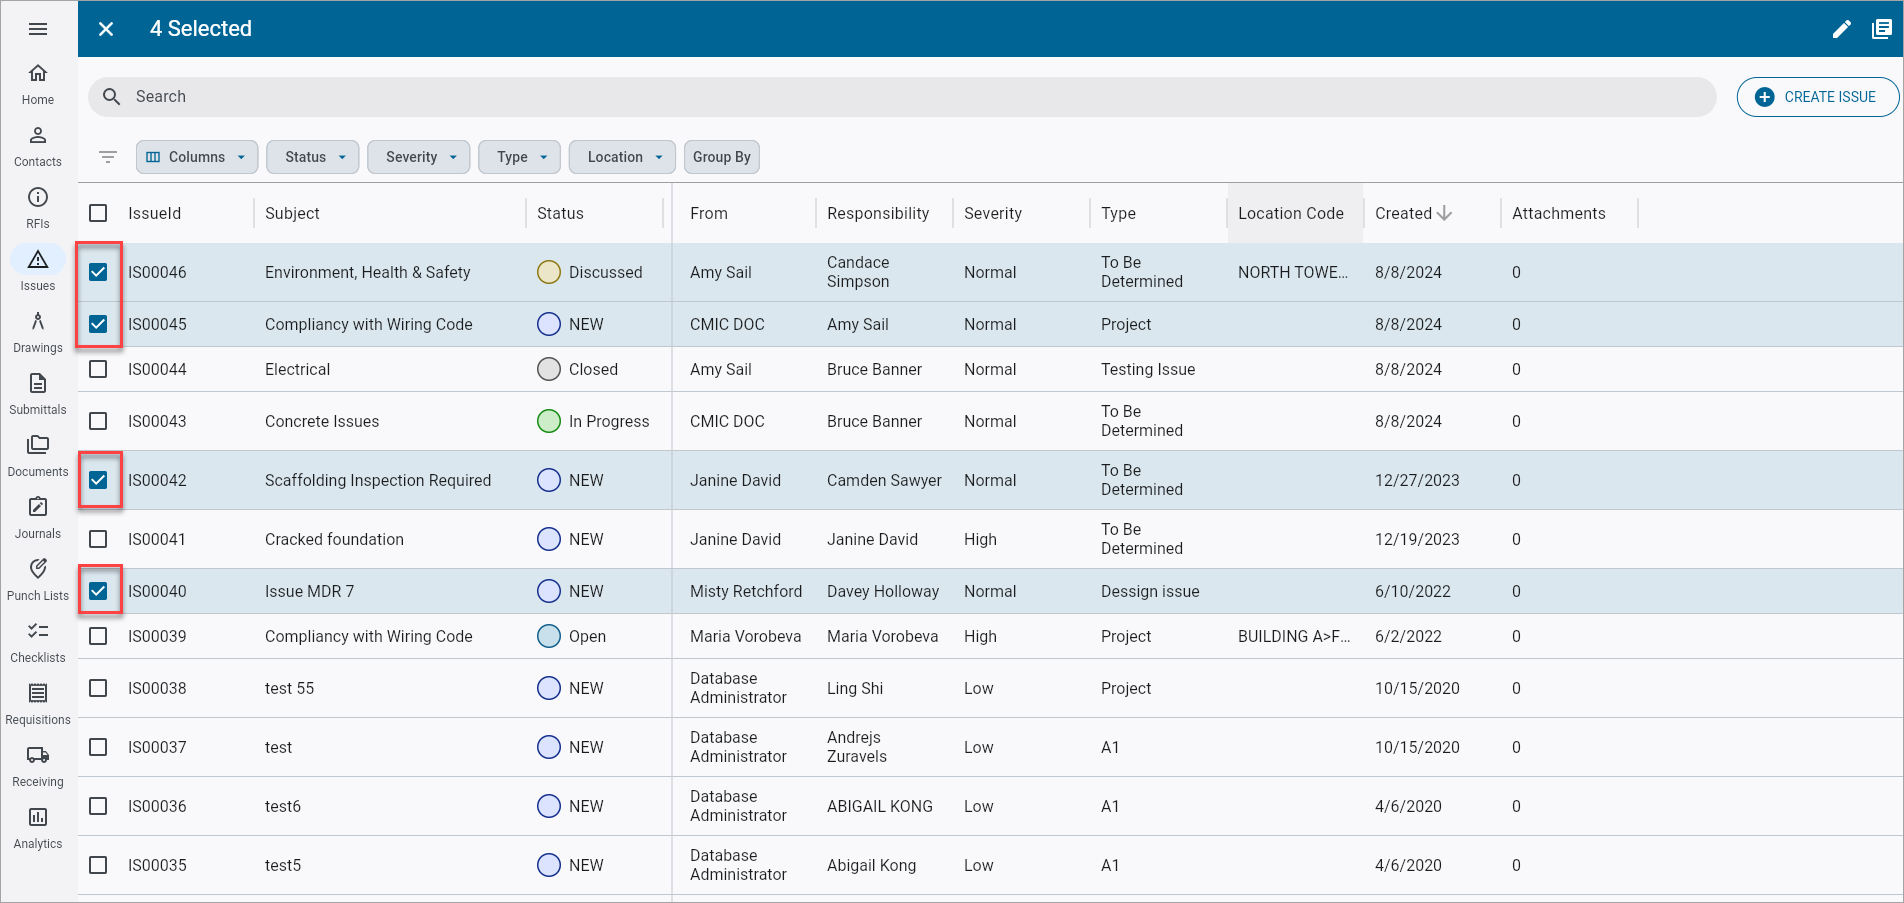
Select one or more issue records and press the Edit icon (![]() ) to launch the Batch Edit Issue Records pop-up window.
) to launch the Batch Edit Issue Records pop-up window.
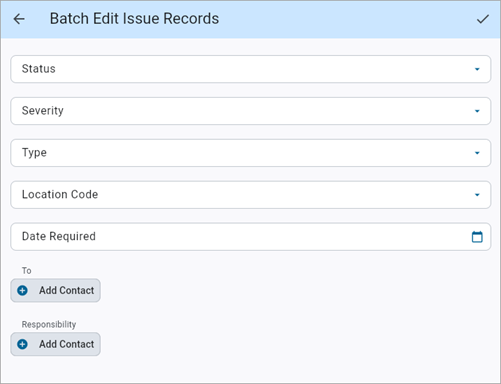
In the pop-up window, select new desired values for the available fields (e.g., Status, Severity, Type, Location, Date Required, To (Contact), and Responsible (Contact)). When finished, press the Save icon (![]() ) to apply the updates to the selected Issue records.
) to apply the updates to the selected Issue records.
Exporting the Issues Log
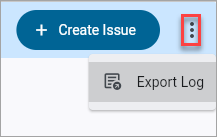
NOTE: The Export Log feature is only available on the web.
To export the Issues log, click on the Options Menu icon (![]() ) and select the "Export Log" option in the drop-down menu. A CSV file is generated which contains all items that meet the current filters applied on the Issues log screen.
) and select the "Export Log" option in the drop-down menu. A CSV file is generated which contains all items that meet the current filters applied on the Issues log screen.