NOTE: As of Nexus 01 (January 2026), Issues will be deprecated, meaning it will no longer be supported as soon as a customer installs Nexus 01. CMiC encourages users to use the web deployment of Construct PM - Issues. To add this custom menu item to the Treeview, please refer to Construct Feature.
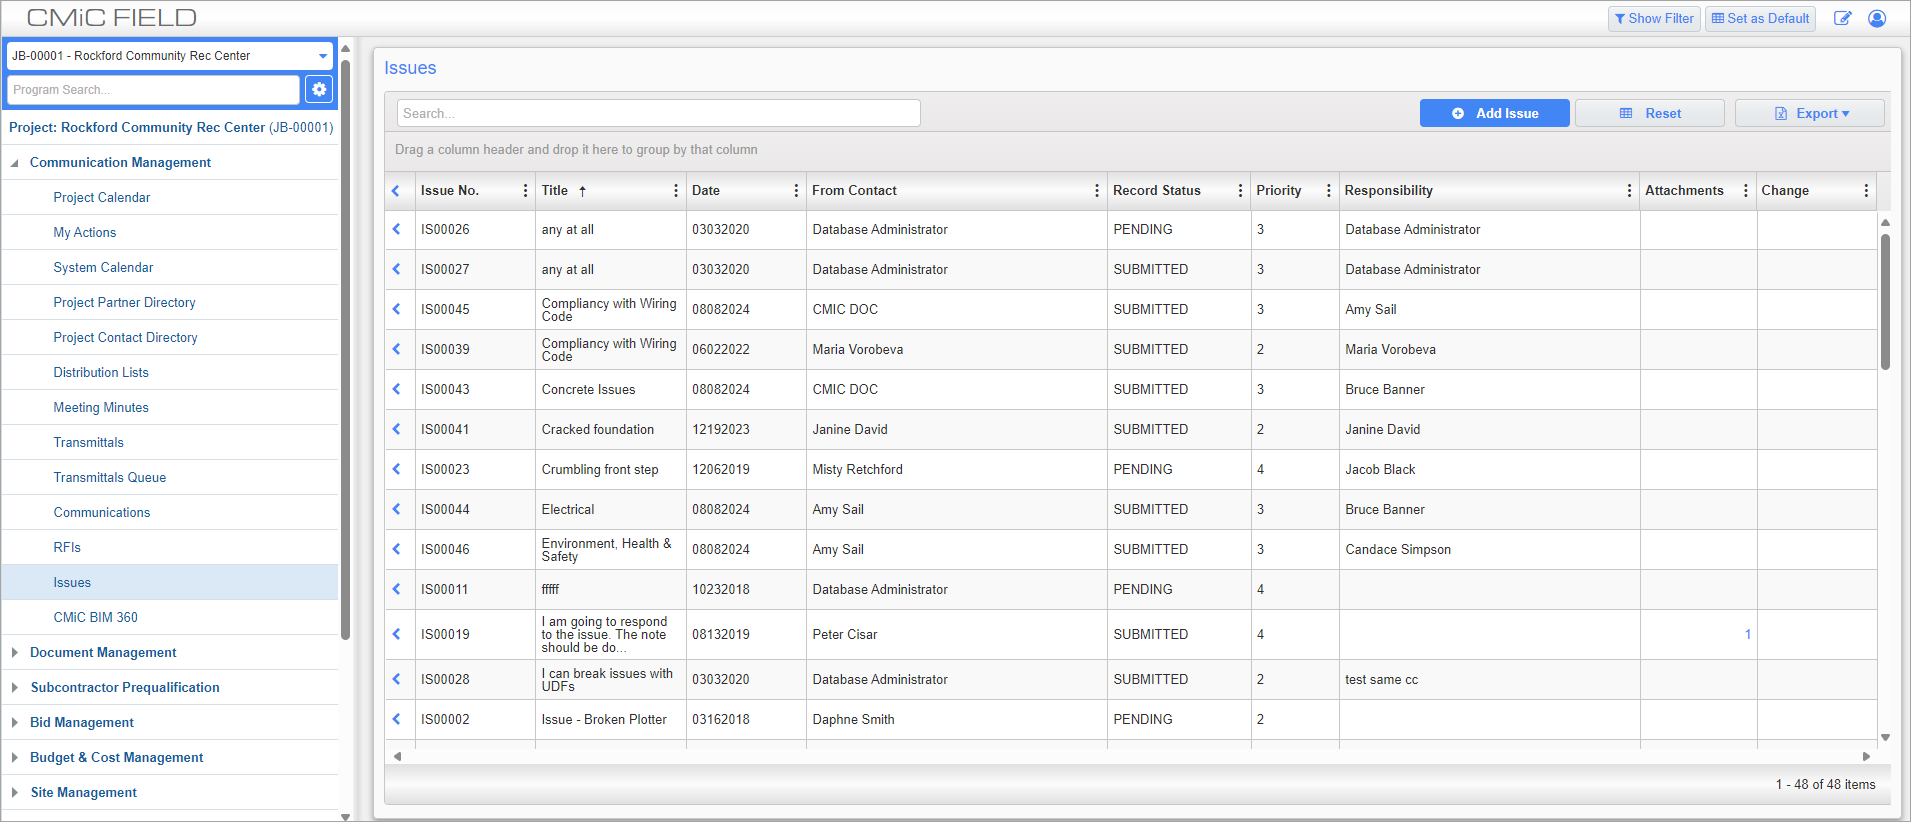
Issues; standard Treeview path: CMiC Field > Communication Management > Issues
The Issues screen can be used to enter any problems encountered with the project. Issues may be reported internally or externally.
Issue Detail – Tab
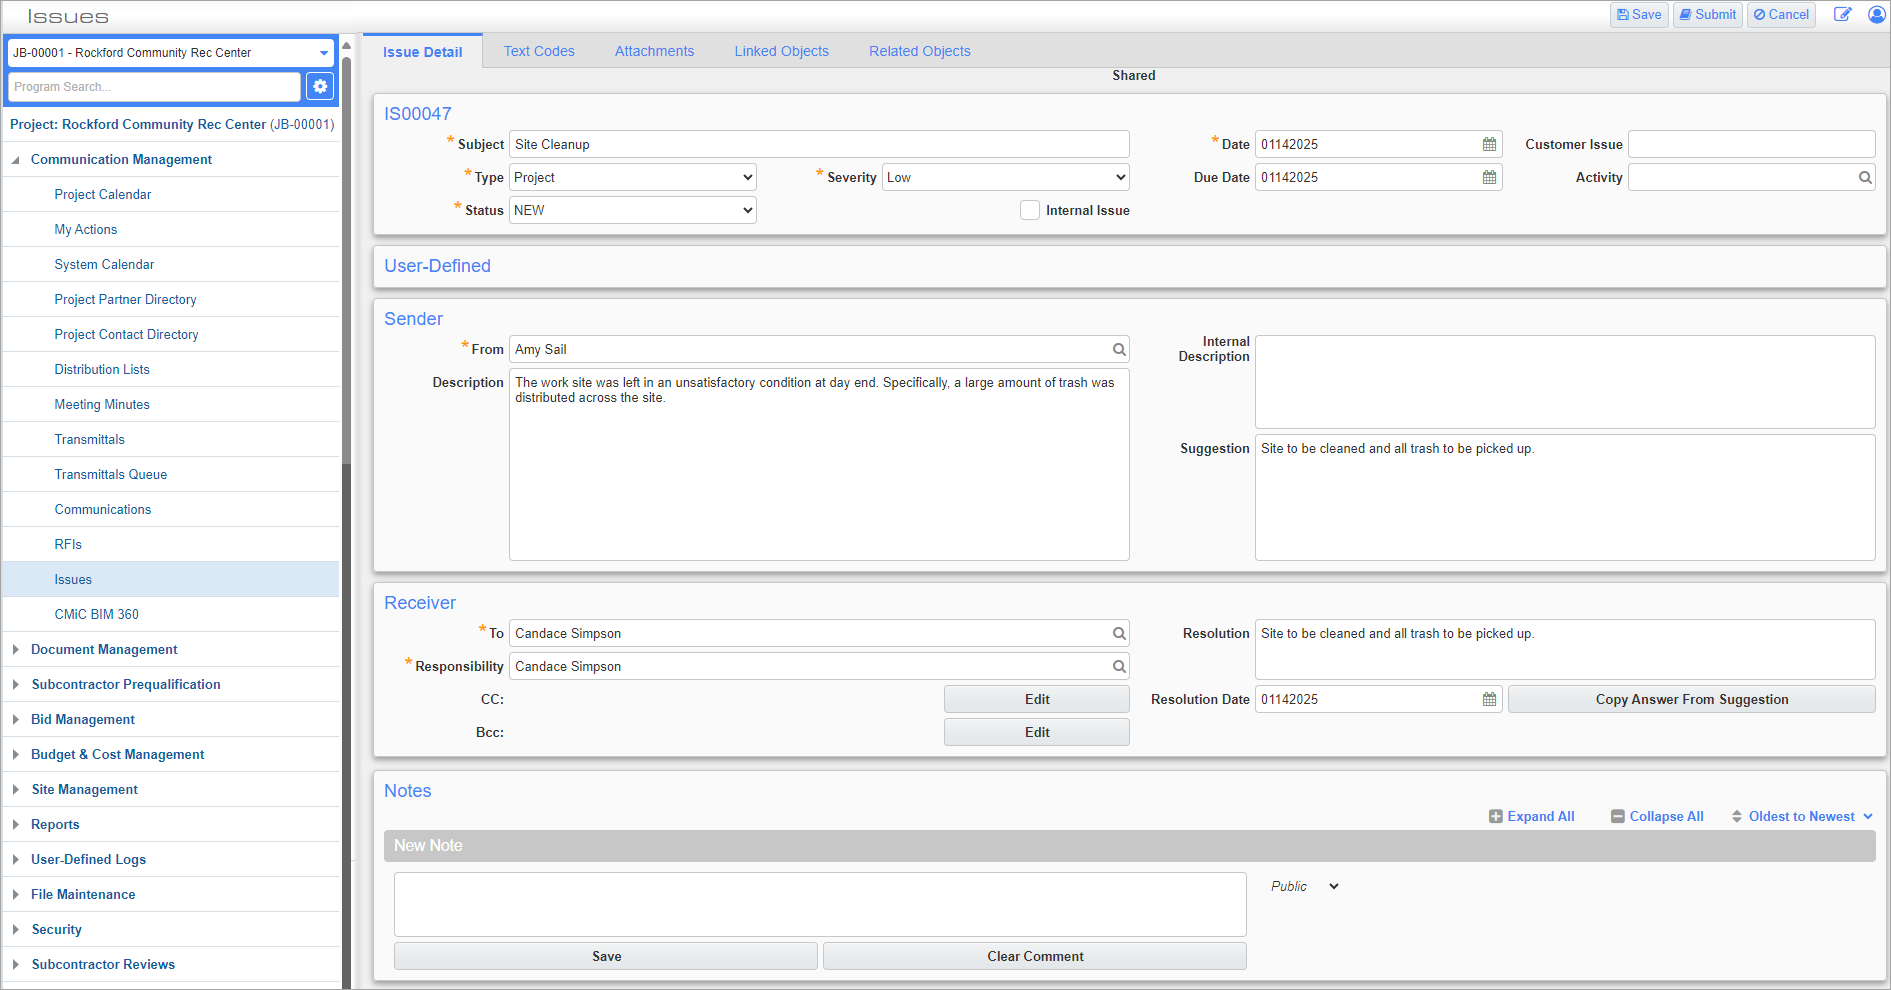
Issues; standard Treeview path: CMiC Field > Communication Management > Issues – Issue Detail tab
This tab can be used to enter all basic information regarding the issue. Until the record has been submitted, information in this tab may be edited without the employees entered in the To and CC fields being made aware. Once the issue record has been saved, the following fields appear on this tab:
Subject
Enter a summary of the issue.
Date, Due Date
Enter the reporting date and resolution date of the issue.
Customer Issue
Enter the customer issue tracking number.
Type
Select whether the issue concerns the project, a testing issue, or something yet to be determined.
Severity
This field sets the issue severity as one of: "Low", "Normal", "High", "Critical", or "Wishlist". The default is set to "Normal" but the default be changed in the General tab of the Project System Options screen (standard Treeview path: CMiC > File Maintenance > Project System Options > General - tab).
Activity
Select the activity which the issue concerns. These codes can be set in the Activities screen (standard Treeview path: CMiC Field > File Maintenance > Activities).
Status
Select whether the issue is new, closed, in progress, or open. The status options available in the LOV are managed in the Maintain Data Process screen on the Issue Status node in the System Data module. For more information, refer to
NOTE: Once an issue has been closed it can be reopened if the ‘Reopen Closed Issues’ box is checked on the CMiC I/O Options screen (standard Treeview path: Enterprise > System > Setup > CMiC I/O Options – Miscellaneous tab). Closed issues can then be reopened by adding a new note or attachment via CMiC I/O. This can only be done if the sender is assigned the ‘Add Notes/Attachments to Closed Issues’ privilege.
Internal Issue – Checkbox
Check this box to limit access to internal users (i.e., C-type users ). When checked, only internal users will be able to view/interact with the issue.
NOTE: This checkbox is only available for C-type users.
Once the issue record has been saved, the following fields appear on this tab:
Submitted – Checkbox
This box is checked if the issue has been submitted. This box is display only and can’t be checked or unchecked manually in this screen.
RFI #
This field appears after the record has been saved but only becomes enabled once the issue has been submitted. Press the Create RFI link to open a pop-up of the RFIs screen. Submitting an RFI from this screen links it to the selected issue. For more information, please refer to RFIs.
Change #
This field appears after the record has been saved but only becomes enabled once the issue has been submitted. Submitting a change item from this screen links it to the selected issue. For more information, please refer to Potential Change Items.
Press the Link Change link to attach a pre-existing PCI to the issue record.
NOTE: Once a PCI is linked to an issue, a link to the PCI can be found in the Issues log under the Change column. Refer to CMiC Field - Change Column in Logs for more information.
Sender
From
Enter/select the employee reporting the issue.
Description, Internal Description
Enter a full description of the issue and, if it differs, the internal company description.
Suggestion
Enter the suggested course of action to take in response to the issue.
Receiver
To
Enter/select the employee to whom the issue report is directed.
NOTE: If the user responds to an I/O email regarding an issue but they have not yet been assigned a security role, then any response they send will only be received if they are the "To" contact and not if they are the "CC" contact.
Responsibility
Enter/select the employee responsible for resolving the issue.
Resolution
Enter the way in which the issue was resolved.
Resolution Date
Enter/select the date on which the issue was resolved.
[CC], [BCC] – Buttons
Press these buttons to add employees to CC or BCC when the issue is submitted.
NOTE: Only employees with a valid email address in their project contact details will appear in the CC/BCC list in the Send I/O Email screen. If no email is assigned, the contact will be removed from the list. For more information, please refer to CMiC Field - Project Contact Directory.
[Copy Answer From Suggestion] – Button
Press this button copy the entry made in the Suggestion field to the Resolution field.
Documents
Press the box labeled “Drag and drop files or click to select” to select documents to attach to the issue. This section only appears once the issue has been submitted.
Notes
Notes can be added to an issue record by completing the text field and pressing the [Save] button. Once the issue has been submitted, replies and supporting documents may be added to the saved notes by pressing the [Add Reply] button and the Plus icon ( ), respectively.
Each time the responsibility of the issue is changed the system automatically adds a note indicating by who it was changed.
Text Codes – Tab
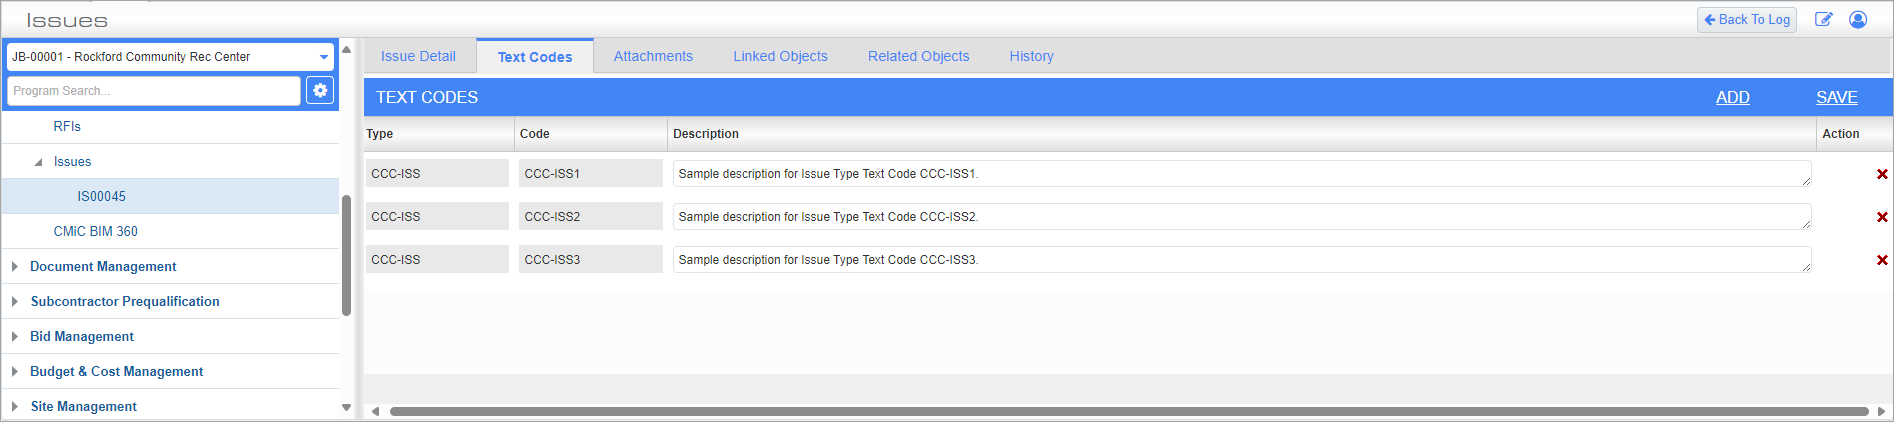
Issues; standard Treeview path: CMiC Field > Communication Management > Issues – Text Codes tab
This tab can be used to select the text code for the issue. Default text codes can be set in the Defaults tab of the Company Control screen (standard Treeview path: File Maintenance > Company Control – Defaults tab).
Text types and text codes can be set in the Systems Global Tables screen (Standard Treeview path: System > Global Tables > Text Type and Text Code).
Attachments – Tab

Issues; standard Treeview path: CMiC Field > Communication Management > Issues – Attachments tab
This is one of many Attachments tabs throughout CMiC Field. Please refer to Attachments for further details.
Linked Objects – Tab

Issues; standard Treeview path: CMiC Field > Communication Management > Issues – Linked Objects tab
This tab works in much the same way as the Related Objects tab. The difference here being that objects can be searched for within this tab. This tab is only available in the Issues screen.
Search For
Enter up to three keywords, separated by commas, to narrow the search. Leave this field empty and press the [Search] button to return all objects which match the other search criteria.
The search can also be refined by selecting object type and file extension. Select the object to link in the Search Results section by checking the relevant checkboxes. Press the Assign link to link the object to the issue record.
NOTE: The Linked Objects and Related Objects tabs use different tables and so any object linked via one is not available in the other.
Related Objects – Tab

Issues; standard Treeview path: CMiC Field > Communication Management > Issues – Related Objects tab
For objects added in the Related Objects tab of an issue, the issue will be available in the Related Objects tab of that object and vice versa.
To add an object, click on the Assign Objects link to open the Related Objects pop-up window. From the popup, filter the objects by object type using the drop-down menu, then select objects related to the issue and press the [Accept] button.
If the issue is linked to a drawing set’s annotation(s), the Store Drawing Sheet link will be displayed. Refer to Storing a Drawing Sheet for details on using this feature.
History – Tab

Issues; standard Treeview path: CMiC Field > Communication Management > Issues – History tab
This tab can be used to view all changes and edits made to an issue record. This tab is view-only and so changes must be made with the [Edit] button in the Issue Detail tab.