Overview
Before entering labor hours into the Construct CT Legacy timesheet, crew codes must be created. If a crew is not created or selected, the user will not be able to enter any timesheets. Once the user has selected a default project in the Construct CT Legacy menu, all crew codes linked to that project will be available to the user.
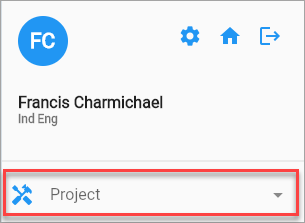
The Project option in the Construct CT Legacy menu is used to select a project.
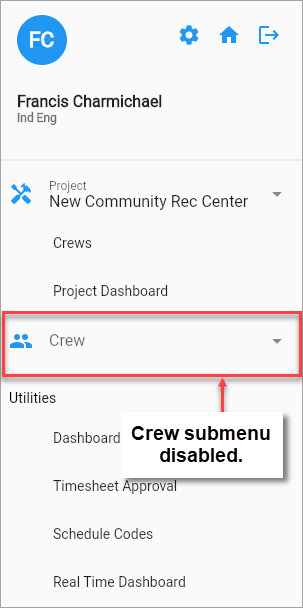
Before any crews have been created for a project, the menu items listed under the Crew option in the Construct CT Legacy menu will be disabled as shown above (i.e., Timesheet, Maintain Crew, Checklists, Crew Dashboard, and Crew Real-Time Dashboard).
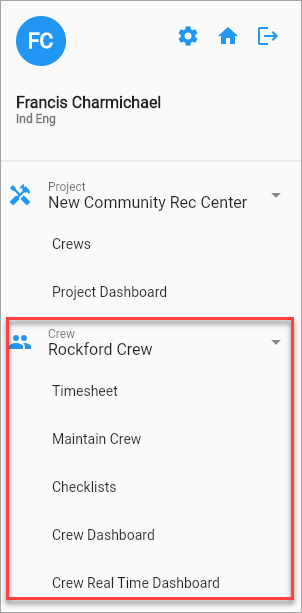
Clicking on the Crew option launches a pop-up window where existing crew codes can be selected. If a crew code is selected for the project, then the menu items listed under the Crew will become enabled.
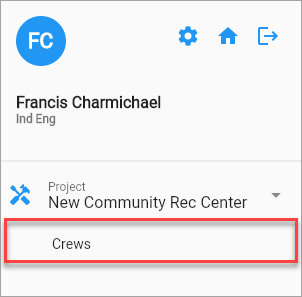
If no crew codes exist for a project, then new ones can be created using the Crews option under the project.
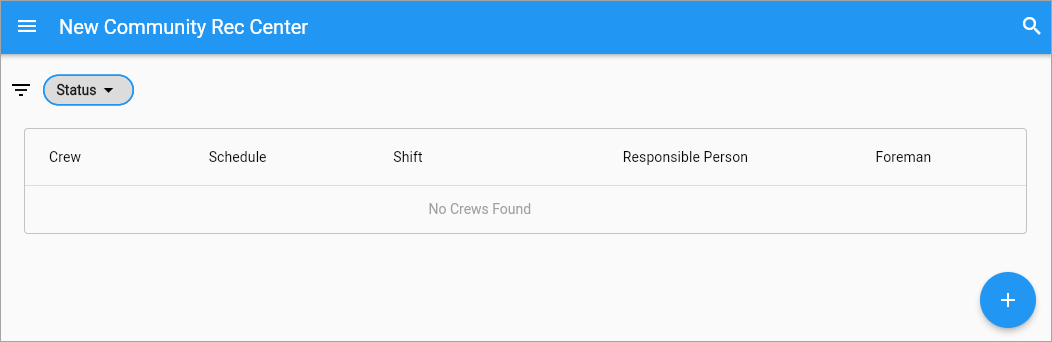
Clicking on Crews launches a log screen, which will be empty at first if no crews exist, but as new crews are created for the project, they will be listed here in this log.
Creating a Crew
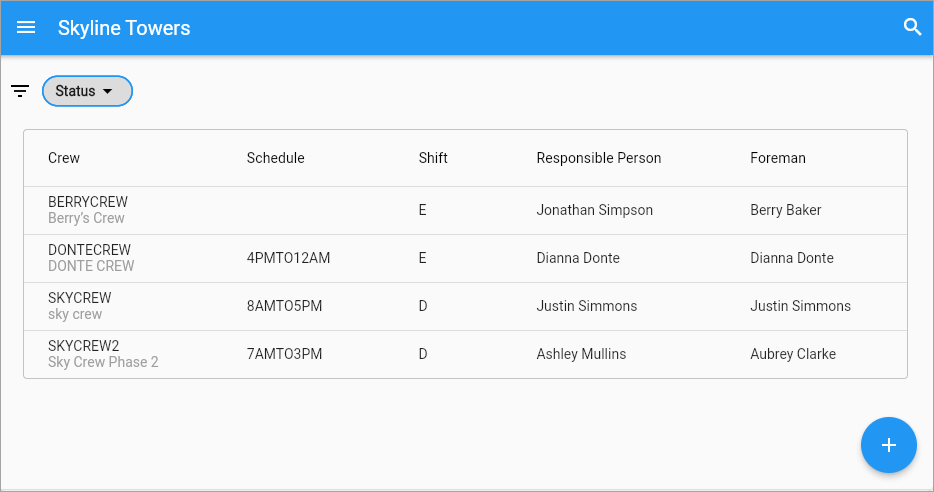
After selecting their project, users can create crew codes by selecting the Crews option from the Construct CT Legacy menu. Upon opening, the screen displays a log showing all existing crews for the project. Press the [Status] button to filter the log by active/inactive crews. Press the Plus icon ( ) to create a new crew code.
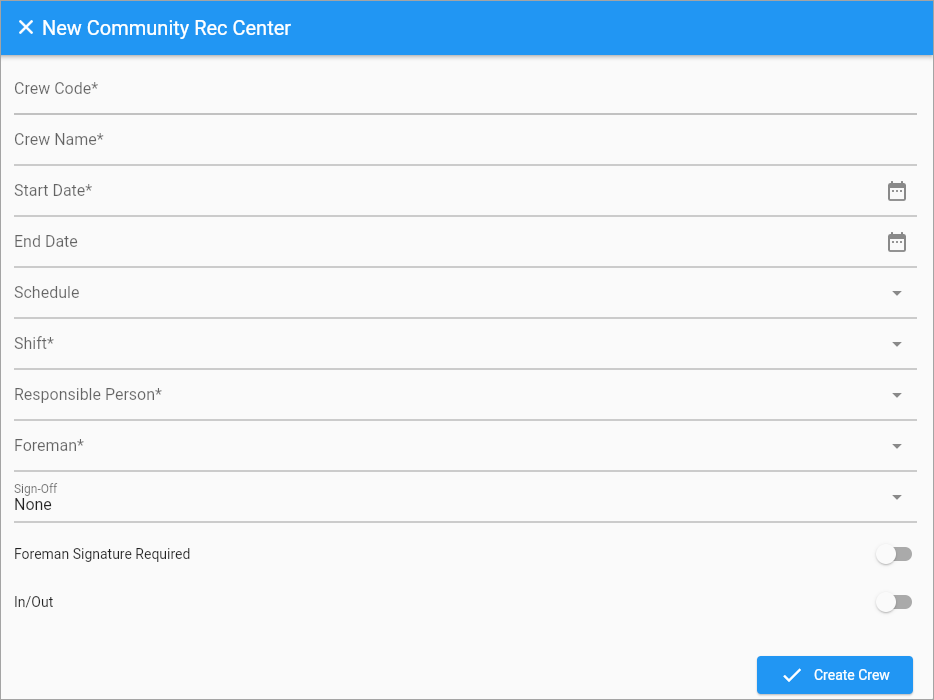
After clicking on the Plus icon, a screen is launched for the user to start entering details for the new crew. Complete the fields in this screen for the crew being created and then click the [Create Crew] button.
The fields on this screen are described in more detail below.
Crew Code
Enter the crew code. This must be a new code as each crew must have a unique code.
Crew Name
Enter the full name of the crew.
Start Date, End Date
Enter the date range for which the crew is available to work. Crew codes are available for timesheets that fall within this date range.
These values default from the crew start and end dates but can be changed for individual crew members.
The end date designates when the crew code will be deactivated.
Schedule
Select a schedule for the crew. Schedules are used to populate in/out times in the timesheet, when in/out times are required for timesheet entry.
Shift
Select a shift code for the crew. Shift codes are independent from schedules and are used to select pay, charge, and bill rates set up in payroll.
Responsible Person
Select the project coordinator or superintendent responsible for managing the crew's time. The LOV will only display employees who have been assigned a personal E-Time access code.
For more information, please refer to E-Time - Access Codes.
Foreman
Select the foreman for the crew. The LOV will only display employees who have been assigned a personal E-Time access code.
For more information, please refer to E-Time - Access Codes.
Sign-Off
Select whether the sign-off process requires an employee signature daily or weekly, or select none if it is not required. The sign-off will be available when the foreman is submitting the timesheet for approval.
Foreman Signature Required
This toggle should be activated if the sign-off process requires a foreman's signature.
In/Out
This toggle should be activated to make in/out time required for timesheet entry.
[Create Crew] – Button
When finished completing the fields above, click this button to create the new crew.
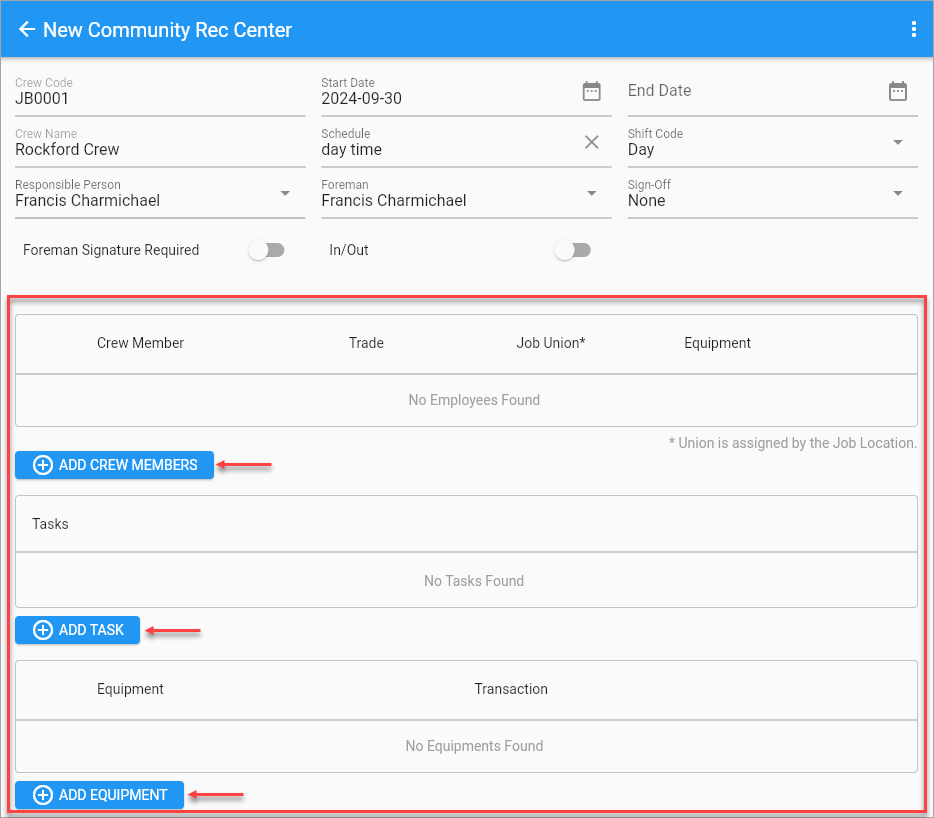
Once the crew is created, add crew members, tasks, and equipment using the buttons available on the screen.
Adding Crew Members
![Screenshot of Pop-up Window Launched from [Add Crew Member] Button](../../Resources/Images/Crewtime_R12/Creating_Crews_28_289x413.png)
Pop-up window launched from [Add Crew Member] button
Press the [Add Crew Member] button to launch the Select Employees pop-up, shown above.
An individual employee can be selected and added, or multiple employees can be selected and added all at once. The list of employees available for selection in this pop-up window is based on user access codes, which are set up in E-Time.
Selected employees will be added to the crew code with the default trade and union from their Employee Profile. The union will be defaulted by the Job Location setup if defined.
Union By Job Location
When creating a crew for a project that is using the job union location functionality, the screen will pull the employee and will replace the union based on the job union location. For more information about how this functionality is used, refer to Construct CT Legacy - Union by Job Location.
Adding Crew Member Details
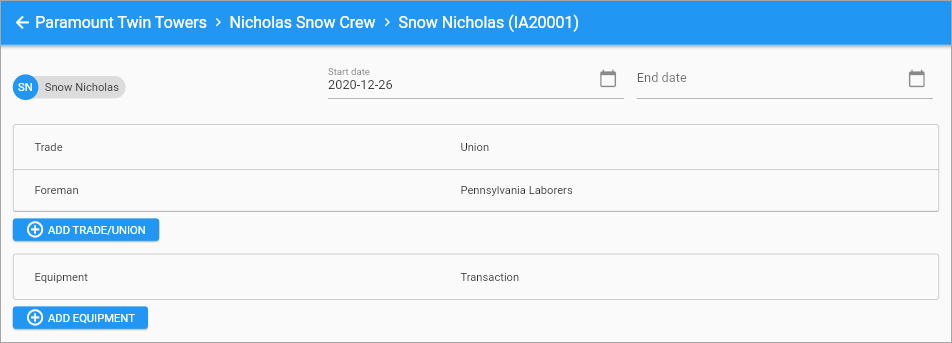
After crew members have been added, their individual details can be edited by tapping the crew member name.
Start Date, End Date
Enter the date range for which the employee is available to work. Employees are available for selection in timesheets that fall within this date range.
[Add Trade/Union] – Button
Crew members can be assigned multiple trades and unions if necessary. Assigned trades and unions will default to the employee's timesheet. Ability to assign multiple trades/unions is determined by the 'Allow to Change Trade and Union' checkbox located in the Crew/Mechanic Time Configuration screen in E-Time, shown below.
NOTE: When the 'Allow to Change Trade and Union' box is checked, the 'Show Union' box is checked by default. The 'Show Union' checkbox is used to control whether the union is displayed in an employee's timesheet.
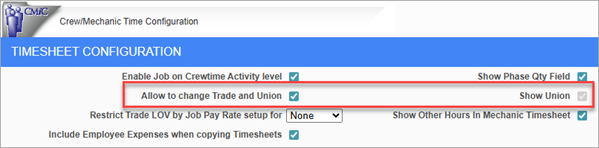
Crew/Mechanic Time Configuration; standard Treeview path: E-Time > E-Timesheet > Crew Timesheet Configuration
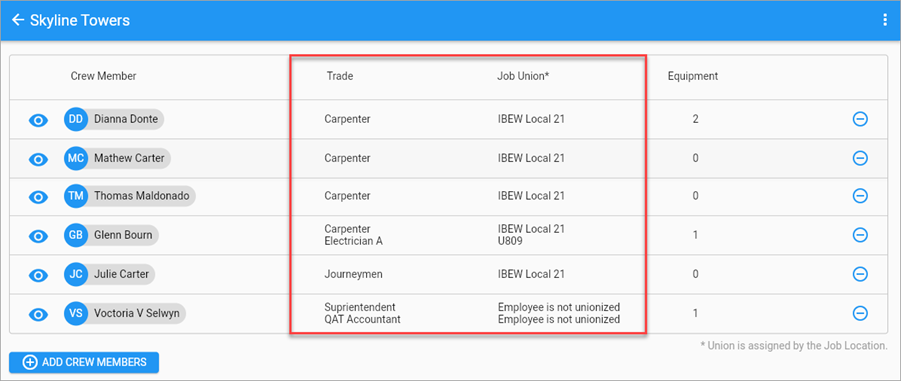
Checking this box causes the [Add Trade/Union] button to appear as shown below.
![Screenshot of Crew Time Entry with [Add Trade/Union] button.](../../Resources/Images/Crewtime_R12/CT_CreatingCrew_AddTradeUnion.png)
Additional trade and union combinations can be assigned to the employee, and new entries will not overwrite existing records. The Delete icon (![]() ) is available for newly added rows. Existing trade/union values defaulted from the employee's profile cannot be edited but can be deleted via the Crew Timesheet Entry screen once additional trade/union combinations are added.
) is available for newly added rows. Existing trade/union values defaulted from the employee's profile cannot be edited but can be deleted via the Crew Timesheet Entry screen once additional trade/union combinations are added.
NOTE: If the 'Allow to Change Trade and Union' privilege is not enabled, the Delete icon will not be visible and users will be restricted to the defaulted trade/union.
[Add Equipment] – Button
This button can be used to add multiple equipment codes for a crew member. The codes will default to the employee's timesheet.
Adding Tasks
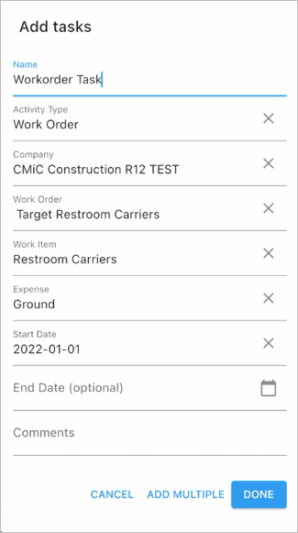
![Screenshot of Pop-up Window Launched from [Add Task] Button](../../Resources/Images/Crewtime_R12/Creating_Crews_29.png)
Pop-up window launched from [Add Task] button
Task codes (also known as cost codes) can be added to individual employees or the whole crew by pressing the [Add Task] button. Codes can either be selected from the list of pre-existing tasks or created by pressing the Add Single Task link, highlighted above.
NOTE: Users can switch back and forth from adding a single task to adding multiple tasks by clicking on the Add Single Task/Add Multiple link. When users click on the Add Single Task link, the link switches to become the Add Multiple link and vice versa.
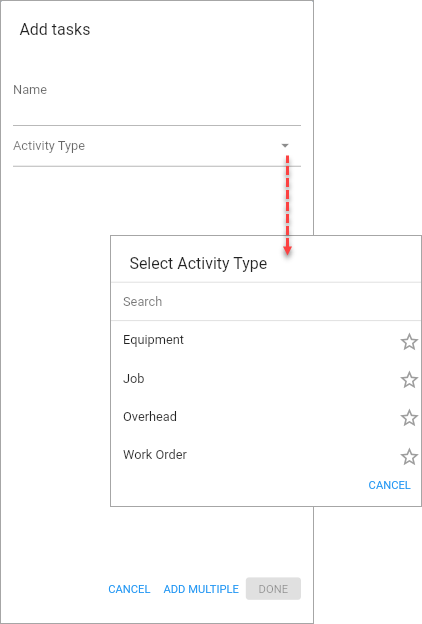
New tasks are defined as one of four activity types:
-
Job
-
Equipment
-
Overhead
-
Work Order
Examples of each activity type entry screen are given below. Once added, tasks are color coded in the Tasks section, as shown below.

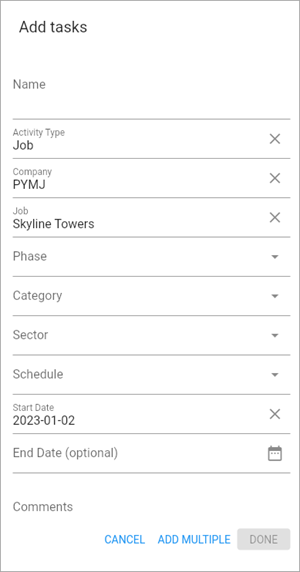
Job
This activity type is only available when the 'Enable Job on Crewtime Activity level' box is checked in Timesheet Configuration, as shown below.
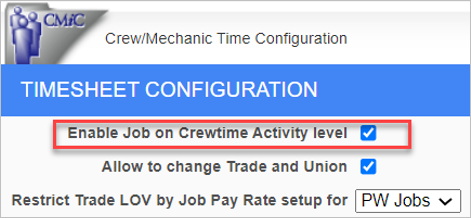
Crew/Mechanic Time Configuration; standard Treeview path: E-Time > E-Timesheet > Crew Timesheet Configuration
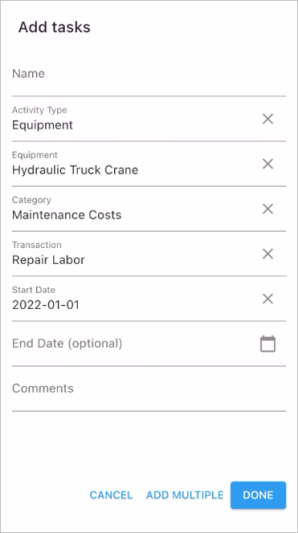
Equipment
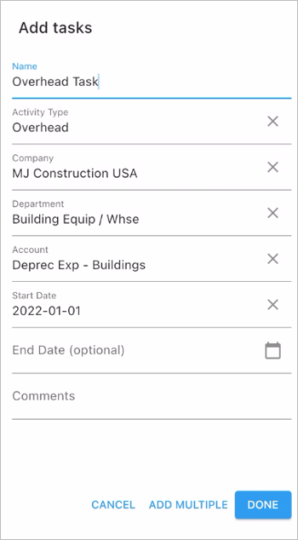
Overhead
Work Order
Adding Task Details
The type of details required will depend on the type of task being created.
For example:
-
Job Task: Company, Job, Phase, Category, PCI, Sector, Schedule, Start Date, End Date, Comments.
-
Equipment Task: Equipment, Category, Transaction Code, Start Date, End Date, Comments.
-
Overhead Task: Company, Department, Account, Start Date, End Date, Comments
-
Work Order Task: Company, Work Order, Work Item, Expense, , Start Date, End Date, Comments.
Company
Select a company. The list of companies available for selection will depend on the user's assigned security access.
Job
Select a job code. The list of available job codes will be limited to the codes available under the selected job company.
Phase (Cost Code)
Select a cost code for the job. The list of available cost codes depends on several key settings. Firstly, it depends on the user's assigned access code. Access to cost codes is assigned to an access code on the Jobs tab of the Assign Access Code screen in the E-Time module.
For more information, please refer to E-Time - Access Codes.
NOTE: At least one category must be assigned to the cost code and the cost code must be active in the Job Costing module, otherwise it may not be available for selection in this field. Refer to Assign Job Cost Codes screen in Job Costing for more information on setting up cost codes.
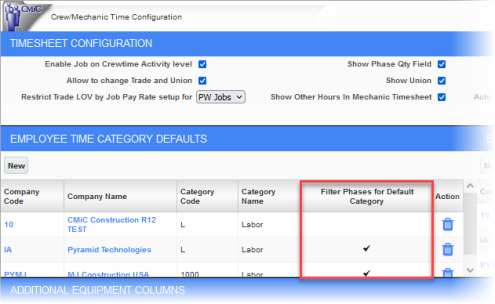
Crew/Mechanic Time Configuration; standard Treeview path: E-Time > E-Timesheet > Crew Timesheet Configuration
Secondly, if the 'Filter Phases for Default Category' box is checked in the Crew/Mechanic Time Configuration screen in E-Time under Employee Time Category Defaults, then the cost code (i.e., phase) will be filtered for the default category assigned. The default category must be assigned to the cost code in the Assign Job Cost Codes screen in the Job Costing module, otherwise all cost codes will be displayed. Thirdly, the cost codes listed could also be filtered based on the hour type specified in the Job tab of the Hour Type Job/Account Mapping screen in E-Time.
Category
Select a category for the job and cost code combination.
NOTE: A category must be assigned to a cost code and the category must be active. Refer to the Assign Job Cost Codes screen in the Job Costing module for more information. The category must also be declared under the Jobs tab of the Assign Access Code screen as a specific category code or an asterisk (*) in E-Time.
For more information, please refer to E-Time - Access Codes.
PCI
The WBS fields will be available based on the job setup. All four WBS fields will be displayed to enter WBS details. Refer to Using WBS for more information.
Sector
Select a job sector code. These codes can be based on the type of area (commerce, residential, etc.) or the location (the state, for example) in which the job is being done.
Schedule
Select a job schedule code. These codes are maintained in the Construct CT Legacy Schedule Codes screen. For more information, please refer to Construct CT Legacy - Schedule Codes.
Equipment, Category, Transaction
These fields are available for an equipment type task. Select an equipment item, category code, and transaction code. The system will retrieve the related charge and bill rates from the Equipment Costing module.
Department, Account
These fields are available for an overhead type task. Select the department and account to which the overhead charges are applied. These fields are only available for “Department" type overheads.
Work Order, Work Order Item, Expense
These fields are available for a work order type task. Select the work order, work order item, and related expense code
Start Date, End Date
Select a start and end date (optional) for the task. The start date defaults to the current date but can be changed.
Comments
Enter any comments about the task in this field.
Adding Equipment
![Screenshot of Crew with [Add Equipment] button highlighted](../../Resources/Images/Crewtime_R12/Creating_Crews_35.png)
Press the [Add Equipment] button to add default equipment to the crew code. Multiple equipment codes can be added for each crew member.
Deleting Crew Codes
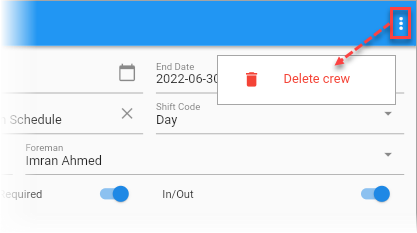
Press the Menu icon (![]() ) to display the [Delete Crew] button.
) to display the [Delete Crew] button.
The Delete option will only be available to delete a crew if the crew is not referenced on a job or if no timesheets have been entered against the crew code.
Inactivating Crew Codes
A crew code can be inactivated by entering a date in the End Date field. The crew code will become inactive on the specified end date.