Overview
The Job Union Location functionality recognizes the job location union versus the employee's home local union for wage rates and fringes. For example, if an employee's home local is 480 but they work in local 500, the hours/benefits/deductions for the employee will be calculated for local 500 for the time worked at that local. The Timesheet Entry screen captures the union code by trade and work location.
NOTE: The Trade Class screen and the Union Locations Maintenance screen may need to be added to the Treeview menu. Refer to
Setup
Complete the following steps to set up the mapping required to use this functionality.
-
Create classifications for trade codes. Trade code classifications are created and maintained on the US Payroll - Trade Class screen.
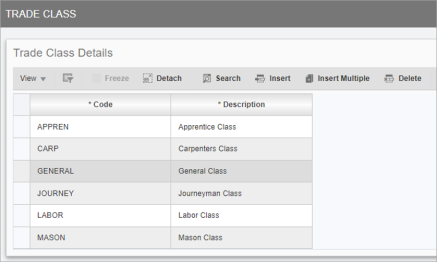
Pgm: PYTRADECLASS – Trades Class; standard Treeview path: US Payroll > Setup > Local Tables > Trade Class
-
Assign trade code classifications to trade codes. Trade code classifications are assigned to trade codes on the US Payroll - Trade Codes screen using the Trade Class field.
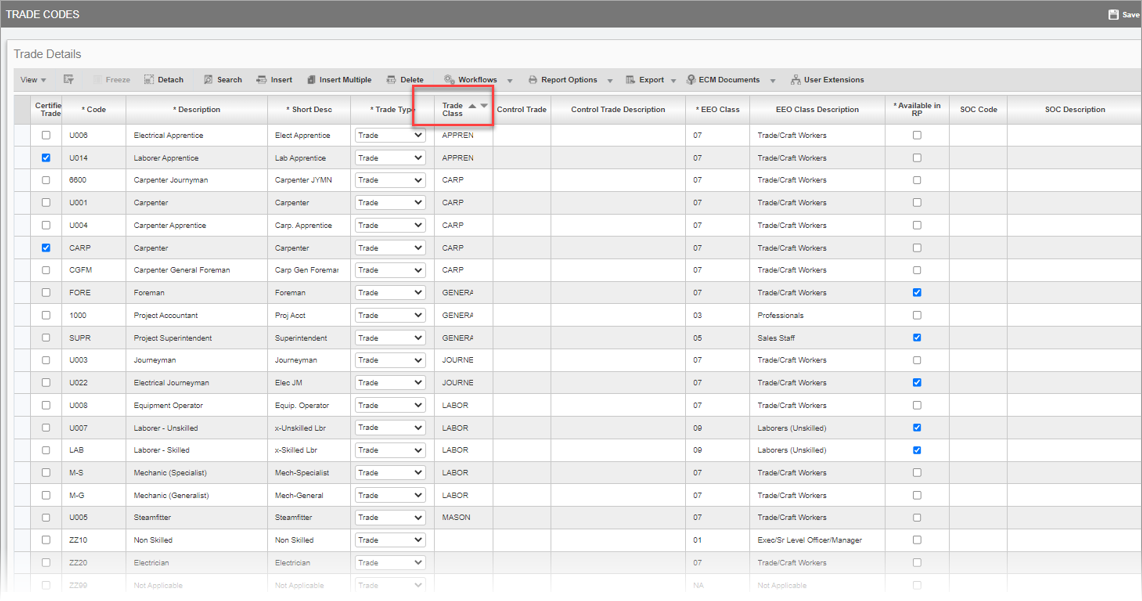
Pgm: PYTRADES – Trade Codes; standard Treeview path: US Payroll > Setup > Local Tables > Trade Codes
-
Assign trade classes to union locations. Trade classes are assigned to union locations on the US Payroll - Union Locations Maintenance screen. Multiple trade classes can be added under each union location but each trade class can only be associated with one union.
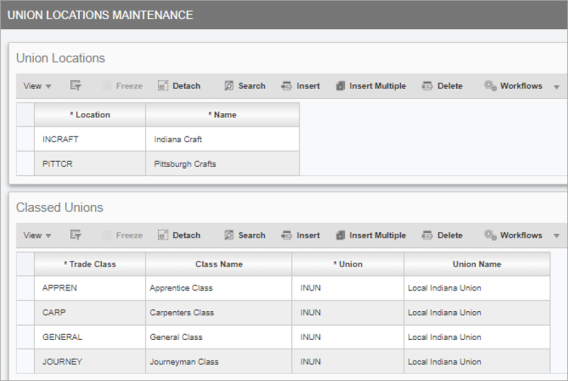
Pgm: PYUNILOC – Union Locations Maintenance; standard Treeview path: US Payroll > Setup > Local Tables > Payroll Unions > Union Locations
-
Assign a union location to a job. A union location can be assigned to a job in the Union Location field on the Payroll tab of the Job Setup screen.
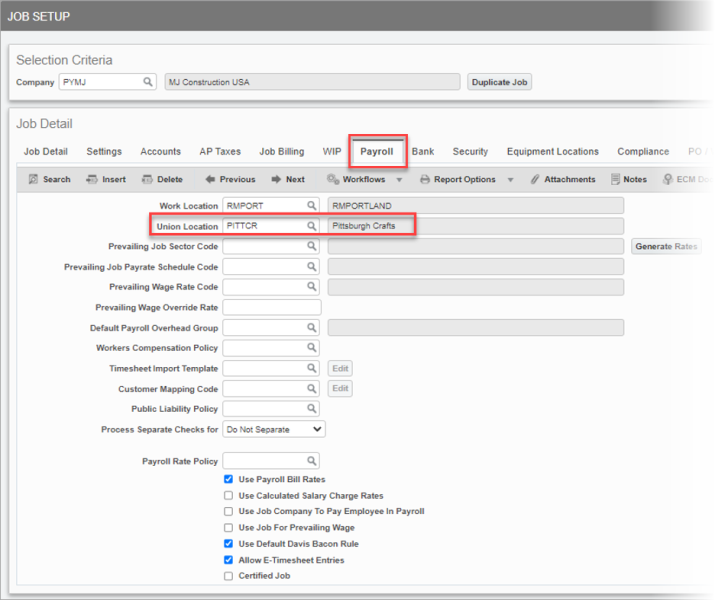
Pgm: JCJOBFM – Job Setup; standard Treeview path: Job Costing > Job > Enter Job – Payroll tab
-
Now that the mapping setup is complete, you are ready to use the Job Union Location functionality. When using the Timesheet Entry screen, as per the standard process, the union code will default from the Employee Profile after the employee number is entered. However, if a job code is entered, and that job is associated with a union whose union location differs to the one currently entered on the Employee Profile, then the union code will be replaced with the appropriate union code based on the setup.