This
-
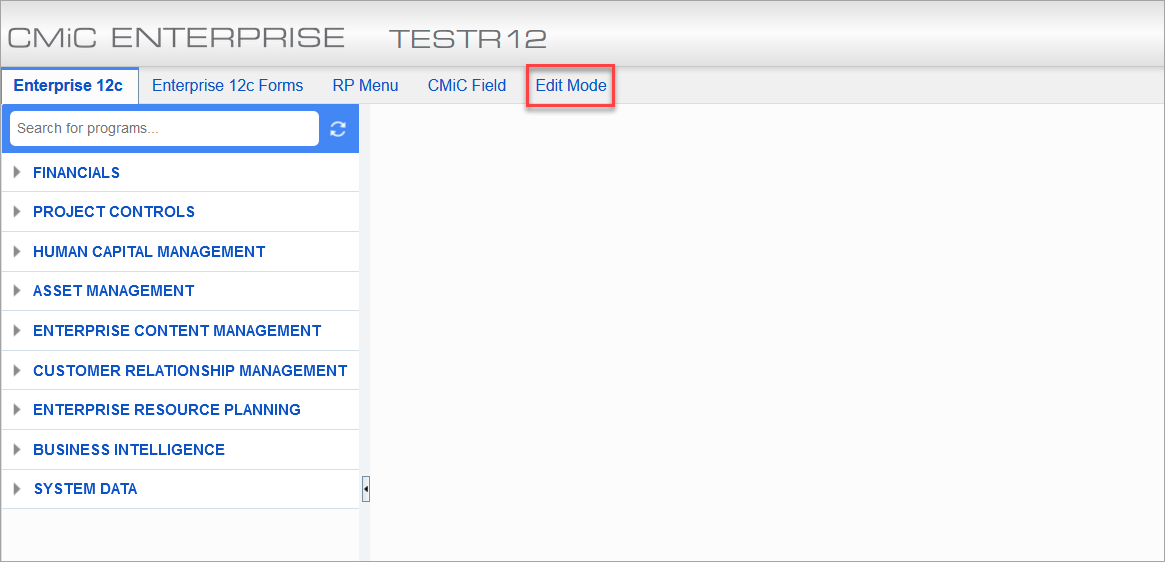
Before adding a new menu item on the Treeview, users need to know which Treeview they are currently using. To find this, click on the Edit Mode option on the top navigation bar of your CMiC environment, as shown in the screenshot below.
-
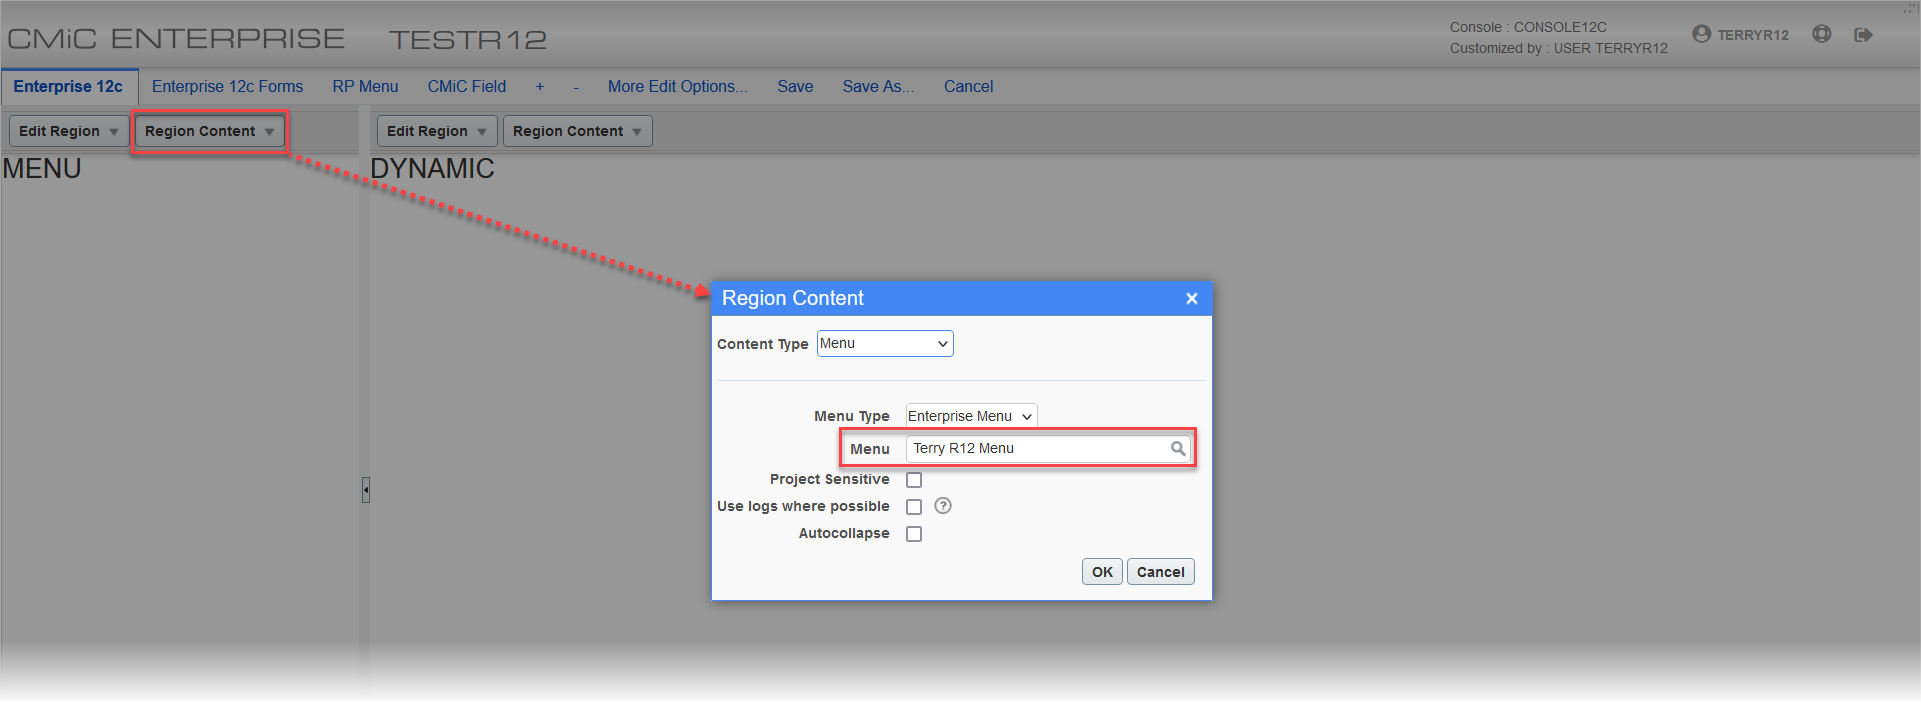
In the next screen, click on the Region Content drop-down menu on the Menu section. Select the "Edit Content" option which opens the Region Content pop-up window. The Menu field indicates which Treeview you are using. Keep note of the name of this Treeview.
-
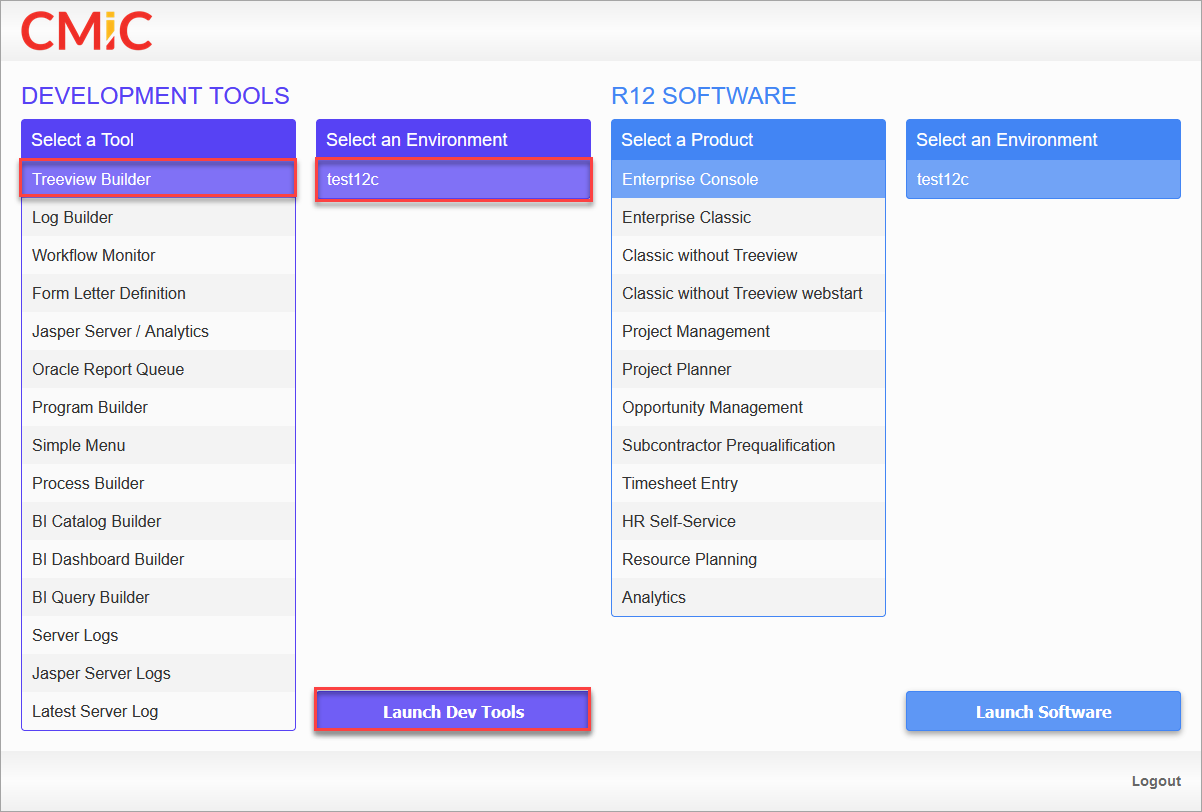
Select the Treeview Builder application in your preferred environment and press the [Launch Dev Tools] button.
-
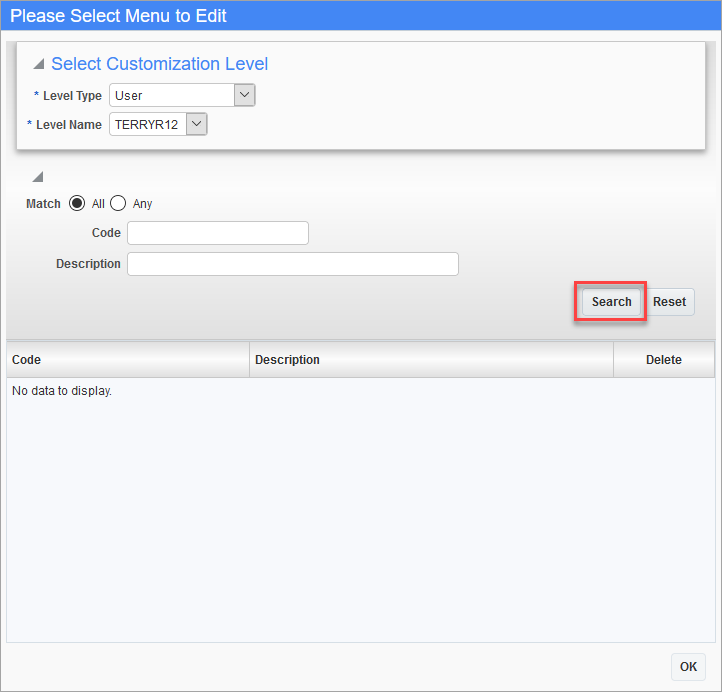
Search for the menu that you found in Step 2 by searching for the name in the Description field, then clicking the [Search] button. Alternatively, click the [Search] button without entering a search criteria to bring up all available menus.
-
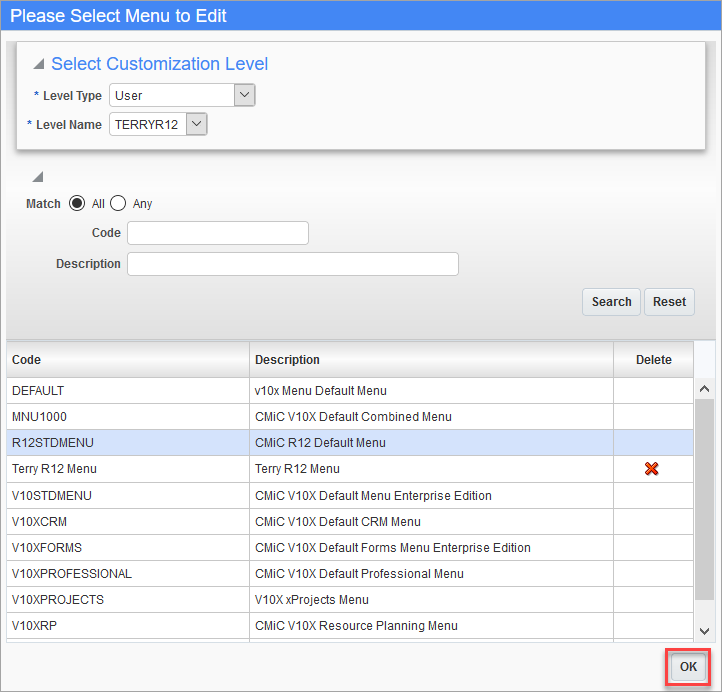
Select the menu you want to edit and click the [OK] button.
-
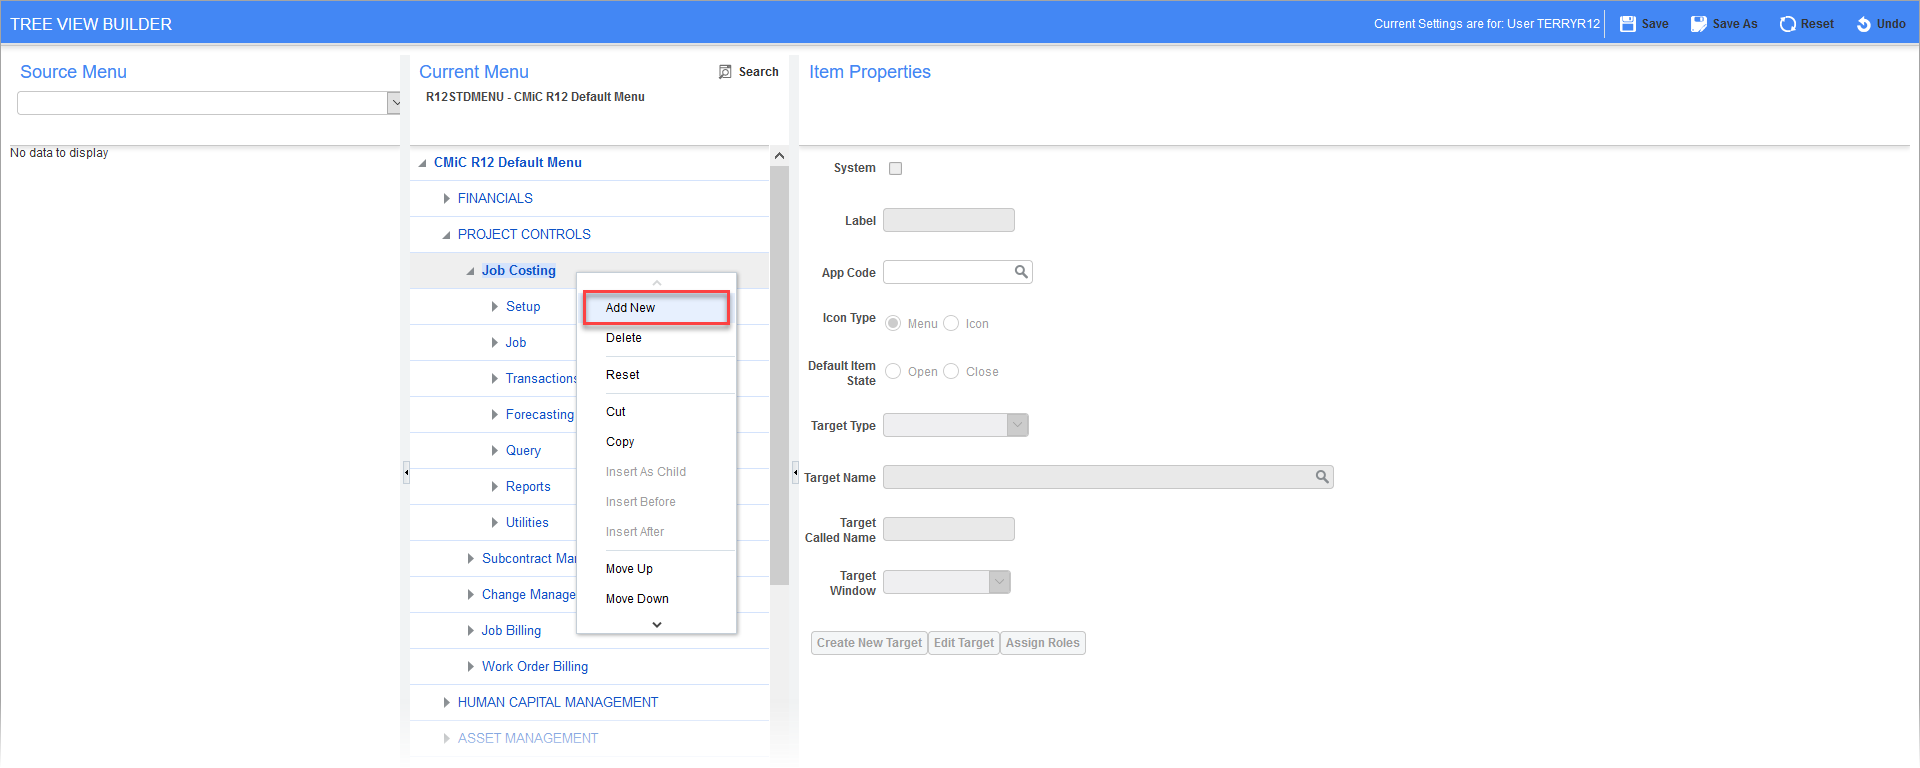
In the Current Menu section, navigate to the area of the Treeview where you want to add a new item, right-click on the menu, then select the "Add New" option. The new item will be added as a child under the menu you have selected.
-
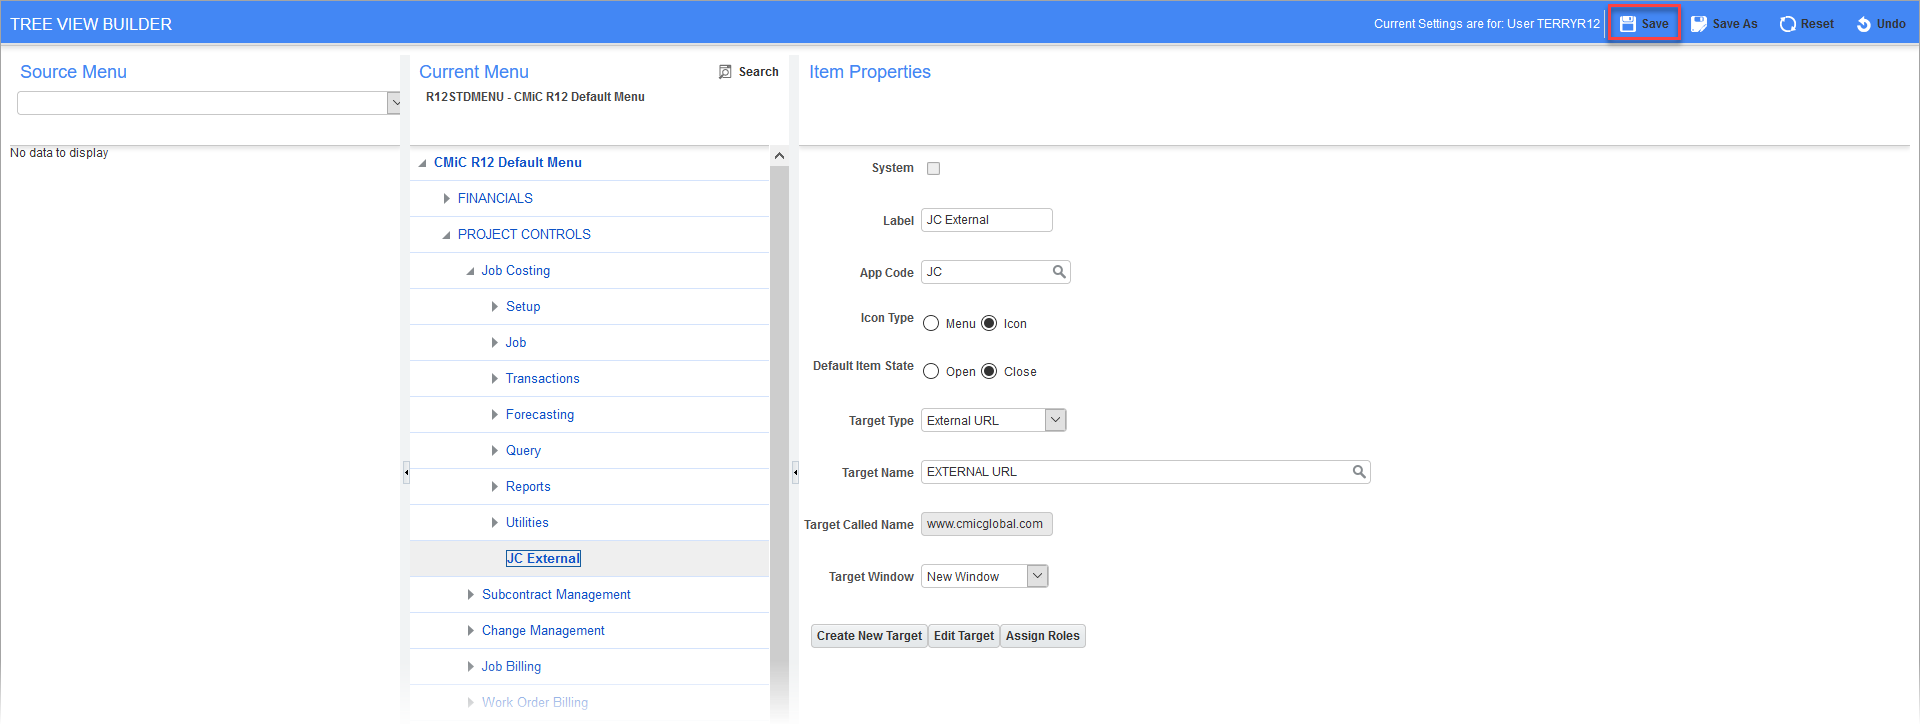
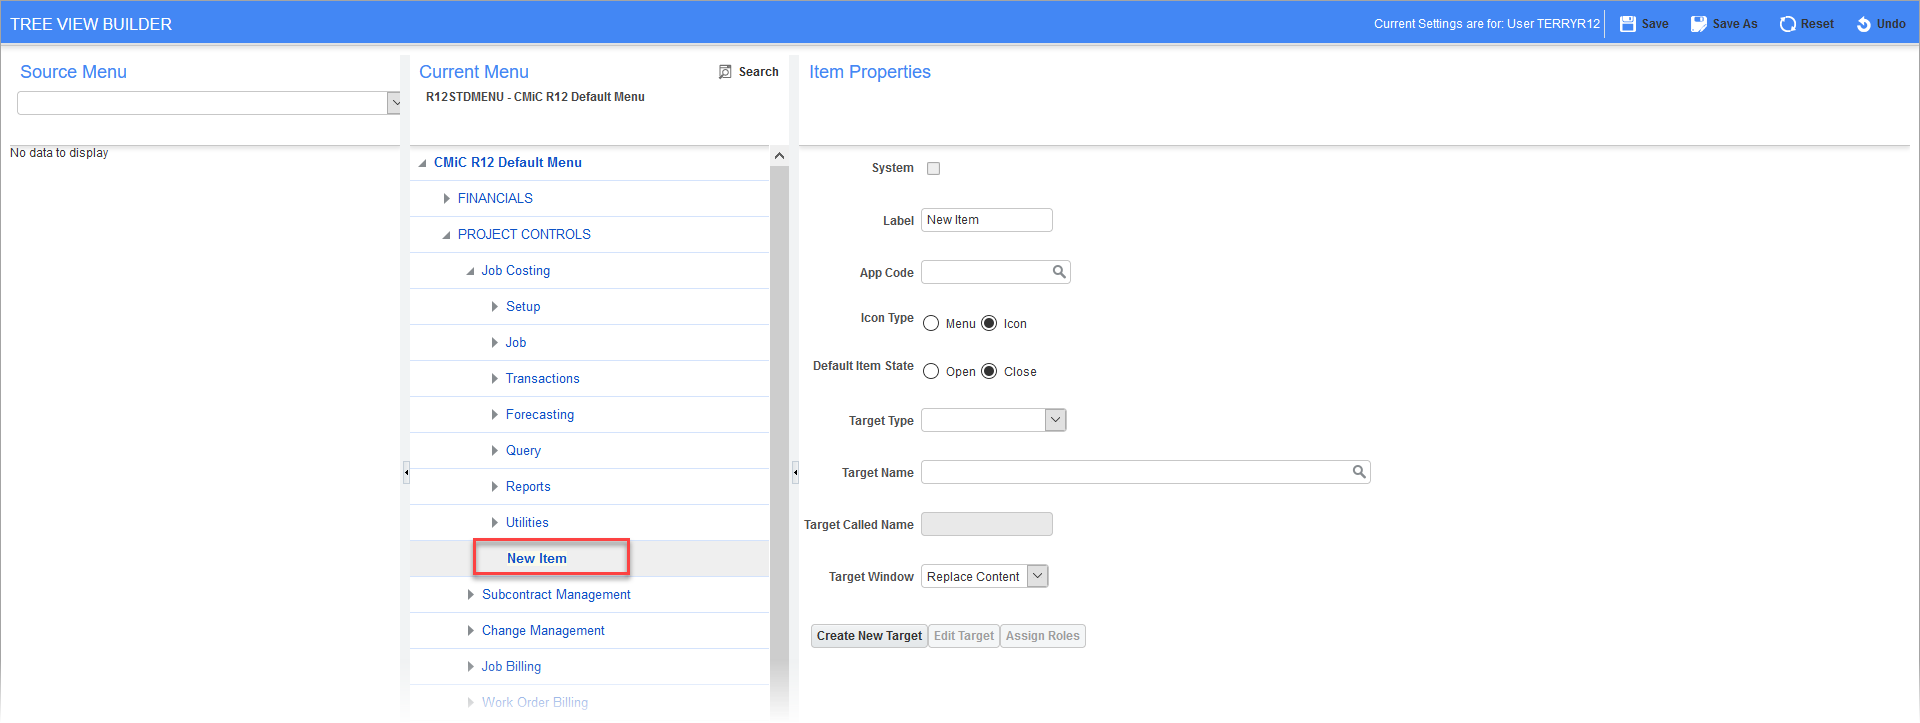
Click on the New Item menu option under the Current Menu section to open the Item Properties section. Fill out the fields as needed. Please see Treeview Builder Sections for more information on each field. If a new target is to be created, please see Create New Target.
-
Once all the information has been entered, press the [Save] button to add the new item to the Treeview.