The Detail section of the Enter Cost Transaction screen is used to enter job costs, equipment costs, work order, and General Ledger dispositions for the transaction specified in the previous section. Each line corresponds to one disposition, either a debit or credit. Every J, E, W or G line entered will debit or credit the General Ledger account associated with job, category on the job, or equipment entered.
In order to post a batch, the total dollars of all the debit dispositions must be equal to the total dollars of all the credit dispositions for every transaction within the batch.
Although the system defaults to "J" as the predominant distribution type code, it also allows for the entry of "G", "E", and "W" type transactions in this screen as well.
Distribution Type Code – "J" type will be entered by default.
-
Enter "J" to distribute dollars to a specific job, cost code, and category.
-
Enter "G" to distribute dollars to a specific General Ledger department and account.
-
Enter "E" to distribute dollars to a specific piece of equipment, category, and code.
-
Enter "W" to distribute dollar to a specific work order, task, and category.
The column headings and fields will change with each line where a differing distribution type has been entered.
Multiple distribution lines may be created to more than one inter company, job, and piece of equipment or General Ledger account.
NOTE: The Company column uses company code validation instead of LOV validation so that the Company LOV does not appear if an exact match is entered.
NOTE: The distribution must be in balance when finished.
[W-line Detail] − Button
This button is only active for "W" type distributions. The launched pop-up window allows for more information to be entered. The type of data that can be entered varies according to the expense code of the line. Labor expense codes allow for the entry of the resource, material expense codes allow the user to enter an inventory or non-stock item and the equipment expense codes allow for the entry of a tool. This information can be viewed after the voucher is posted, in the Preventive Maintenance Work Order Budget Summary screen when the 'Cost' radio button is used.
[Create CostCode/Cat] − Button
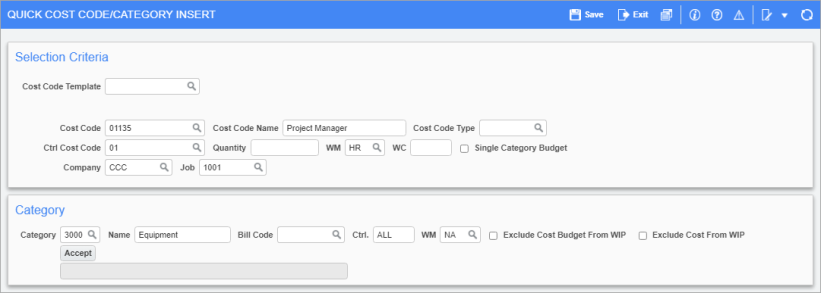
When inserting new detail lines, if a new cost code and category is required, this button can be used to launch a screen to create them.
Templates can be specified when assigning cost codes on the fly using the Cost Code Template field. For more information on using this feature, refer to Use Quick Cost Code/Category Insert.
[Reference] − Button
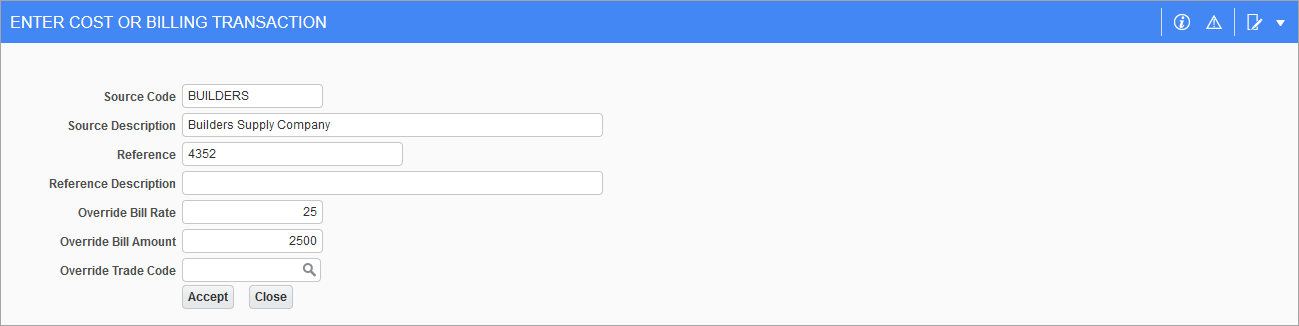
Pgm: JCTRNENT – Transaction Entry Reference Details – [Reference] Button
This button launches a screen to change a detail line’s defaulted source and reference descriptions. Please refer to Job Costing - Change Distribution Line Reference for more details.
The launched screen is also used to override Job Billing amounts or rates. Please refer to Job Costing - Change Distribution Line Job Billing Information for more details.
WBS/TAC Code 1, 2, 3, 4
The WBS
These fields are also active for a G-line and then only if the account is utilizing TAC codes. This is where the user can enter/modify the transaction allocation code associated with this transaction and account. TAC codes can be updated but not deleted from this screen. For more information, please refer to General Ledger - Transaction Allocation.
NOTE: The WBS Code columns are not applicable to billing transactions.
Work breakdown structure codes provide a supplementary method to effectively track and summarize costs on a transaction to transaction basis. The type of breakdown is dependent on the costing structure of the job and can be tailored to the specific requirements of the company. The WBS codes are user-defined and may be assigned with the system-defined field named PCI#.
The WBS functionality with PCI number allows users to specify the potential change item number when transactions are entered, and upon posting, the transaction detail records are associated with specific PCI numbers, allowing users to track the costs. Similarly, when request for payments are posted, the PCI number linked to the subcontract will be used as a WBS value and posted to the transaction details table.
NOTE: If using the PCI/WBS code option, ensure that the PCI numbers are not set to use the maximum size of PCI Numbering field (must be less than 11 characters) as it is larger than the maximum 10 characters of the WBS value code size. If done incorrectly, users will not be able to assign PCI codes in the WBS Code fields. In addition, if WBS with PCI# is defined at the company level, then the PCI auto-numbering mask must be less than 11 characters, otherwise an error message will be triggered when a user attempts to save a PCI.
Forecasting based on the billing contracts with WBS mapping with PCI functionality allows forecasting with PCI projections showing specific bill codes with PCI number and tracking all committed, spent costs and billings.
The use of WBS functionality in Contract Forecasting may be classified in two categories.
-
Jobs with WBS mapping and using transactions with PCI# as the WBS code.
-
Jobs with standard mapping and using WBS code (PCI#) for transactions.
For further details about WBS codes, please refer to Contract Forecasting - WBS Functionality & Contract Forecasting in Contract Forecasting, and to Job Billing - Creating Mappings from JC in Job Billing.
The standard Treeview path for the WBS Codes screen in CMiC Field is CMiC Field > File Maintenance > Local Tables > WBS Codes, WBS Values.