All Transaction Entry screens that allow J-type transactions will validate data to ensure that all required WBS codes are assigned with valid WBS value codes whenever a J-type transaction line is entered.
-
If the selected job/cost code/category has an assigned WBS code with the 'Required' box checked, and it has a default value applied, the system will automatically default the value for each entry; the operator does not need to enter the values unless modification is required.
-
If the selected job/cost code/category has an assigned WBS code with the 'Required' box checked, and no default value applied, the operator will be required to enter valid WBS data.
-
If the WBS code has the 'Required' box unchecked and the 'Editable' box checked, the operator can modify the WBS data.
-
If the WBS code has the 'Editable' box unchecked, the operator is permitted to view the codes, but modifications are prohibited.
The WBS Code and Name fields are available directly on the transaction detail line. By default, these fields are hidden and the Lite Editor must be used in order to make them visible. The following steps explain how to enable these fields.
-
Click on the Lite Editor icon on the screen’s top Toolbar, then click on the Pencil icon on the transaction detail line.
-
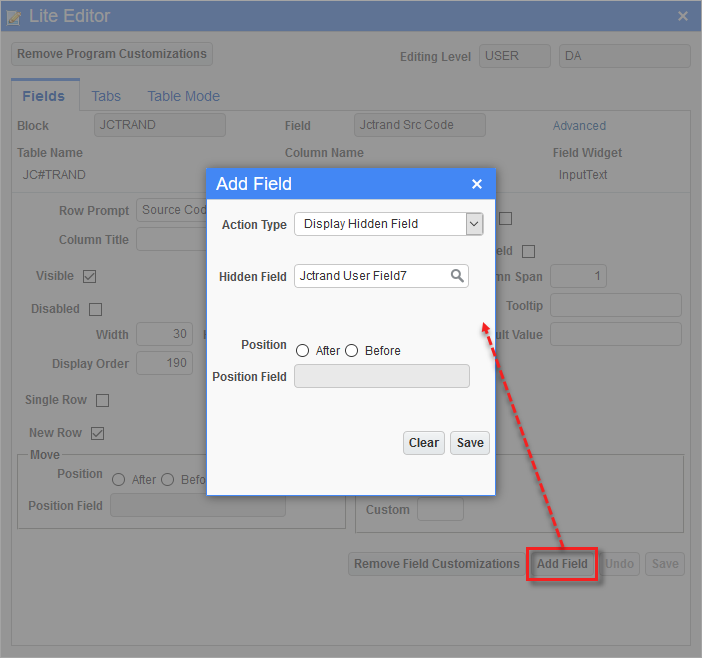
In the Lite Editor pop-up window, click on the [Add Field] button.
-
In the Add Field pop-up window, change the Action Type field to “Display Hidden Field”.
-
Click the Search icon on the Hidden Field LOV that appears and select “Jctrand User Field5”.
-
Click [Save] and the WBS Code 1 field will be added to the transaction detail line.
-
Repeat steps 1-5 for “Jctrand User Field6”, “Jctrand User Field7”, and “Jctrand User Field8” to add WBS Code 2, WBS Code 3, and WBS Code 4, respectively. For WBS Name fields, add “User Field Name5”, “User Field Name6”, “User Field Name7”, and “User Field Name8”.