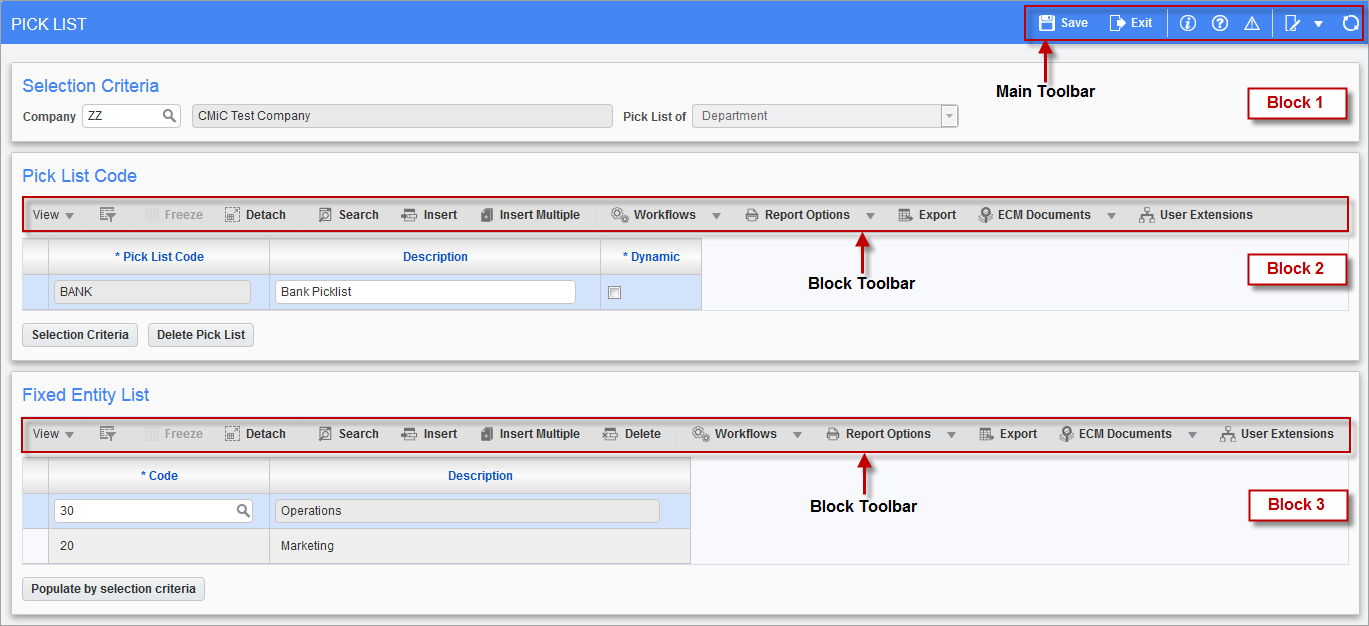
Screen with three sections (i.e., blocks) and the two main toolbar types used by Enterprise Console
The Enterprise Console screens use two main toolbar types: Main Toolbar and Block Toolbar. The Main Toolbar handles the broad functionality of the screen, and the Block Toolbar handles section-specific functionality. The options available in these toolbars can vary.
Main Toolbar Options

About – Current Application
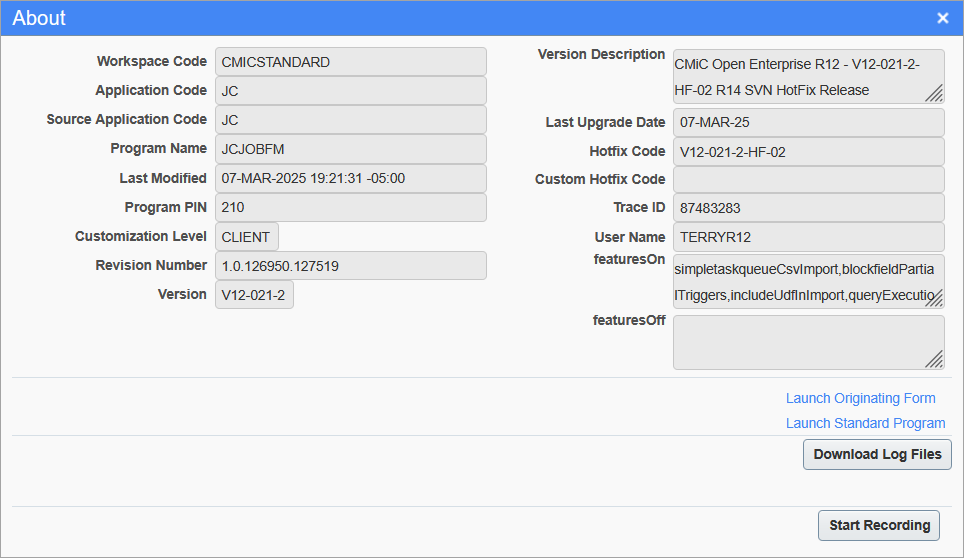
The About icon, on the Menu Toolbar, displays information about the current module and the editing privileges of its current user. For more details, see Getting Started - About.
Main Toolbar Icons
| Icon | Name | Usage | Function Key |
|---|---|---|---|

|
Add New |
Add/Insert a new record. |
N/A |
|
Table Mode |
Switch from displaying a single record to displaying a table of records. |
N/A |

|
Save |
Save the record(s) in the current application. |
Ctrl-S |

|
Exit |
Exit the current application. |
Ctrl-Q |

|
About |
Displays information about the current application and the editing privileges of its current user. |
N/A |

|
Help |
Launches the Help screen for the current application in a new browser window. Refer to the ADF Help section of this guide for further details. | N/A |

|
Error Details |
Displays details about any errors that may have been encountered in the current application. |
N/A |

|
Toggle Edit Mode |
Used to customize the application’s display for a user. After clicking this option, click any of the Pencil icons to bring up the customization screen. The screen will display up to 3 tabs: Fields, Tabs, and Table Mode. Then customize how the application displays its records, such as what fields or tabs to display, and whether the module should start in table mode or form mode. NOTE: Module must be in form mode to customize the tabs. |
N/A |

|
Restart |
Restarts the current application. | N/A |
Block Toolbar Options
This section provides further details about the more involved options of the Block Toolbar.
Attachments and Notes
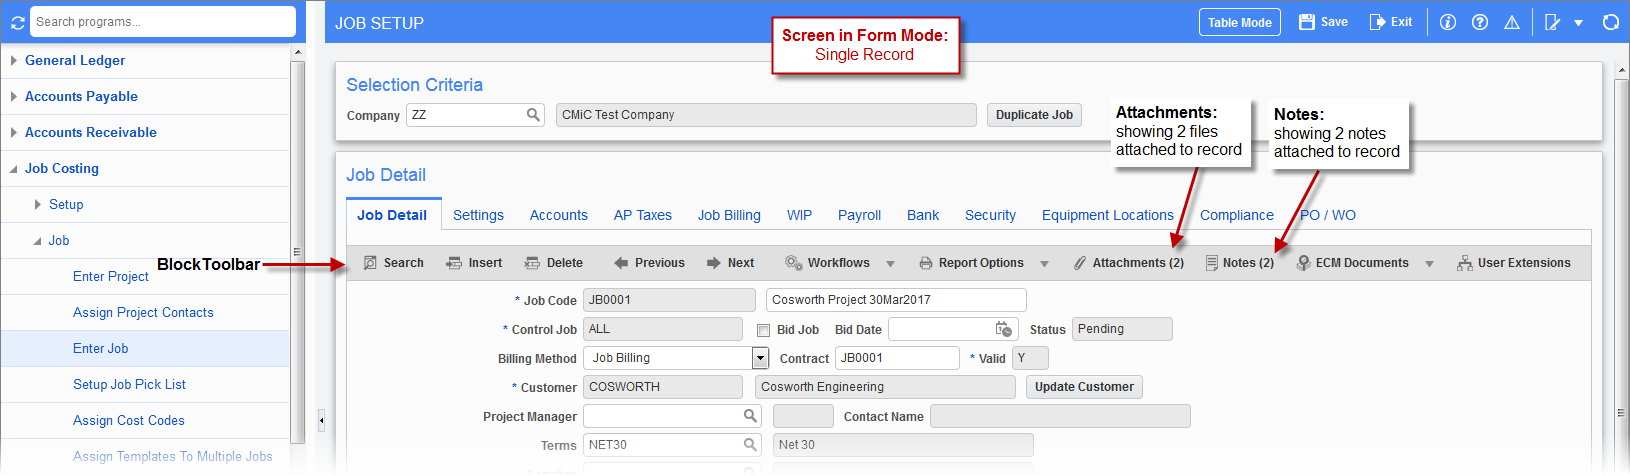
Job Setup screen in form mode, displaying a record with associated attachments and notes
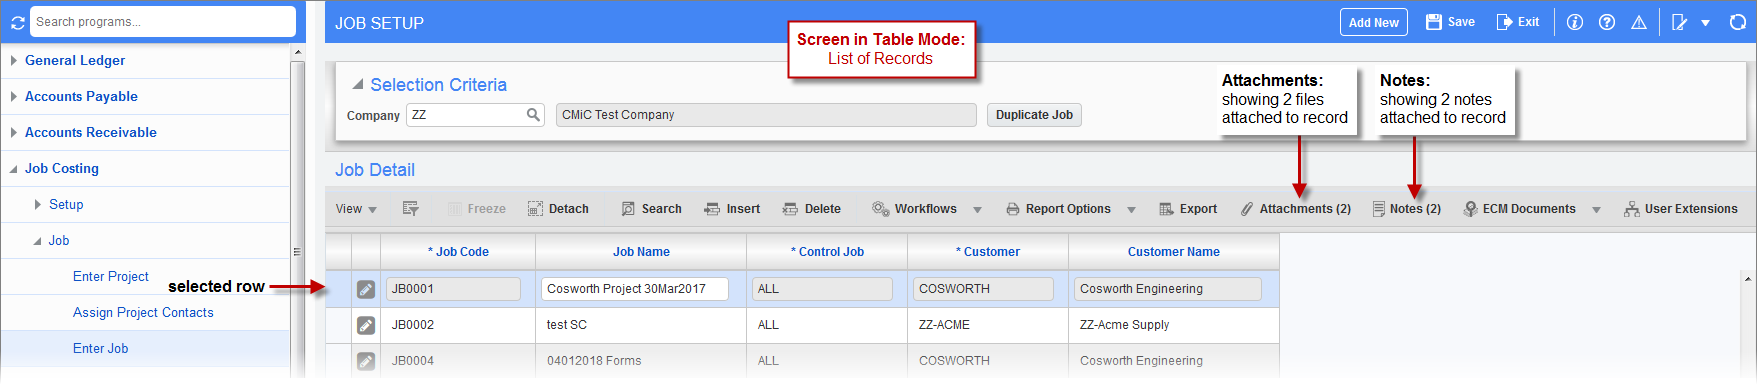
Screen in table mode, displaying a record with associated attachments and notes
Attachments and notes enable the storing of additional information related to Enterprise objects, such as projects, jobs, contract forecasts, and work items. Attachments can be any type of file format (XLS, CSV, DOC, PDF, etc.), and require an appropriate module to open and view them. Notes, in comparison, are like post-it notes, and their text is displayed by their Enterprise module.
Screens displaying records that can have associated notes or attachments, or both, have the [Notes] or [Attachments] button on the Block Toolbar. Also, if a record has any associated notes or attachments, the [Notes] or [Attachments] buttons will display how many, within brackets, as shown by the above screenshots.
Notes
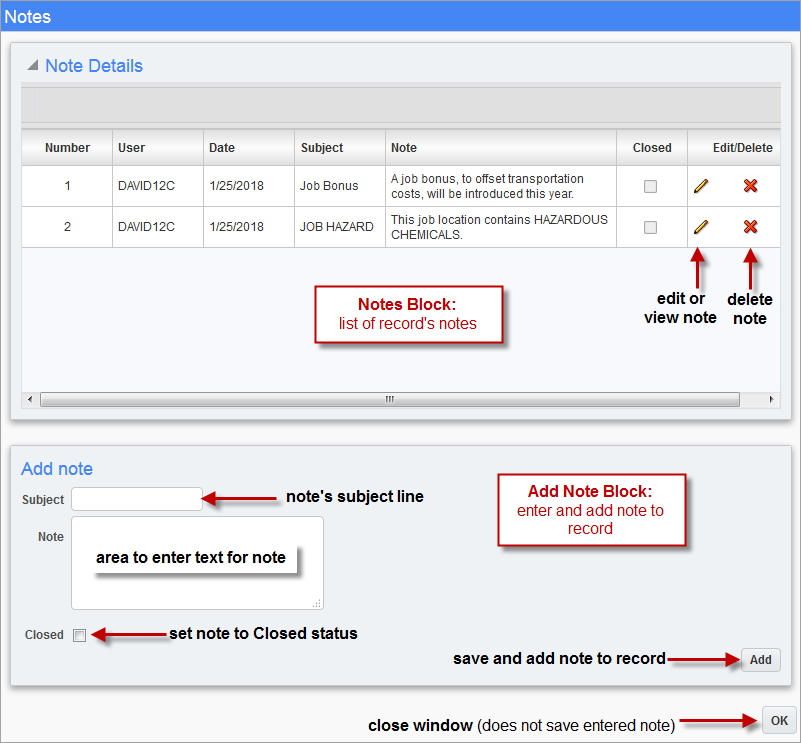
The above screenshot shows the Notes pop-up window that is displayed when the [Notes] button is clicked. This pop-up window is comprised of two sections: Note Details and Add Note.
The Note Details section lists the notes. The fields displayed for each note are for display only.
The 'Closed' checkbox indicates if the note’s status is closed or open. The closed status can have different meanings for different companies. One meaning, for instance, is that the note is no longer current. To edit or view a note, click the corresponding Edit icon ( ). To permanently delete a note, click the corresponding Delete Icon (
 ).
).
The Add Note section is used to add notes. Enter the note’s subject line (if option is enabled in System Options), and enter the note into the note’s text area. The ‘Closed’ checkbox is available if the note’s entry is belated and no longer current, but could still be helpful.
Once the note’s information has been entered, click the [Add] button to save and add the note. The note will be displayed in the Note Details section.
Click the [OK] button to close the window.
NOTE: When entering a note, clicking [OK] will not save the note. To save a note, the [Add] button must be used.
NOTE: The subject line for notes is optional. It enabled via the ‘Subject Line Appears In Notes Entry’ checkbox, it will display system-wide. This checkbox is found on the General tab of the System Options screen (System > Setup > System Options).
Attachments
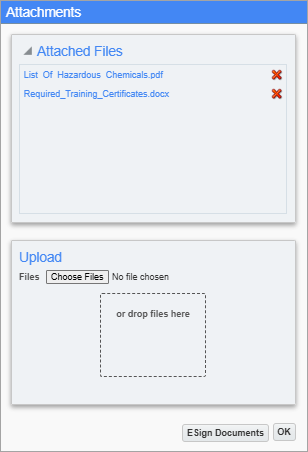
This pop-up window is comprised of two sections: Attached Files and Upload.
The Attached Files section lists the attached files. The list can be collapsed using the Collapse icon ( ) or expanded using the Expand icon (
 ). To view an attached file, simply click the file’s name (file names are hyperlinks). To delete an attachment, click on its corresponding Delete icon ().
The Upload section is used to upload attachments. To upload a file, use the [Choose Files] button to browse for and select a file to upload, or drag and drop a file into the drop area of the window.
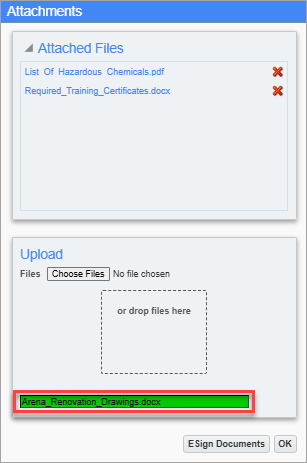
For both methods, once the upload is complete, the attachment will appear in the Upload section highlighted in green. Click [OK] to attach the file.
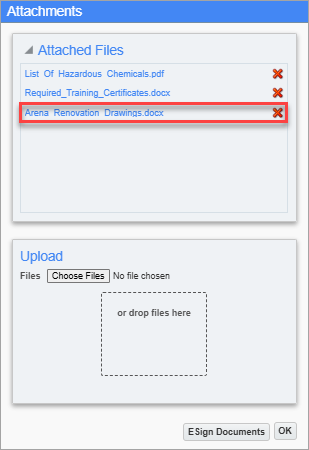
The attachment will then move to the Attached Files section.
The [E-Sign Documents] button initiates the DocuSign process for any attached documents that require an electronic signature. This option is available on screens where system-generated outputs need to be signed electronically. To learn more about this feature, refer to DocuSign Integration - R12.
NOTE: Adding attachments to ADF screens which have this functionality available requires additional security privileges to be assigned to a user's PM role in CMiC Field. The
ECM Documents
[ECM Documents] button on the Block Toolbar
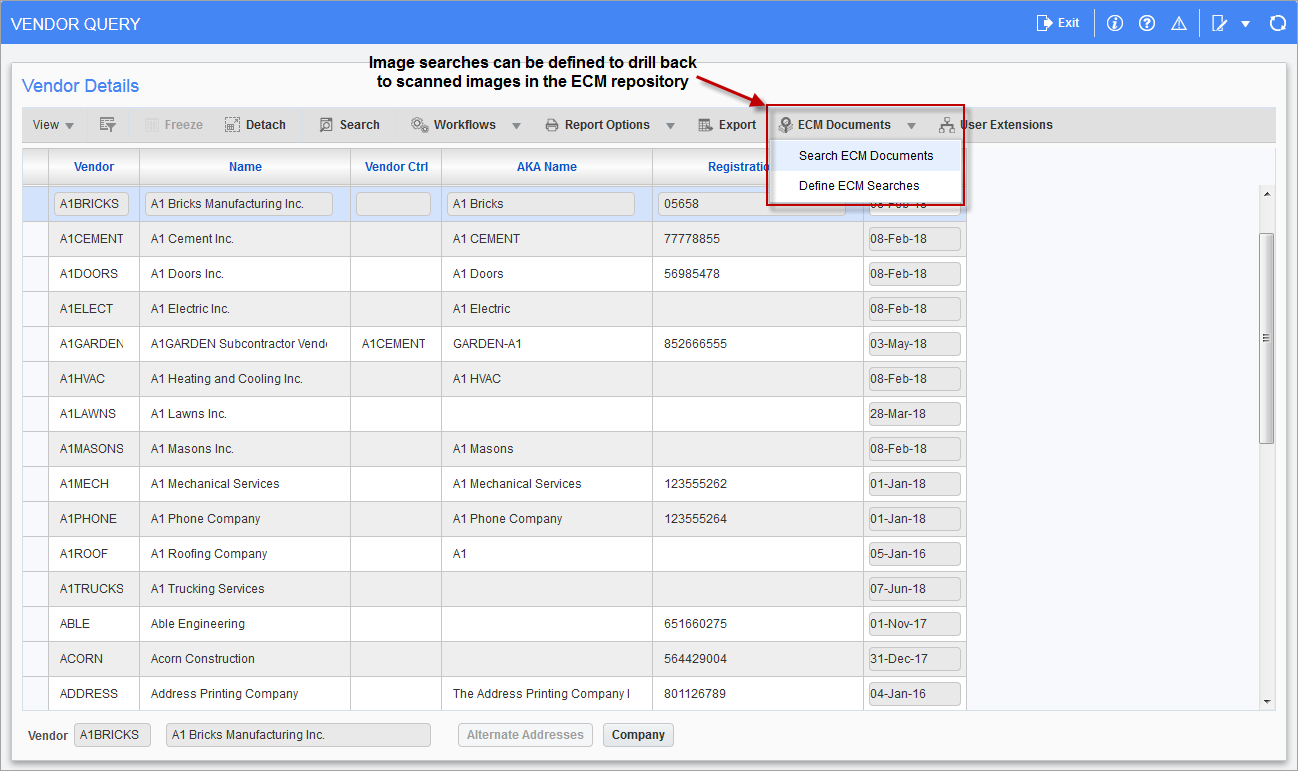
Any program within CMiC Enterprise can be given the ability to query and display images according to the current data record. Each program can have multiple searches defined.
Searches are user-defined, allowing for maximum flexibility and customization.
When the user is in a particular screen, for example the AP Vendor Query, they can, if at least one image search has been defined, view the images with a relationship to the current record.
Define ECM Search
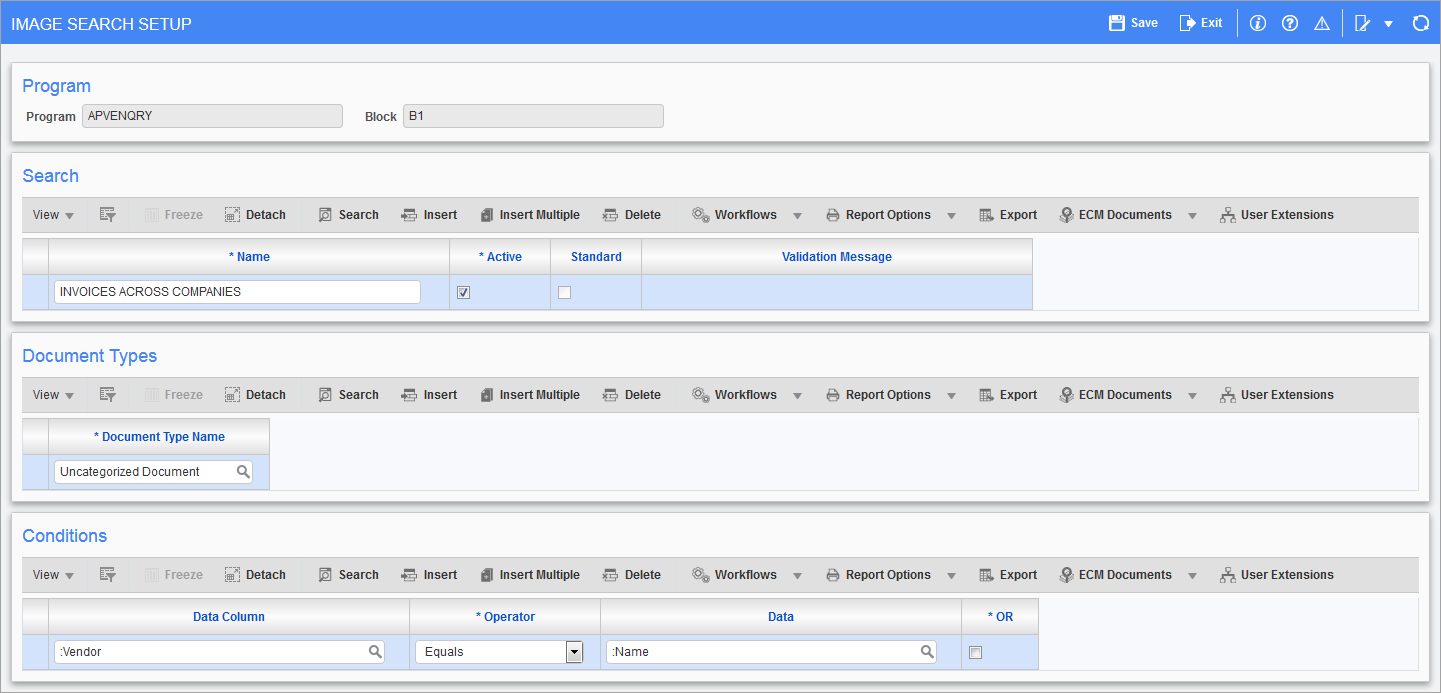
Image Search Setup pop-up window launched from the drop-down menu in the [ECM Documents] button
Defining a search is done directly in the CMiC Enterprise screen that requires the search to be added. To define the search, click on the drop-down menu of the [ECM Documents] button and select “Define ECM Searches”.
The Image Search Setup screen is used to define/create the image searches required for the program. The system allows for more than one image search per program.
This facility has been designed to be as simple to use as possible, but it still requires that the user be familiar with table joins, functional operators plus, and/or statements.
Search ECM Documents
The following screenshot is an example of the results of an image search showing scanned images in CMIC’s ECM repository.
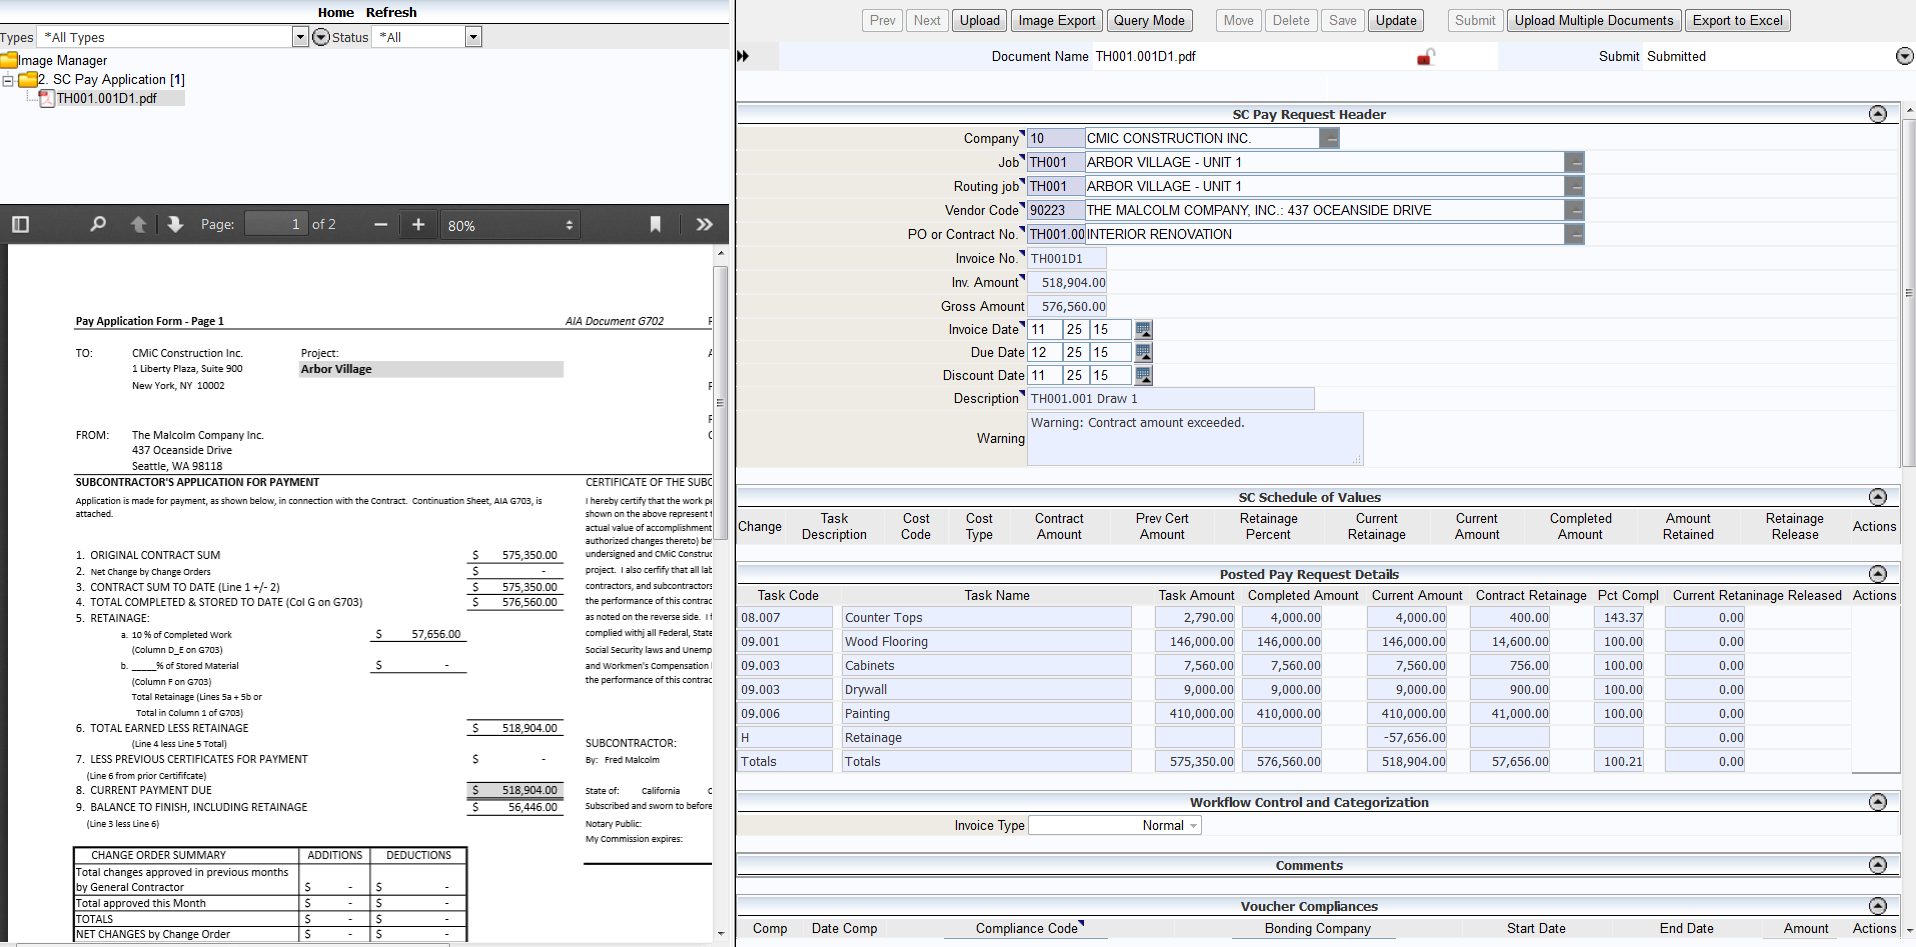
Search results in CMIC’s ECM repository
Block Toolbar Icons
| Icon | Name | Usage |
|---|---|---|

|
View |
Control how records are displayed in a table, such as how they are sorted, how the columns are ordered, and what columns are displayed. Refer to the Searches, Table Filters & Sorts section of this guide for further details. |

|
Query by Example (Filter) |
Available in table mode and used to filter the records displayed by the table. Refer to the Searches, Table Filters & Sorts section of this guide for further details. |

|
Freeze |
Prevent current record from being altered. |

|
Detach |
Detach the corresponding screen or block from the console. |

|
Search |
Similar to the Query by Example button, but has more options. Used to find and display a record or a group of records. When activated, a filter (search) section will appear with key fields that correspond to the fields of the records handled by the current screen. Enter the value or text in the field(s) that you want to match records against and press the [Go] button. Refer to the Searches, Table Filters & Sorts section of this guide for further details. |

|
Insert Record |
Create a new record for data entry and insertion into the system. |
|
Insert Multiple Records |
Bring up a table of new, empty records for data entry and insertion into the system. |

|
Delete Record |
Delete selected record from the system. |

|
Previous Record |
When in form mode (displaying a single record), this option displays the record that is before the current record. |

|
Next Record |
When in form mode (displaying a single record), this option displays the record after the current record. |

|
Workflows |
Deals with the workflows defined for the current application, block and row. Please refer to the Workflow reference guide for further details. |

|
Report Options |
Used to set up and print reports for the screen or block. Refer to System Data - Forms for further details. |

|
Export |
Creates an Excel/XLS file of the records handled by the current screen. |

|
Import |
Used to import records into the system through an Excel/XLS file. |

|
Attachments |
Add or view attachments associated with the current record. Refer to the Block Toolbar Options section for further details. |

|
Notes |
Add or view notes associated with the current record. Refer to the Block Toolbar Options section for further details. |

|
ECM Documents |
Enterprise Content Management |
|
User Extensions |
Display user extensions, which are custom fields that have been added to the records handled by the current screen. Refer to the User Extension section of the System Data reference guide for further details. |