Overview

Notices; Standard Treeview path: CMiC Field > Site Management > Notices
Notices communicate non-compliances: formal notifications that something is not complying with the project specifications, such as safety standards or that there is a deficiency in the work being performed. Normally, there is a specific number of days allocated to rectify the situation. Usually, the recipient provides details of the corrective action taken.
Creating a Notice

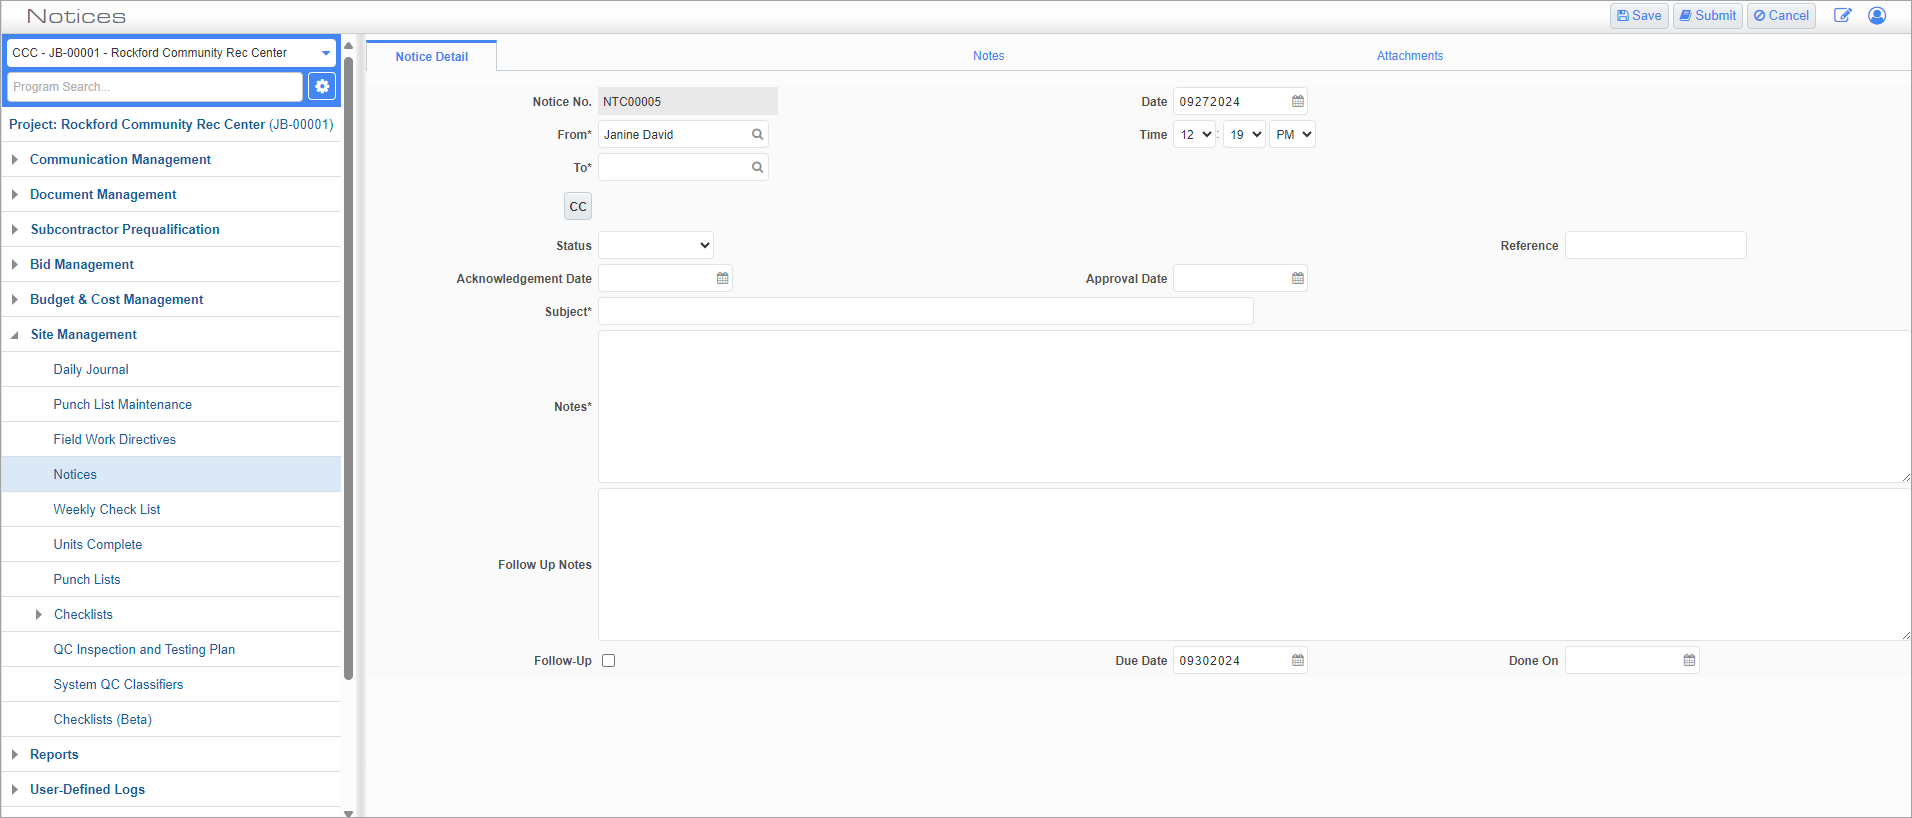
Standard Treeview path: CMiC Field > Site Management > Notices – Notice Detail tab
To create a new Notice, press the [Add Notice] button at the top of the Notice log.
Notice Detail – Tab
Use this tab to create a Notice and submit it to the relevant contacts. To save the record mid-entry, press the [Save] button. To submit the Notice to the parties entered in the To and CC fields, press the [Submit] button.
Notice No
Enter the Notice number. This number can be automatically generated by following the information in Masks and Auto-Numbering.
Date, Time
Enter/select the creation date/time of the Notice. The system defaults to the current date and time.
Submitted – Checkbox
This field is read-only and displays whether the Notice has been submitted.
Received – Checkbox
This field is read-only and displays whether the Notice has been received and the date it was received by the To contact.
From, To
Select the contacts sending and receiving the Notice.
Change #
This field only appears after the record has been saved and requires the security role privilege 'PCIs – Create from and Link to other objects'. For more information, please refer to CMiC Field Security - PCIs.
To link the Notice to a new PCI, press the Create Change link in this field to launch the Potential Change Items pop-up, which is used to create a new PCI. Once the PCI is created and the pop-up window is closed, the newly created PCI will be linked in the Change # field. For convenience, the Create Change link turns into an Edit Change link, which can be used to re-launch the new PCI to make any additional changes.
To link the Notice to an existing PCI, press the Link Change link and enter/select a PCI from the LOV.
[CC] – Button
Press this button to add an LOV to this section where the user can enter any contacts to CC.
Status
Select the status of the Notice. These codes can be set in the Notice Status screen.
Reference
Enter a reference description for the Notice.
Subject
Enter a short summary of the Notice.
Notes
Enter any additional information for the Notice here.
Follow-Up Notes, Follow-Up – Checkbox
If the non-compliance is still not resolved and the Notice requires a follow-up, check this box and enter any follow-up notes.
Due Date, Done On
Enter the dates on which resolution of this Notice is expected and completed.
Notes –Tab
This tab is used to enter and review notes about the Notice. For more information, please refer to CMiC Field - Notes, Attachments, and Documents.
Attachment –Tab
This tab is used to attach documents to the Notice. For more information, please refer to CMiC Field - Notes, Attachments, and Documents.
History –Tab
This tab is used to view all changes and edits made to the Notice. This tab is view-only and changes must be made with the [Edit Notice] button in the Notice Detail tab.
Buttons

[Add New] – Button
Press this button to open a blank Notice record.
[Copy] – Button
Press this button to create a new Notice record with the information copied from the current Notice.
[Edit Notice] – Button
Press this button to edit the Notice record.
[Delete Notice] – Button
Press this button to delete the Notice record.
[Print Report] – Button
![Screenshot of Select Report screen launched from [Print Report] button](../../../../Resources/Images/CMiC_Field/Notices_02_651x213.png)
Press this button to open the Print pop-up screen, shown above. For more information on printing reports see Reports and Printing Multiple Reports.
[Link To Issue] – Button

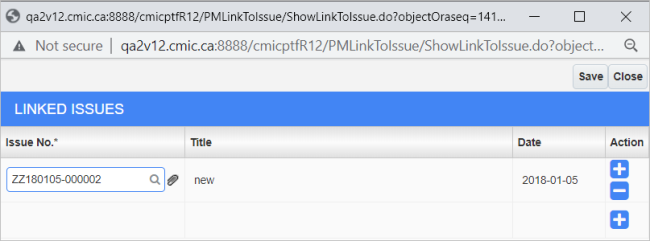
Press this button to open the Linked Issues pop-up screen, shown above. For more information on issues please refer to the Issues screen.