General Workflow
CMiC SSO is a new authentication feature for Cloud customers that allows users to bring their own identity when logging into CMiC. This allows IT admins to control password policy through your Identity Provider (IdP), such as Azure (Microsoft) or GCP (Google), with no need to have the password stored in CMiC.
CMiC SSO is powered by Azure. When a user is invited to use CMiC SSO, we set up the user as a guest user in our own Azure tenant. Once the user has accepted the invitation, end users will enjoy a single sign on experience (using their corporate identity).
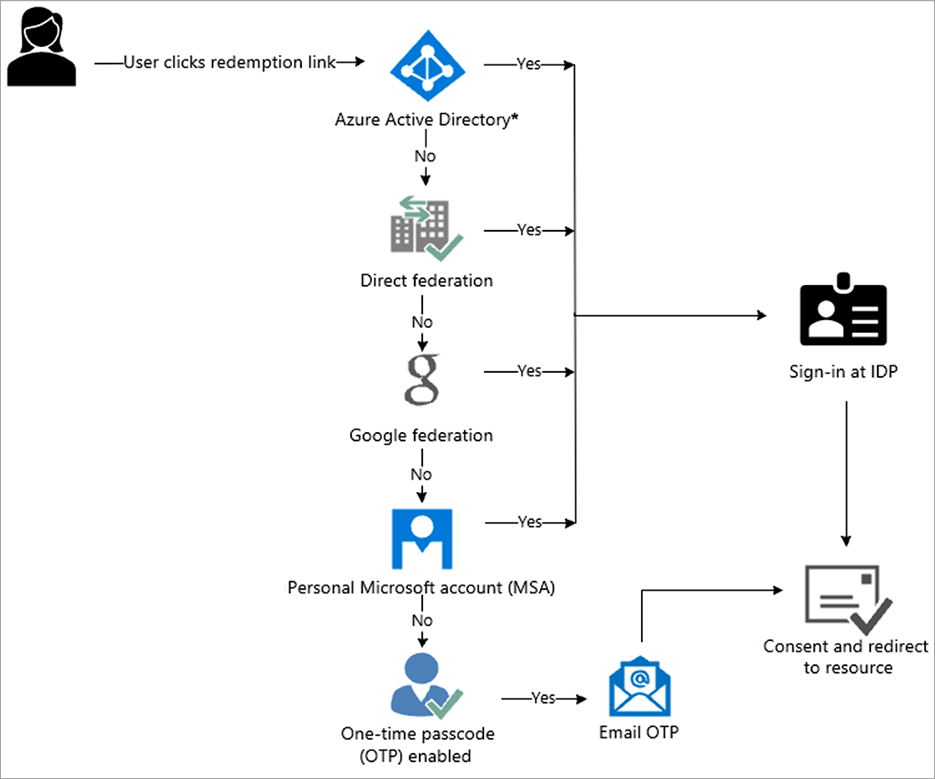
Authentication/Federation Flow
One Time Passcode (OTP) Fallback
If the user’s email does exist in another federated provider, Azure will send the user a one-time passcode via email. Entering this one-time passcode will authenticate the user into CMiC.
Getting Started
During the initial launch of CMiC SSO, once a user has been invited to Azure, they must authenticate using CMiC SSO. We plan to shut down the legacy CMiC username/password authentication method; however, a firm decommission date will be communicated in advance, giving users plenty of notice before the cut-off. Please reach out to your account manager if you have any issues with this timeline. CMiC is dedicated to working with clients to ensure a smooth transition.
We recommend starting with a few internal users to ensure that the authentication flow works as expected. Once you have confirmed that the authentication flow works as expected, you can expand to a larger group of internal users.
Security Considerations
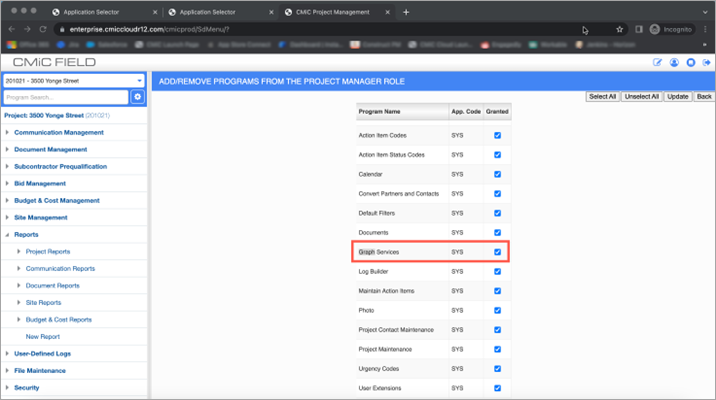
Security Roles; Standard Treeview path: CMiC Field > Security > Role Maintenance
Admins must be assigned security access to the Graph Services program in PM (Project Management). Access is assigned to a security role on the Role Maintenance screen. This security is required to access the User Audit program.
User Audit Screen
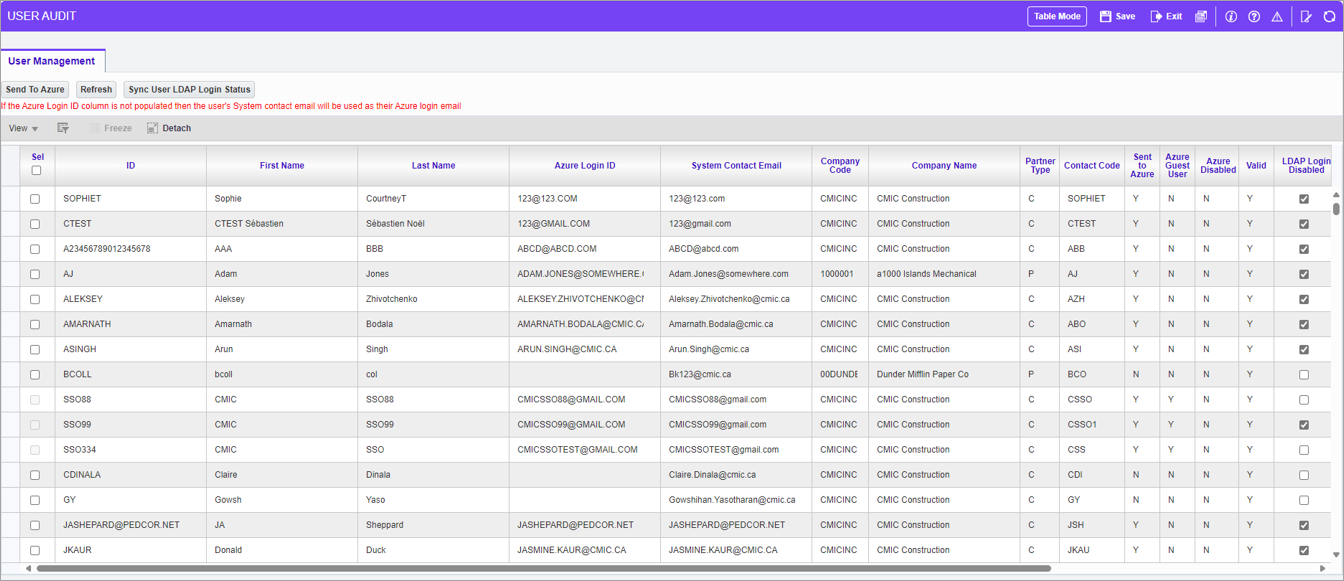
Pgm: SDUSRAUDIT - User Audit
The User Audit screen is used by admins to review all user email addresses to ensure they are valid and unique (within the tenant). This is also the screen where admins can invite their users as Guest Users in Azure by selecting the user and clicking on the [Send To Azure] button. For more details, see System Data - User Audit.
Accepting the Invitation
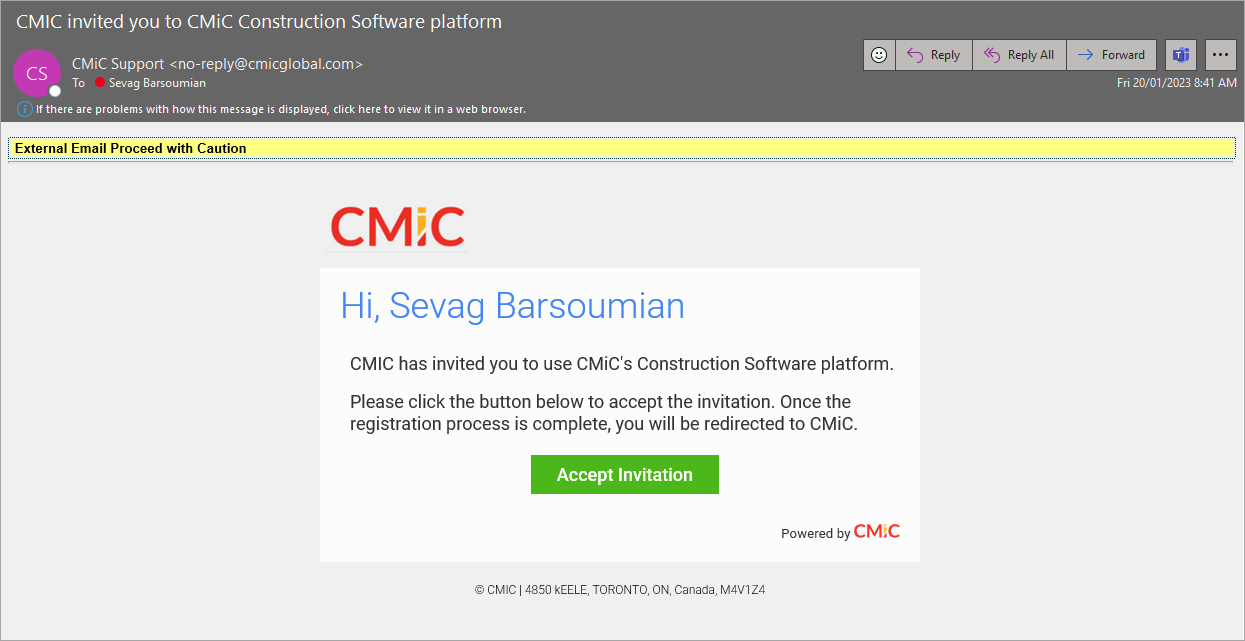
CMiC SSO Invitation Email
The CMiC SSO invitation will look similar to the one shown in the screenshot above. The customer's tenant “Account Name” will be used as the recipient's name in the email. The company logo is also pulled based on tenant set-up.
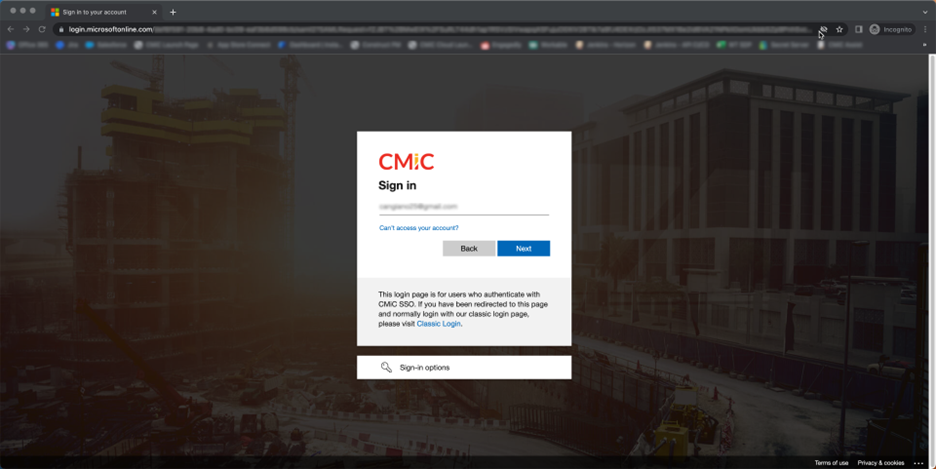
CMiC SSO Sign-in Page
To manually navigate to the CMiC SSO login page, use the following links:
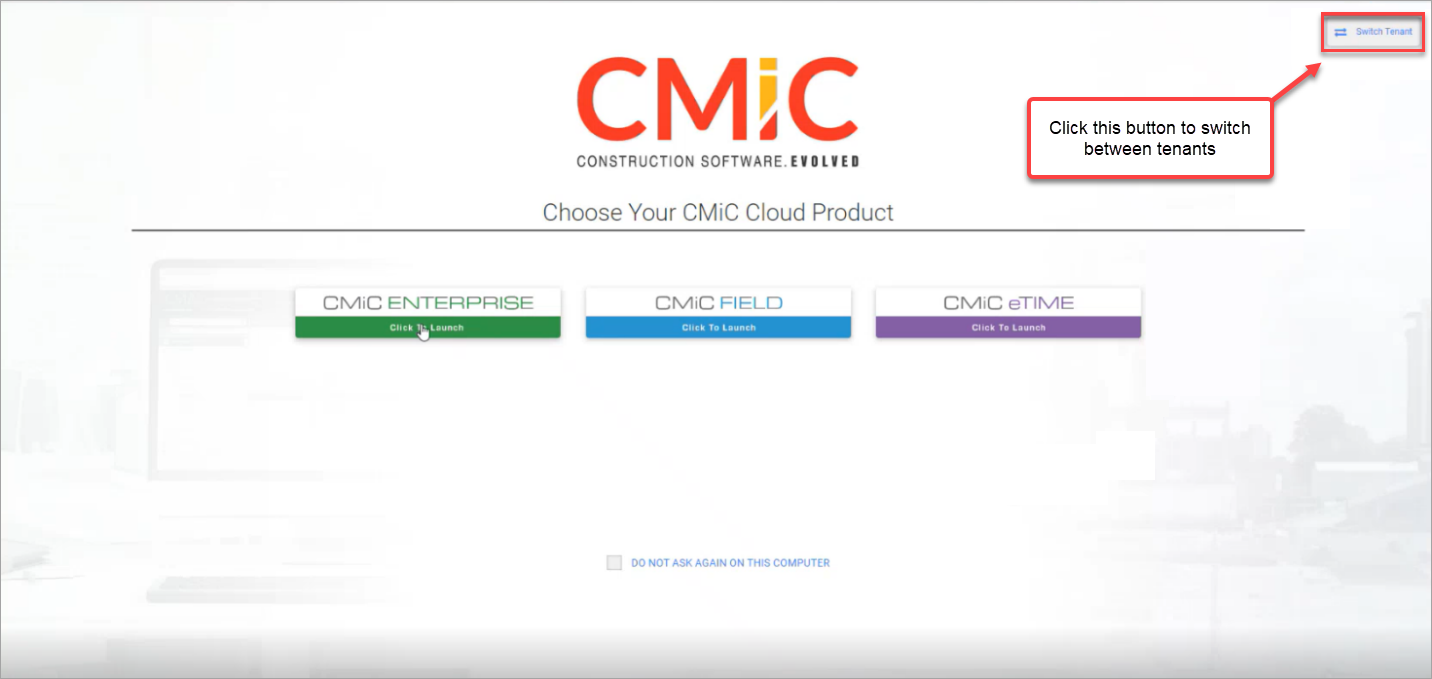
Switching Between Tenants
A convenient feature of CMiC SSO is that users will no longer have to enter their tenant ID when logging in. CMiC SSO will automatically connect the user to their tenant. If the user has access to multiple tenants, we added a new option for the user to switch between tenants.
NOTE: Users that have access to multiple tenants must be invited to use CMiC SSO from each tenant.

Switching Between Tenants
To switch tenants, click the user ID link on the console to open the User Settings pop-up window. From the Defaults tab, click on the [Change Tenant] button to launch a second pop-up window where the tenant can be switched.
Alternatively, users can switch between tenants by clicking on the [Switch Tenant] button on the top right corner of the Application Selector screen, as shown in the screenshot below.
FAQ
Do I have to use CMiC SSO?
Yes, all users must register for CMiC SSO to ensure a smooth transition when the feature goes live. We have different options available for you to handle authentication through CMiC SSO and have allowed for extra time in our implementation plan to deal with any unexpected requirements. Rest assured we will not go live until we have a solution in place for all our customers.
What Identity Providers do you support?
Initially we will support Azure AD and Google as federated identity providers. If you are using a different identity provider, your Account Manager will explore different options with you. We can accommodate any identity provider that supports SAML 2.0.
What is the impact to my users?
Once the system admin has validated all user email addresses (within the tenant), we will send the users an invitation. Once they accept the invitation, they will be granted access to login to CMiC with their company’s identity provider (like Azure or Google). If they have already authenticated to these services during their browser session, they won’t be prompted for credentials at all as they are already authenticated and will be logged into CMiC automatically.
How will this impact my collaborators (external users)?
The registration and login process will be the same for external users. External users who login via Collaborate Gateway will authenticate with their own company's identity provider (just like your internal users). If this is not possible we can issue one time pass codes via the user's email to authenticate.
How should I handle the following error message? "Too many contacts with the same email address."
Verify that a unique email address is assigned to one system user/contact.

Pgm: SYSCNTCT - Contacts; standard Treeview path: Job Billing > Setup > Local Tables > Contacts (This screen can also be accessed in Opportunity Management)
If duplicate users with the same email address exist, delete the user name and the contact through the User Maintenance screen.
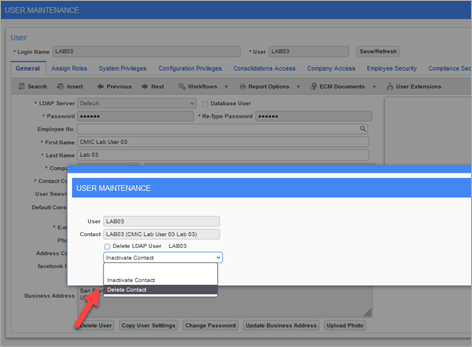
Pgm: SDUSRMNT – User Maintenance; standard Treeview path: System > Security > Users > User Maintenance - General tab
If the problem persists after correcting the duplicate email, then review whether there are also other contacts among partners that have the same email address as the user associated with the unsuccessful SSO invite. This can be done by creating a UI Log on the SYSCONTACT view as follows:
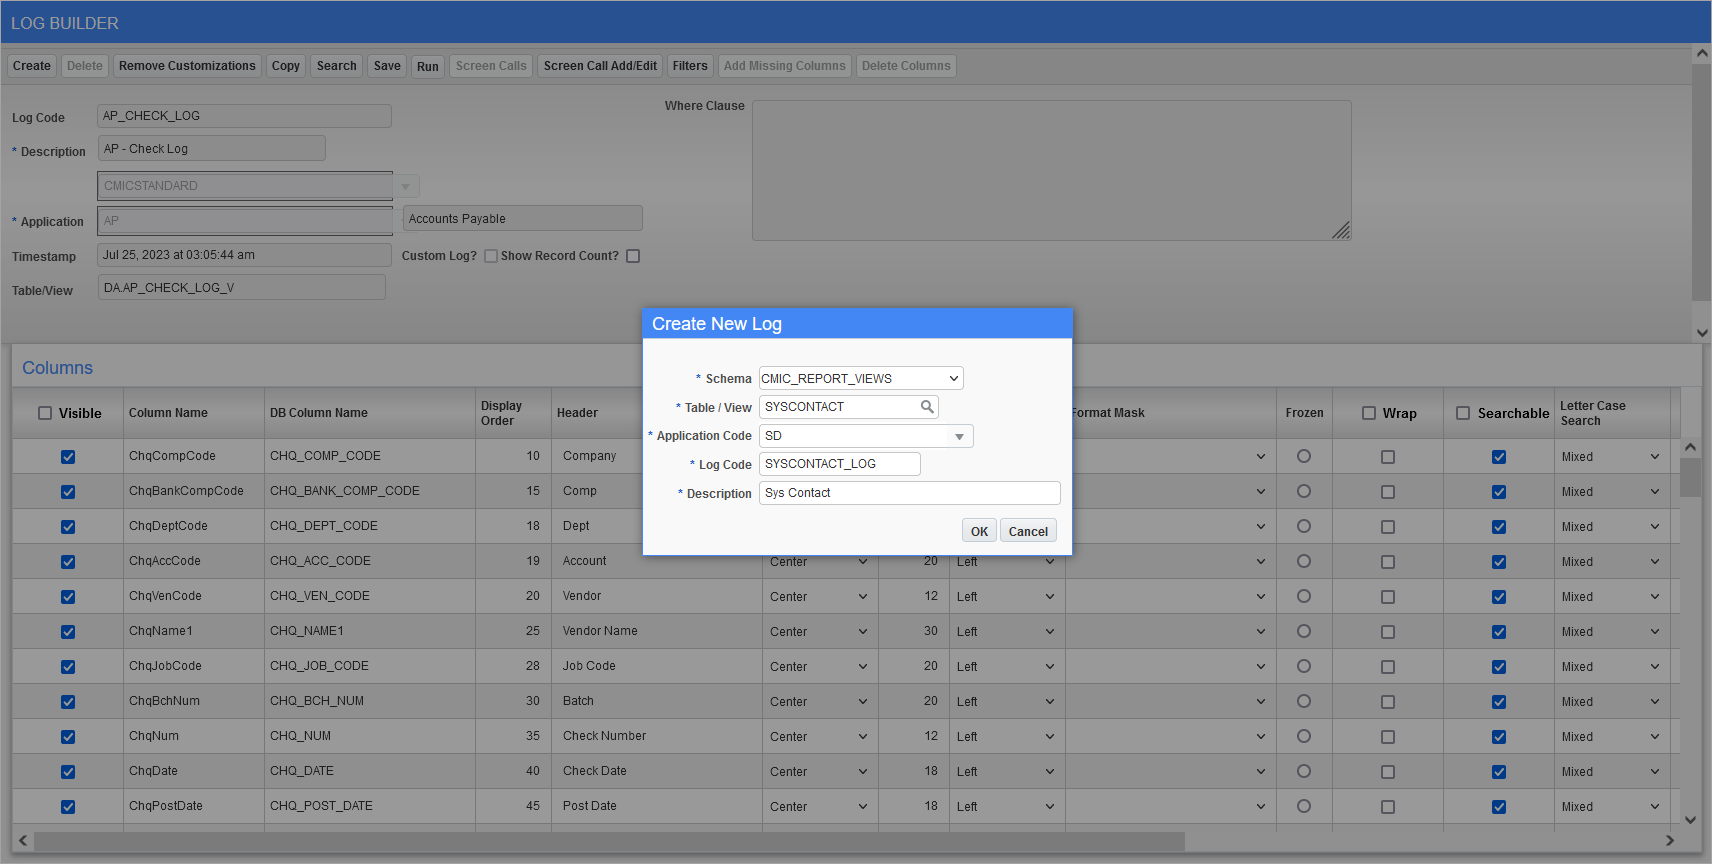
Log Builder
NOTE: For details on the use of Log Builder, see Getting Started - Log Builder. This step related to UI Log is optional, but strongly recommended because the alternative is to manually review contacts listed in every single partner in CMiC Field, which can be a tedious process if there are multiple partners.
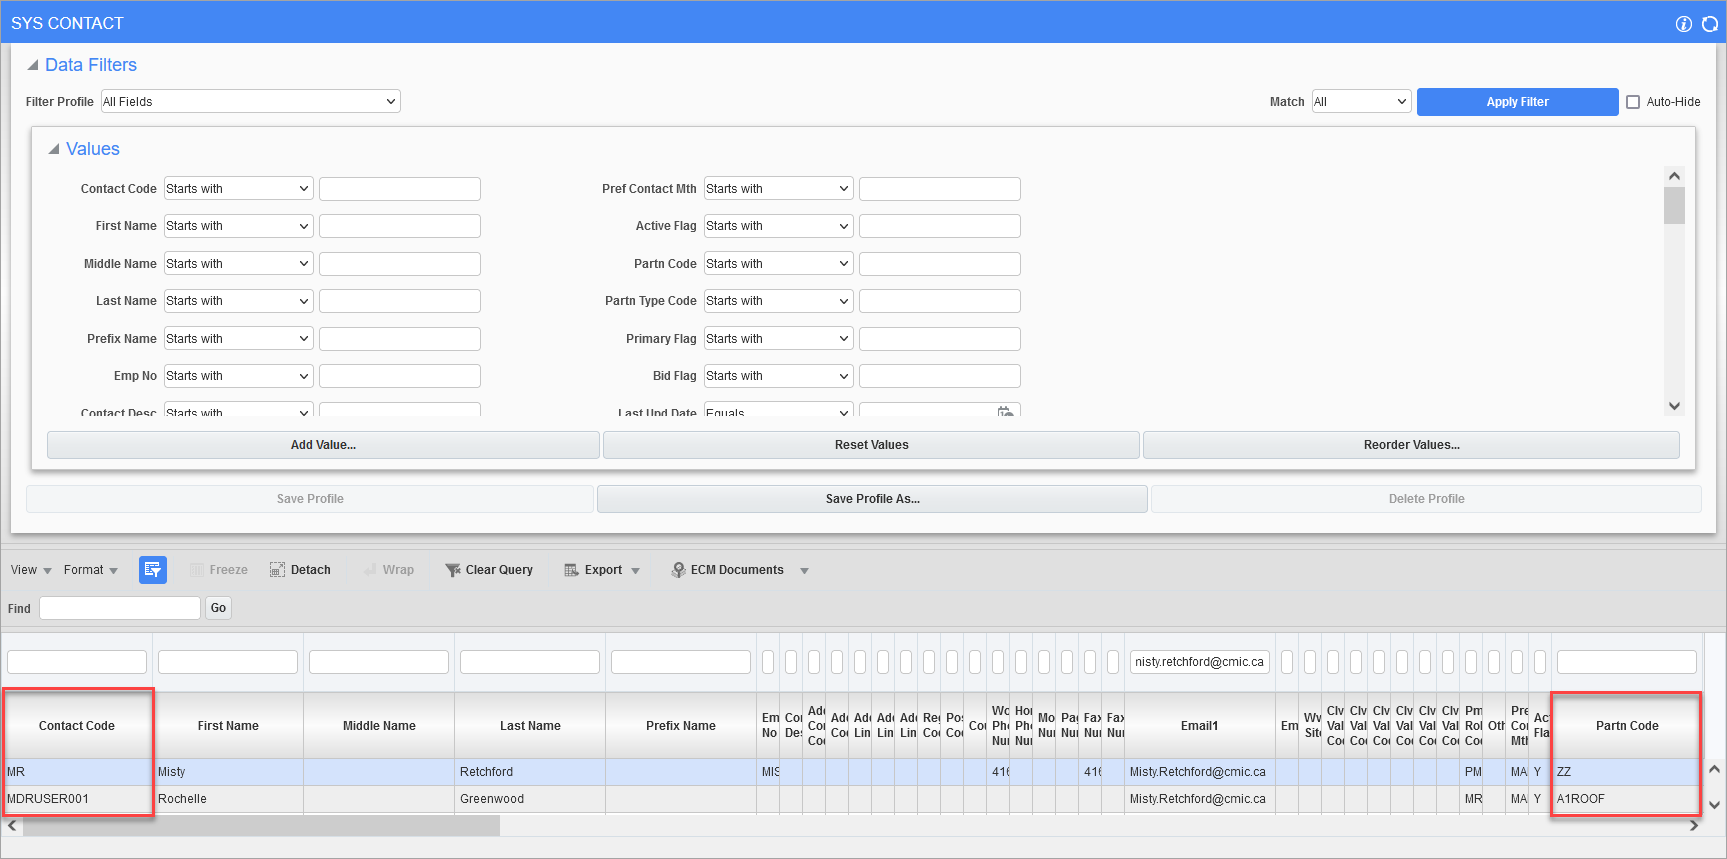
Once created, run the UI Log. Apply a filter on the Email1 column for the email address associated with the failed SSO invite. Take note of the Contact Code and Partner Code columns, as shown in the example below.
Once the contact and partner codes are identified, review the partner records in CMiC Field. Please see CMiC Field - Partners for further details.
Navigate to the Partners screen found under the Security menu of CMiC Field and click on the partner record.

Partners; standard Treeview path: CMiC Field > Security > Partners
From the partner record's Contacts screen, find the contact(s) with the duplicate email address. Once identified, click the Edit icon to change the email address of the partner contact.
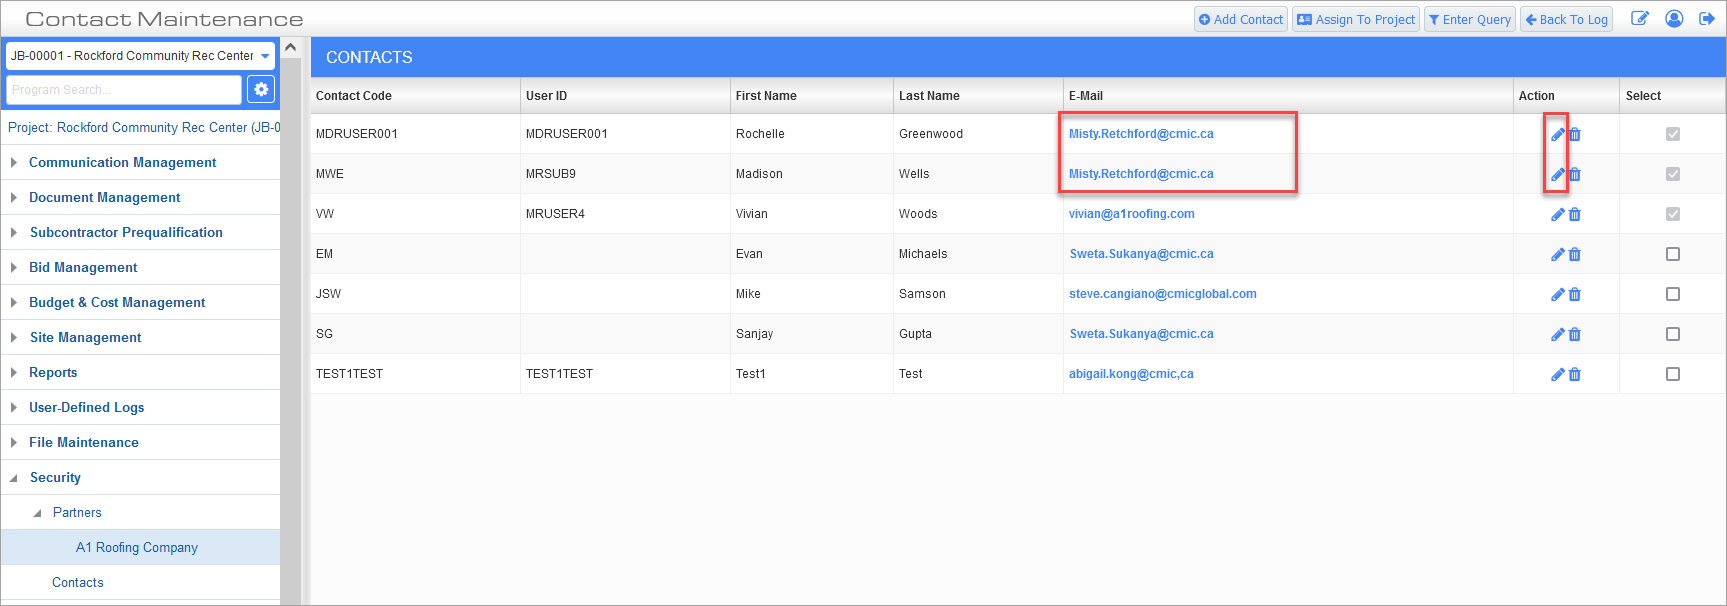
Partner's Contacts; standard Treeview path: CMiC Field > Security > Partners - Select a Partner Record
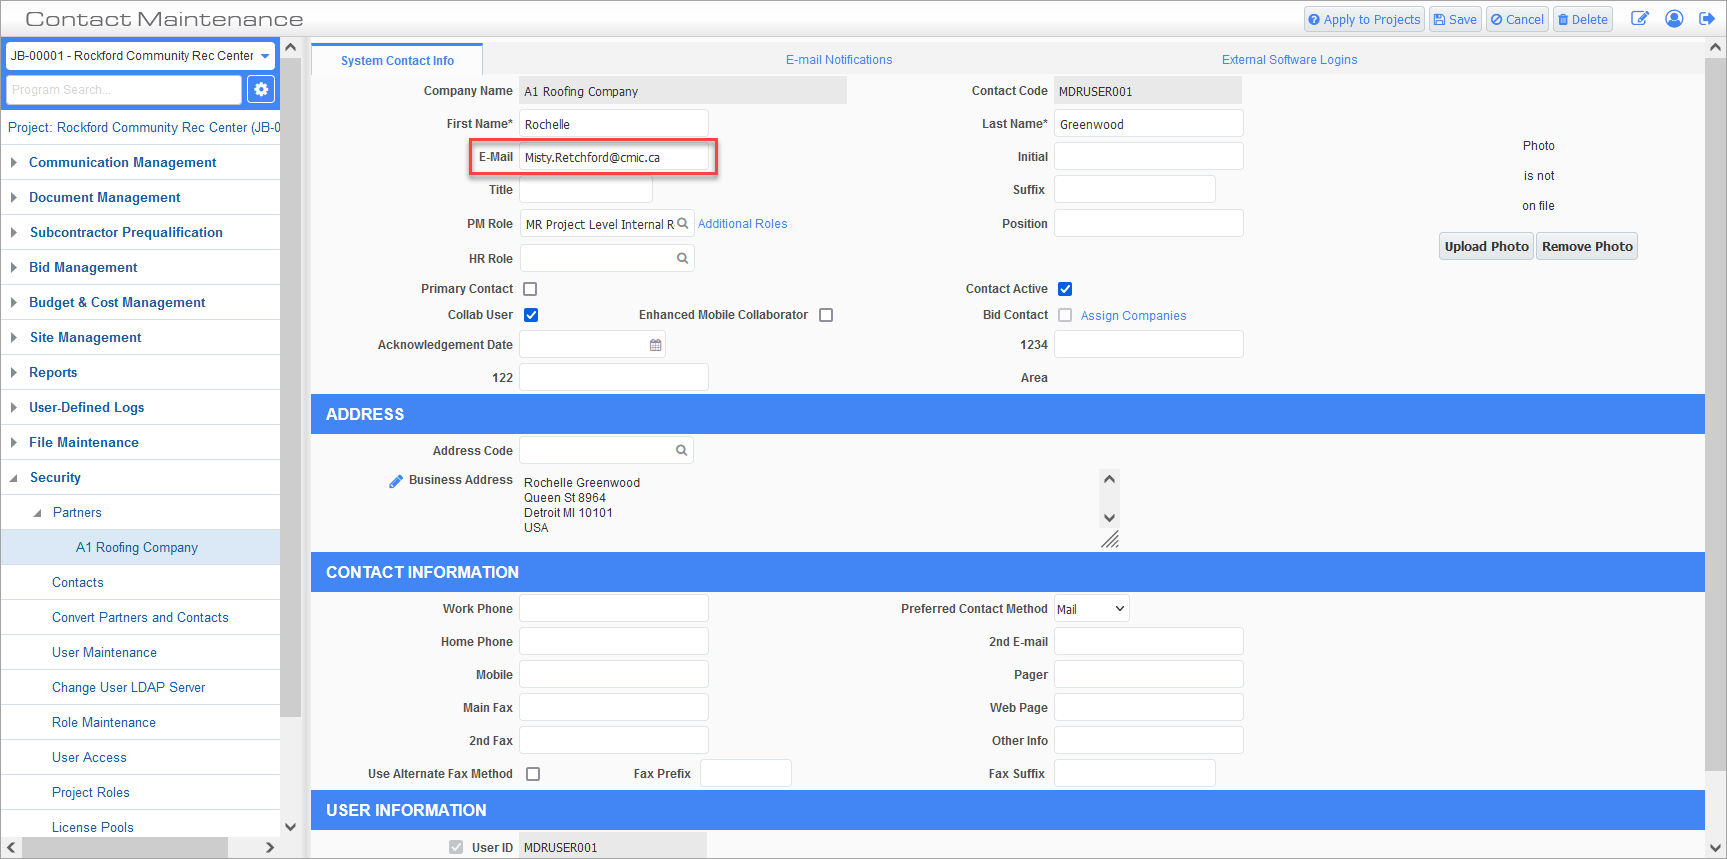
Contact Maintenance; standard Treeview path: CMiC Field > Security > Partners > Select a Partner Record > Click the Edit icon to edit contact
Once the other identified contacts have their email address modified, the SSO email invite can proceed.
How do I prevent non-SSO users from being redirected to the SSO login?
To prevent this, the cookie for cmiccloud.com needs to be cleared from the browser, followed by closing and restarting the web browser. We are currently testing a link to remove the cookie causing the redirect to the SSO login. If a legacy user is being redirected to the SSO login, please use the following link, then close the browser:
-
https://atlas-az.cmiccloud.com/cmicprod/cmic/clearCmicAzureCookie (ATLAS)
-
https://nova-az.cmiccloud.com/cmicprod/cmic/clearCmicAzureCookie (NOVA)
When they open their browser again and attempt to access their standard CMiC link, they should now be able to access the legacy login page.