NOTE: As of Patch 20, support for the JSP Crew Time Entry will be limited. While the screen will remain accessible from our standard menu, no further enhancements will be made. Users are encouraged to transition to the timesheet entry solutions available in the Construct CT (App) to benefit from continued support and new feature development.
Crew Time Entry; standard Treeview path: E-Time > E-Timesheet > Crew Timesheet Entry
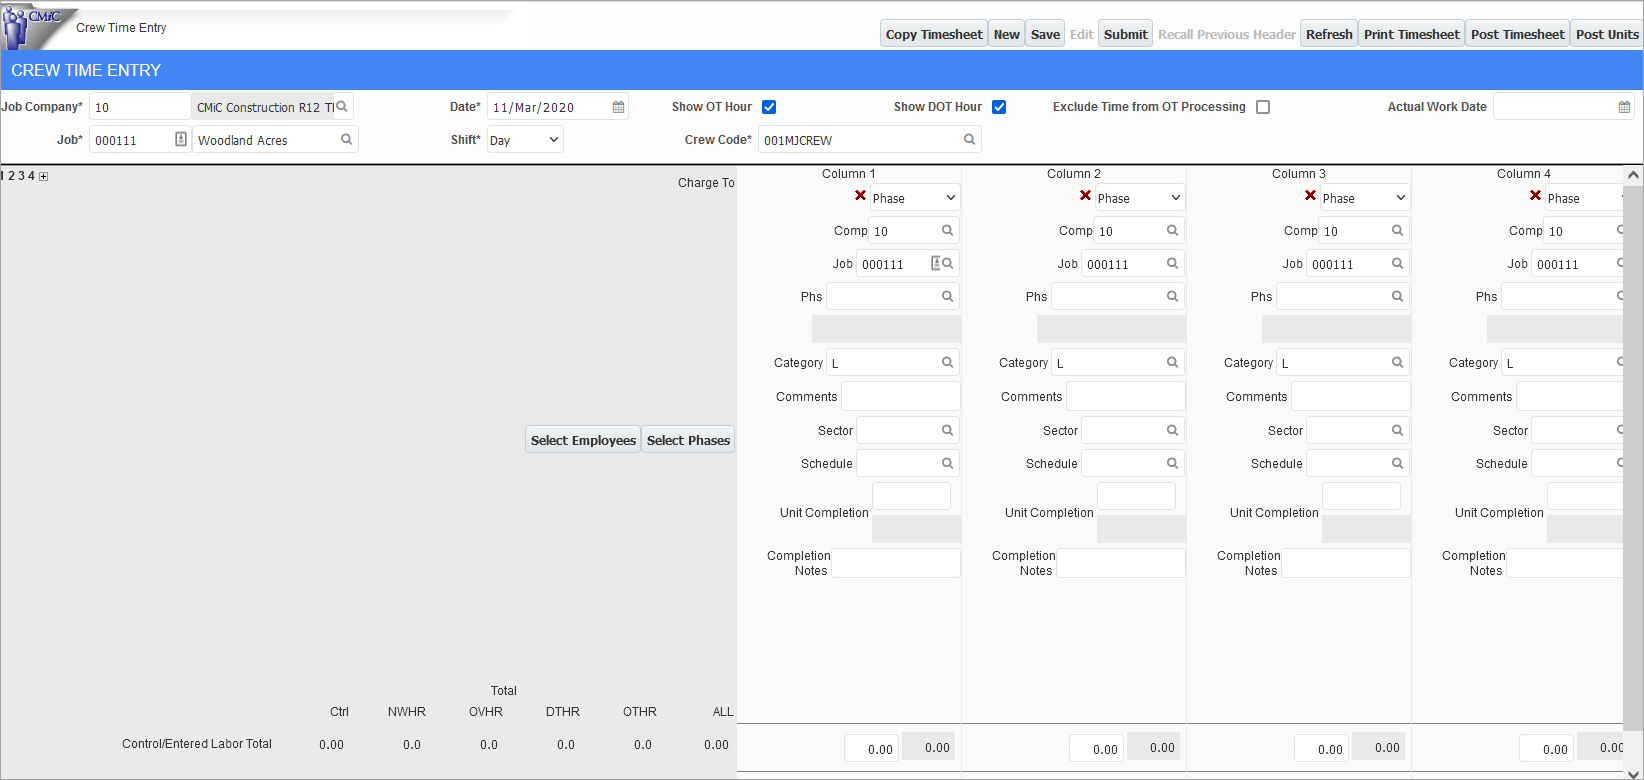
Use this screen to enter time worked on jobs for entire crews. To display the columns and the [Select Employees] and [Select Phases] buttons, press the [Refresh] button. A summary of entered crew time can be seen by using the E-Time - Crew Timesheet Report screen.
Job Company
Enter/select the code for the company performing the job. If the 'System Wide Unique Job Code' box is checked on the Projects tab of the System Options screen, then this field is unavailable (standard Treeview path: System > Setup > System Options – Projects tab).
Job
Enter/select the code for the job against which time is being entered.
Date
Enter/select the date against which time is being entered.
Shift
Select whether the crew worked day, evening, night, or all shifts.
Show OT Hour, Show DOT Hour - Checkboxes
Check these boxes to display overtime and double overtime hours during timesheet entry.
Exclude Time from OT Processing - Checkbox
Check this box to ignore this time when applying OT rules.
Actual Work Date
Enter/select the actual work date of the crew. This date is then referenced in Job Costing for billing purposes.
Crew Code
Enter/select the crew having their timesheets entered.
Columns
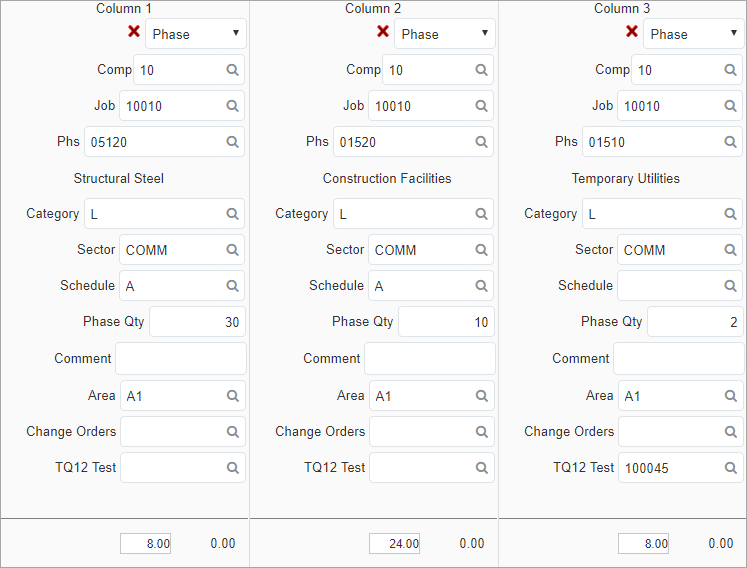
Crew Time Entry; standard Treeview path: E-Time > E-Timesheet > Crew Timesheet Entry – Columns section
The columns on the Crew Timesheet Entry screen display the various costs of the transaction. Time can be entered against a phase and category, a piece of equipment, or a General Ledger account. Additionally, comments can be entered, which can then be included when printing the US Payroll - Timesheet Reports.
Other Columns
The Crew Time Configuration screen allows for the creation of other columns, such as “Idle” and “Repairs”.
These columns appear in the placement entered on the Additional Equipment Columns section of the screen. You will be required to enter the same distribution setup as above. These columns are used to record the time the equipment was sitting idle or in for repair as an example.

Control

There are non-mandatory controls that may be entered for both the labor and equipment columns. The user should enter the batch totals for the labor and equipment time in these fields, respectively. When the entry is finished, the right- and left-hand fields should match and, if they do, the fields appear in white. If an entry error is made, the field’s value appears in red and a correction to the entry must be made before submitting or posting the entered hours.
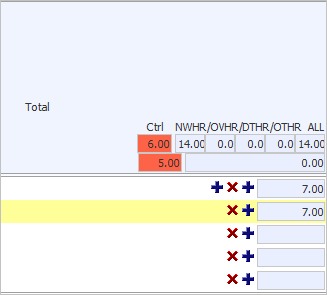
At the end of the columns the total control times are shown. As each row is totaled, it is compared to the controls. These totals must be equal before submitting and posting are allowed.
Rows
The rows in crewtime sheet allow for the entry of employee time and trade, equipment used, overtime, and leaves taken. Equipment codes can be set in the Equipment Classes screen (standard Treeview path: Equipment Costing > Setup > Local Tables > Equipment Classes).
Buttons
[Copy Previous Record] - Button
This button copies employees and their hours entered in the Crew Timesheet Entry screen to a new timesheet if the 'Copy Previous Timesheet Hours' box is checked in the Crew Timesheet Configuration screen. The job, shift, and crew code must be the same as the previous timesheet on the new timesheet to be copied.
If the checkbox is not checked, the employees are copied over but not their hours.
[Select Employees] - Button
Press this button to select the employees that populated the crew.
[Select Phases] - Button
Press this button to select the phases against which time is entered. When using this button, the phase codes default to individual columns with the category defaulting from the Crew Timesheet Configuration screen.
[New] - Button
To start a new timesheet while working on a current timesheet, press the [New] button. A prompt will appear, asking whether to keep the incomplete record.
[Save] - Button
Press this button to save, but not submit, the entered data.
[Submit] - Button
Press this button to submit the timesheet information for approval or posting.
Once submitted, the background color changes. If invalid information is entered a “Submit Failed, invalid data found” error is given and the [Show Error Message] button appears.

If the error message is due to an entry on the timesheet, then use the [Edit] button to return to the entry screen for correction.
Once any errors have been corrected, the timesheet can be printed and the timesheet report can be pre-posted and posted.
[Edit] - Button
Press this button to make any corrections.
[Recall Previous Header] - Button
Press this button to access buttons in the header that are not currently displayed.
[Refresh] - Button
Press this button to display the columns and the [Select Employees] and [Select Phases] buttons.
[Post Units] – Button
Press this button to post the phase quantity units separately as standalone items. They will not post when timesheets are posted.
NOTE: This button is enabled when the 'Auto Post JC Phase Units' privilege is not assigned on the Crew Timesheet Configuration screen.
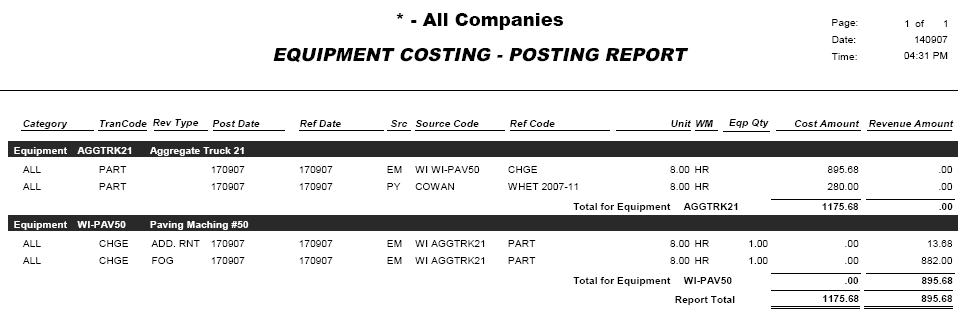
Posting Reports
Once the timesheet is posted, a screen appears where the user can select which reports to print, as shown below.
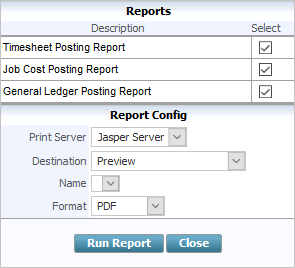
The only difference between posting crew time reports and payroll timesheet reports is that the former displays both cost and revenue totals on the equipment costing report.