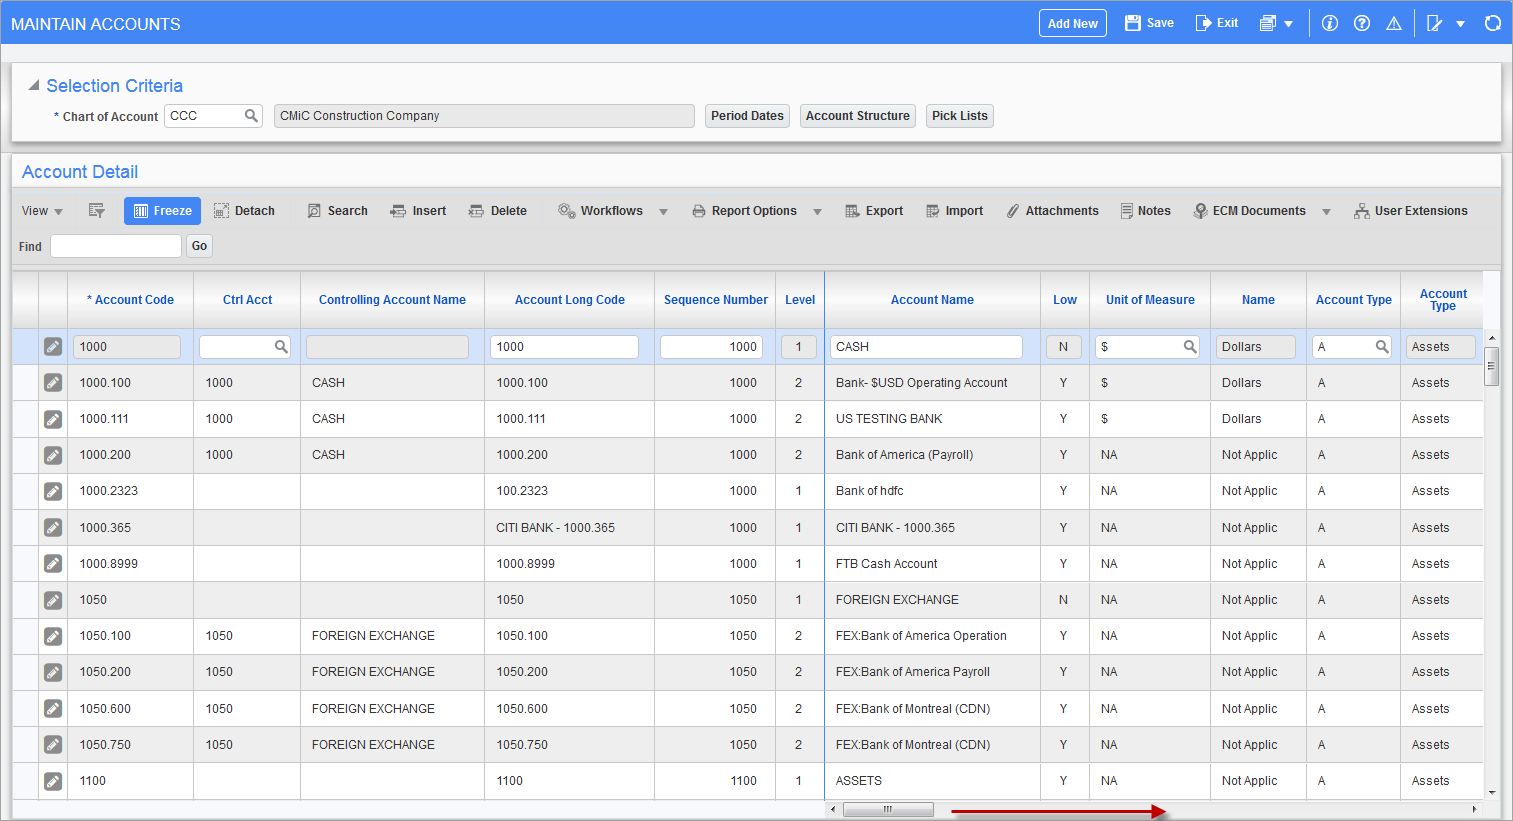
Pgm: ACCFRM – Account Maintenance; standard Treeview path: General Ledger > Setup > Maintain Accounts
This screen is used to continue the process of creating a chart of accounts, by selecting the chart of accounts code (chart code) created via the Chart Codes Maintenance screen (standard Treeview path: General Ledger > Setup > Global Tables > Chart Codes), and specifying its accounts.
The individual General Ledger accounts entered on this screen create the chart of accounts. Companies and departments with the same chart code can be consolidated on financial statements through consolidation codes.
To add accounts to the chart of accounts, click [Add New] or [Insert].
The account structure and account codes should be developed before any accounts are entered via this screen. The account codes can be numbers grouped into account types within the account structure, or characters can be used to make the codes describe the function of the account.
For this reason, a sequence number is also provided, which determines the order of processing of the accounts, particularly for the trial balance. It also determines where in the account structure the account lies, associating the account with a type such as assets or liabilities.
If account codes are set up as numbers within the account structure, then the sequence number can be the same as the account code and will default the account number automatically.
The system will default the account type suggested by the number in the Sequence Number field. The number entered in that field will be compared to the ranges specified on the account type form.
The account type for the range of sequence numbers that the sequence number on this form falls within will default to the Account Type field.
Chart of Account
Enter/select the chart code that was previously created via the Chart Code Maintenance screen for which the chart of accounts is being created.
Account Code
Enter the code to represent the account being defined. This code can be up to eight alphanumeric characters in length. Lowercase letters will be converted to uppercase.
The account codes can be numbers, grouped into account types within the account structure, or characters can be used to make the codes describe the function of the account.
Name
Enter the descriptive name for this account, up to 30 characters in length.
Ctrl Acct (Controlling Account)
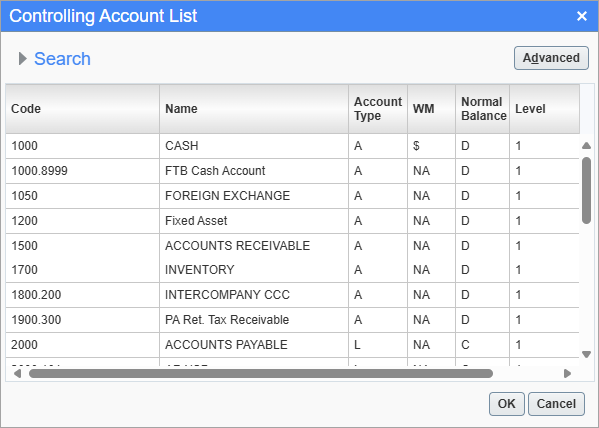
Controlling Account List pop-up
Enter/select the controlling account from the Controlling Account List pop-up if an account hierarchy is being maintained. A hierarchical chart of accounts is where a group of accounts is created that report up to another account for reporting purposes only. Transactions can only be applied to the lowest level accounts.
The highest-level account is "1". All GL accounts with a controlling account will exist one level below the controlling account. The GL account’s Low field will be set to "Y" at the lowest level of an account structure. All transaction entry screens will validate the account entered at the lowest level with the field set as "Y".
For example, if GL account 5110 is added without a controlling account assigned to it, it’s Level field would be set to “1” and it will have a Low field set at "Y". However, once a new GL account "5111" is entered and its controlling account is "5110", then the system will automatically set the Low field for account 5110 to "N" and GL account 5111 will have its Level field set at "2" and have a Low field set to "Y".
Controlling accounts will report a cumulative balance that includes all child accounts.
NOTE: Controlling accounts with a Low field set at "N" will not appear on trial balance reports, logs, or queries.
Sequence Number
Enter the sequence number for this account. The number should be unique for the chart code. If this field is left blank, the account number will appear in this field and will be used as the sequence number.
The sequence number determines the order of processing of the accounts, particularly for the trial balance. It also determines where in the account structure the account lies, associating the account with a type such as assets or liabilities.
If account codes are set up as numbers within the account structure, then the sequence number can be the same as the account code.
Level
This field is read-only and displays the account level if an account hierarchy is being maintained. The highest level account is "1". All GL accounts with a controlling account will exist one level below the controlling account.
Low
This field is read-only and displays whether the account is the lowest level account. Transactions can only be applied to the lowest level accounts.
NOTE: Controlling accounts with a Low field set at "N" will not appear on trial balance reports, logs, or queries.
Account Long Code
The account long code should be used to match the account code in CMiC with an account code in another system. If you are planning on exporting account balances, it would be the account code of the system the data will be imported into. This field can also be used to store the source account code if account codes are being changed when first starting to use the CMiC system. This field is not used directly by CMiC.
Unit of Measure
The system transfers the appropriate unit of measure automatically by cross-referencing the chart code with information from the assigned account structure.
The operator has the option to edit the weight/measure code for this GL account. The code must have previously been set up on the Weight Measure screen in the System Data module (standard Treeview path: System > Global Tables > Weight Measure).
It is useful to associate a unit of measure with specific accounts when custom GL reports and financial documents are required which show costs and revenues per unit. For example, an aggregate producer might want to see an income statement that also shows a column displaying costs per ton for different expense accounts. The aggregate producer would use this field to specify the unit of measure for tons for those expense accounts where it is required.
Account Type
The system transfers the appropriate account type automatically by cross-referencing the chart code with information from the assigned account structure. This code will determine the account type for this account on reports and financial statements where the account sequence is not relevant.
The module will default the account type suggested by the number in the Sequence Number field. The number entered in that field will be compared to the ranges specified on the Account Structure screen. The account type for the range of sequence numbers that the sequence number on this screen falls within will default to this field.
Normal Balance
The module defaults the appropriate account type automatically by cross referencing the chart code with information from the assigned account structure.
The operator has the option to edit the account type code for this account. Valid entries for this field are "D" (debit) or "C" (credit). This value may not be different from the value assigned to the control account if there is a control account assigned to the current account being created/edited.
Sub-Ledger Control
Enter a sub-ledger code if this is the controlling account for the sub-ledger. If the sub-ledger control is specified, then distributions to the account should normally be entered only in the specified sub-ledger screen, such as Payroll, Accounts Payable, Accounts Receivable, etc., and not directly in the General Ledger module.
A warning message will be displayed if users attempt to enter a transaction in the GL Transaction Entry screen using an account defined as a sub-ledger control account, and they will not be allowed to use the account set as the sub-ledger control unless they have the ‘SUBLGACC’ system privilege (granted via the System Privileges tab of the User Maintenance screen; standard Treeview path: System > Security > Users > User Maintenance)
In addition, when setting up control accounts in the other modules, if the account entered is not defined with a sub‑ledger control account here, the account will not be accepted.
Sub-ledger codes that should be set up are:
-
AP – Accounts Payable
-
AR – Accounts Receivable
-
PR – Payroll
-
IV – Inventory.
The code “XX” can be used to mark an account as inactive. Also, the same sub-ledger control may be applied to more than one account.
Sub-Ledger Summary – Checkbox
Check the box if individual debits and credits posted from sub‑ledger screens should be summarized when posted to the accounts in the General Ledger. If this option is checked, only one debit or credit per posting batch will be written to the General Ledger for this account. The amount posted will be a summation of the individual debits or credits to that account.
If you select this option, the detail for the fields Source Code, Source Description, Reference Code, and Reference Date will be lost when the batch is transferred to the General Ledger. The Reference Description field will contain the batch name.
Uncheck the box if individual debits and credits should be posted from the sub‑ledger screens to be fully detailed in the General Ledger. If this option is chosen, each debit and credit posted in each sub‑ledger batch for this account will be written to the General Ledger.
The module will default an unchecked status to this field.
Allow in Cost Pool Allocation – Checkbox
If this field is checked, and the cost pool functions within CMiC are being used, the balance of this account can be considered as a source account in the cost pool allocation routine.
Group By And Report at This Account Level on Schedule G Allocation Reports – Checkbox
This checkbox is only applicable if the Schedule G report is run via the Cost Pool Allocations screen.
Inter-Company Account – Checkbox
Check this box if the inter-company accounts should not be seen on reports that consolidate companies with inter-company transactions.
Leave this box unchecked if the inter-company accounts should be seen on reports that consolidate companies with inter-company accounts.
Monetary Account – Checkbox
This box is checked by default and indicates whether the account is a monetary account.
This box must be checked in order to use the account in the Remeasure Foreign Currency Balances screen (standard Treeview path: General Ledger > Utilities > Remeasure Foreign Currency). For more information, please refer to General Ledger - Remeasure Foreign Currency Balances.
NOTE: This checkbox is hidden by default and can be added using Lite Editor.
Remeasure Foreign Currency Balances – Checkbox
Check this box to indicate whether the account's foreign currency balance will need to be remeasured using the Remeasure Foreign Currency Balances screen (standard Treeview path: General Ledger > Utilities > Remeasure Foreign Currency). This box is unchecked by default. For more information, please refer to General Ledger - Remeasure Foreign Currency Balances.
NOTE: This checkbox is hidden by default and can be added using Lite Editor.
Account Currency
Enter/select the currency code to be associated with this account. The currency must already be defined in the system.
Foreign Currency Accounts
Normally the General Ledger accounts are all stored in local currency; this means any transaction entered in a sub-ledger in a foreign currency will post to the General Ledger account in the local currency. The foreign currency account (FX) functionality will automatically split the foreign currency transaction into two. The first being the amount of the transaction in the foreign currency, the second being the conversion amount. This functionality allows the balance of a currency account to be known in either local or foreign currency at any time.
For example – If the company is Canadian and a $100 US voucher is posted using this method, the amount will split – Accounts Payable US = $100, Accounts Payable US FX = $60 – assuming $100 USD = $160 CDN. If this new method is not used, the Accounts Payable account would get $160.
The most common accounts that this functionality would be applied to are bank accounts and Accounts Payable and Accounts Receivable control accounts. The module does not restrict the user, so this functionality can be applied to any account.
Before starting to use this feature, the following must be done:
-
Create the FX accounts required
-
Create a General Ledger transaction to move the required balance from the currency account to the FX account – This only applies if a balance already exists in the currency account and was not previously using this functionality.
-
Add the FX account to the currency account on the account form.
As soon as the FX account is applied to the currency account, the module will start to split the postings between these two accounts.
Foreign Exchange (FX) Account
This account will be associated with the base account. This is the account that will receive a transaction for the conversion. An FX account cannot be associated with more than one account.
[Access Group] – Button
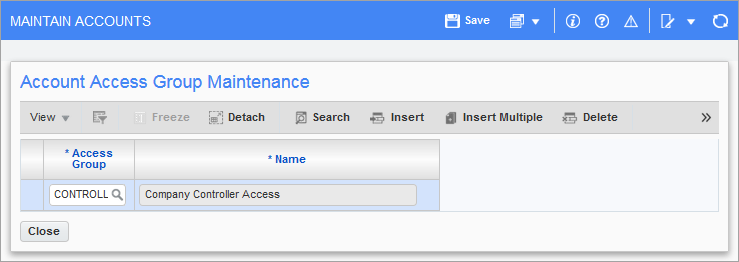
Pgm: ACCFRM – Account Access Group Maintenance pop-up window
Use the [Access Group] button to assign this account to an access group or a series of access groups. Account access groups allow the user to limit access to an account by assigning an account to an access group and then applying those groups to various departments. See Account Access Groups for more details.
To apply an account against an access group, press the button and enter/select the group(s) to be assigned to this account. This account may be assigned to as many access groups that exist on the system. Once entries have been completed, exit the pop-up window and return to the Maintain Accounts screen.
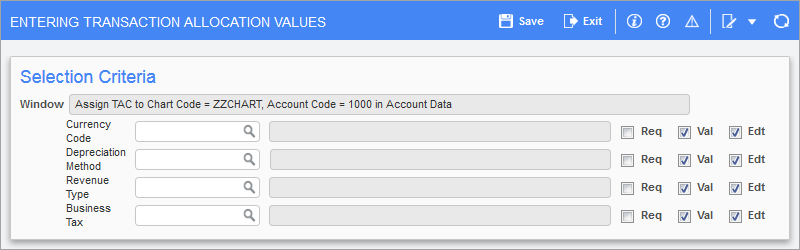
Pgm: TACTRWIN – Entering Transaction Allocation Values pop-up window
This button is only available if transaction allocation codes have been defined. The launched pop-up window allows the user to assign default TAC values and checkboxes to all the accounts within a specified chart code. The ‘Req’ (required), ‘Val’ (validated), and ‘Edit’ checkboxes are defaulted from the Transaction Allocation Codes screen (standard Treeview path: General Ledger > Setup > Global Tables > Transaction Allocation Codes), which in turn may be overridden by the user against specific accounts.
For details about transaction allocation codes, please refer to the following Transaction Allocation section of this user guide.
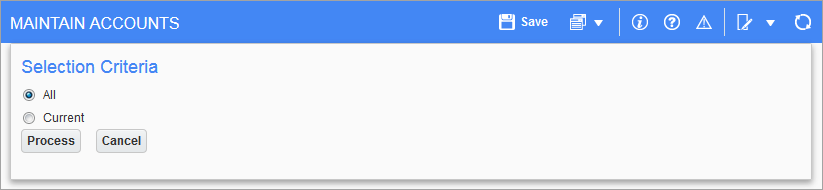
If changes were made or new transaction allocation codes were created using the Transaction Allocation Codes screen (standard Treeview path: General Ledger > Setup > Global Tables > Transaction Allocation > Transaction Allocation Codes), update the values in the Maintain Accounts and Enter Transaction screens. Click this button to update any changes made to default transaction allocation codes and values. A pop-up window will prompt the user to select either all TACs or only the current TAC.
The All field will wipe out all existing defaults for all the TACs at all lower levels and replace them with the defaults defined within this screen.
The Current field will replace only the changed value with the new default at all the lower levels.
If applicable, enter/select a group account code from the LOV. Group codes are used to group account types like assets, liquid assets, administration expenses, etc. These groups can be used for custom reports.