Step 1: Set User Defaults for GL Module
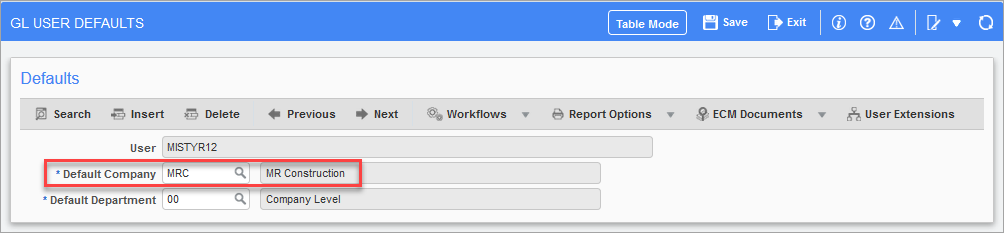
Pgm: GLSETFRM – GL User Defaults; standard Treeview path: General Ledger > Setup > Set User Defaults
Use the Set User Defaults screen in the GL module to set the user’s default company. Setting the default company will help prevent mistakenly entering data for the wrong company and department.
For more details on the GL User Defaults screen, see the General Ledger - Set User Defaults
Step 2: Define Departments
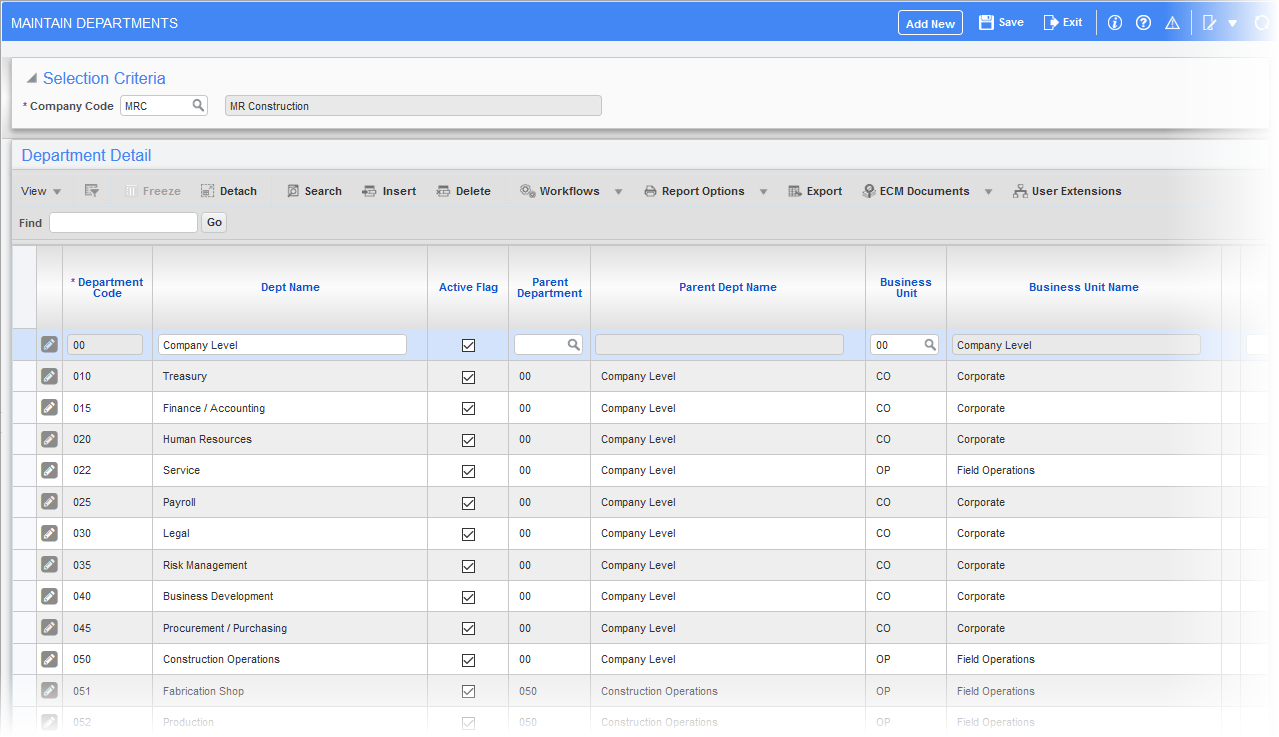
Pgm: DEPTFRM – Maintain Departments; standard Treeview path: General Ledger > Setup > Local Tables > Maintain Departments - Department Details tab
If departments are not being used to group the accounting activity into different divisions, this step is not required.
If departments are not being used, note that the controlling department "00" is already set up. It may not be used as a department code but may be used as a controlling department for any department that will be set up.
NOTE: The Departments tab of the Company Setup screen can also be used to enter a company’s departments.
For more details on departments, see the Maintain Departments
Step 3: Enter Accounts by Department (Optional)

Pgm: ACCBYDEP – Account by Department; standard Treeview path: General Ledger > Setup > Local Tables > Account by Department
The chart of accounts is applied to departments in their entirety, allowing all departments access to the chart of accounts without the necessity of entering each department’s accounts repeatedly. The account by department was created for those companies who would like to limit access to the accounts a department may use.
For more details on account by department, see the Account by Department
Step 4: Enter Journal Codes & Names
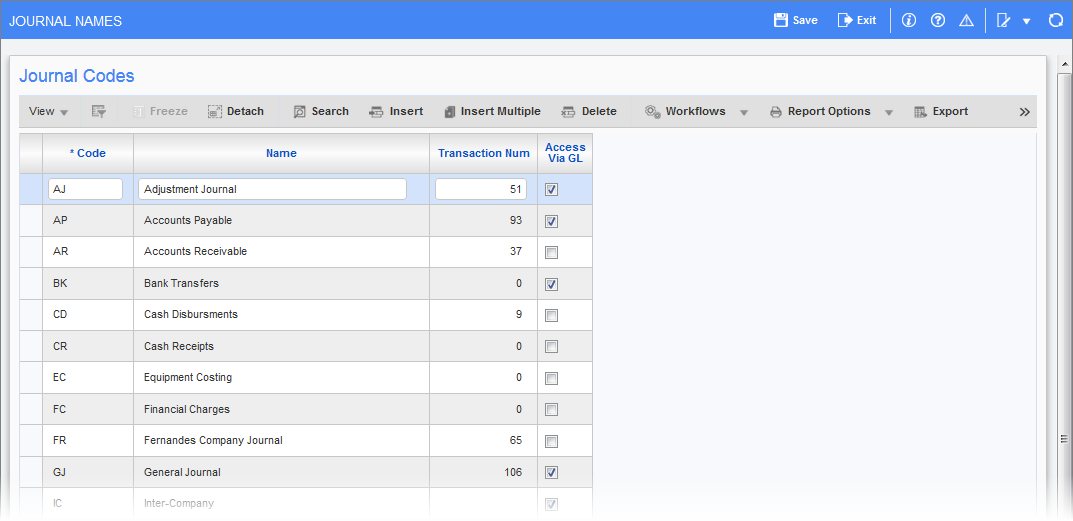
Pgm: JOURFRM – Journal Names; standard Treeview path: General Ledger > Setup > Global Tables > Journal Names
If the first company is being set up on the system, this option must be accessed to create the different journals required for the account activity. If companies are already set up on the system, the required journals may already exist.
For more details on journal codes and names, see the Journal Names
Step 5: Enter Region Codes
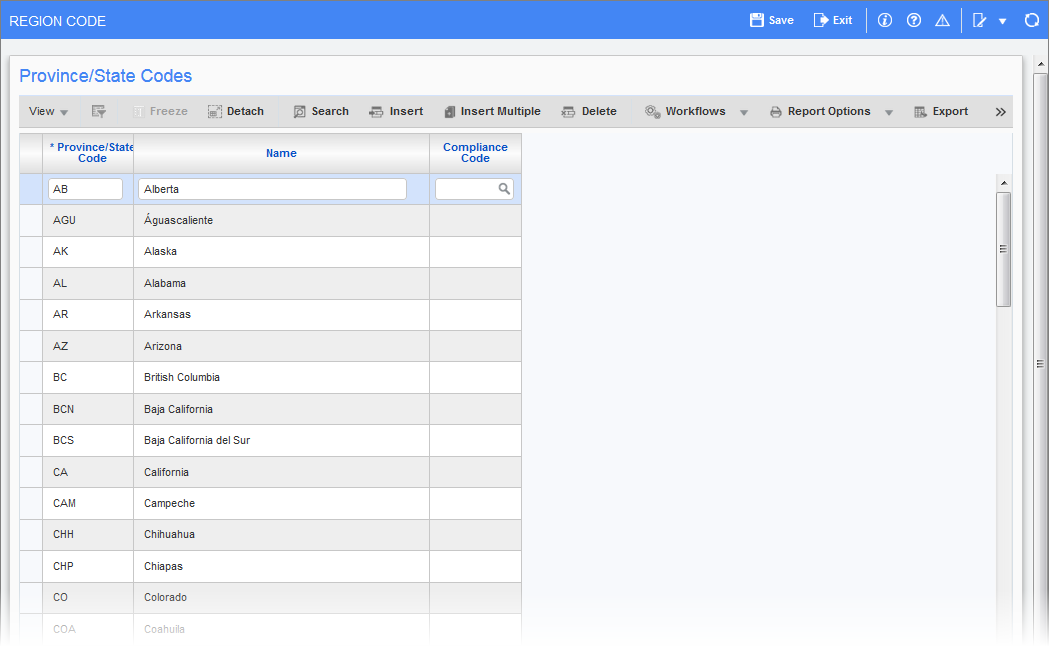
Pgm: REGFM – Region Code; standard Treeview path: System > Global Tables > Region Codes
The system requires the entry of geographical regions on many screens for address information. These codes are used to reference provinces/states throughout the system.
Step 6: Set Up Transaction Allocation Codes (Optional)
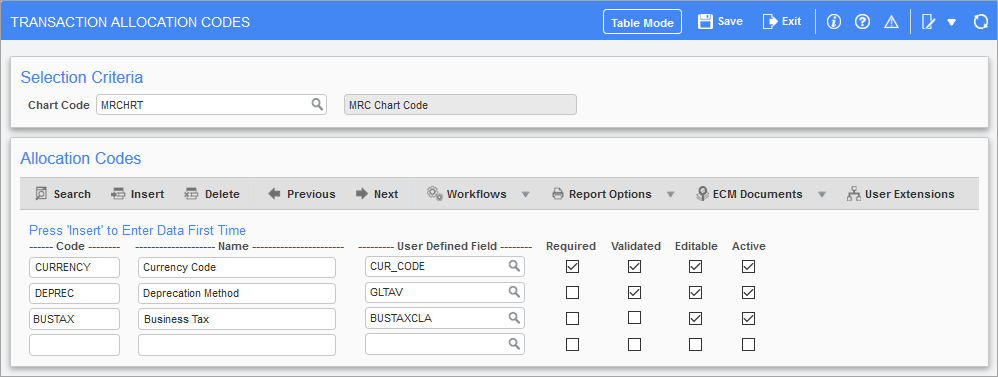
Pgm: GLTACFM – Transaction Allocation Codes; standard Treeview path: General Ledger > Setup > Global Tables > Transaction Allocation > Transaction Allocation Codes
Transaction allocation codes (TACs) provide a supplementary method to track and summarize dispositions posted to the various accounts in the General Ledger. TACs are user defined, and each code is assigned a set of values. These values define the attributes to be allocated to every disposition.
For more details on transaction allocation codes, see the Transaction Allocation