Overview
This article outlines the process of entering, managing, and approving crew expenses in Construct CT Legacy. Users with the appropriate privileges will have the ability to add, edit, submit, reject, and approve expenses for their crew members.
Access and Privileges
Entering Expenses
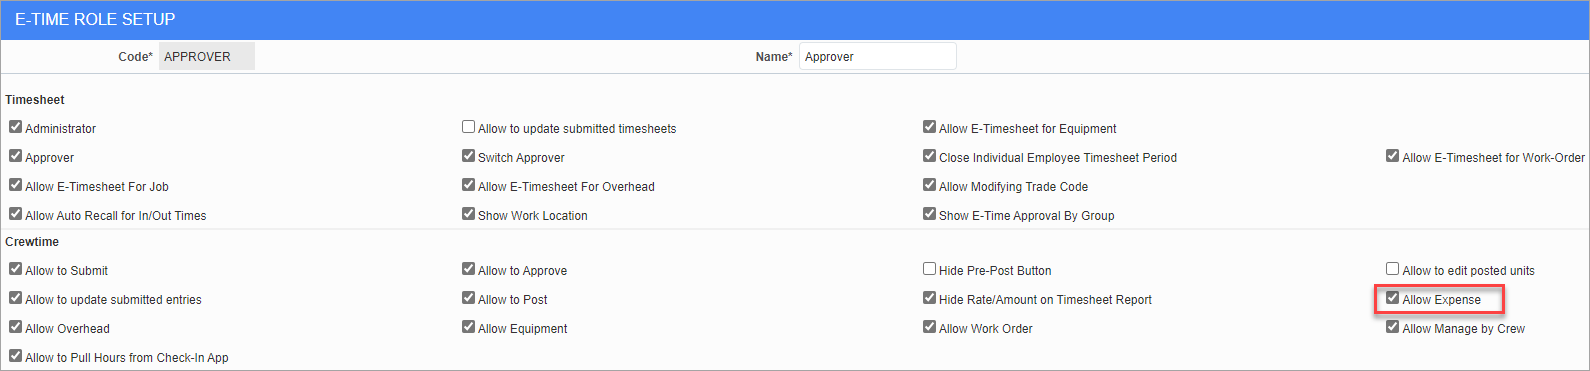
E-Time Role Maintenance; standard Treeview path: E-Time > E-Timesheet > Setup > E-Time Role Maintenance
The 'Allow Expense' checkbox, located on the E-Time Role Maintenance screen in the E-Time module, enables the Expense tab on the Construct CT Legacy Timesheet Entry screen and allows users to enter, edit, and submit expenses for their crew members.
For more information, please refer to E-Time - Role Maintenance (E-Time Roles).
Copying Expenses with Timesheets
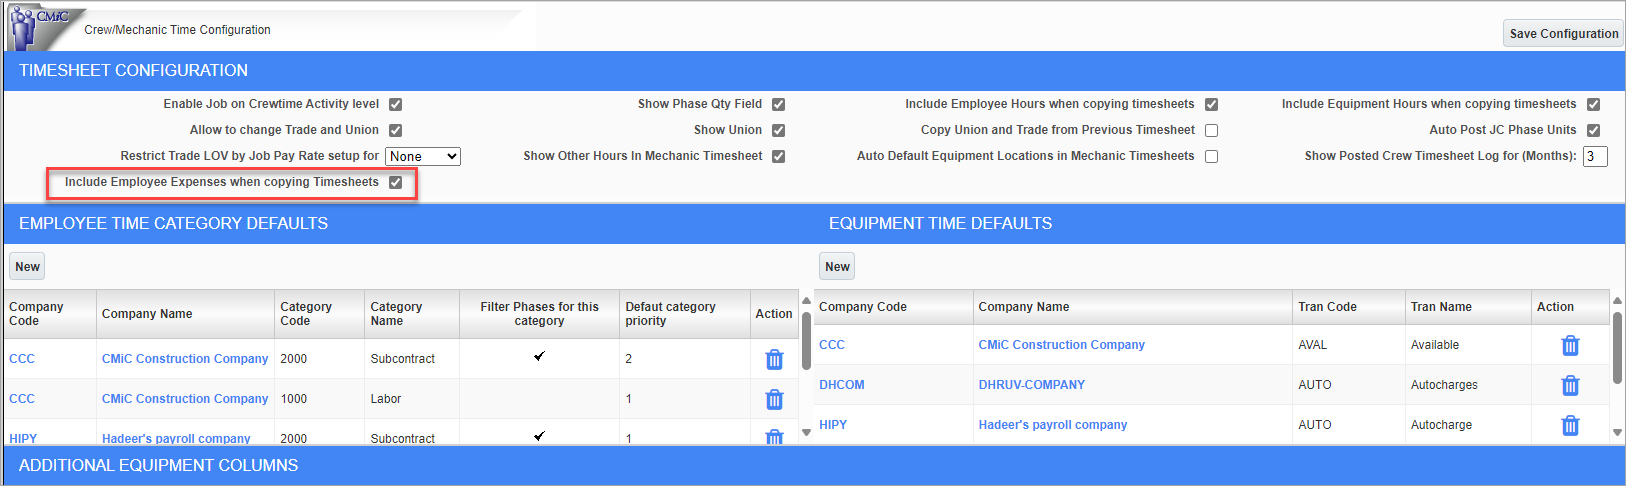
Crew/Mechanic Time Configuration; standard Treeview path: E-Time > E-Timesheet > Setup > Crew Timesheet Configuration
The 'Include Employee Expenses when copying Timesheets' checkbox on the Crew/Mechanic Time Configuration screen in the E-Time module allows users to copy expenses alongside employee hours when copying timesheets.
For more information, please refer to E-Time - Crew/Mechanic Time Configuration.
Expenses
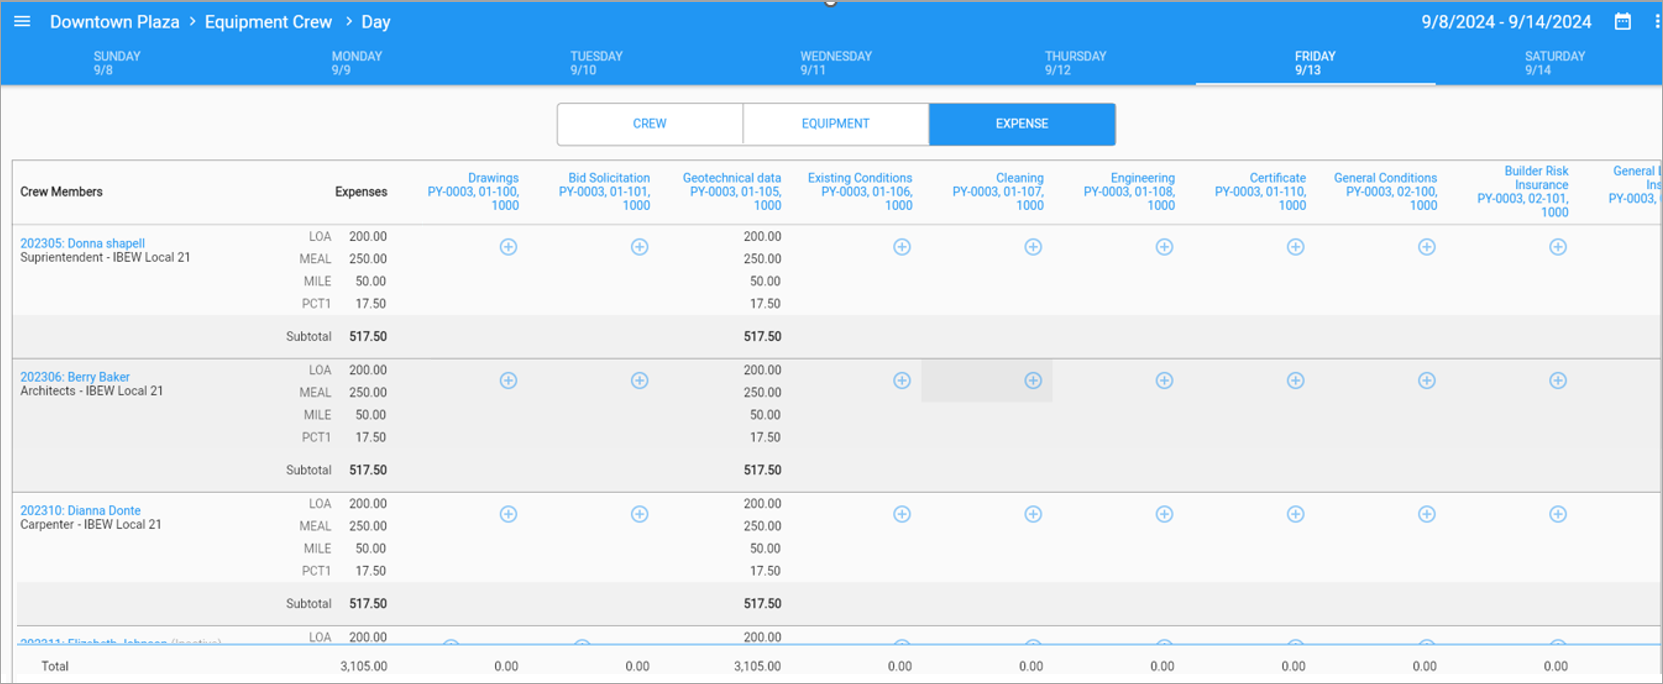
Expense tab on the Timesheet Entry screen
The Expense tab on the Construct CT Legacy Timesheet Entry screen displays employees and activities directly linked to the crew for seamless management. Initially, all cells on this tab will display no values. After saving, expenses appear as dollar amounts and subtotal and total expenses are displayed for each employee and activity.
[Copy Transactions] – Button
The [Copy Transactions] button allows users to copy timesheets (including employee hours), equipment hours, and employee expenses (with the appropriate configuration). Please see Copying Expenses with Timesheets above for more information.
Adding Expenses for Single Employees
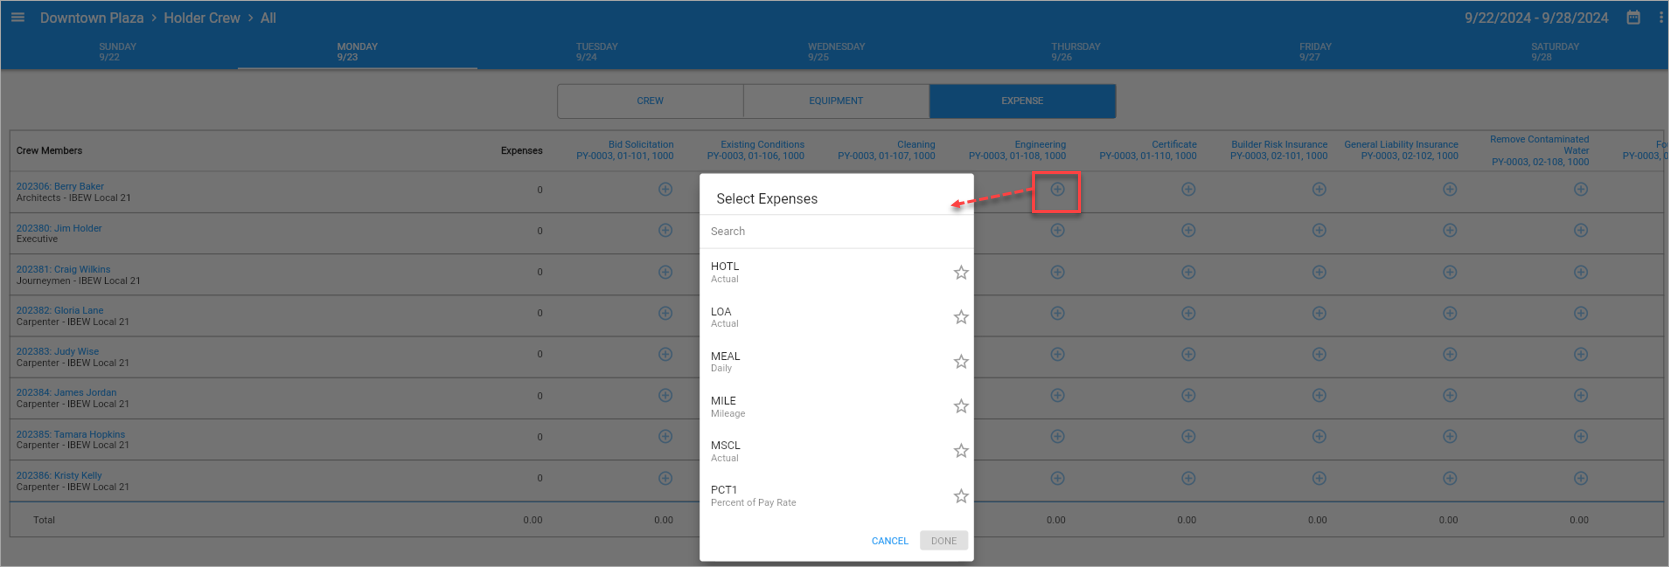
Press the Add icon (![]() ) in an activity cell to launch the Select Expenses LOV pop-up. Select one or more expenses from the LOV and press the [Done] button.
) in an activity cell to launch the Select Expenses LOV pop-up. Select one or more expenses from the LOV and press the [Done] button.
Adding Expenses for Multiple Employees

To initiate a multi-selection of employees, press and hold the Add icon (![]() ) in an activity cell and then select multiple employees.
) in an activity cell and then select multiple employees.
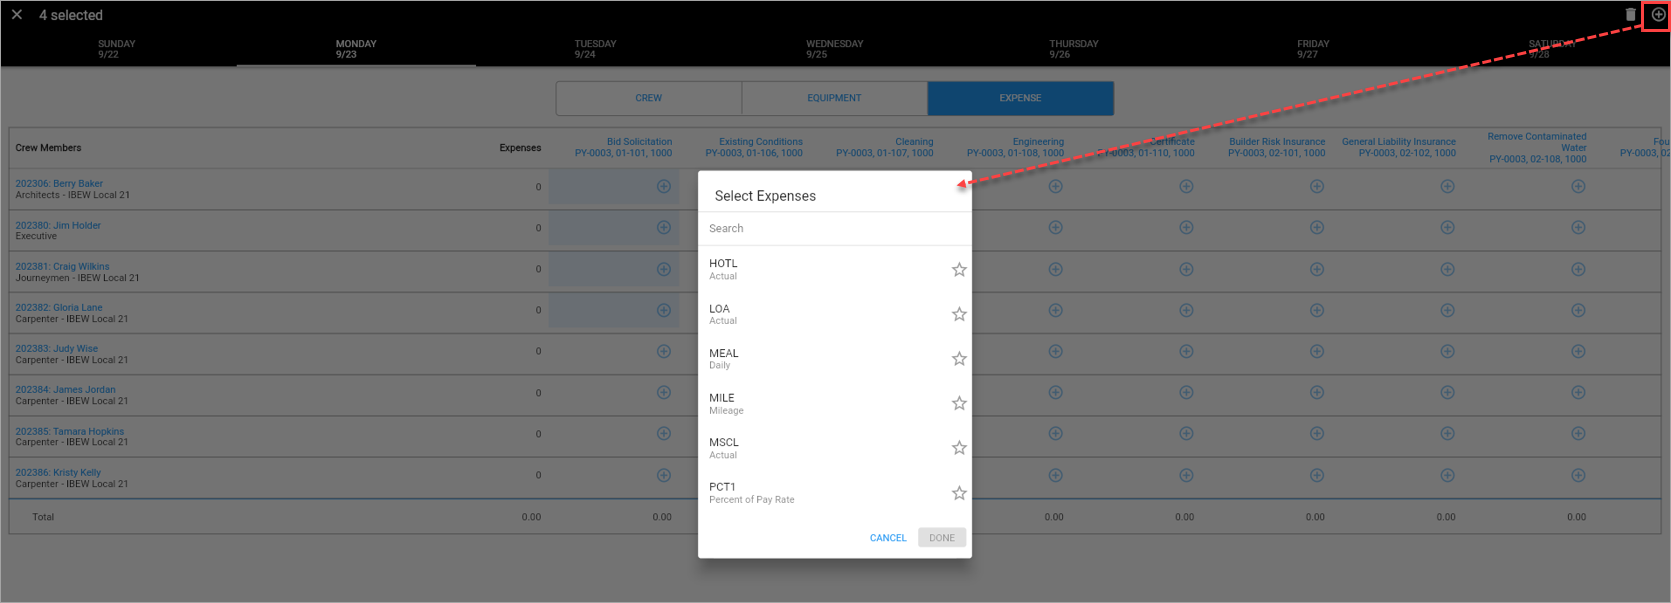
Press the Add icon (![]() ) in the top right corner to launch the Select Expenses LOV. Select one or more expenses from the LOV and press the [Done] button.
) in the top right corner to launch the Select Expenses LOV. Select one or more expenses from the LOV and press the [Done] button.
Entering Expenses

Users can enter values in the Expense screen.
Type
This field is read-only and displays the following expense types:
-
ACTL – Actual Expense: This type of expense only requires a value for the Amount field.
-
DAY – Daily Expense: This type of expense requires values for the Quantity (Days), Rate, and Amount fields.
-
MILE – Mileage Expense: This type of expense requires values for the Quantity (Miles), Rate, and Amount fields.
-
PCT – Percentage of Pay Rate Expense: This type of expense requires values for the Hours Type, Quantity (Hours), Rate, and Amount fields.
Status
The following status types are available:
-
Saved: Entered expenses are in draft form. These types are displayed in black.
-
Submitted: Expenses are submitted for approval and are locked for editing. These types are displayed in blue.
-
Approved: Finalized expenses that cannot be edited. These types are displayed in green.
-
Rejected: Expenses marked for correction and resubmission. These types are displayed in red.
-
Posted: Permanently recorded expenses. These types are displayed in gray.
Hours Type
Select the hours type for the expense (e.g., regular, overtime, double overtime, etc.). The system will automatically determine the applicable rate based on the percentage defined in the Expense Categories screen in the US Payroll module.
This field is only available for percentage of pay rate expenses.
Quantity
Enter the quantity associated with the expense type. This value could be, among other things, the number of miles traveled in a rental car or the number of days spent at a hotel.
Rate
This field is not available when an “Actual” expense type is selected.
Enter a rate associated with the expense code if a rate has not defaulted from the expense set-up in the US Payroll module. For example, the rate for the mileage on a rental car may be set at 20 cents a mile. If a standard rate has been set, it will default into this field, but may be changed.
NOTE: Users can change the default rate if the 'Override Calculated Amount' box is checked on the Expense Categories screen in the US Payroll module (standard Treeview path: US Payroll > Setup > Company > Expense Categories).
-
If this box is checked, users are permitted to manually edit the rate.
-
If this box is unchecked, editing the rate is not allowed.
However, regardless of whether the box is checked or unchecked, if a user modifies the calculated amount, the system will automatically adjust the quantity to reflect the change.
For more information, please refer to US Payroll - Expense Categories.
Amount
Enter the monetary amount claimed on the expense. This defaults as the rate multiplied by the quantity but may be changed.
Save
Press the Save icon (![]() ) to save the expense.
) to save the expense.
Example

For a user with a standard pay rate of $70/hour and a default expense rate of 2%, the rate is calculated by the system as:
Rate = Pay Rate x Expense Rate
Rate = $70 x 2% = 1.4
For a percent of pay rate type expense, the user enters 8 hours in the Quantity field and the amount is calculated as:
Amount = Quantity x Rate
Amount = 8 hours x 1.4 = $11.2
Managing Expenses
Click a cell to edit or add an existing entry where an expense has been entered. Edits can be applied to one or more expense entries. Press the Save icon (![]() ) to confirm the updates. The Delete icon (
) to confirm the updates. The Delete icon (![]() ) can be used to delete selected expense entries.
) can be used to delete selected expense entries.
Expense Approval
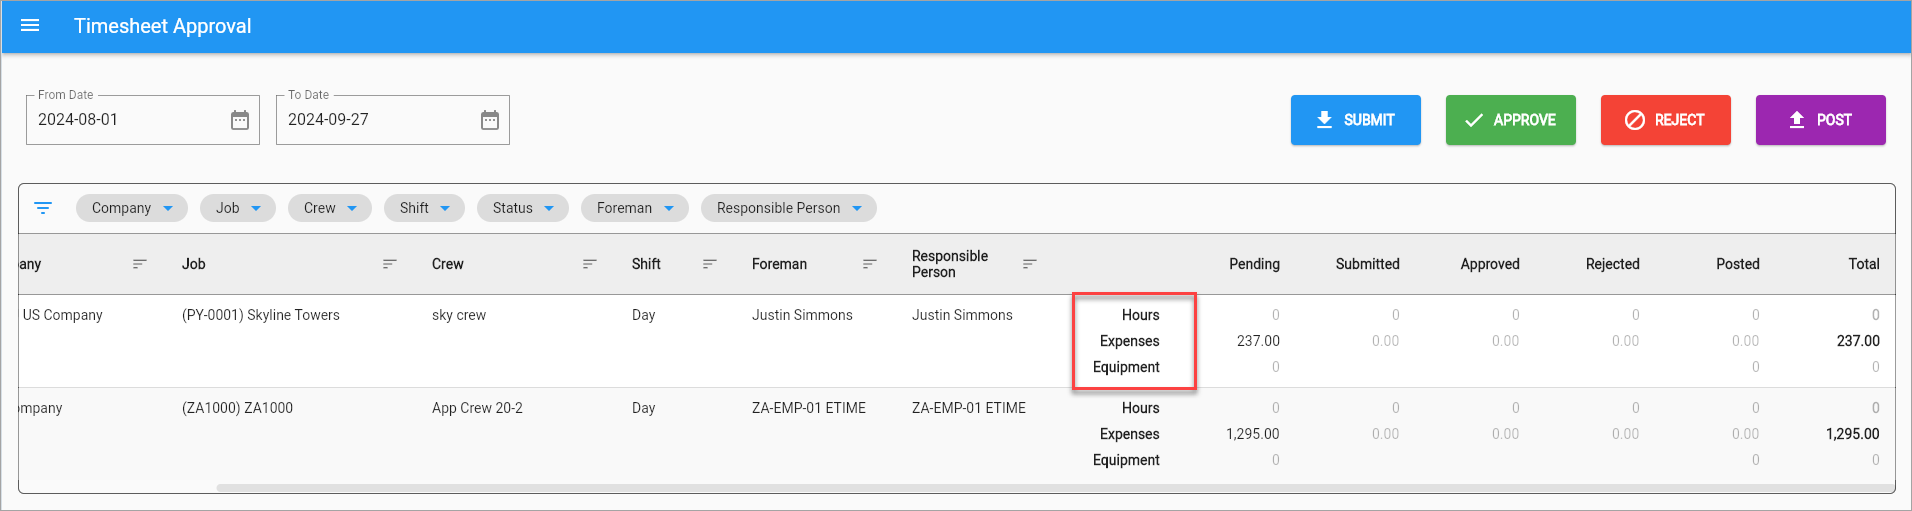
Expense approval is managed in the Construct CT Legacy Time Approval screen. Each entry on the Timesheet Approval screen will have a dedicated row for labor (time entries) that displays the usual details about hours worked by the employee. Below each labor row, within the same cell, a secondary row will be dedicated to expenses. This allows the approver to review associated expenses for the corresponding labor entry in a single glance.
[Submit] – Button
The [Submit] button allows approvers to submit both their time entries (hours worked) and expenses for approval. Press this button to move the labor hours and expense entries to the Submitted column.
[Approve] – Button
The [Approve] button allows approvers to validate and accept labor hours and expense entries in one step. Press this button to move labor hours and expense entries to the Approved column. Expenses will be marked as "Approved" for processing.
[Reject] – Button
The [Reject] button allows approvers to reject labor entries and the associated expenses. Press this button to move the labor hours and expense entries to the Rejected column. Expenses will be marked as "Rejected".
[Post] – Button
The [Post] button finalizes labor and expense entries, making them ready for financial and project records. Press this button to post the labor hours and move them to the final Posted status. Expenses will simultaneously be moved to the "Posted" column.