Overview
Pgm: VOUCHENT – Enter Voucher; standard Treeview path: Accounts Payable > Voucher > Enter Voucher – Voucher Detail tab
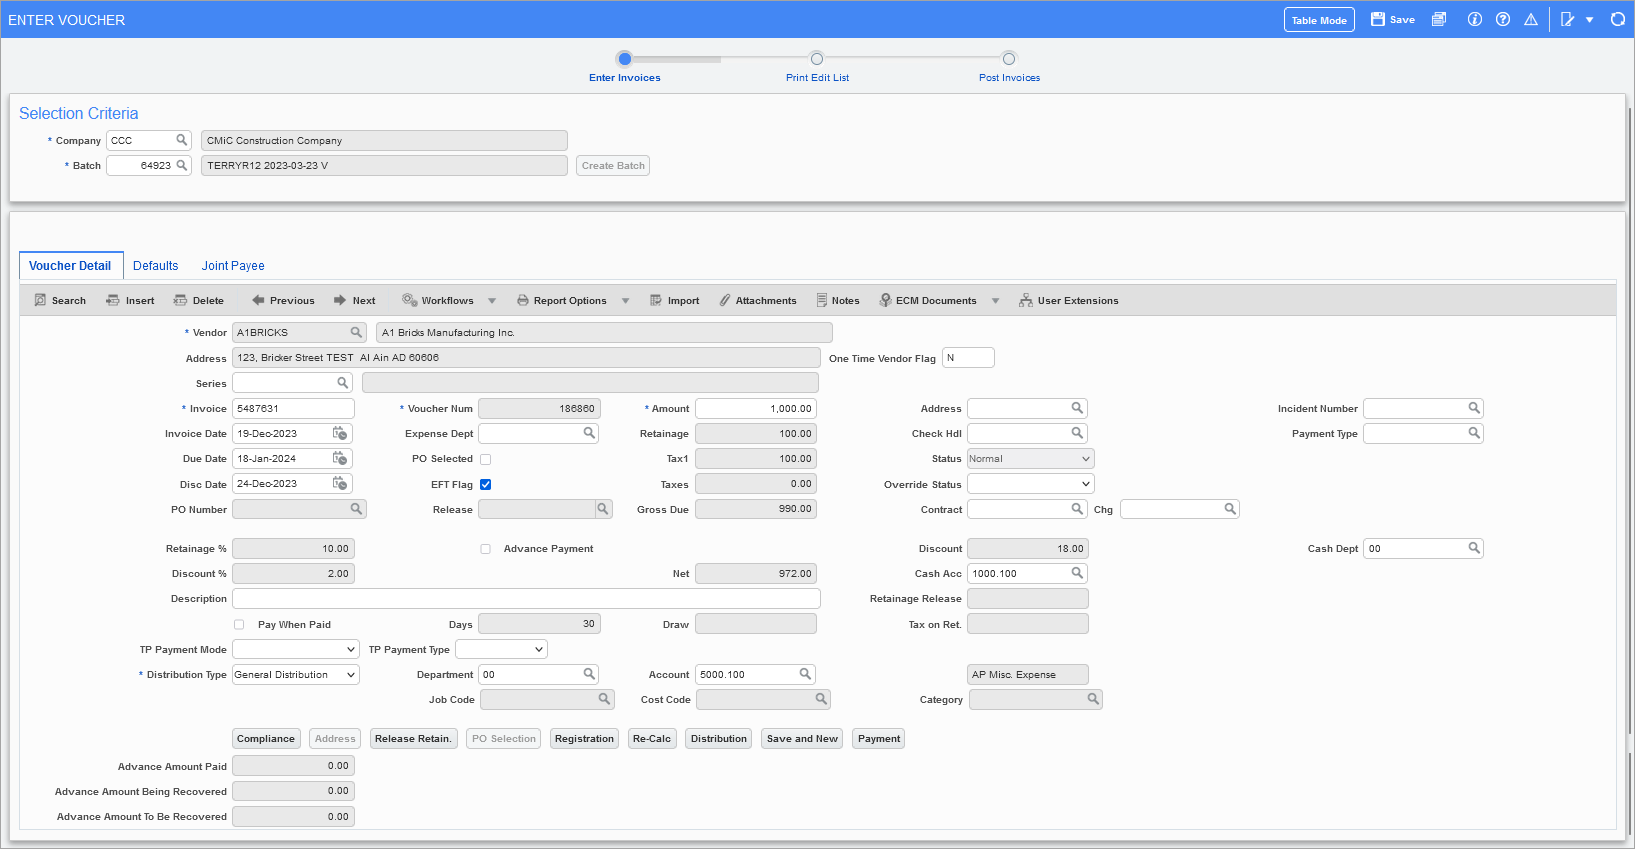
The Enter Vouchers screen is one of the larger and most frequently used screens in the system, and it is used to manually enter vouchers in the AP system for various invoices types. It allows users to enter vouchers against purchase orders, one-time vendor invoices (refer to One-Time Vendor Invoices), and against Subcontracts if the Enter Invoices field on the Contract Defaults tab of the Subcontract Control File is set to “Via – Accounts Payable”. This screen also allows users to release retainage, pull in registered invoices, enter joint payee information, handle compliance codes, and much more.
This screen contains the following section and tabs:
-
Accounts Payable - Enter Vouchers - Voucher Detail - Tab: The Voucher Details tab is used to enter a voucher’s details, which are required before the voucher’s distribution can be completed.
-
Accounts Payable - Enter Vouchers - Defaults - Tab (Override Vendor’s Defaults): The Defaults tab is used to view or edit the default voucher details for the vendor specified and to view or edit a breakdown of the amounts.
-
Accounts Payable - Enter Vouchers - Joint Payee - Tab: The Joint Payee tab is used to split the payment among multiple payees.
This screen also contains the following buttons (on the Voucher Detail tab):
Also, if a vendor’s default distribution setup needs to be overridden for a particular voucher, the [Distribution] button’s pop-up can be used. Refer to Accounts Payable - Enter Vouchers - [Distribution] - Button for more details.
Note In the Data Import pop-up window, as well as the CSV import file, users can import the Retainage % field values to their corresponding voucher records if needed.
One-Time Vendor Invoices
If the invoice being entered is an invoice from a vendor that will not be used again, then use the one-time vendor feature instead of having to create the business partner and vendor records for a one-time invoice.
When entering a one-time vendor invoice, the steps are identical to entering a normal invoice, except:
-
The vendor code selected must be for a vendor set-up as a one-time vendor.
-
The vendor name and address information must be entered via the Address pop-up that will automatically open. The name and address entered here will print on the check produced for this voucher.
Once the vendor Address pop-up is exited, an address code is created and applied to the voucher. This will make this vendor readily available for selection again, should the need arise. There is a list of names and addresses already used available in the Address pop-up.
NOTE: One-time vendors can't be used in the Imaging module for entering one-time vendor invoices.
Entering a Foreign Currency Invoice
This type of voucher means that the currency of the vendor does not match the currency of the invoice. In this case, when entering the data, you will need to change both the currency code of the voucher and the cash account.
The currency is changed via the Defaults tab. There are two ways to change the currency. First, you may change the cash account of the voucher. You will be warned that the currency differs from the vendor currency, and once you accept the warning, the currency code on the Defaults tab will automatically change. The second way is to change the currency on the Default tab first. If this method is used, you must return to the voucher and change the cash account. The cash account fields will only allow entry of accounts that are associated with bank account and currency entered. The amount entered will be the amount in the invoice currency.