Pgm: PYRETROPAY – Retroactive Payment Processing; standard Treeview path: US Payroll > Processing > Retroactive Payment Processing
This screen is used to process payments owed to employees for past pay periods. Based on the selection parameters, the screen displays all past wages for the selected employees. The employees to be included for the retroactive payment can then be selected. Once all employees are selected and accepted, the screen populates positive and negative transaction lines into the main screen, similar to the Adjustment Entry screen.
However, this screen also includes employee pay rates which are updated for the new lines created. The rate population is based on the preference setup in the Employee Profile and the effective date when the retro payment is processed. Timesheet data is considered for other parameters (trade, union, job, etc.) to populate the rates.
The adjustment data can be reviewed prior to payroll processing by users. The retro wage calculation is picked up when processing for the payroll period and the system calculates taxes on wages based on the current period.
This screen will also include benefits and deductions in the payment calculations if the 'Include in Retropay Processing' box is checked at the Master level on the Benefits Master screen (for benefits) and on the Deductions Master screen (for deductions). For more information, please refer to Master Benefits.
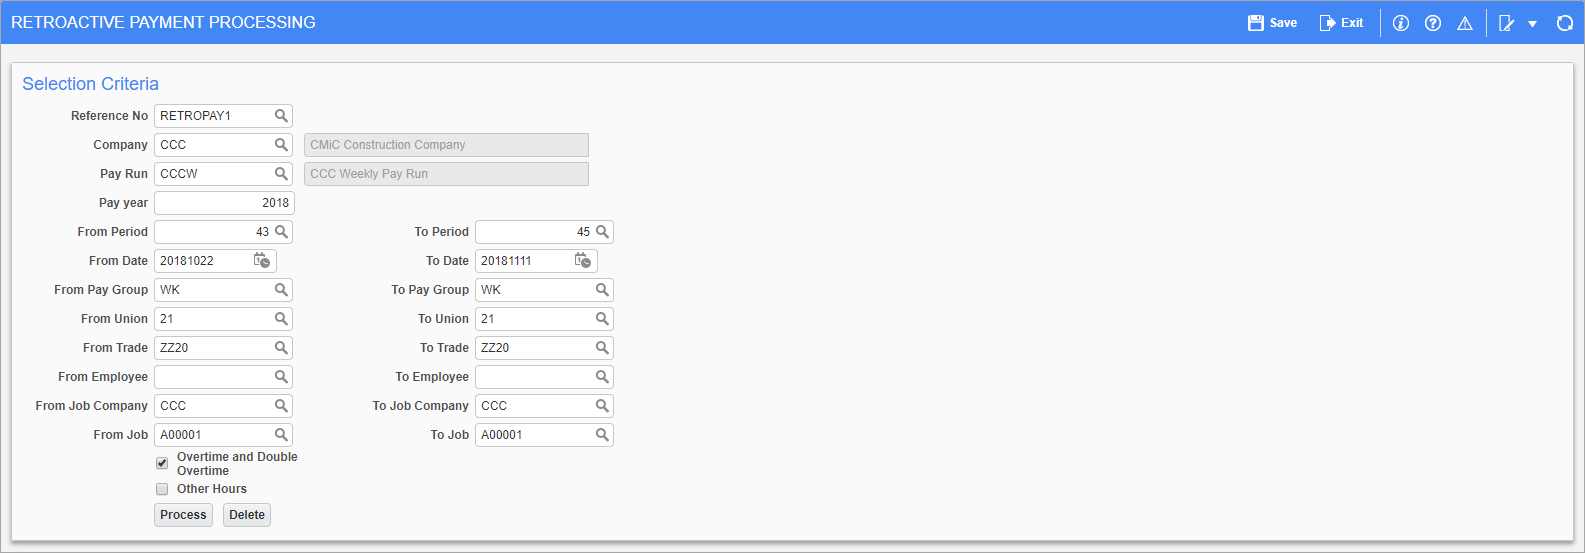
Reference No
Enter/select a unique reference number for the payment. This can either be created here or in the Salary Adjustment Edit list.
Company, Pay Run, Pay Year
Enter/select the company, pay run, and pay year for the retroactive pay to be calculated.
From Period, To Period
Enter/select the pay period for the retroactive payment.
From Pay Group, To Pay Group
Enter/select the range of pay groups for the retroactive payment.
From Union, To Union
Enter/select the range of unions for the retroactive payment.
From Trade, To Trade
Enter/select the range of trades for the retroactive payment.
From Employee, To Employee
Enter/select the range of employees for the retroactive payment.
From Job Company, To Job Company
Enter/select the range of job companies for the retroactive payment.
From Job, To Job
Enter/select the range of jobs worked on for the retroactive payment.
Overtime, Double Overtime, Other Hours – Checkboxes
Check these boxes to include overtime, double overtime, and other hour types in the retro pay calculation.
Steps for Retro Payment Processing
1. Enter the Reference Number and all other mandatory fields in the Retroactive Payment Processing screen and press [Process]. Once this button has been pressed and the record has been saved, any entered selection parameters can't be edited.
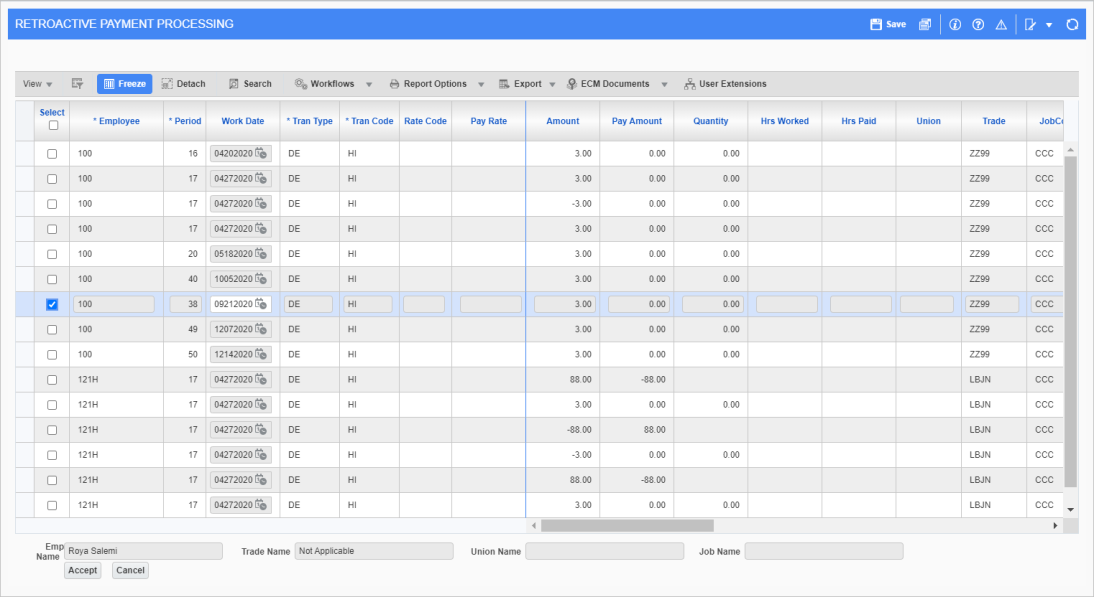
2. From the Retroactive Data Selection screen, shown below, select the Timesheet record to be used for retroactive payment calculation and press [Accept]. The total amount from the selected timesheets will be retroactively transferred to the period selected in step 3.
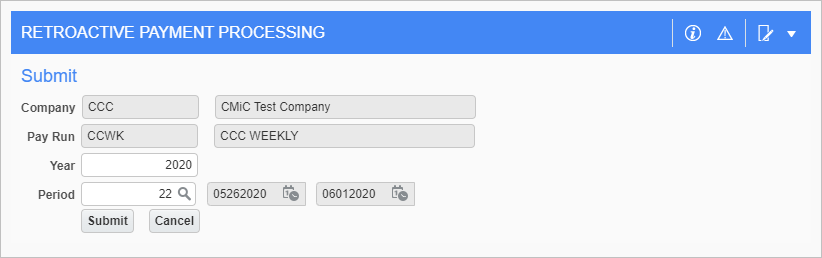
3. In the Open Period pop-up, enter the period being transferred the retroactive pay and click [Submit]. The system will default the first open period based on the entered pay run.
4. This will bring up the screen, shown below, which displays the selected timesheets and the amount of pay being transferred. Click [Process] when finished.
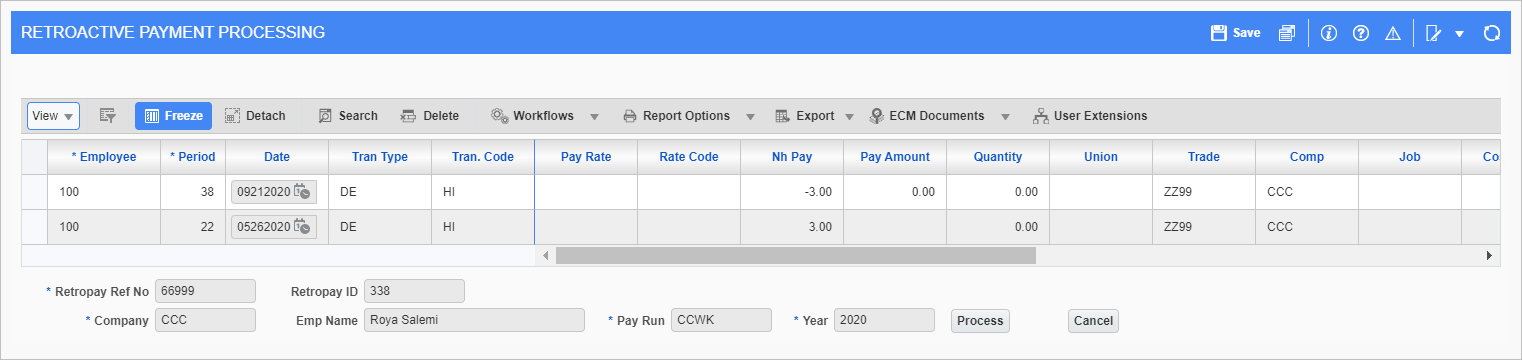
5. This record is then transferred to the US Payroll - Adjustments Entry screen for further processing. The user can update Job/Phase/Category information in this screen, but the record can't be deleted.
6. The Retro Payment Ref. No field is now added to the Salary Adjustment Edit List screen, and also appears on the screen’s report.
7. The user can delete all the transactions against the Retroactive Payment Reference Number as long as the pay check has been processed against a transaction.