MIP documents can now display a logo based on the company. Maintenance for this feature is done in the new Document Merge Logo Maintenance screen found under the Document Merge submenu in the Treeview.
NOTE: If the Document Merge Logo Maintenance screen is not in your Treeview menu, first check that your security role has been granted access to the Document Merge Logo Maintenance menu item by checking CMiC Field - Security Roles. If your security role has the right access, then use the Menu Maintenance screen in CMiC Field to drag the menu item from the standard Treeview menu to the desired Treeview menu. For more details, see CMiC Field - Menu Maintenance.
Document Merge Logo Maintenance
Logos used must be uploaded through the screen. Uploaded files are uploaded to the attachments directory.

Document Merge Logo Maintenance; standard Treeview path: CMiC Field > File Maintenance > Document Merge > Document Merge Logo Maintenance
Company code can be entered in manually or can be selected from the LOV. There can be a logo for each company code. Each company is only allowed one logo.
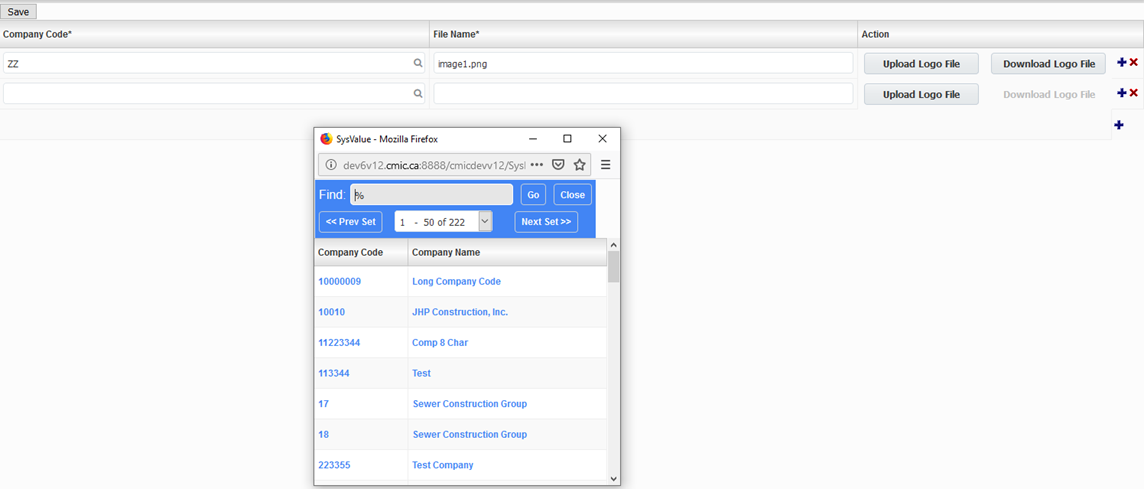
Document Merge Logo Maintenance; standard Treeview path: CMiC Field > File Maintenance > Document Merge > Document Merge Logo Maintenance – Company Code LOV
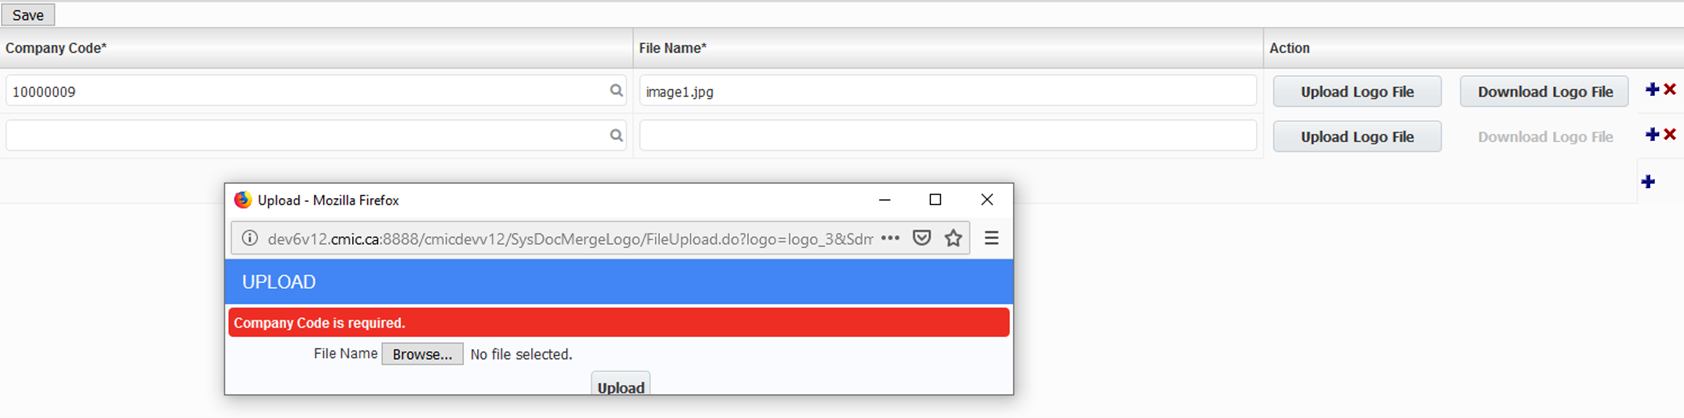
Users must enter the company code before attempting to upload. Failing to do so will cause an error.
Document Merge Logo Maintenance; standard Treeview path: CMiC Field > File Maintenance > Document Merge > Document Merge Logo Maintenance – [Upload Logo File] Button
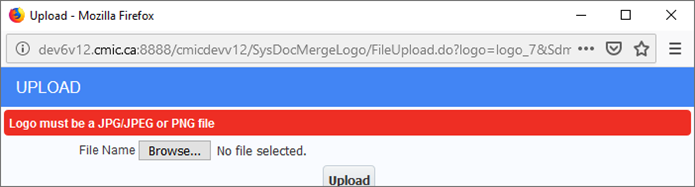
Files must either be JPG/JPEG or PNG files. Attempting to upload a file with a different extension will produce the following error:
Attempting to upload another file to an existing record will overwrite the previous file.
The record will be saved once the upload is successful.
The [Download Logo File] button will download the file that is currently uploaded to the server. The button is disabled until a file is uploaded.
To delete a record, click the red [X] button under action and click the [Save] button. If the user does not click the [Save] button, the records will not be deleted.
Creating the Template
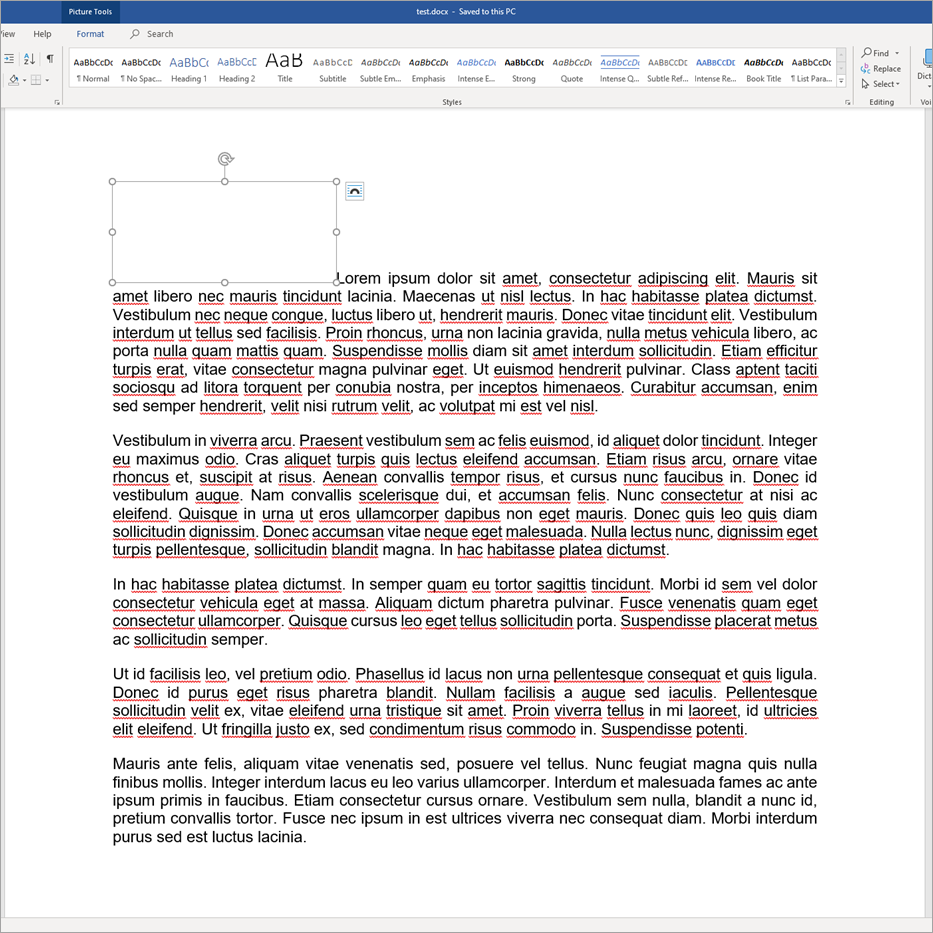
In order to use this functionality, the template must have an image as a placeholder. When the document merge is processed, the logo uploaded for the company code will replace the placeholder. The placeholder must be the first image in the document and must have the same dimensions as the one uploaded.
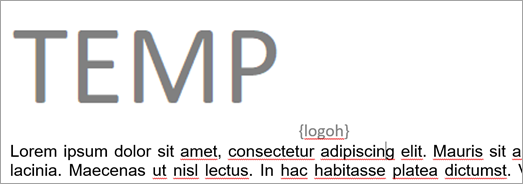
There are two tags that can be used in the template to indicate that logo replacement should occur. If the logo should be in the body of the template, copy the "{logo}" tag in the template body and the first image in the template (placeholder) gets replaced with the logo. If the logo should be in the header, use the "{logoh}" tag in the header of the document. Make sure the image (placeholder) is placed in the header so that the image in the header will get replaced with the logo on all pages.
E.g.: Template with placeholder image
MIP Logo Replacement Errors
Error 1
Before:
After:
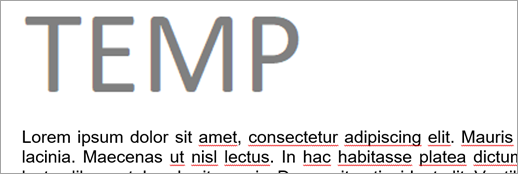
If the tag disappears after printing but the default logo has not been replaced, please check if a logo for the company has been uploaded.
Another possible reason the default logo has not been replaced is if the "{logo}" tag was copied and pasted with the original formatting. To fix this, you can manually type the "{logo}" tag directly in the MIP template. Another option would be to paste the text into software like Notepad first to remove any unwanted formatting, then copy and paste the text from Notepad into the MIP template.
Error 2
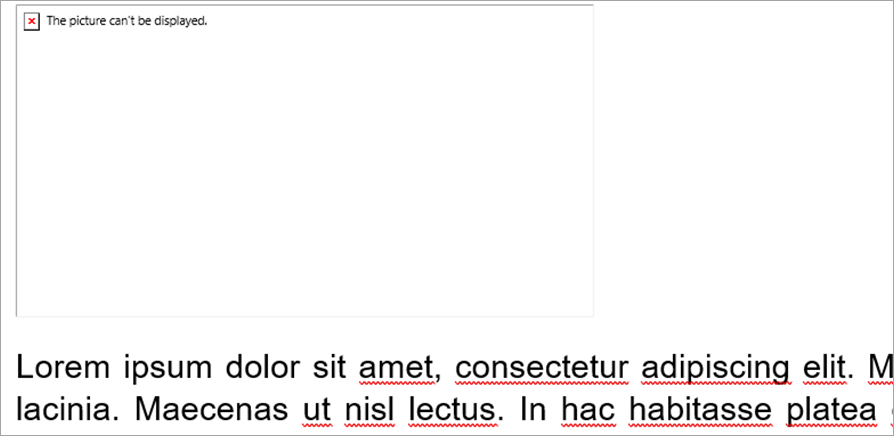
If the tag disappears after printing but the default logo is now replaced by an error, please check if there is access to the attachment directory and if the logo image exists in the directory. Users may also attempt to download the logo from the Document Merge Logo Maintenance screen to check if the logo exists and is accessible.