This article covers the core job process, from creating a job to entering invoices and billing for any costs incurred. The main steps are:
-
Setup: Job/Project
-
Setup: Subcontracts
-
Setup: Owner Contract
-
Entering Costs: Entering Job-Related AP and SC Invoices
-
Billing for Costs: Billing Owner for Costs Incurred
-
Paying Invoices
-
Creating Retention Release Invoices
Considerations
-
There are many ways to set up and bill for work completed. We strongly recommend consulting sessions in order to meet the requirements of various contract types.
-
We offer a number of Job Billing invoice formats. If a format that you require is not provided, then we can create a new Job Billing invoice format for you. Please submit any sample reports or mock-ups to our support center.
-
If you are using Imaging, image links can be embedded within your Job Billing backup report, in order that it can be submitted to the construction project owner and they will be able to view any and all invoices related to the draw.
Process
-
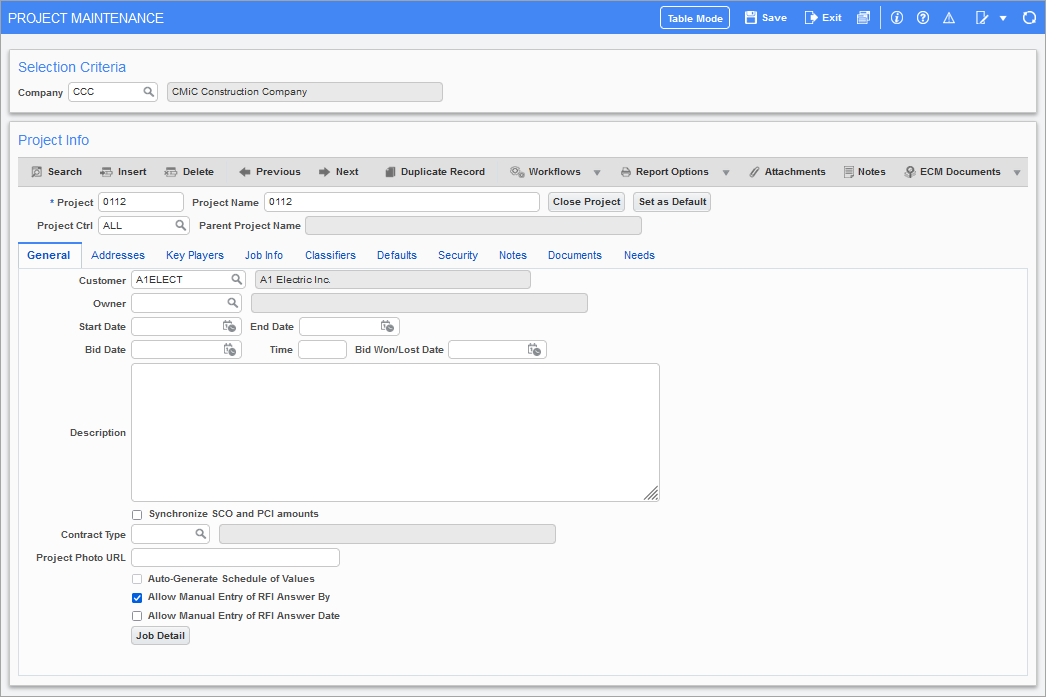
The first step is to create a job/project:
-
Assign cost codes
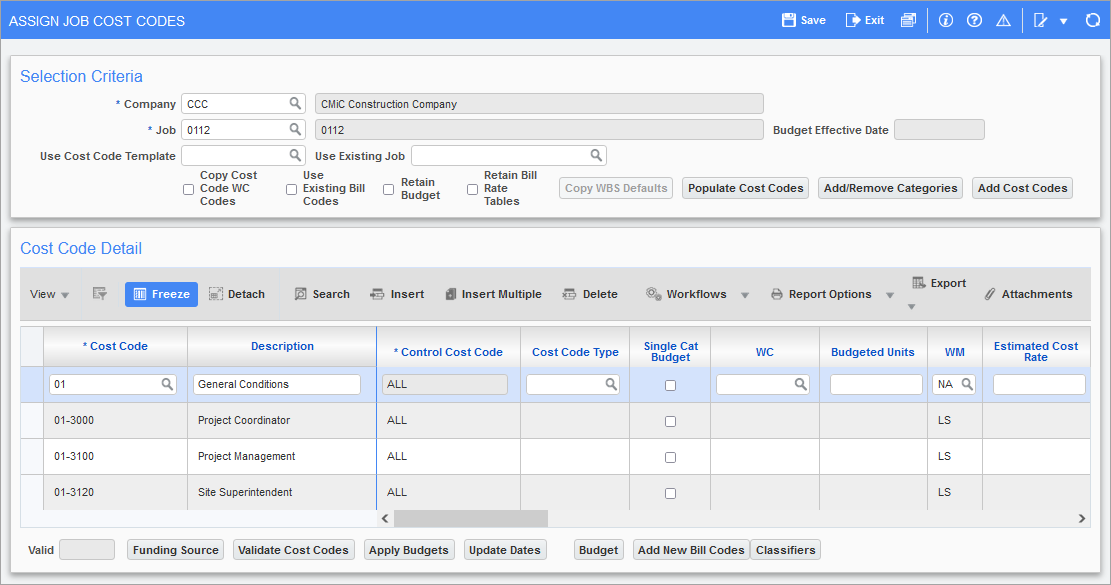
-
Enter a budget. Once the budget is complete, create a Job Billing contract using the [Create Contract] button:
![The [Create Contract] button on the JC Enter Budget screen](../../../Resources/Images/JC_12c/jcprocess3.png)
-
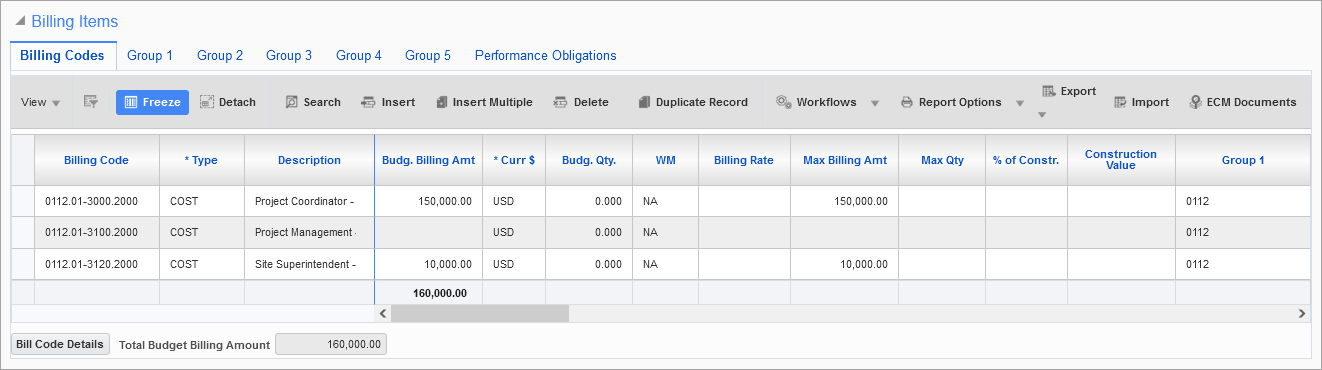
This creates a contract, which can be set up further within the Contract Entry screen found under the Contracts sub-menu of Job Billing:
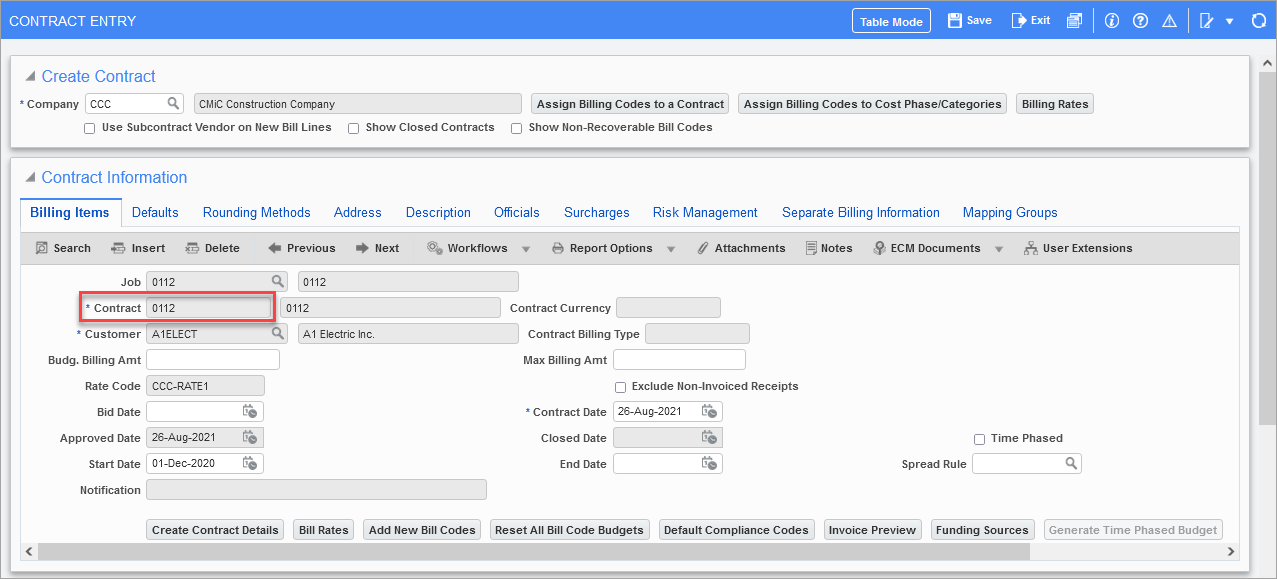
-
The Billing Items section of this screen shows detail lines of the cost codes and their budgets. Each billing code is a unique code that corresponds to one line on the contract and is usually set as a combination of the cost code and category:
-
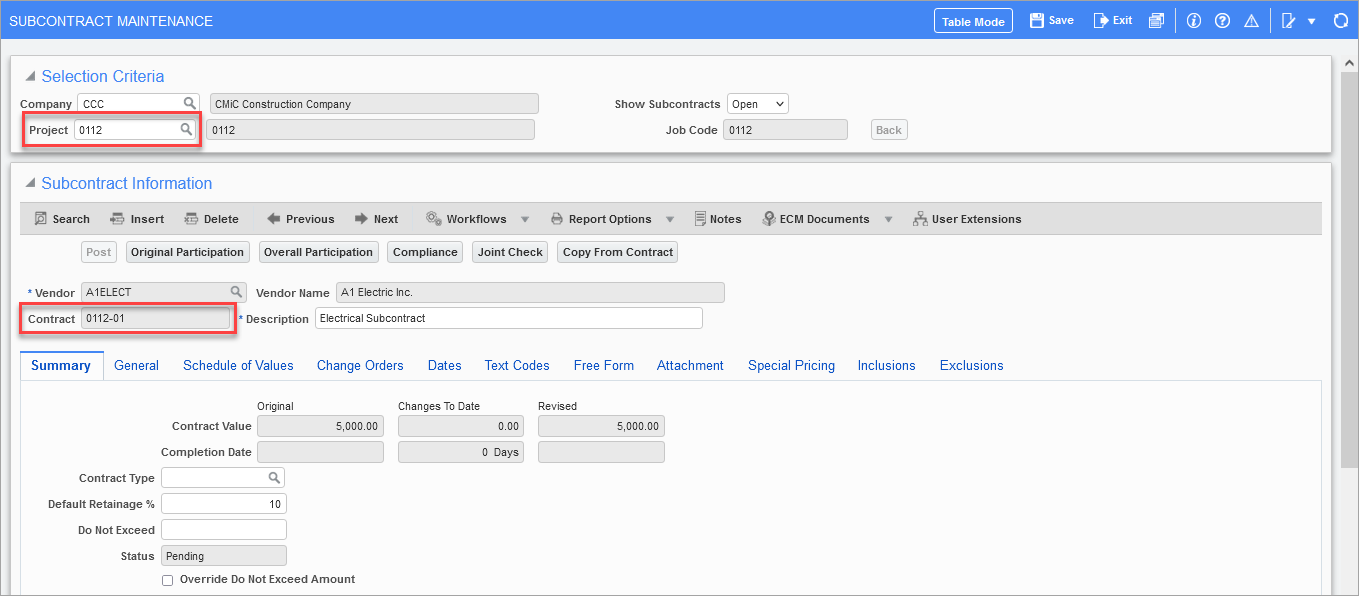
Create subcontracts for this job/project:
-
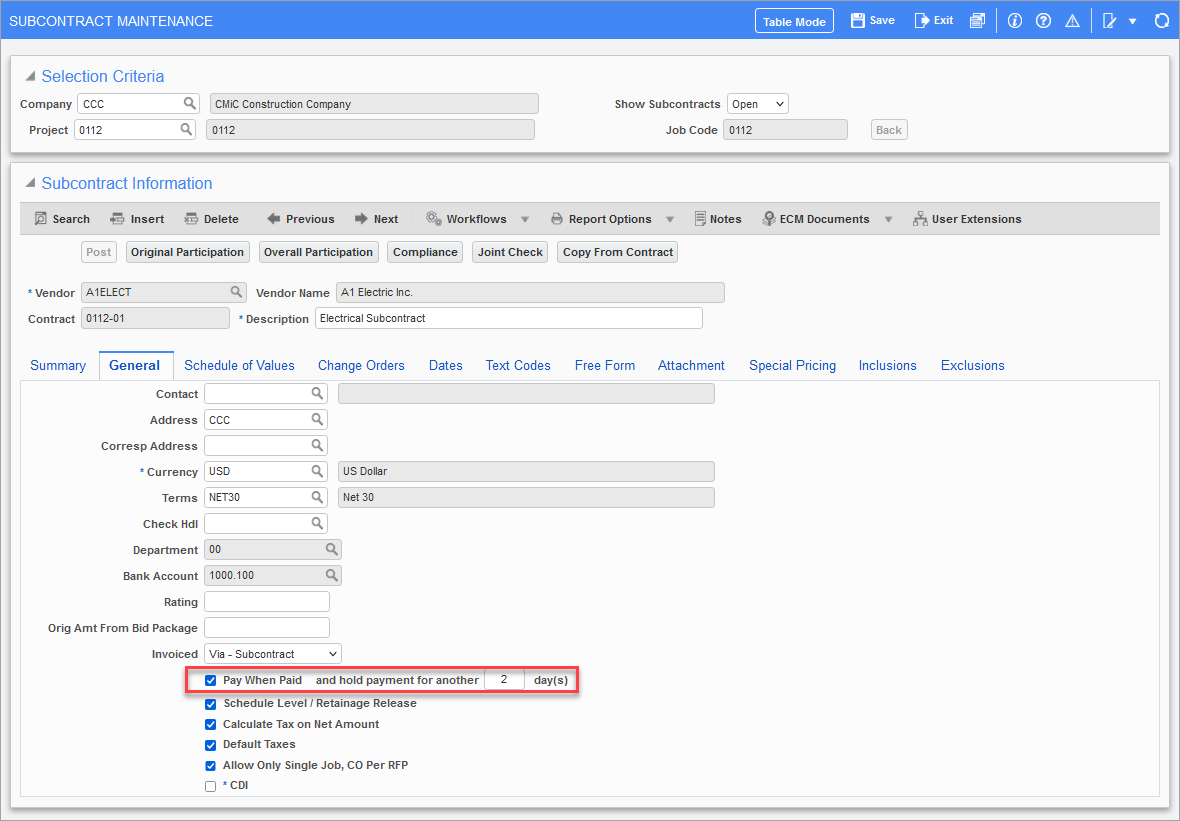
Select the 'Pay When Paid' checkbox to keep this invoice on hold until payment is received towards the job contract. You can also set the number of days to hold payment after receiving payment, if so desired:
-
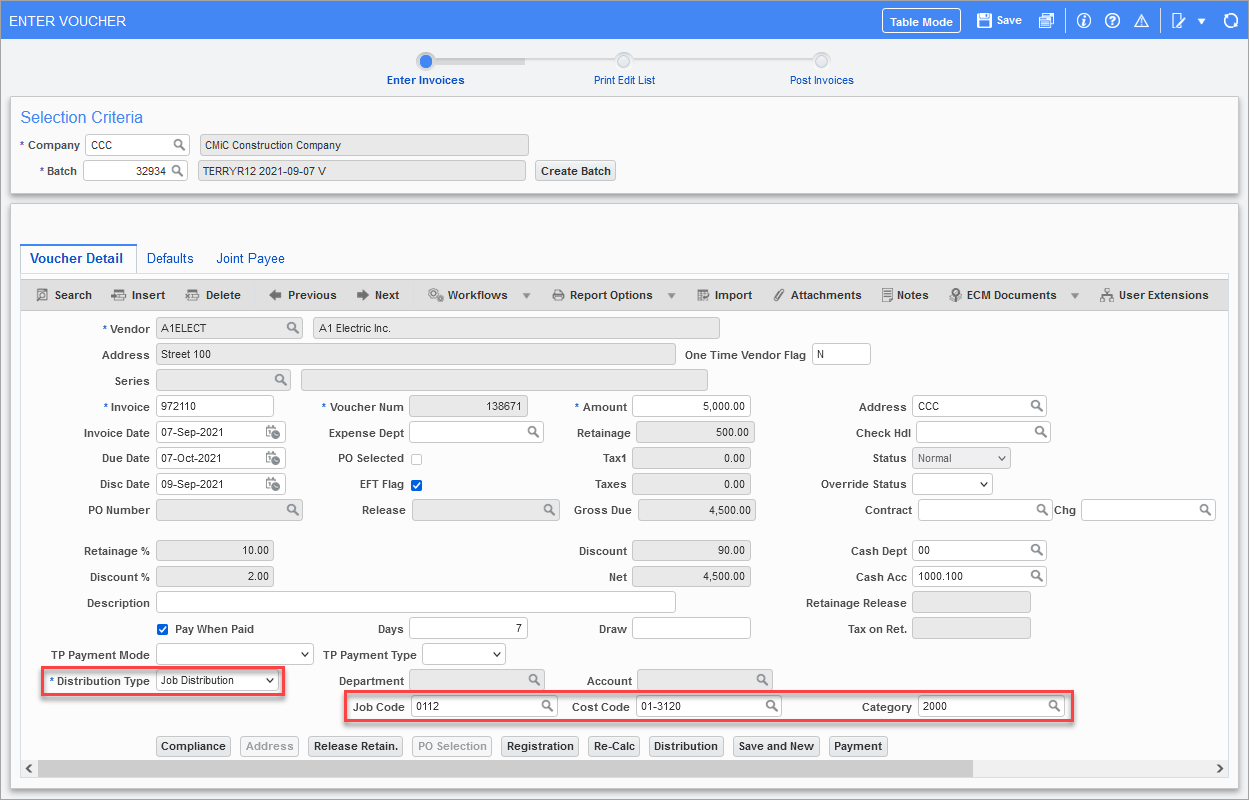
Enter Accounts Payable job-related invoices for invoices that are not related to subcontracts
-
Create and post the subcontractor's requests for payments (RFPs). Subcontractors can also be given access to enter their own invoices. For this example, we are paying for 100% completion:
-
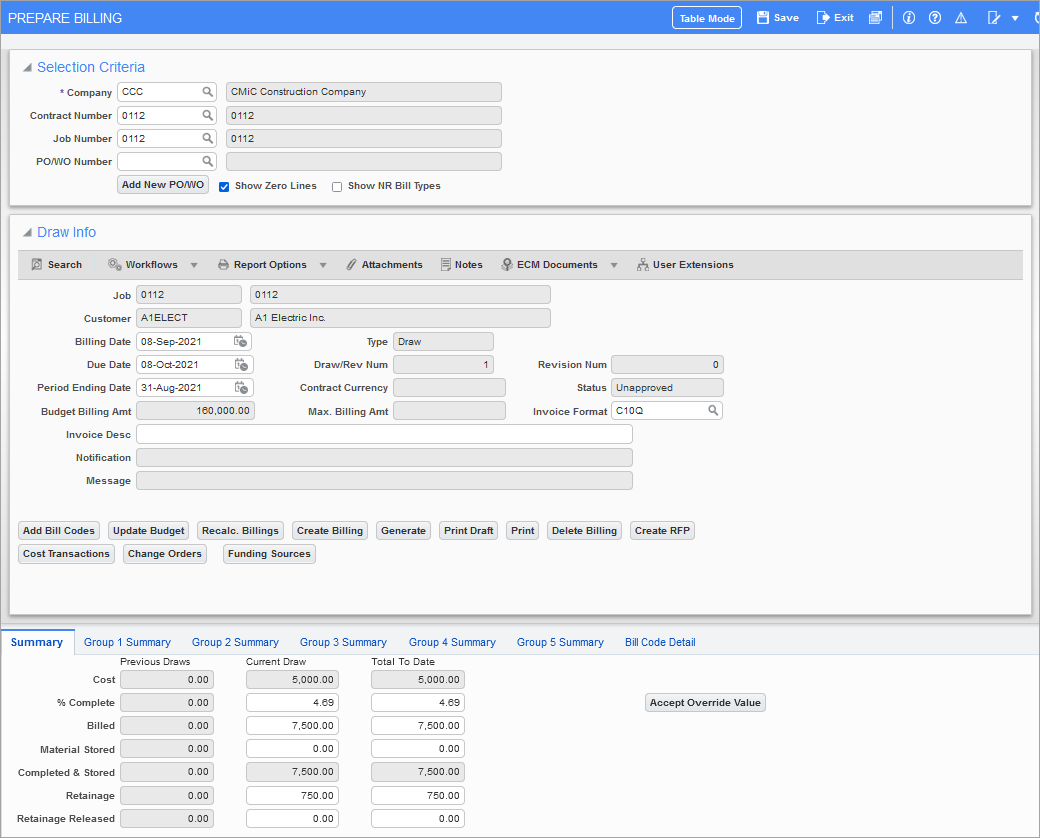
Open Prepare Billing from within the Job Billing module. Enter or select the contract code:
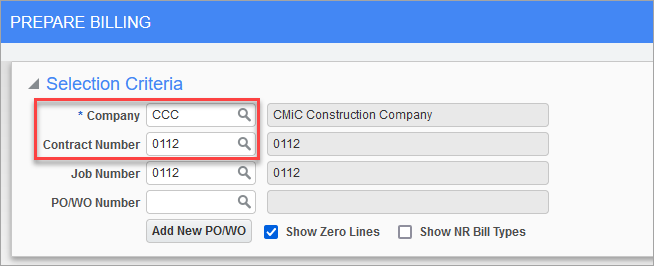
-
If no draw is in progress, you will see a pop-up window asking if you would like to create a new draw. Create the new "Draw #1" by pressing [Draw]:
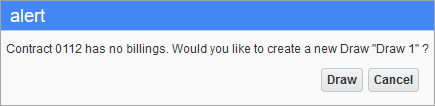
-
The next pop-up window will ask if you would like to include transactions with reference dates (not post dates) up to the Period Ending Date. The reason why these are referred to as "reference dates" instead of "invoice dates" is because transactions that are to be included for billing are not necessary from invoices, but can also be from payroll or might have been entered manually as Job Costing - Job Cost Transactions. Enter a date in the To Ref Date field.
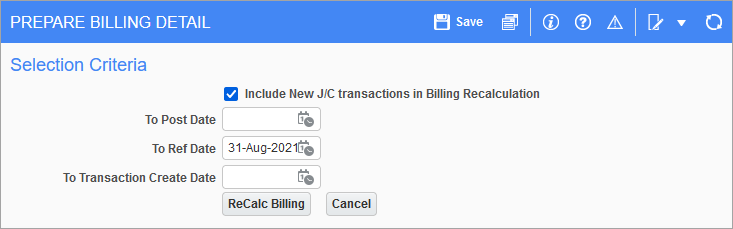
-
To include transactions based on other criteria, press [ReCalc Billing] and select the checkbox to include Job Costing transactions. The total billed in this draw can be seen on the Summary tab:
-
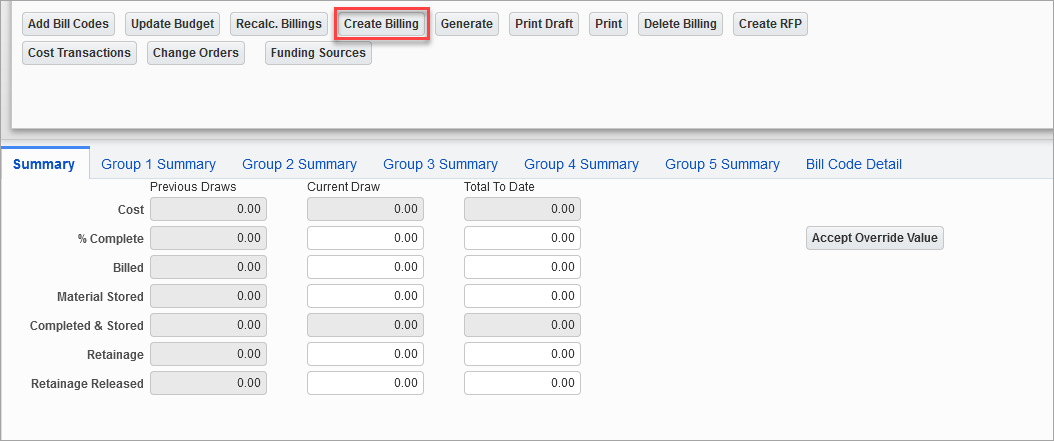
If the Summary tab starts off blank, as shown below, press [Create Billing]:
-
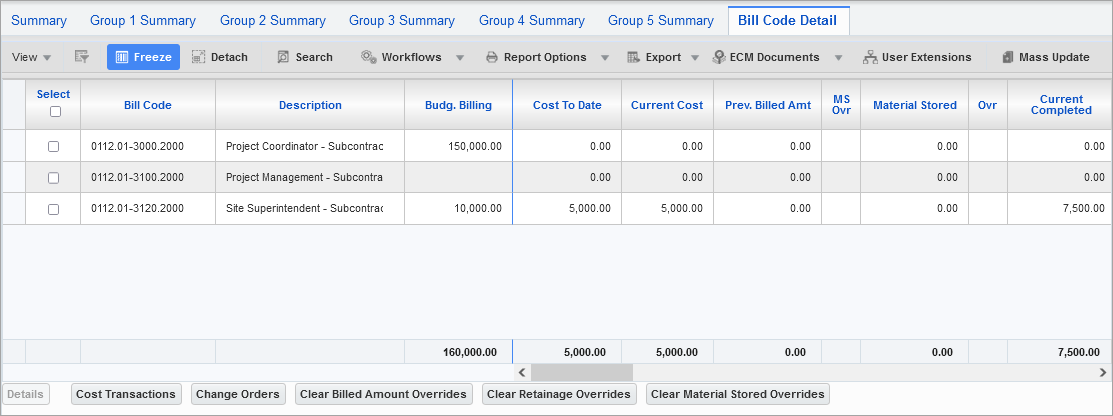
The Bill Code Detail tab shows the most granular level of detail. Each bill code corresponds to one line on the contract. The Cost To Date column displays the costs that have been incurred to date. The Current Cost column shows the costs which are being billed in this draw. The Current Completed column is the amount being billed in this draw, which is often more than the costs. The Compl & Stored column is the total billed to date, including this draw:
-
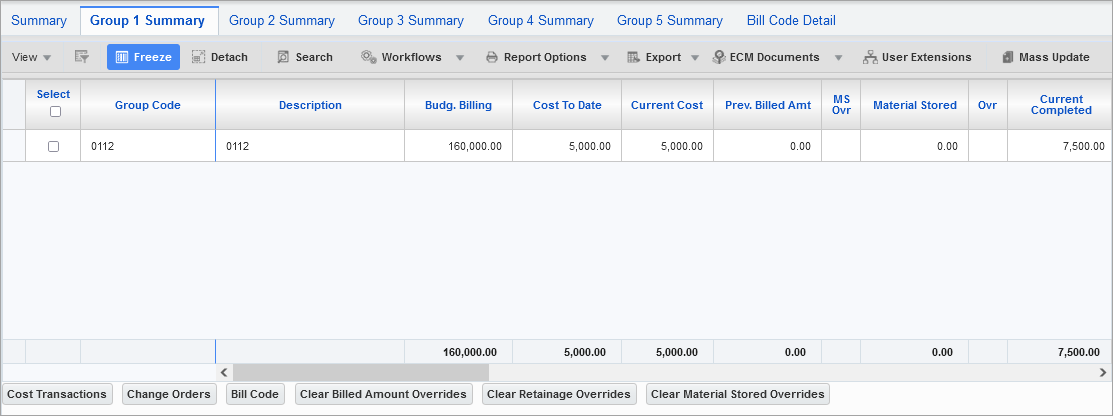
The Group 1 Summary tab is usually set to be shown on the invoice, as this group splits up the draw according to cost code:
-
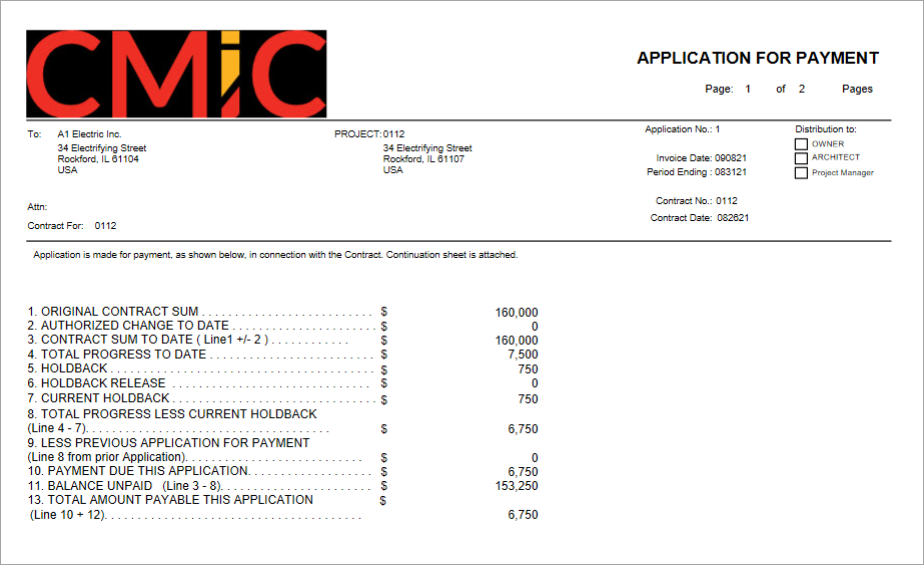
Generate, print, and post the Job Billing invoice, using the [Generate] button, then the [Print Draft] or [Print] buttons.
-
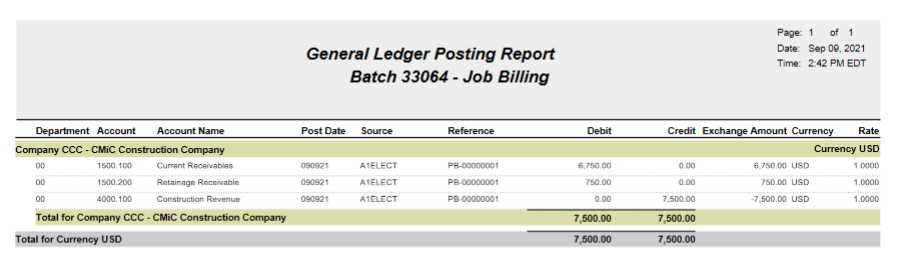
When complete, post the batch:
-
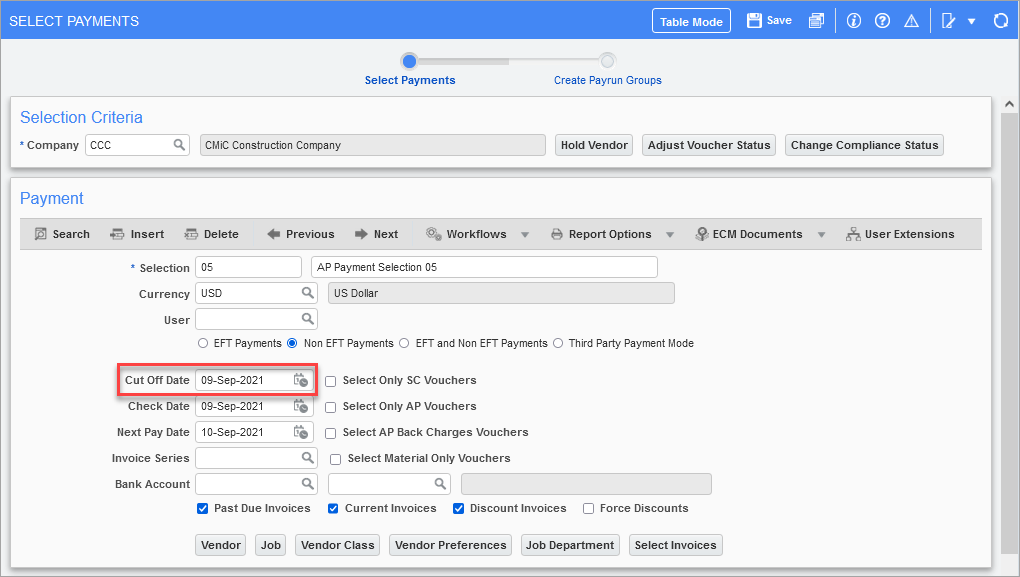
Pay the AP job-related invoice using the Select Payments screen. Keep in mind that the cut-off date is used to select invoices that are due as of that date:
-
Click the [Adjust Invoice Status] button within Select Payments:

-
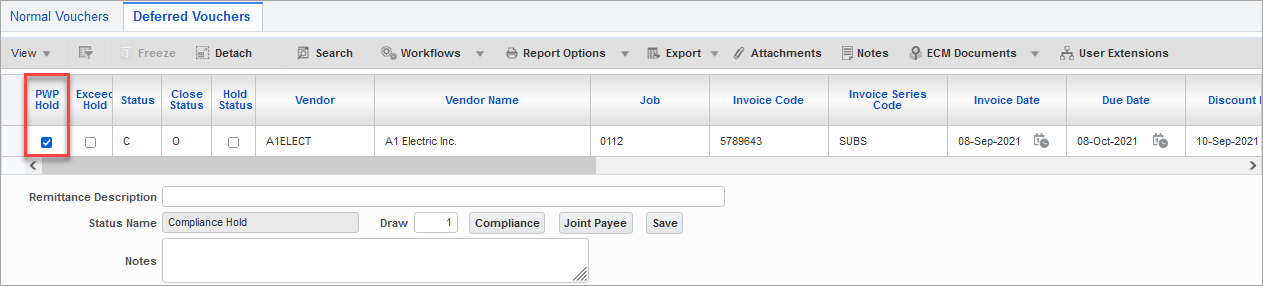
Select the Deferred Vouchers tab. Due to the settings on the subcontract, this SC invoice is on a Pay When Paid (PWP) hold:
-
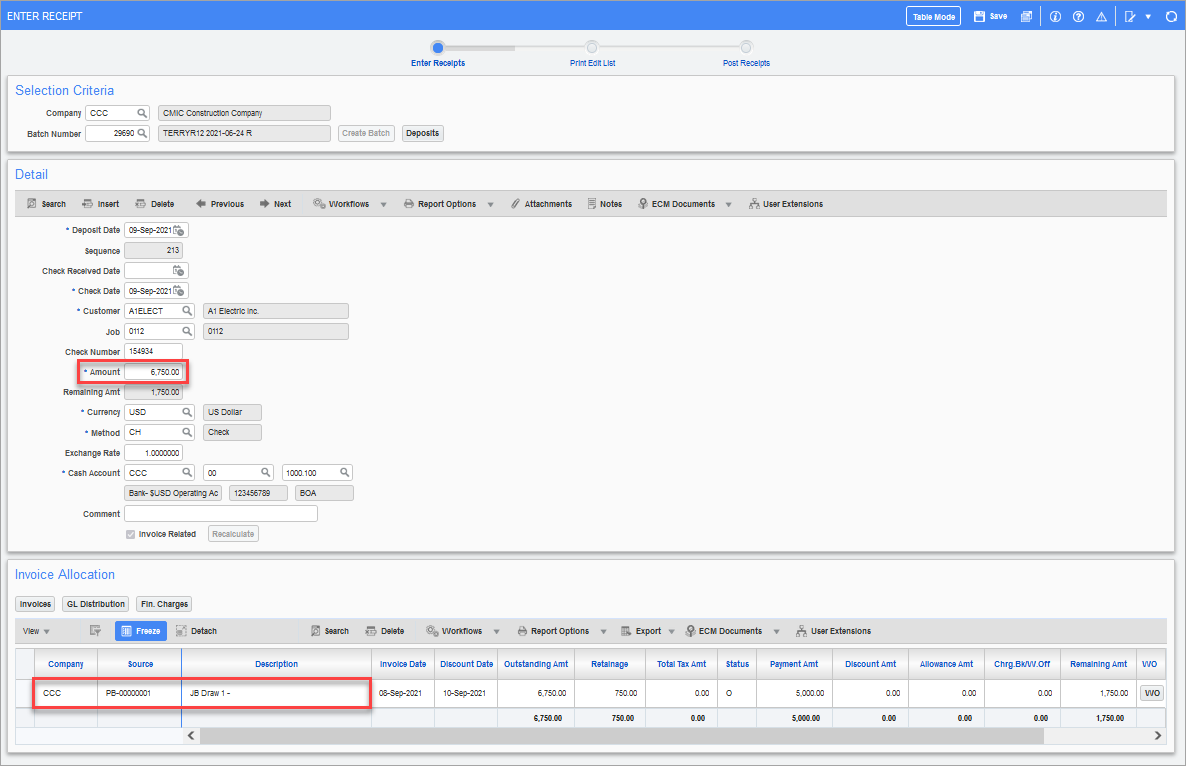
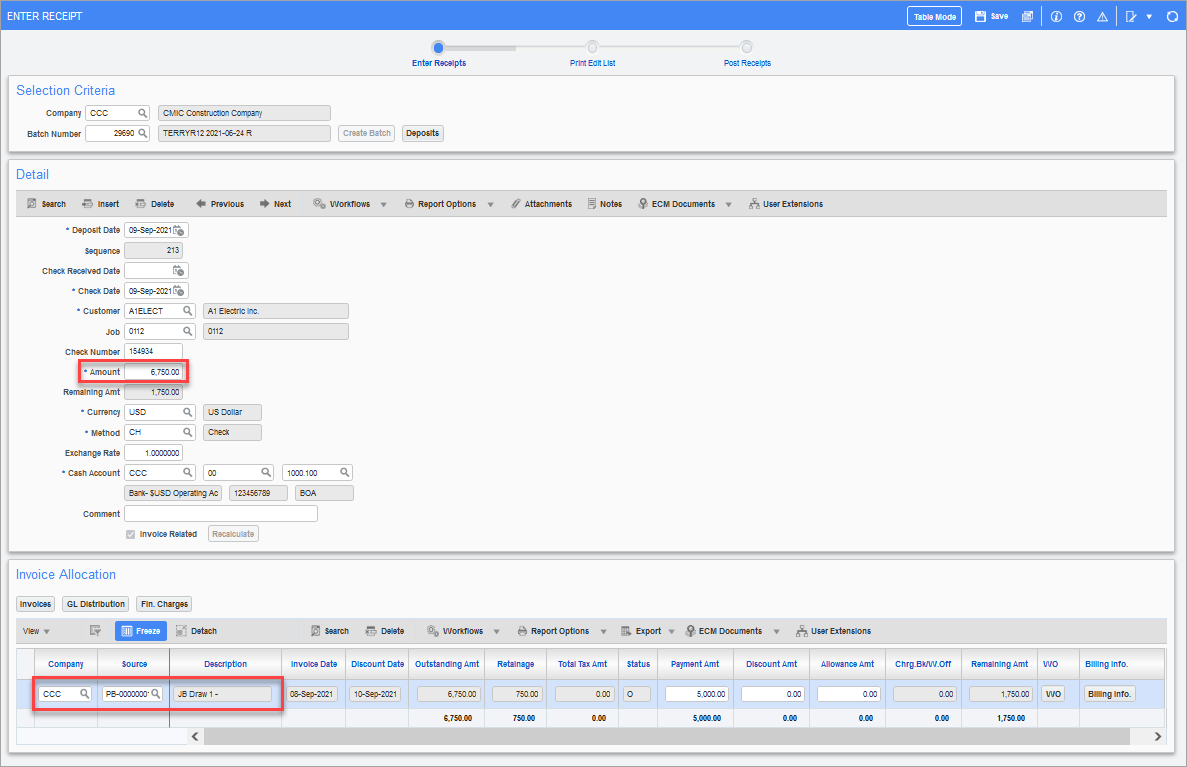
In Accounts Receivable, enter the receipt of a check against the Job Billing invoice and [Save]:
-
Now return to the Select Payments screen and select invoices again, using the same cut-off date as before. The Subcontract invoice is no longer on hold and will be available for payment:
-
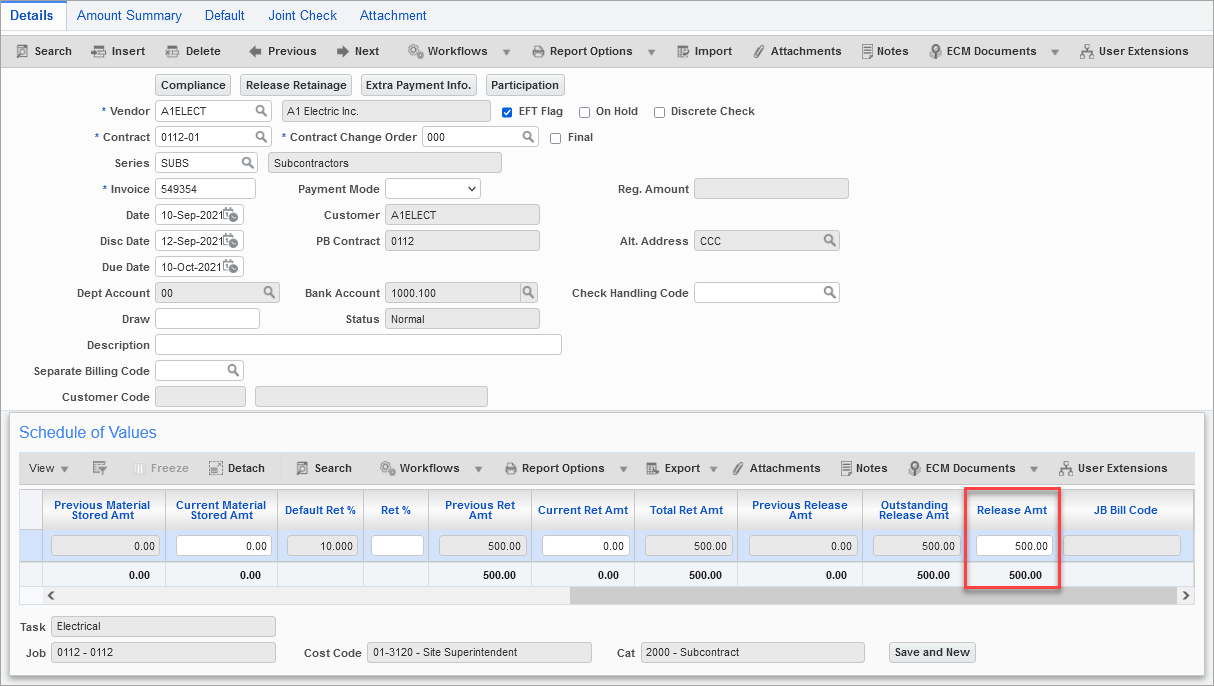
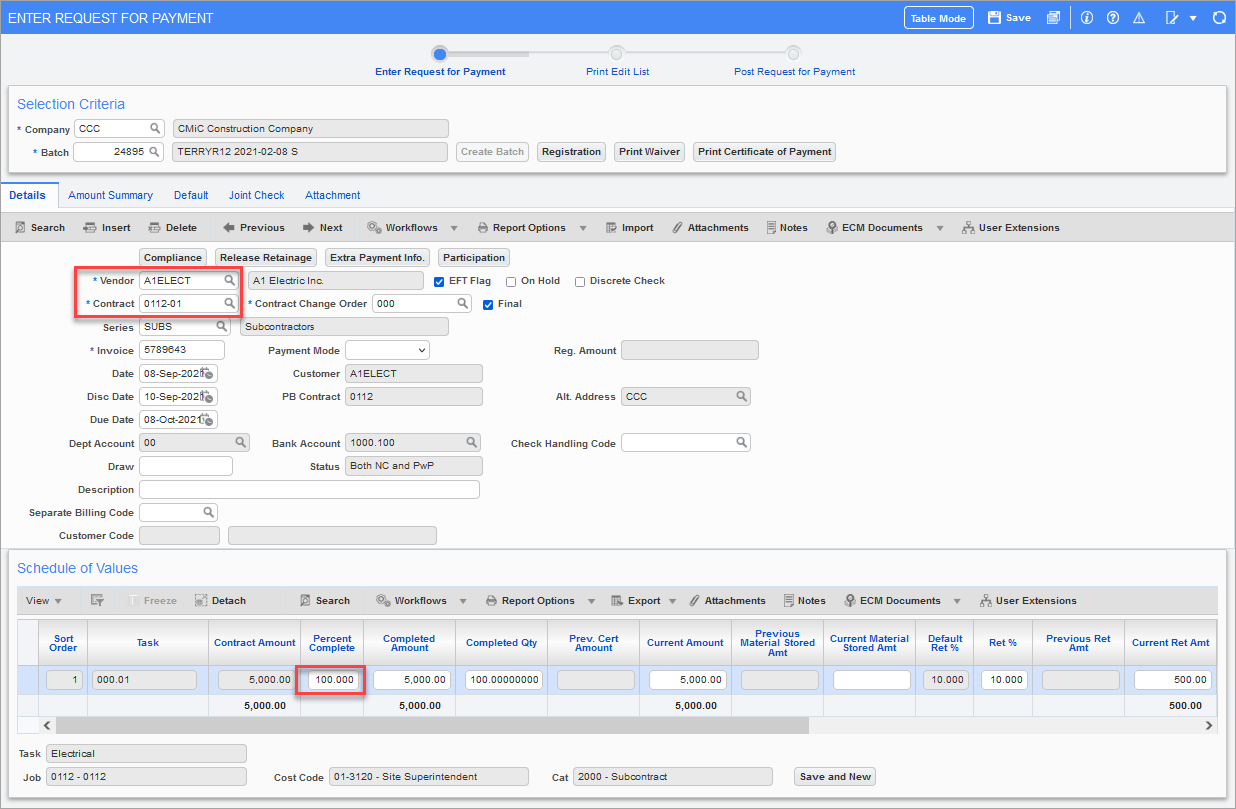
When it is time to release the retainage for the subcontractor, go back to the Enter Request For Payment screen in the Subcontract Management module and enter the invoice. If no batch is created, press [Create Batch]:

-
Enter a value in the Release Amount column for each line, then save and post the invoice: