During a check run, invoices are selected in bulk for payment. Below are instructions showing how to select invoices and process checks.
Considerations
-
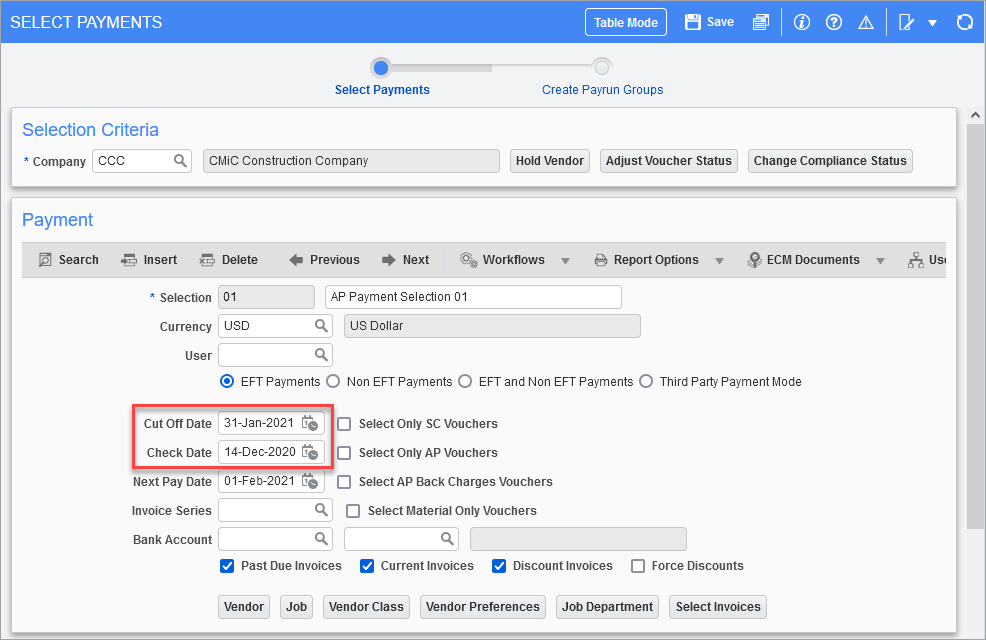
The Cut Off Date field selects invoices that are due on or before that date. If check runs are done daily, there is no need to change this date, since it will default to the current date.
-
If check runs are only run twice a week (e.g. on Mondays and Thursdays), set the cut off date to be equal to the next pay run in order to print checks for everything that will be due between check runs.
Invoice Selection
-
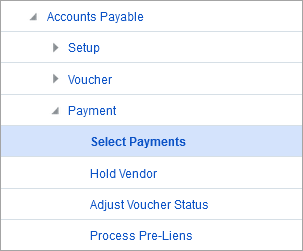
Navigate to Select Payments from the Payments sub-menu in Accounts Payable.
-
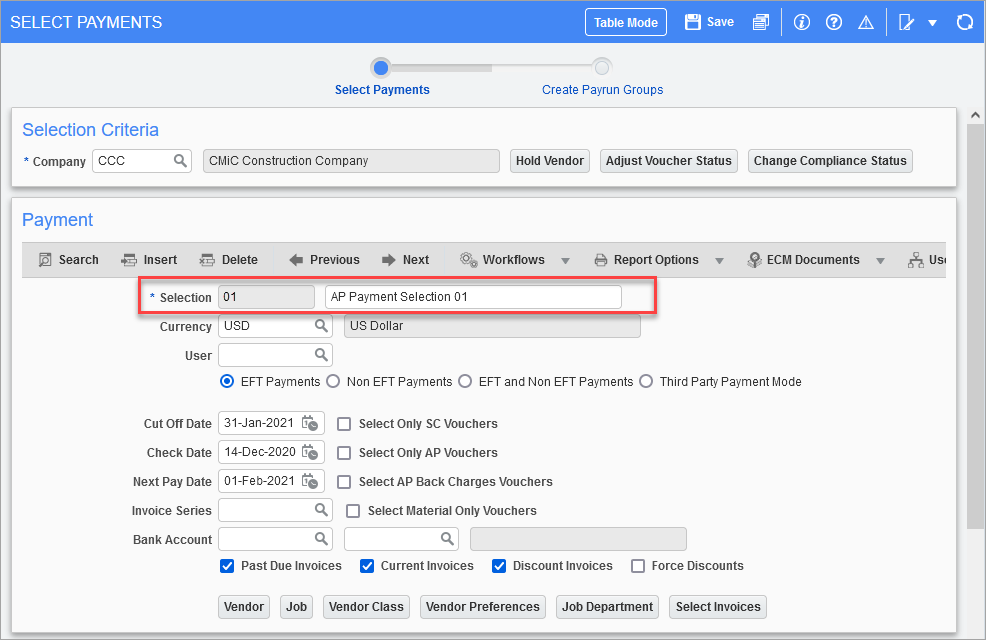
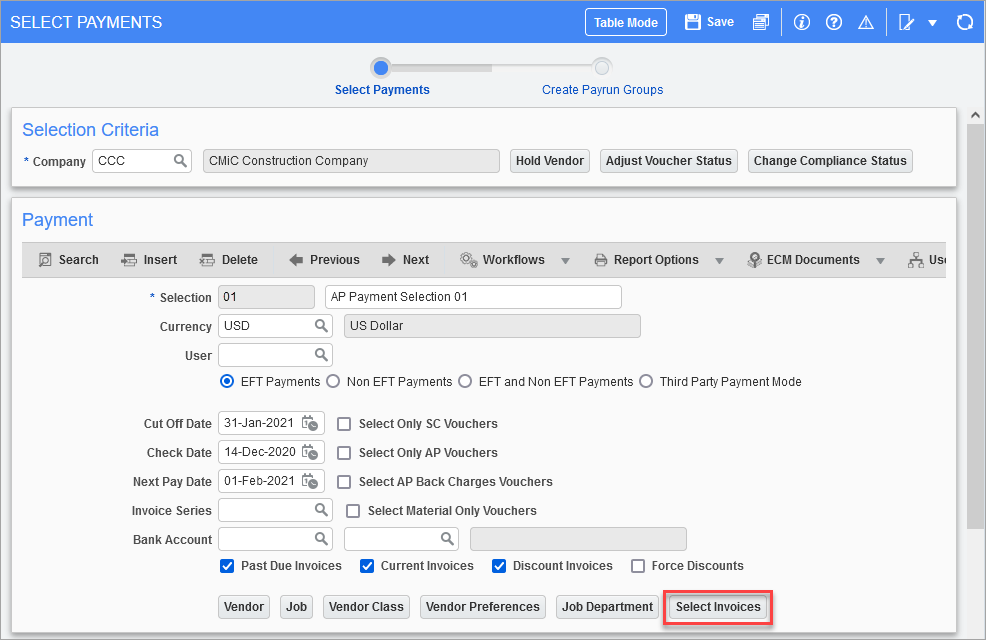
The screen opens with the default company code and the last created payment selection code. If no payment selection exists, payment selection 01 will be created. If you would like to make a new selection, insert a new record.
-
The Cut Off Date field is used to select invoices for payment that are due on or before this date. The Check Date field is the date that will print on the check.
-
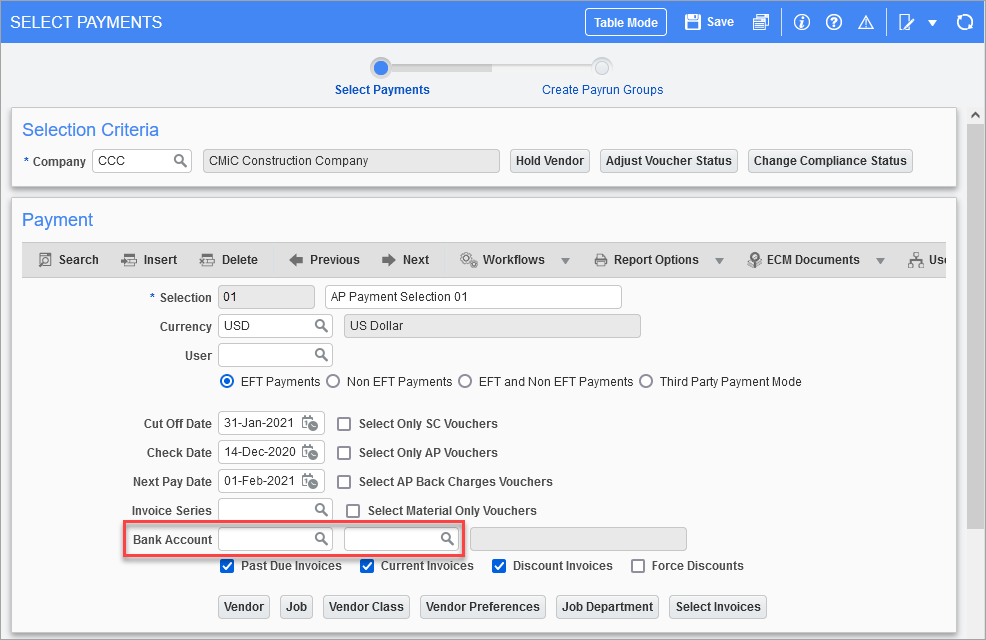
The Bank Account fields are used to specify the account from which funds will be taken if different than the default setting. If an invoice is being paid from a different bank account (e.g. due to being a different currency), change the bank account.
-
Press the Select Invoices button to display a list of invoices to be paid.
-
Move to the Selected Invoices section of the screen and review the list. The listed invoices will all be selected by default. Remove any invoices you do not wish to pay by unselecting the checkbox for that invoice.

-
To make a partial payment to an invoice, change the invoice amount.

-
To add an invoice, insert a new record and select a value for the Vendor and Invoice Number fields using the LOV.

-
Once the list is complete, save the changes by using the Save button.

Preparing, Printing, and Posting Checks
-
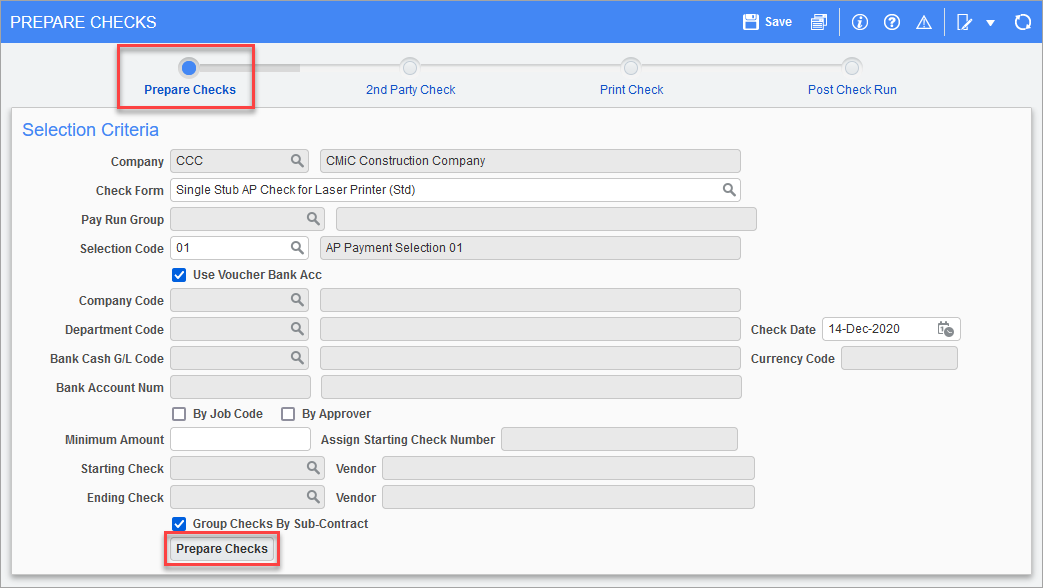
Navigate to Accounts Payable > Check > Print Checks in the Treeview to open the Prepare Checks screen. This part of the process generates checks and assigns the check numbers. Review the information and press the Prepare Checks button. When the process is complete, the screen displays the number of checks generated.
-
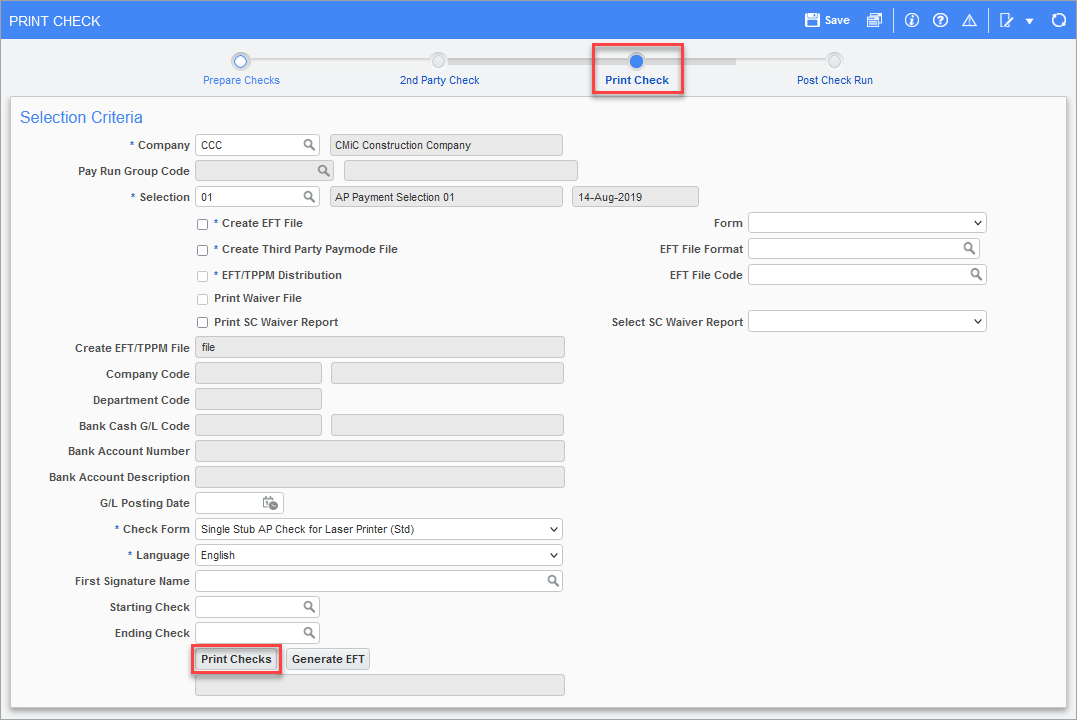
Move along the train and select the Print Check node. Press the Print Checks button to open the printing window.
-
Press the Run Report button. This produces a PDF file which you can then print.

-
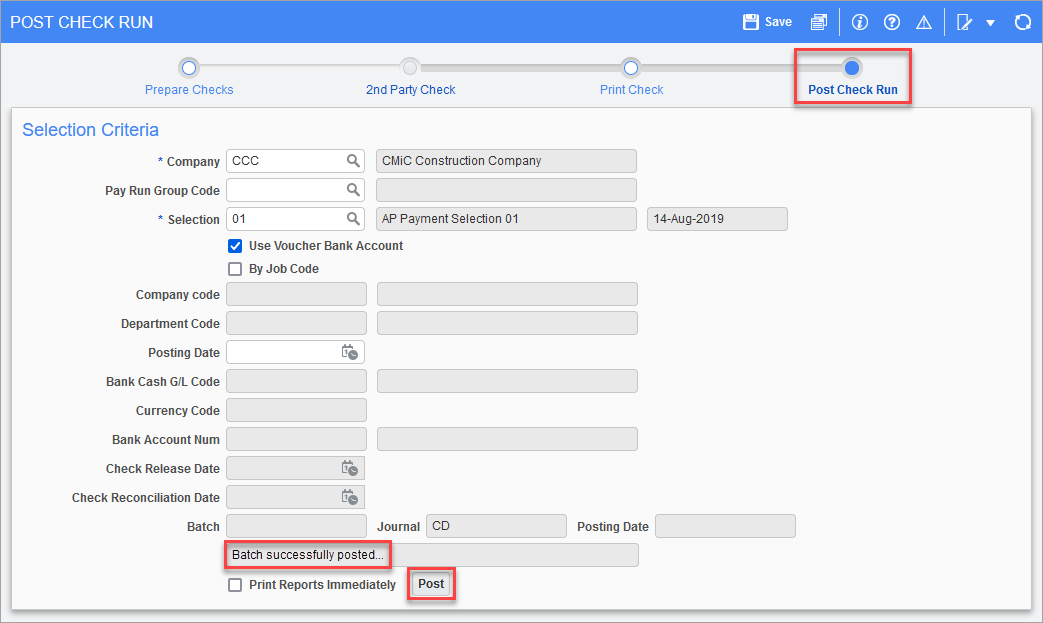
Lastly, post the check run. Verify the posting date and post the checks. A message will display once the checks are successfully posted.
To learn more the check printing process, please refer to Accounts Payable - Printing Checks and Accounts Payable - Verifying a Check's Print Settings.