Overview
Construct ESS - Personal Information
Personal information for the logged-in user can be viewed by
Security
Role Maintenance
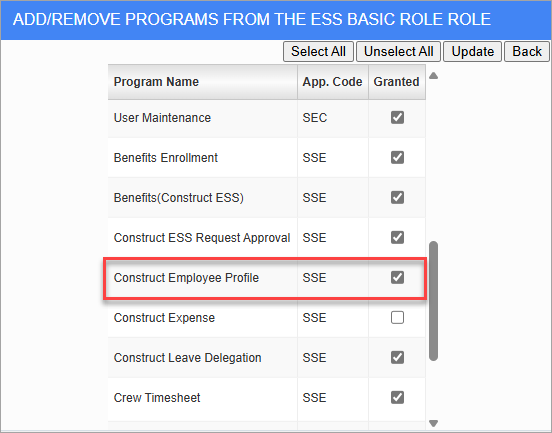
Access to the Personal Information screen can be granted to a user's role in the Security Roles screen located in the ESS module. The Personal Information screen will be available from the Navigation Bar or the Construct ESS launch page.
NOTE: The Security Roles screen launched from the ESS module contains security options and settings that are not widely available in the security screens launched from other modules (e.g., CMiC Field, E-Time, etc.). The screen being discussed here is only available for assignment in the Security Roles screen located in ESS.
Security Roles; standard Treeview path: Employee Self Service > Security > Security Roles - Assign Field Security
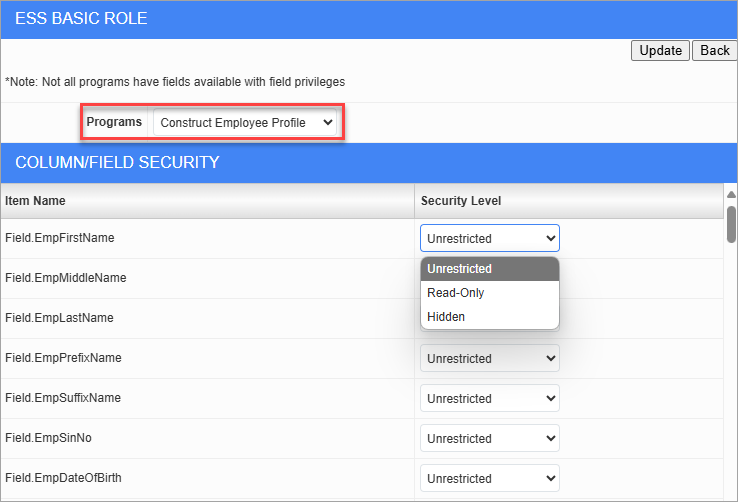
The ability to edit profile information fields is controlled by the user's field security settings in the Security Roles screen located in the ESS desktop module. Each profile field can be configured as:
-
Unrestricted: The employee can change and submit this field.
-
Read-Only: The field is visible but cannot be modified.
-
Hidden: The field is not visible to the employee.
Only editable (unrestricted) fields can be changed and submitted for approval.
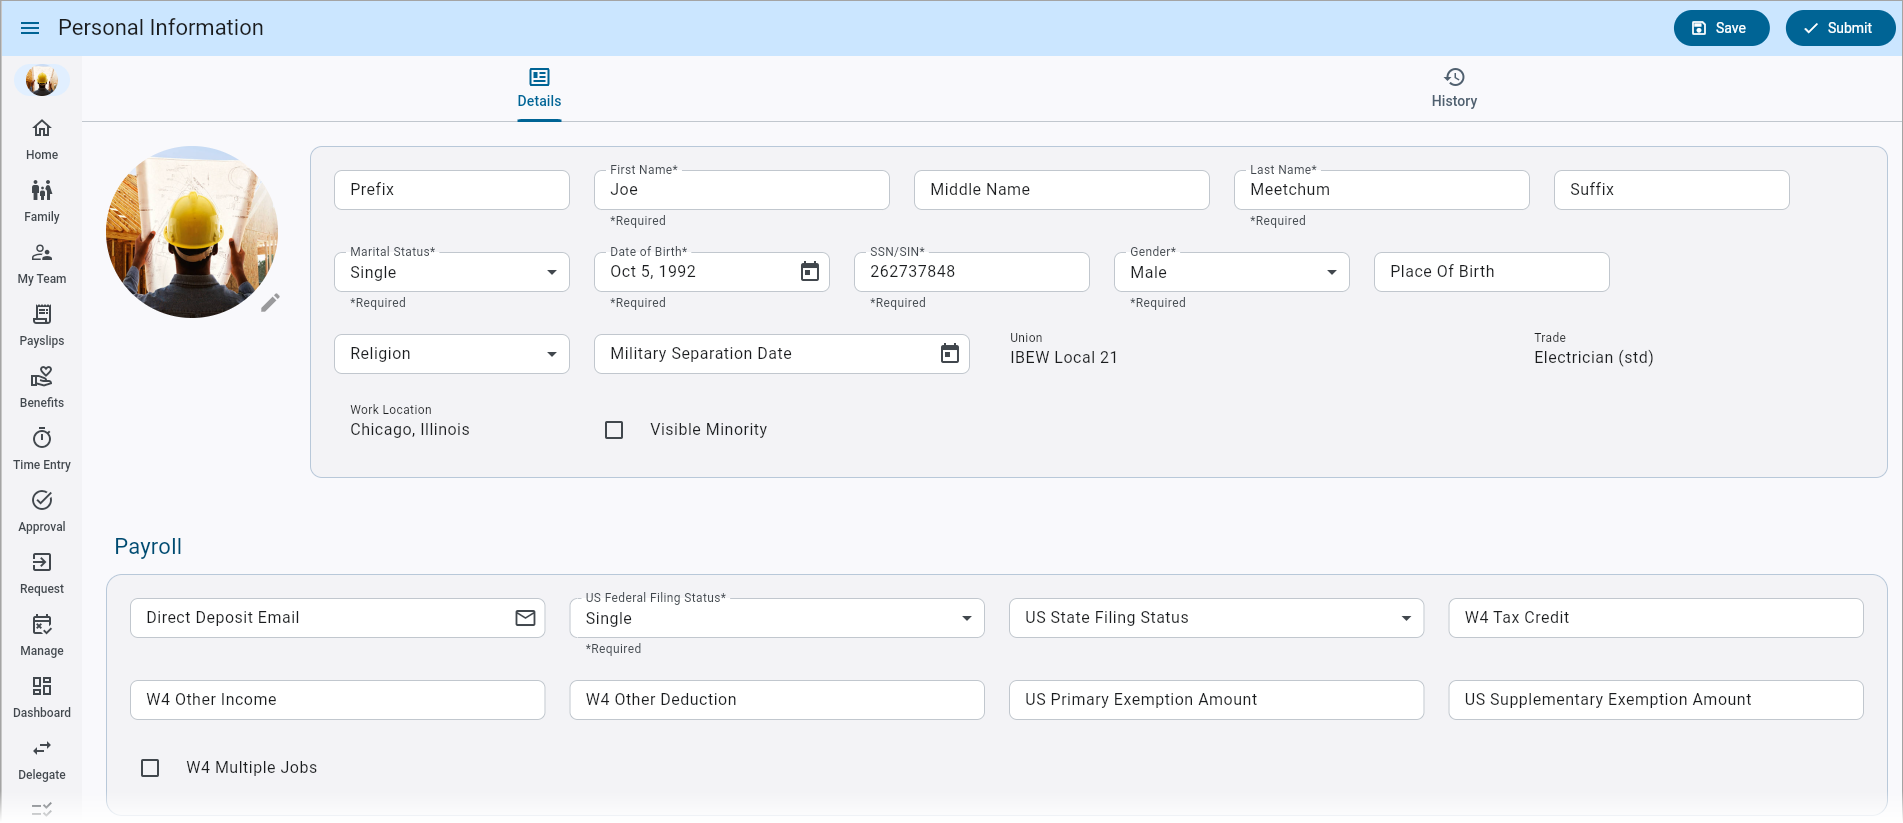
Details – Tab
Users with field security privileges can modify their profile and submit changes for approval. This information can also be entered in the
Personal
This section displays the name, date of birth, and marital status for the user.
Payroll
This section displays the relevant tax information for the user. This includes their federal and state filing status, whether they work multiple jobs, dependent tax credits, and other incomes and deductions.
Home Address, Mailing Address
These sections display the home and mailing address for the user.
Home Contact, Work Contact
These sections display the home and work contact details for the user.
Others
This section displays any additional personal information of the user, such as their nationality and passport/visa/labour card details.
Attachments, Notes
These sections display any attachments and notes of the user, including those from change request approvers.
History – Tab
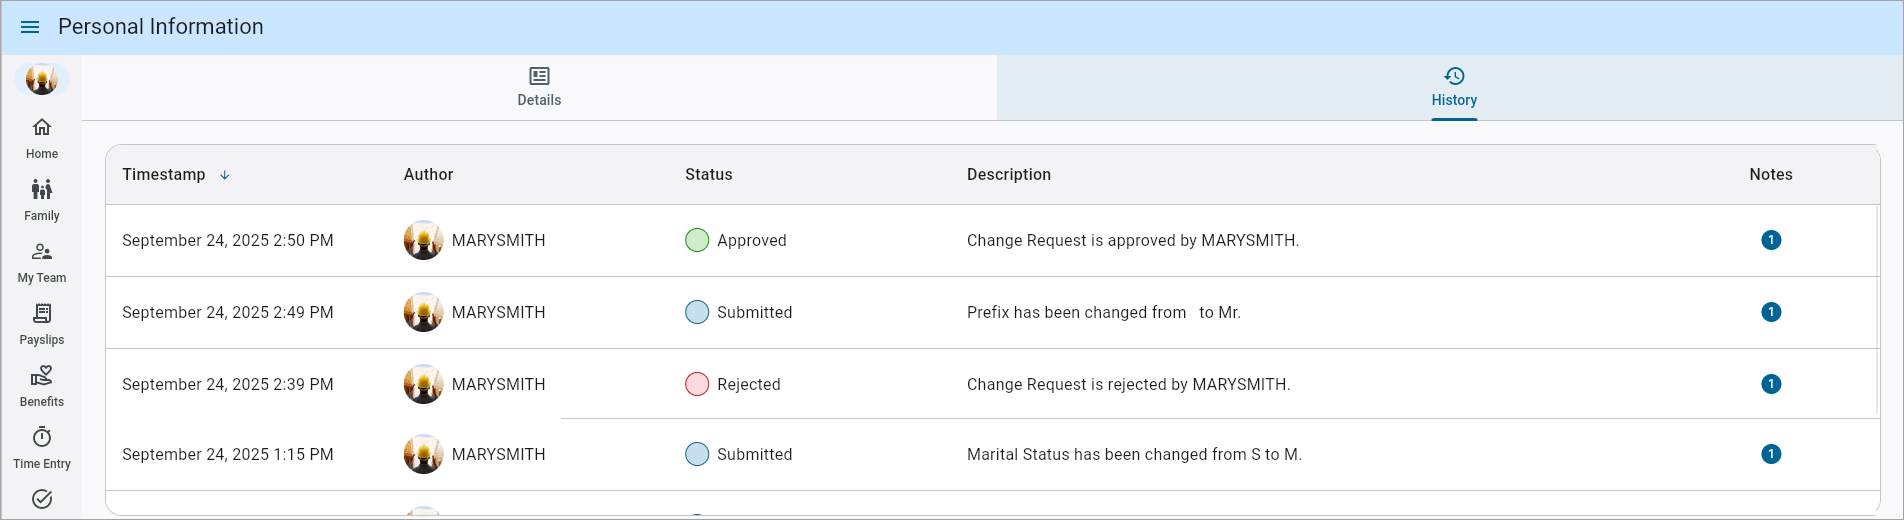
Construct ESS – Personal Information - History tab
The History tab includes a detailed log of all the personal information changes, including the date, time and user who made the update.
Editing Personal Information
When users with field security privileges modify their profile, the changes go through a controlled approval process.
| State | Description |
|---|---|
| Draft | Employee has updated editable fields but has not submitted the changes yet. |
| Pending | Changes are submitted for admin approval. Data is locked from further editing. |
| Current/Approved | The update is reviewed and accepted. Profile fields are updated accordingly. |
| Rejected | Changes are denied. The employee is notified and can revise or delete them. |
Edited fields will be updated with labels to indicate their status.
Entering Changes
Users can enter, save, and discard draft changes to unrestricted fields.
Save As Draft
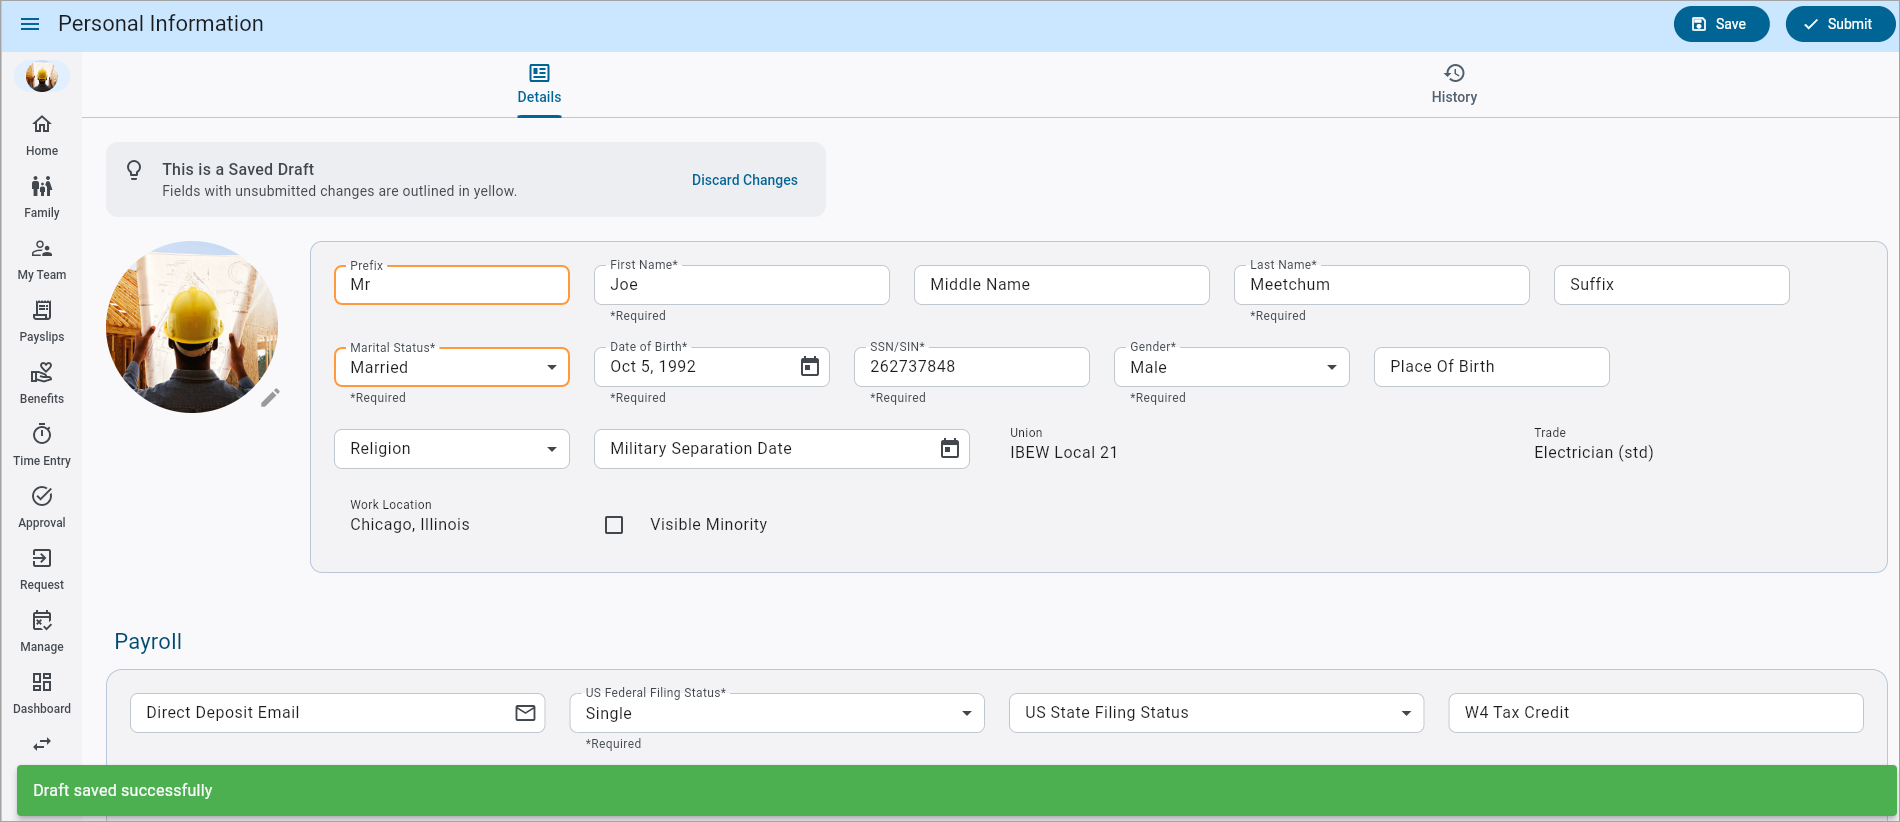
Click on the
Discard Changes

Once a profile update is saved, the Discard Changes link becomes available to remove unsaved profile edits. Press [Okay] to confirm the request to discard changes. Upon confirmation, the system reverts all fields to their last approved values.
NOTE: This action is irreversible and cannot be undone once confirmed.
Submitting Changes for Approval
Once changes are made, press the
NOTE: If the request includes changes to any address or tax fields, the calendar will restrict the effective date selection to only allow dates on or after the start date of the current pay period. Past dates before this start date will be disabled.
The system will alert users that the details are awaiting approval.
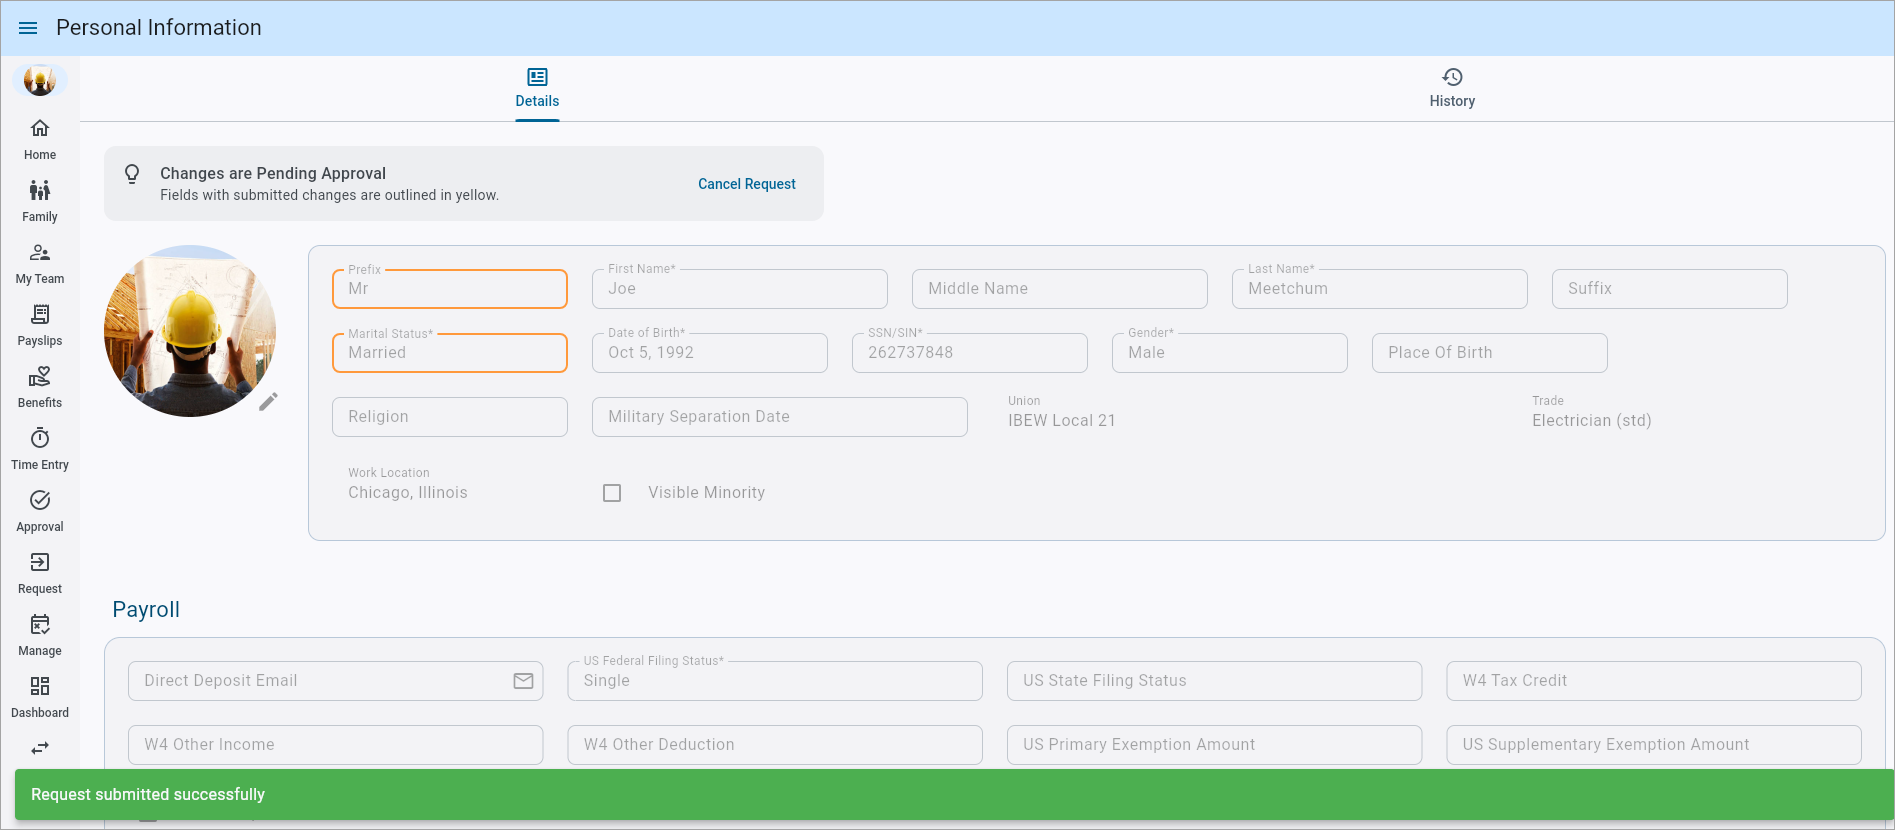
Once changes are pending approval, the screen will be locked and cannot be changed. Edited fields will be highlighted in yellow to indicate they are under review.
Canceling a Pending Request
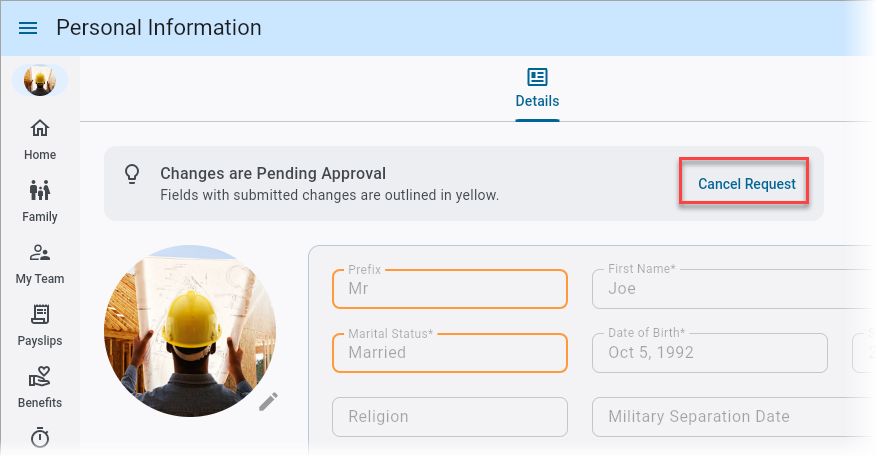
After submitting a profile update, the request enters the Pending state and remains locked from further edits. However, if the employee needs to withdraw the request, the Cancel Request link is available.
Once the cancel request is confirmed, the request is removed from the approval queue and all pending changes are reverted to the last approved state.
NOTE: This action is irreversible and cannot be undone once confirmed. Once canceled, the request must be re-entered if needed.
Rejected Requests
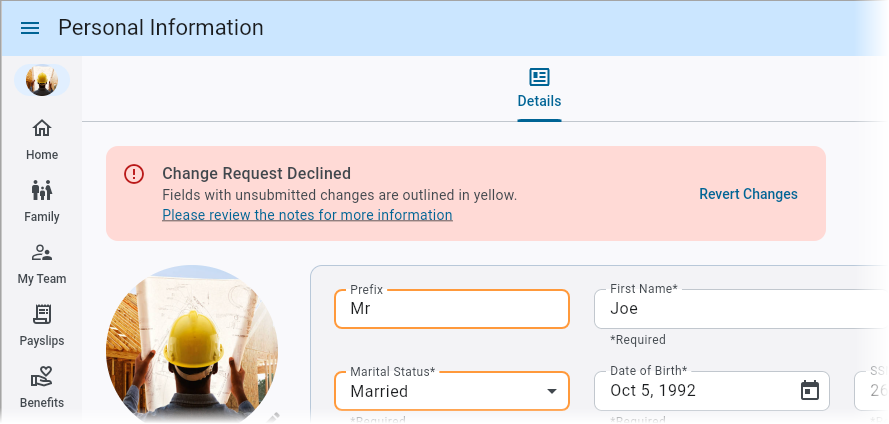
Once a change is rejected, the user will be alerted with a "Change Request Declined" message. Users can either resubmit the change request or revert the changes to the last approved state.
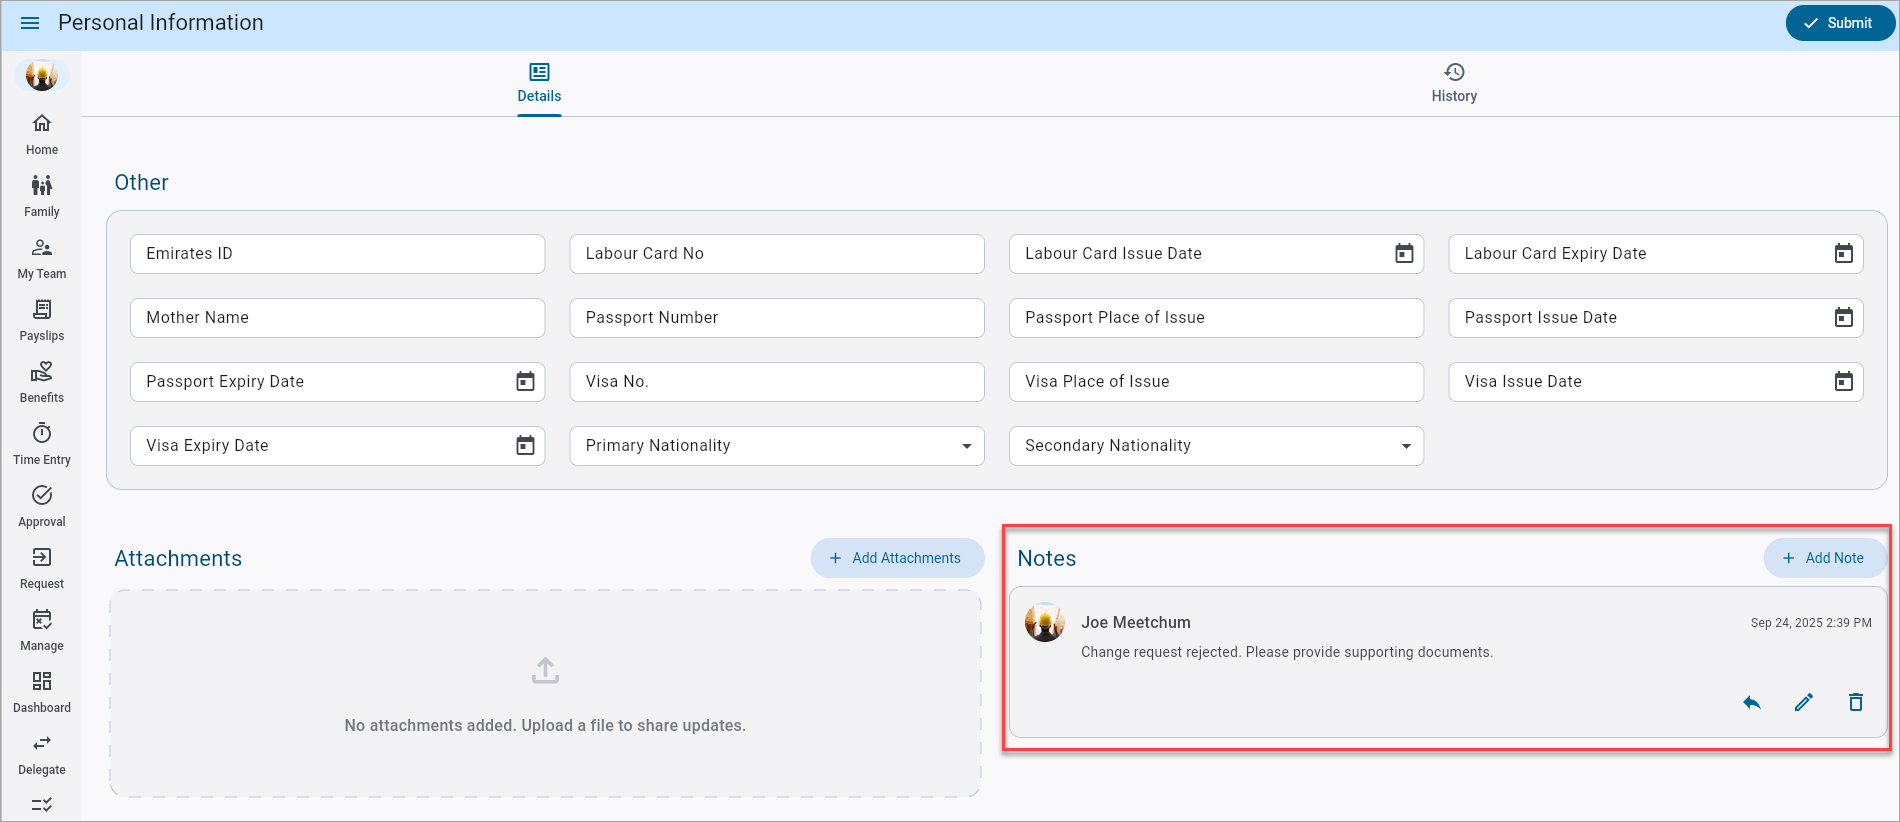
Users can click on the See notes for details link to jump to the Notes section to view the note from the Approver regarding the rejected request.
Updating Contact Picture
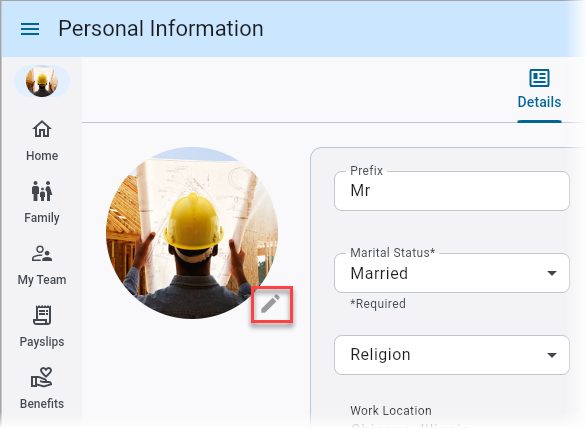
Construct ESS – Home
Employees can now upload or update their profile pictures directly from Construct ESS. This ensures that Contact records are accurate and up-to-date, especially useful for identification in team settings. Press the Add or Edit icon next to the profile picture on the Home screen to start the upload process.
Managing Document Attachments

Upload Document pop-up
Press the Add Attachments icon to launch the Upload Documents pop-up. Users can drag and drop their files or click to browse their device manager. This screen includes meta data fields for the attachments.
Document Type
Select the document type (required). A search bar is available to filter the LOV.
The Document Type LOV lists all the document types that have been assigned to the current program. Document types are assigned via the [Program Access] button on the Documents screen in the Human Resources module. Each document type may be linked to multiple Construct ESS programs. The system provides the following default document types for Construct ESS:
-
SSEPROFILE: Document type for Construct ESS Profile Information.
-
SSEFAM: Document type for Construct ESS Family Information.
For more information, please refer to Human Resources - Documents.
Organization
Select the organization.
Date Issued, Expiration Date, Renewal Date
Select the attachment's issue date, expiration date, and/or renewal date.
Family Information
The Family Information link in the Personal Profile section on the Home screen launches the Family Information screen which allows employees to add, modify, or remove family members and submit changes for admin approval. For more information, please refer to ESS Employee - Family Information (Web).