Enterprise Content Management - ECM Exporer Document Data Extraction - Pop-up Window
NOTE: This tool is deprecated and no longer being supported by CMiC. We recommend using our Drawing and Specs Upload and Extraction Tool which is more convenient to use and has all of our latest features. For more information, see CMiC Field - Drawing and Specs Upload and Extraction Tool.
Overview – Document Data Extraction
The extraction process involves the following:
I) PDF Splitting & Optical Character Recognition (OCR)
-
Large, multipage PDF file from architect/engineer is split into different pages.
-
For each page, data is extracted from each extraction region for the sheet label, sheet title, sheet name, etc.
II) Hyperlink Creation
-
For each extracted data, all sheet labels are converted to hyperlinks to facilitate navigation between the sheets.
III) Upload Data into CMiC Field
Extracted data is uploaded into CMiC Field as drawing set sheets for drawings extraction or RFIs for specifications extraction.
Document Data Extraction – Pop-Up Window

Click the Upload Plans and Specs icon, shown above, to open the Document Data Extraction pop-up window, which is used to:
-
Select the project to which the extracted drawing set will be added.
-
Set the Document Type field to perform a drawings extraction or specifications extraction.
-
Select original PDF(s) from which the data will be extracted.
-
Provide details for the document being extracted.
The following are details about the fields in the Document Data Extraction pop-up window.
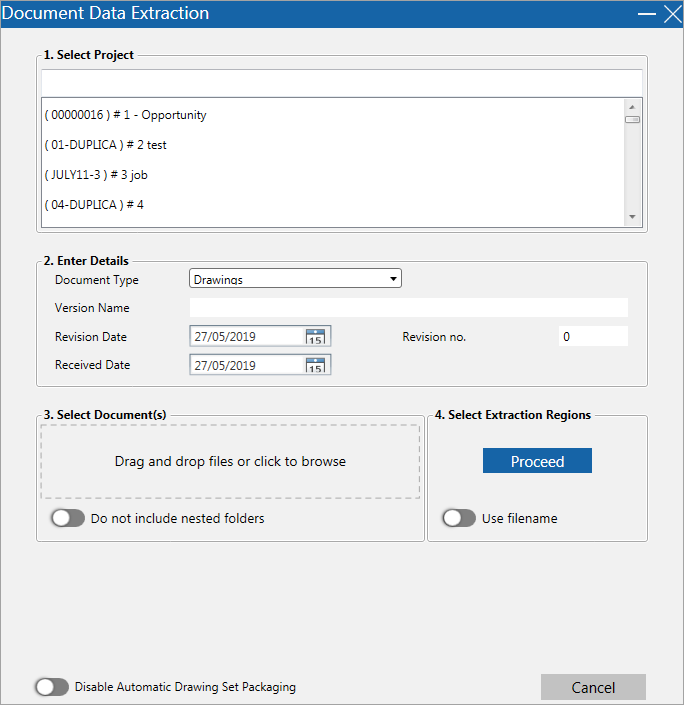
Select Project
Select the project to which the extracted data will be added.
Document Type
Select “Drawings” to perform a drawings extraction or “Specifications (Beta)” to perform a specifications extraction.
Version Name
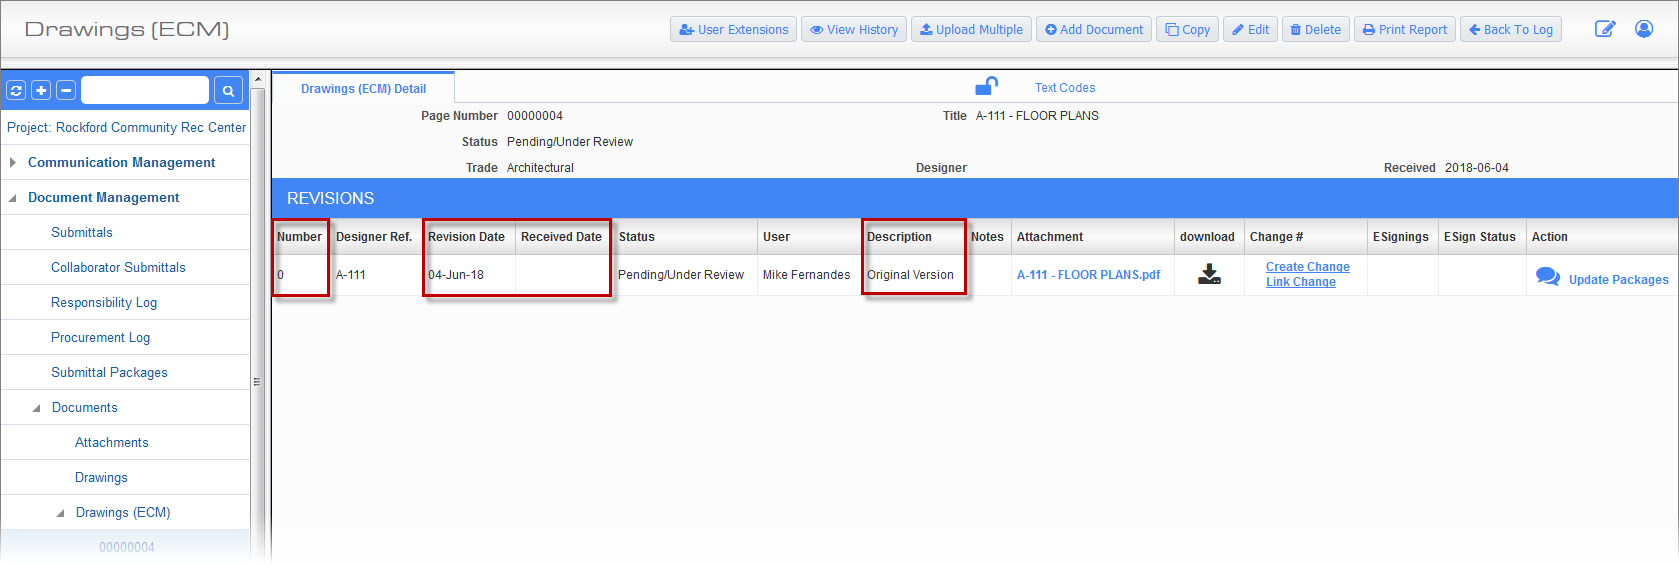
This field populates the Description field for each drawing set sheet being uploaded to PM JSP, as framed in the below screenshot. Like keywords and tags, the version name gets associated to each sheet being uploaded so that searches can later be done against it in PM JSP and Mobile Field.
Revision Date
This field defaults to the computer’s system date and populates the Revision Date field for each drawing set sheet being uploaded to PM JSP, as framed in the below screenshot. This default revision date can be overridden on a sheet-by-sheet basis following the Step 2: Validate Extracted Sheet Info & Enter Overrides section found under Part 2: Extracting Sheet Labels & Sheet Titles in this guide.
Received Date
This populates the received date for each drawing set sheet being uploaded to PM JSP, as framed in the below screenshot. This default received date can be overridden on a sheet-by-sheet basis following the Step 2: Validate Extracted Sheet Info & Enter Overrides section found under Part 2: Extracting Sheet Labels & Sheet Titles in this guide.
Revision no.
This populates the Number field (revision number) for each drawing set sheet being uploaded to PM JSP, as framed in the below screenshot. This default revision number can be overridden on a sheet-by-sheet basis following the Step 2: Validate Extracted Sheet Info & Enter Overrides section found under Part 2: Extracting Sheet Labels & Sheet Titles in this guide.
Select Document(s)
Use these controls to select the document(s) to upload for extraction.
NOTE: More than one document can be selected for extraction.
Document Extraction Output Folder:
Right after selecting the documents, if the destination folder has not been set for the extracted PDFs yet, a prompt appears letting the user know that they must set it.
The extracted PDFs are stored in the CMiC Field module, as a drawing set sheets, but copies of the extracted PDFs are stored in the specified destination folder.
Click [OK] and use the launched pop-up window to select the destination folder for the extracted PDFs.
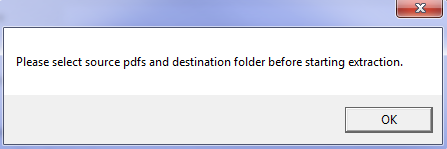
Once the destination folder for the extracted PDFs is set, it is not necessary to set it again, but it can be changed using the Document Extraction Output Folder field on the General tab on the Settings screen.
Do Not Include Nested Folders – Toggle
Use Filename – Toggle
When enabled, ECM Explorer will use the name of the file as the drawing sheet name.
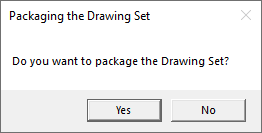
Disable Automatic Drawing Set Package – Toggle
After extracting, editing, linking, and uploading drawing sheets, ECM automatically packages the drawings. Packaging is important for mobile to view the drawings. If enabled, ECM will prompt the user with the following Confirmation pop-up window after uploading the drawing sheets.