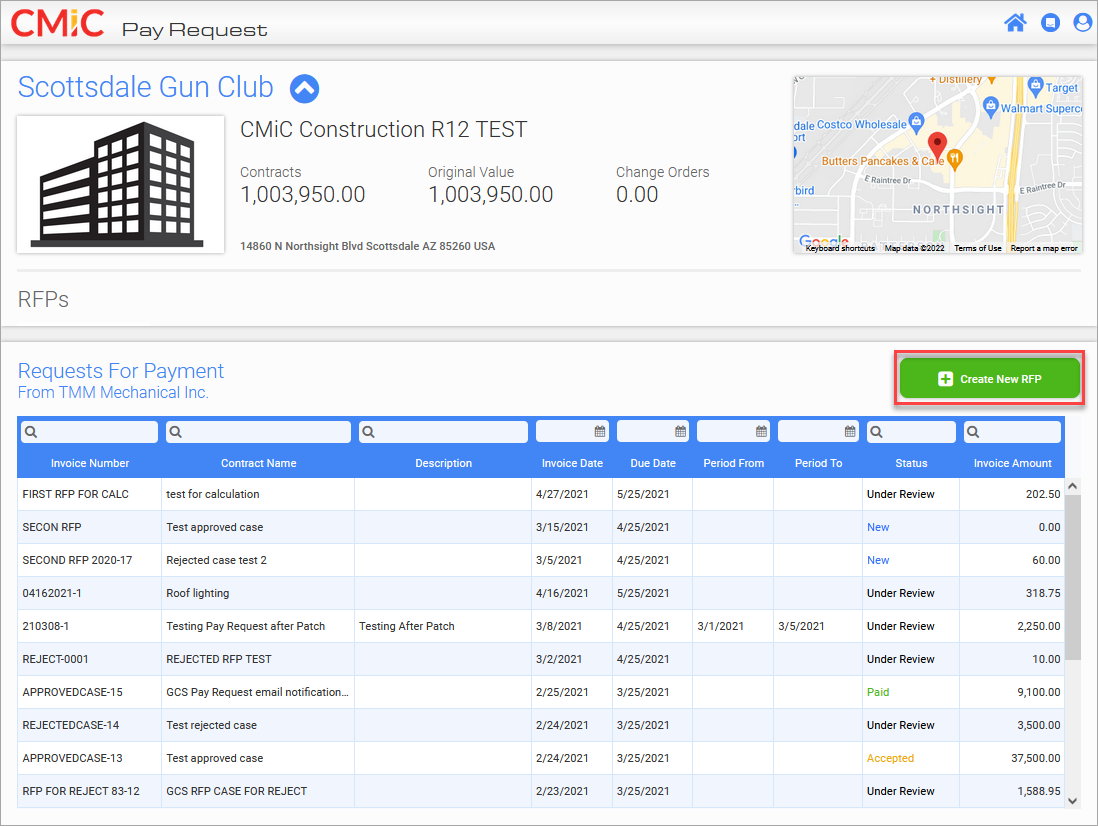
When a subcontractor logs in to Pay Request, the [Create New RFP] button will be enabled if there are posted subcontracts that have been linked to Pay Request and the project's payment request window is open and accepting payments.
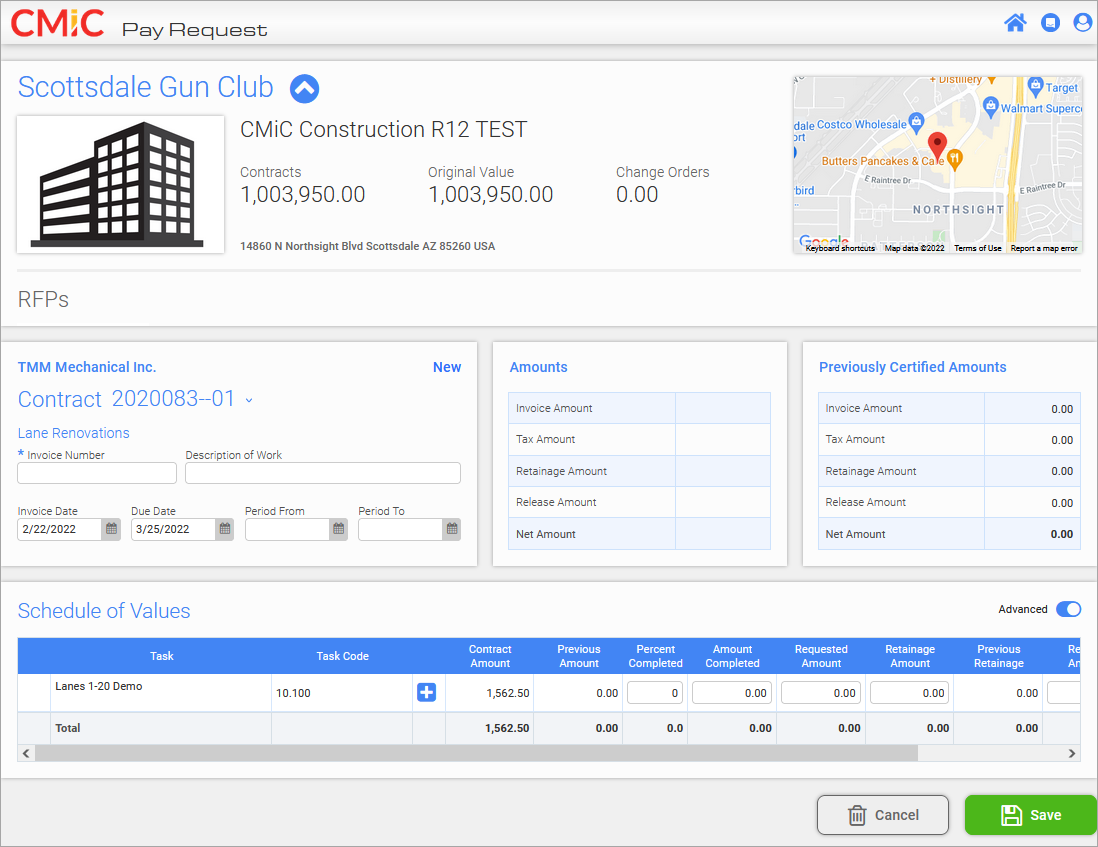
When the subcontractor clicks on the [Create New RFP] button to create an RFP against a subcontract, the RFP screen opens.
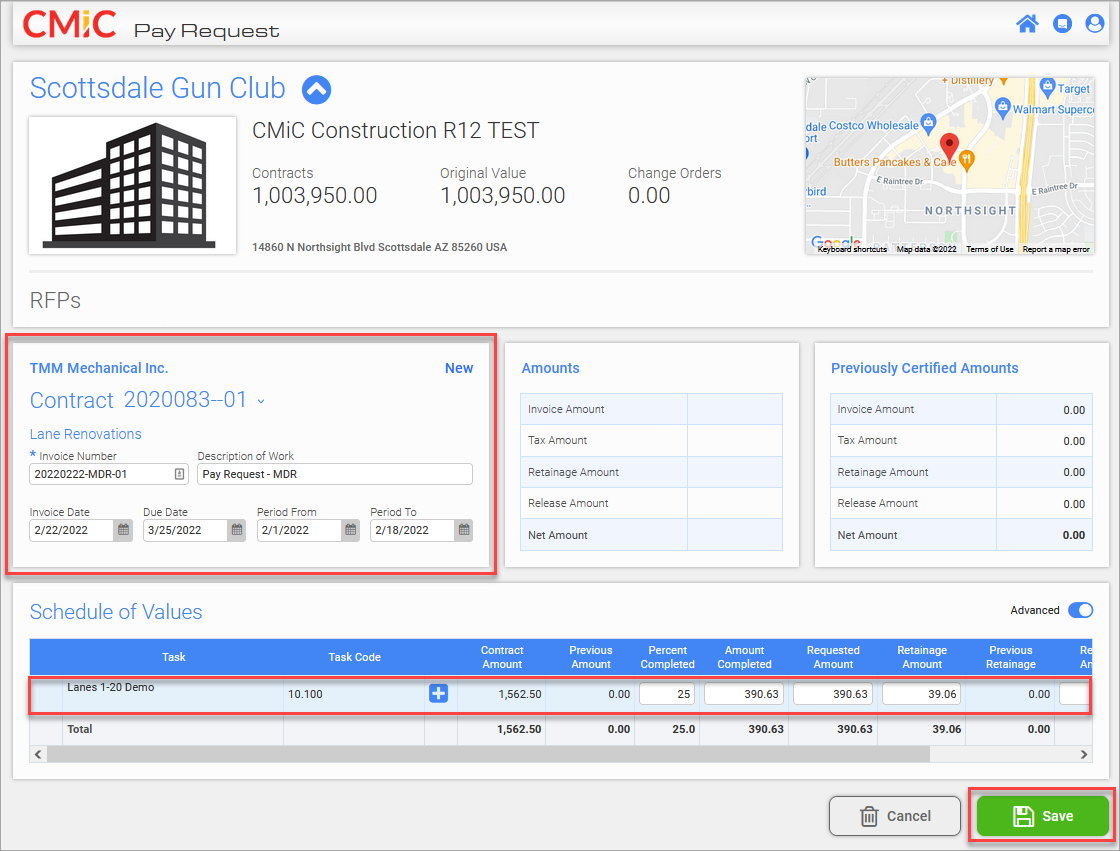
Enter the required details for the RFP and click on [Save].
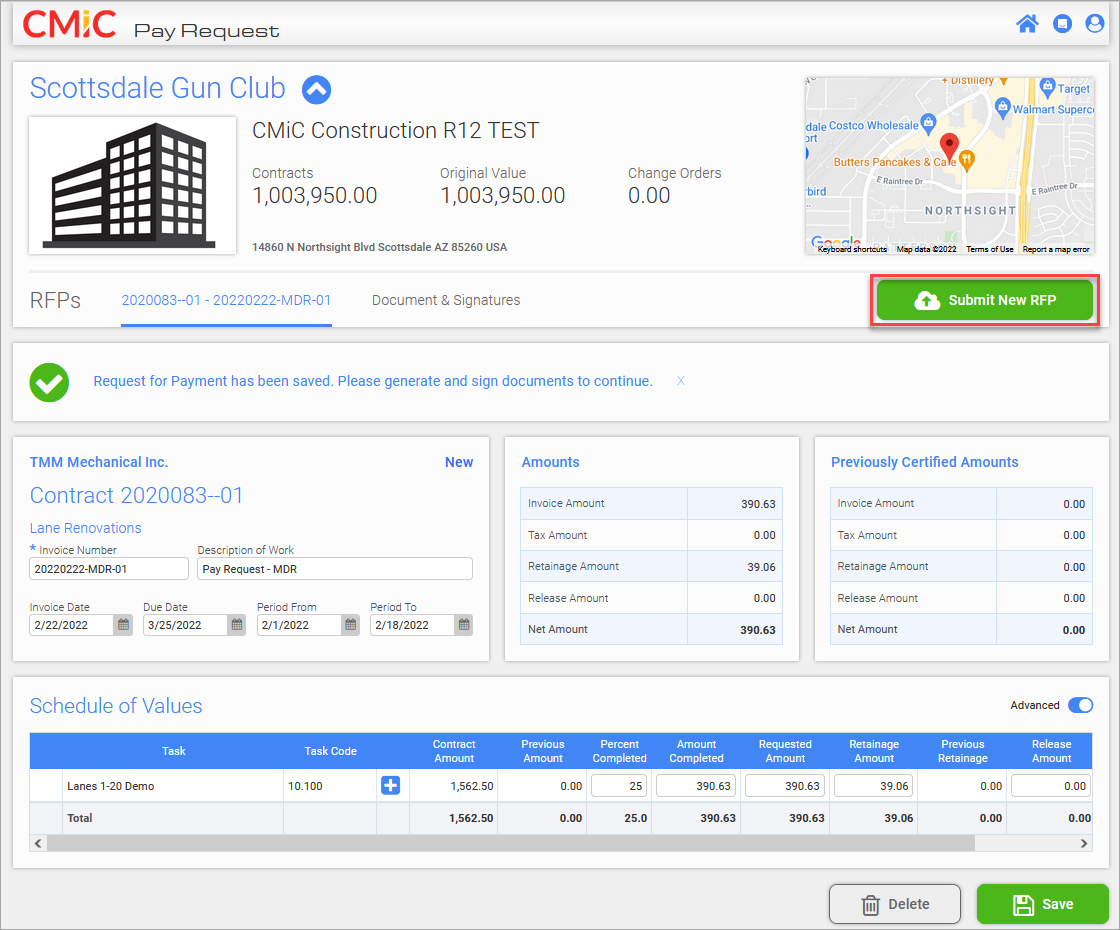
Once the RFP has been saved, click on the [Submit New RFP] button to submit the RFP.
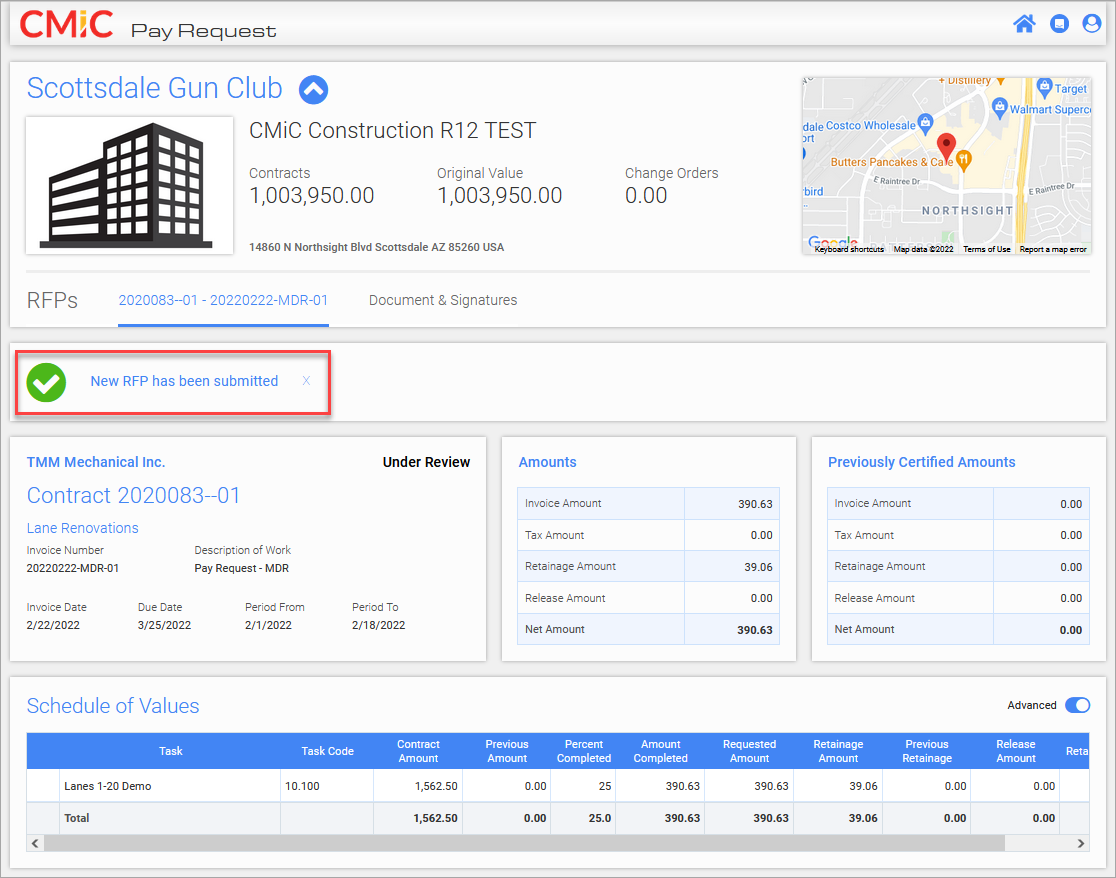
A message will be issued to indicate that the RFP has been submitted.
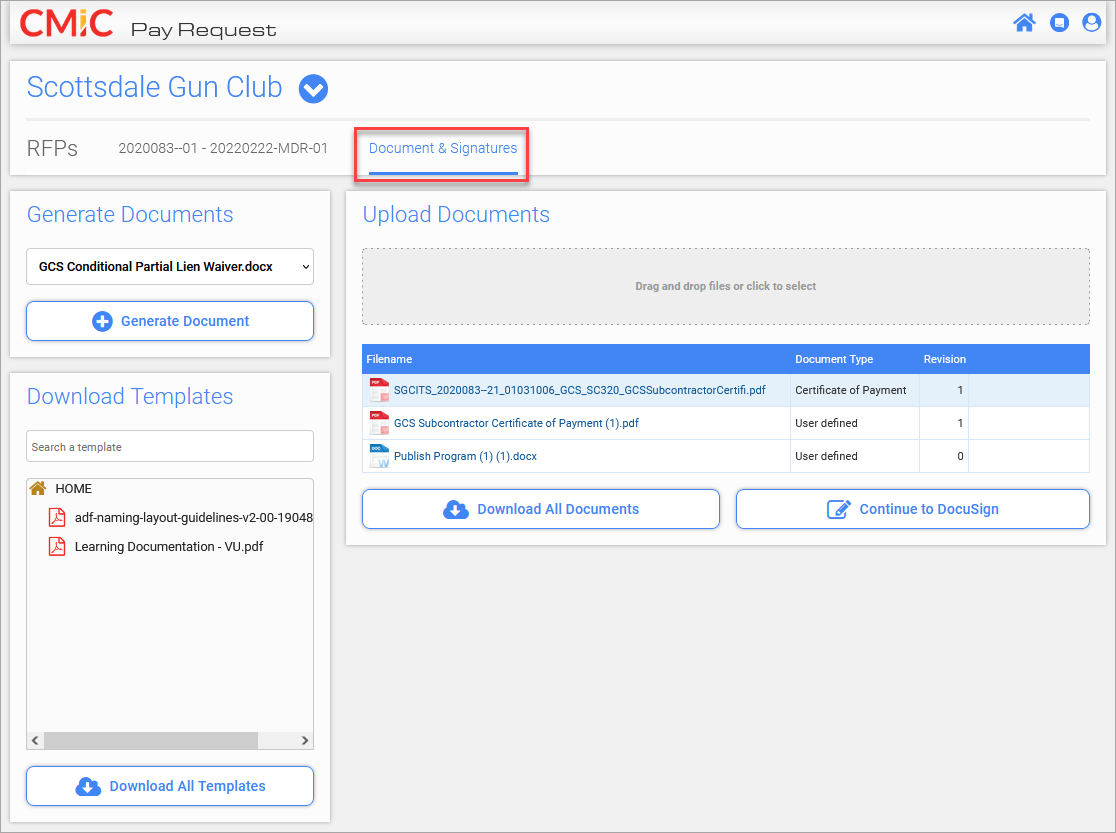
Click on the Document & Signatures tab to view documents and templates associated with the RFP.
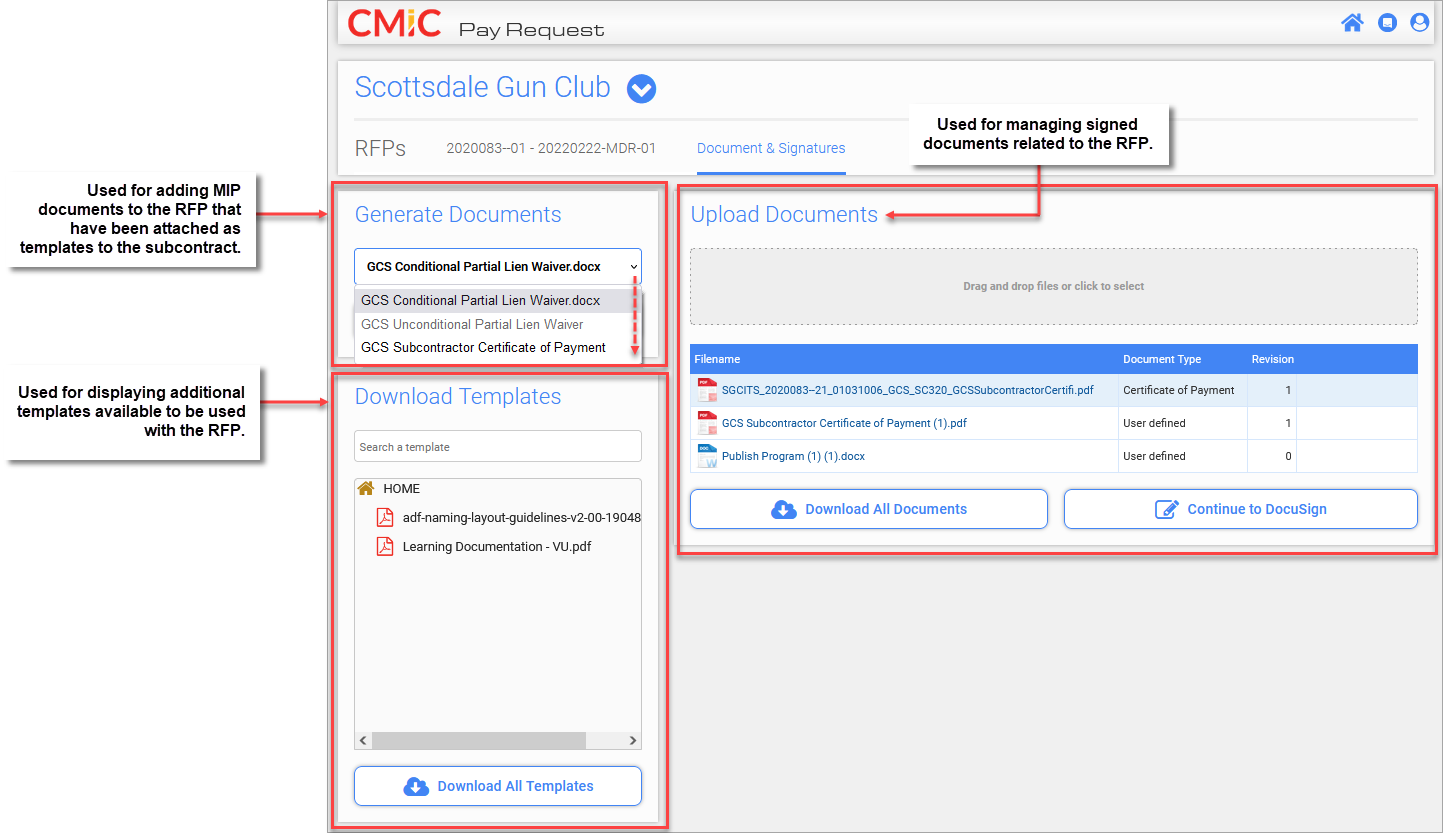
The Document & Signatures tab screen is divided into three sections:
-
Generate Documents - The Generate Documents panel is used to generate documents from the MIP templates attached to the subcontract. Click the drop-down menu to list available MIP templates. Select a template from the drop-down list and click [Generate Document] to add the document to the RFP. The MIP document will be listed in the Upload Documents panel of this screen. Generate any additional MIP documents, as required, using this method.
NOTE: When the RFP is created, the Certificate of Payment is automatically created from the MIP template and added to the Upload Documents panel. Refer to Pay Request - Create Subcontract Tied to Pay Request for more information on MIP templates.
-
Download Templates - The Download Templates panel is used for displaying additional templates that are available to be used with the RFP. Click on a template to open or save the file. Use the [Download All Templates] button to download a complete set of the templates and save them as a zip file. For more information on how these templates are managed, refer to Pay Request - Template Maintenance.
-
Upload Documents - The Upload Documents panel is used for uploading and managing RFP documents. Documents can be dragged and dropped into the grey dropbox labelled "Drag and drop files or click to select" or the dropbox can be clicked to browse and select files to upload. Use the [Download All Documents] to download a complete set of the documents and save them as a zip file. Documents can then be signed and re-loaded into this panel. Alternatively, the [Continue to DocuSign] button can be used to esign documents using DocuSign software. For more information regarding signing Pay Request documents, refer to Pay Request - Sign Pay Request Documents.
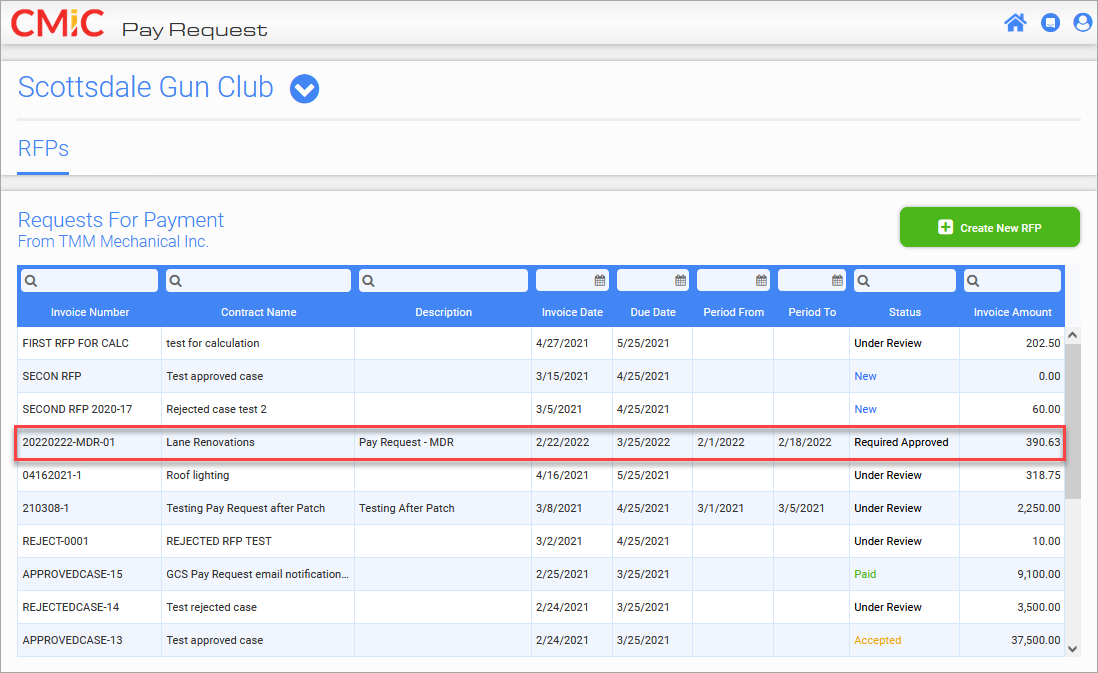
The RFP will now be listed on the Pay Request screen, as shown in the screenshot above.

It will also be available in the Imaging module, to be submitted and approved in Workflow.
If the RFP is approved, its status will be updated on the Pay Request screen to "Approved". If rejected, the status will be updated to "Rejected" and the [Create New RFP] will be enabled as long as the pay request window is still open to allow the subcontractor to modify and re-generate the RFP.
Pay Request Status
The Status field displays the status of the RFP in the pay request process and the stages are defined as follows:
-
New: RFP has not been submitted in GCS yet.
-
Under Review: RFP has been submitted and sent to Imaging.
-
Approved: RFP has been approved in the workflow.
-
Rejected: RFP was rejected from the workflow.
-
Accepted: A voucher has been processed and posted for that record.
-
Paid: A check has been paid.
E-mail Notification
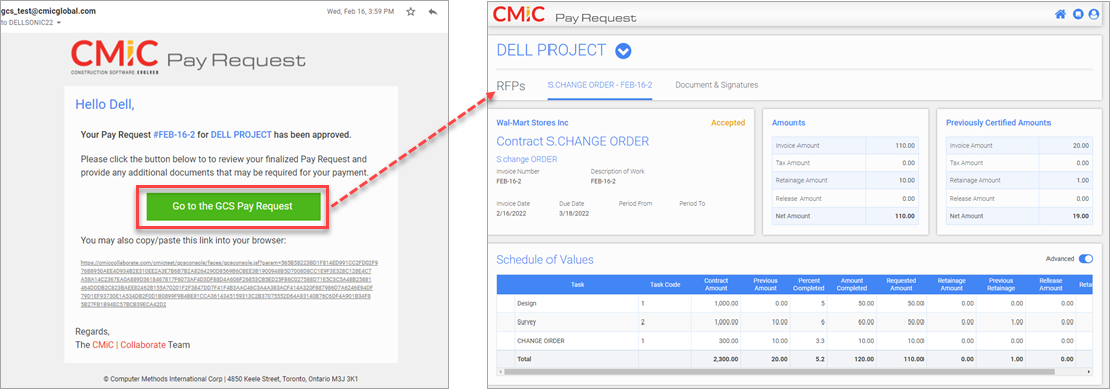
Example of a Subcontractor's Pay Request E-mail Notification
When an RFP is approved or rejected, subcontractors will get an email notification, similar to the one shown in the screenshot above. When the subcontractor clicks the [Go to the GCS Pay Request] button or the text-based link located below the button, they will be taken directly to the RFP's detail screen in Pay Request.
NOTE: Login process is required if user is not yet logged into Collaborate.