Overview
User Access Administration Screen
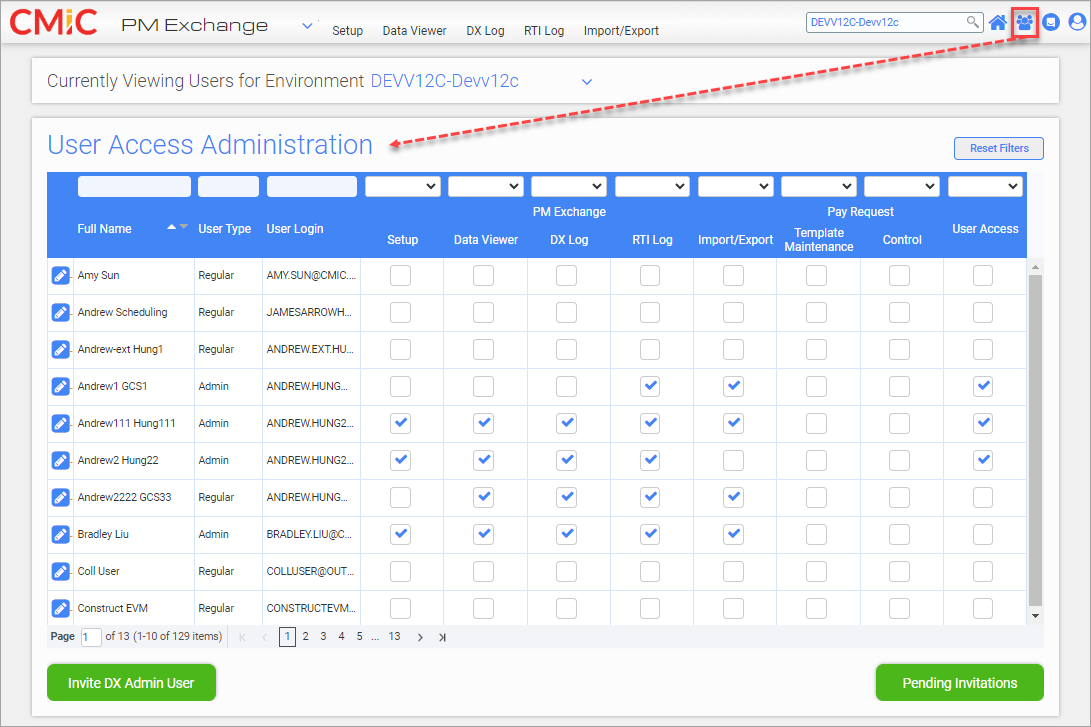
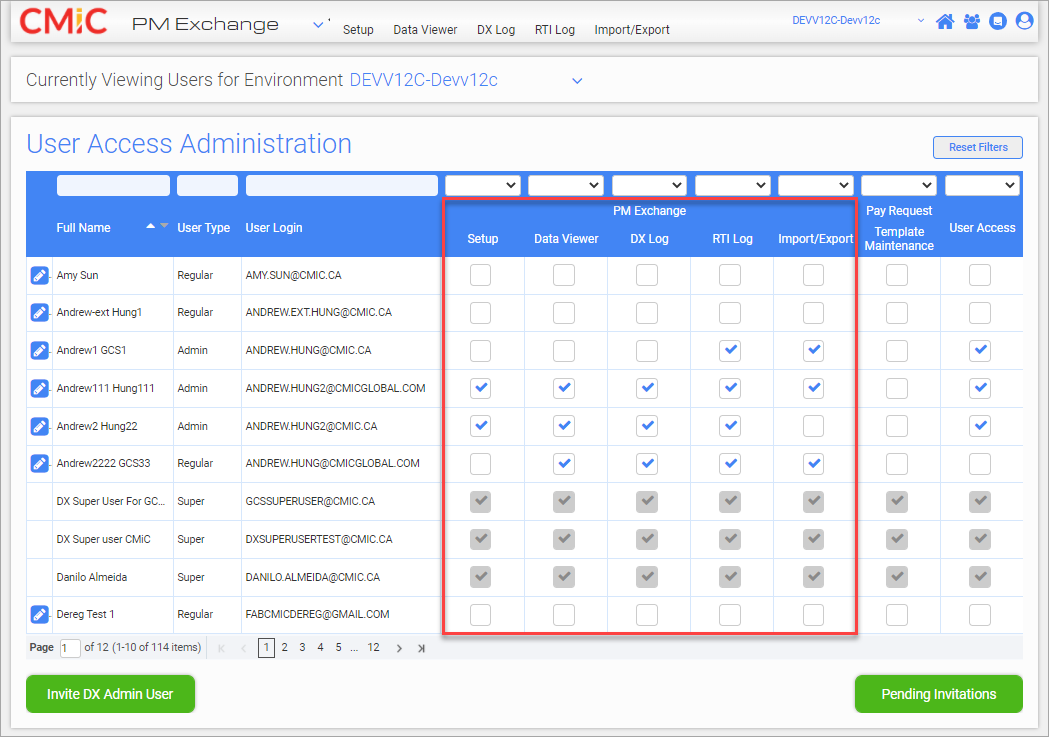
The User Access Administration screen is used to manage users and assign access to applications in Collaborate. This screen is launched from the User Access icon ( ) on the Collaborate console's toolbar. Administrators use this screen to create users in PM Exchange, assign access to screens in PM Exchange and Pay Request, as well as to assign access to the User Access Administration screen itself.
Security Access to the User Access Administration Screen
User Access Administration Screen
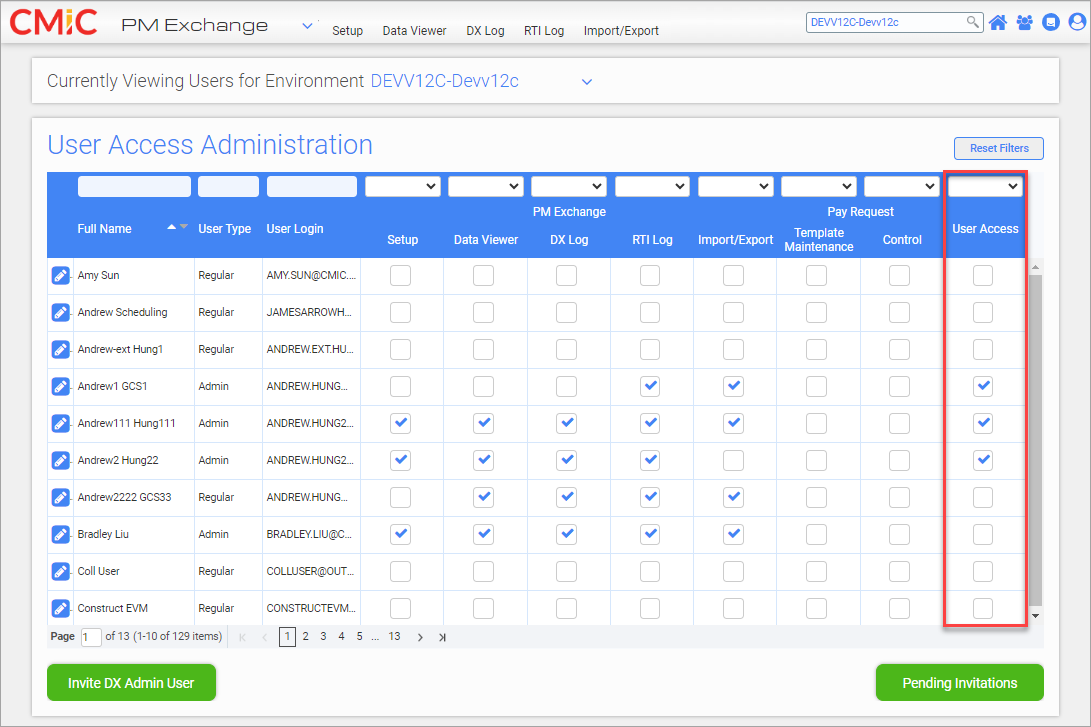
The security privilege to access this screen is located in the User Access column, as shown in the screenshot above.
An administrator can be assigned access to this screen by checking the User Access checkbox on the administrative user's row.
NOTE: Once access has been granted, the administrative user will need to refresh their screen to see the User Access icon (). A refresh can be initiated by clicking the CMiC logo or Home icon ( ).
).
Change Environments
Changing Environments in User Access Administration Screen
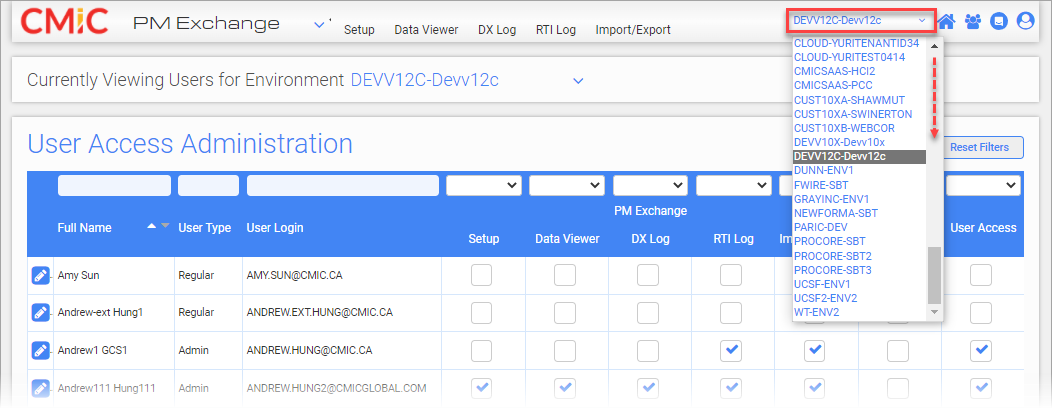
Clicking the Environment drop-down menu, as shown in the screenshot above, will list the environments to which the currently logged-in user has access.
There are two types of environments:
-
CMiC on-premise environment
-
Third-party environment
NOTE: The type of environment selected will determine how new users are added to PM Exchange. Refer to Add Users for more information on adding users.
PM Exchange Administration
One of the main features of the User Access Administration screen is managing PM Exchange administration.
Create and Manage Users in PM Exchange
The User Access Administration screen is used to create users for the PM Exchange application, and assign those users access to PM Exchange screens within the application (i.e. Setup, Data Viewer, DX Log, RTI Log, and Import/Export).
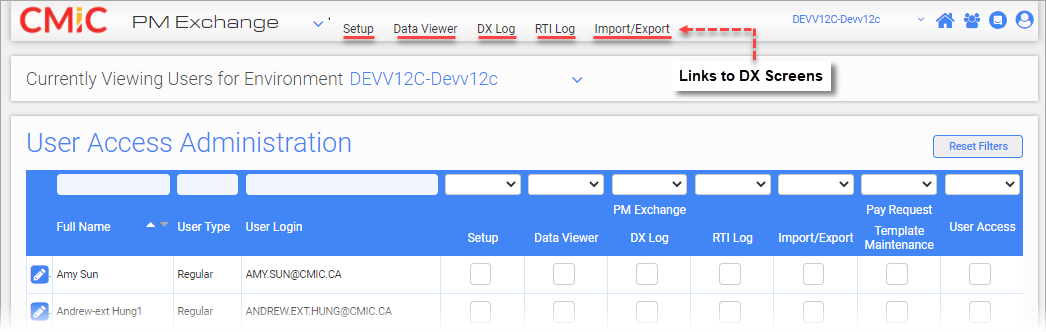
NOTE: If the user being defined is given access to all five PM Exchange screens (i.e. all the PM Exchange boxes are checked), then when the user logs into PM Exchange, the user will see links to all five PM Exchange screens, similar to what's shown in the screenshot above.
Add Users
Types of PM Exchange Users
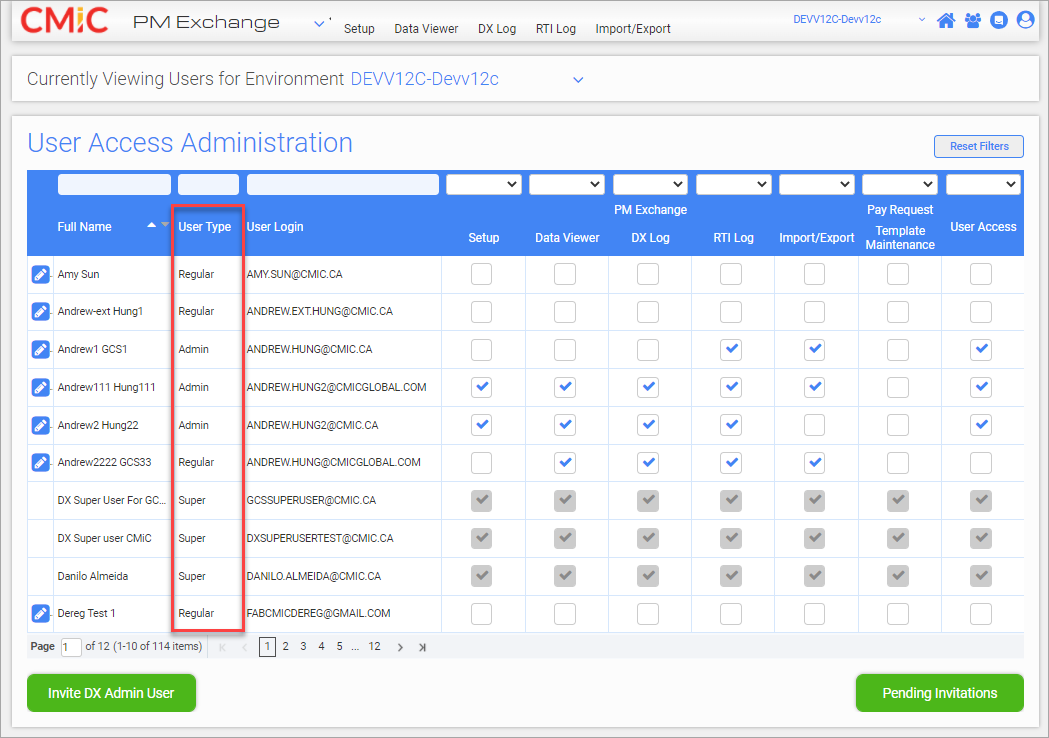
There are three types of PM Exchange users:
-
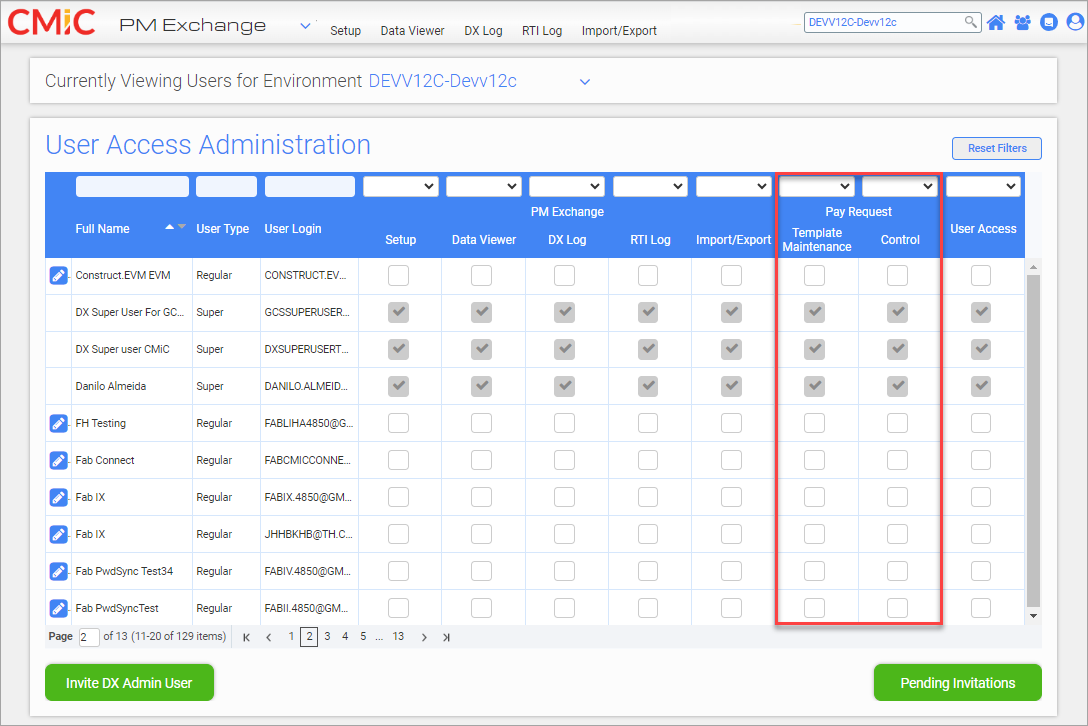
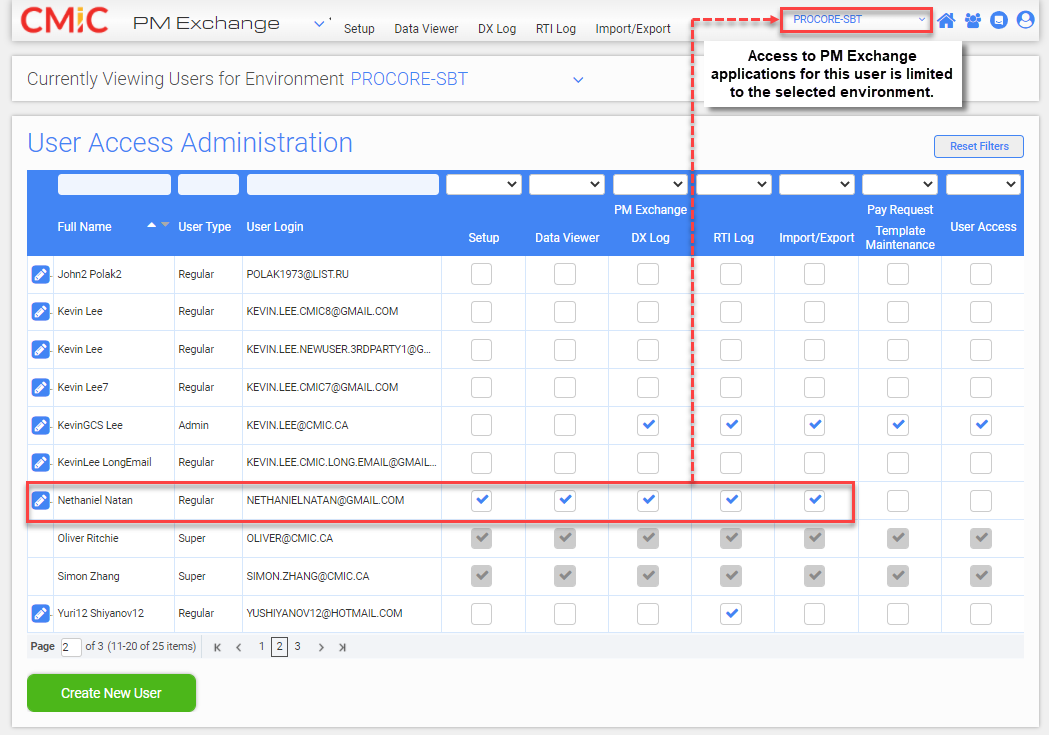
Super: Superusers are added in the database and are not created in the User Access Administration screen. Superusers have access to any environment and all applications. In addition, they have no Edit icon (
 ) available since a superuser's record can't be updated from this screen. Notice that the PM Exchange application boxes are all checked and disabled (greyed out) for superusers in the screenshot above.
 -
Admin: Administrative users have access to the User Access Administration application. They may also have access to some or all of the remaining PM Exchange applications.
-
Regular: Regular users don't have access to the User Access Administration application. They will have access to some or all of the remaining PM Exchange applications.
The type of environment that the logged-in user has selected from the Environment drop-down menu determines how PM Exchange users will be added. Refer to Change Environments for more information on the types of environments.
CMiC On-premise Environment
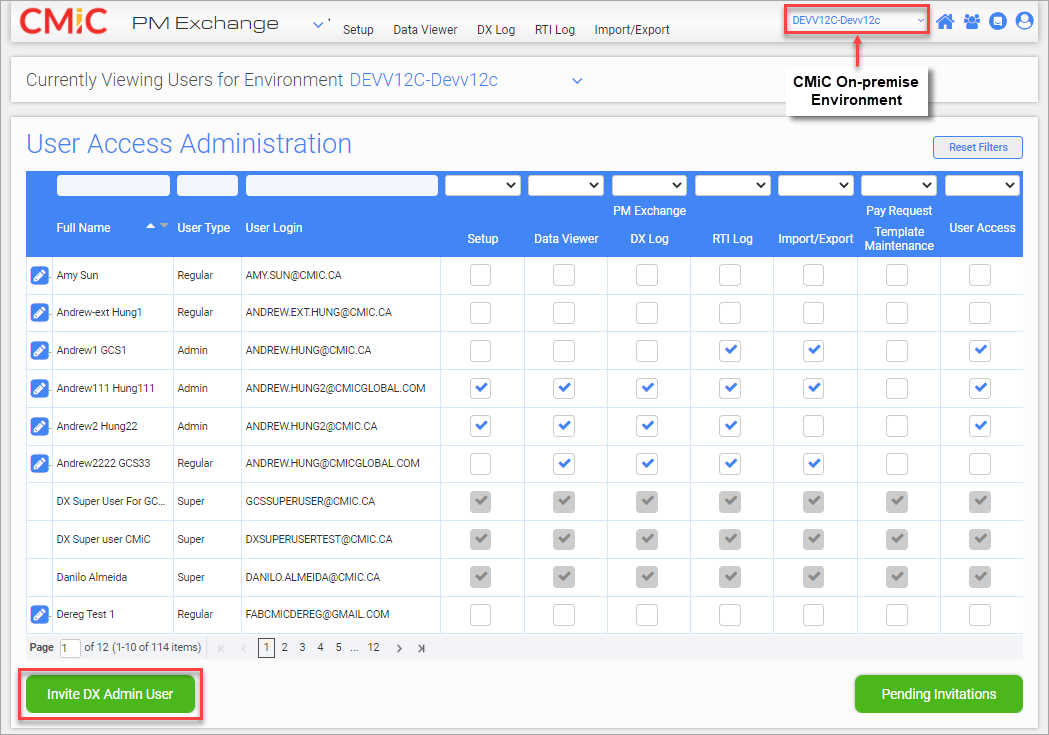
If a CMiC on-premise environment is selected, the [Invite DX Admin User] button will be used to invite a user to be an Admin type user. Users will need to complete CMiC Collaborate's standard invitation process.
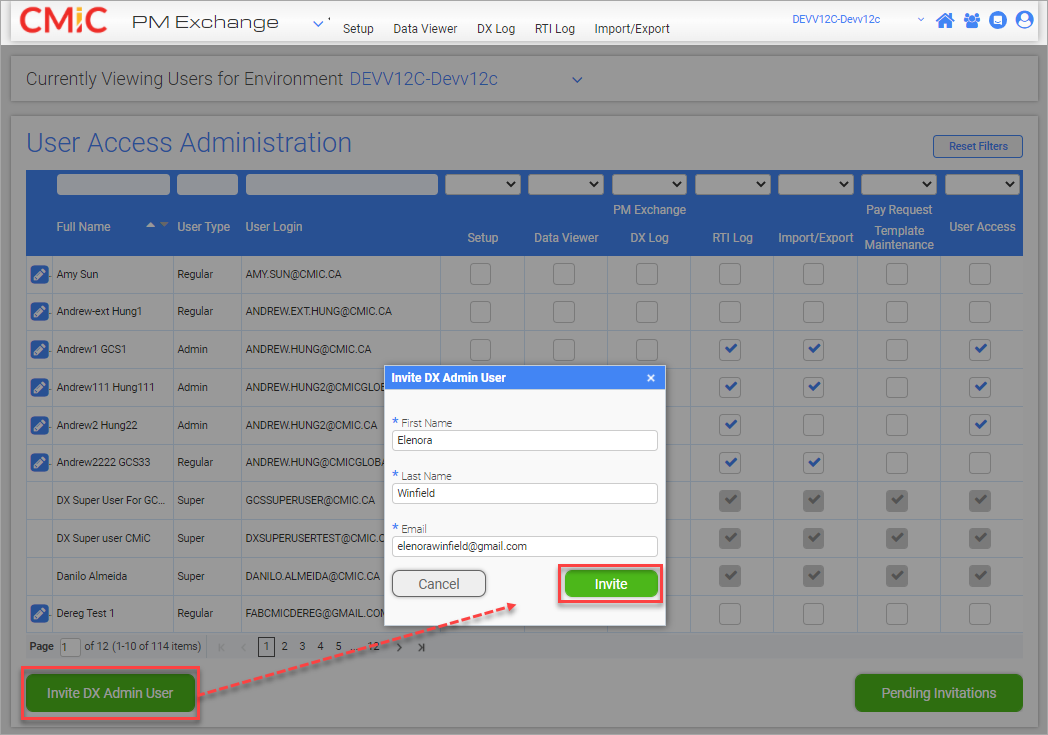
Click on the [Invite DX Admin User] button to launch the Invite DX Admin User pop-up window, where the name and email address of the new user can be entered. When finished, click on [Invite].
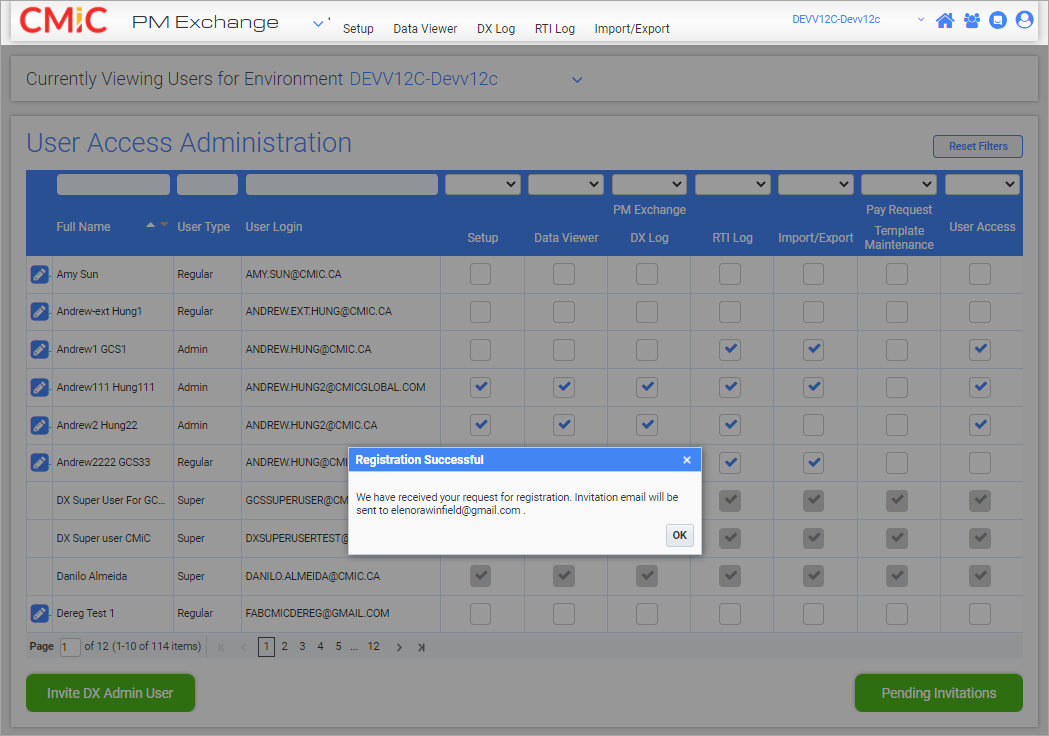
An invitation will be sent to the specified user.
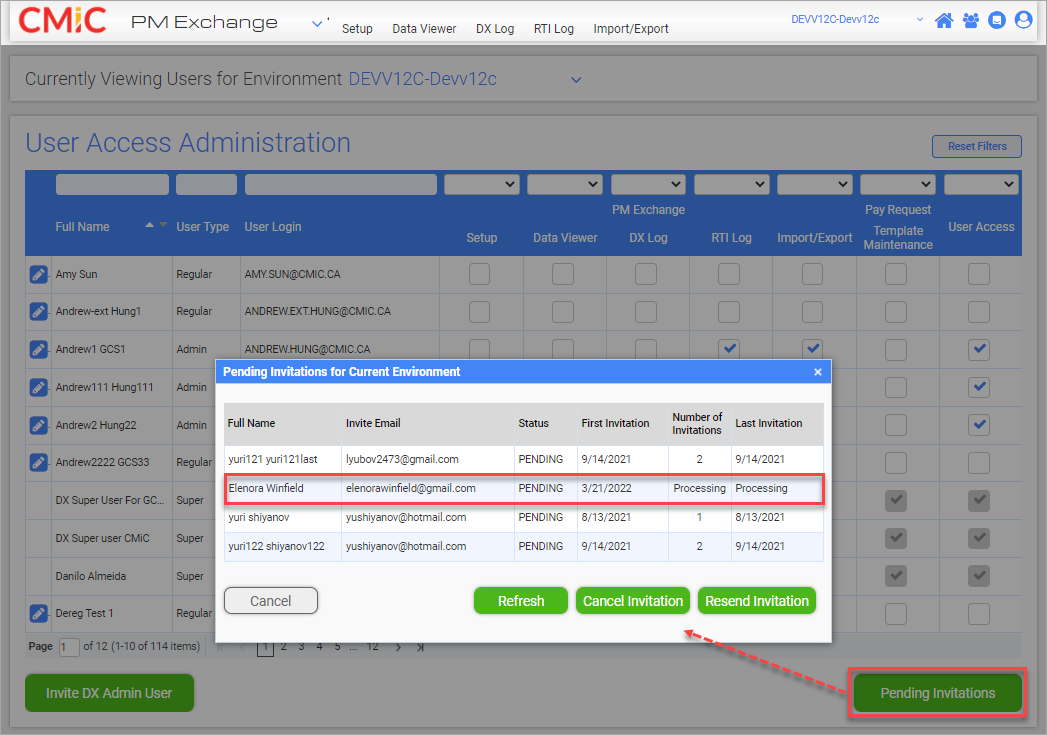
When there are pending invitations for the current environment, the [Pending Invitations] button will be visible. Clicking this button launches a pop-up window where additional options are available. The [Refresh] button can be used to refresh the pending invitations listed in the pop-up window. The [Cancel Invitation] button can be used to cancel a selected pending invitation or the [Resend Invitation] button can be used to re-send an invitation to a user who may have missed a previous invitation.
NOTE: If there are no pending invitations for an environment, the [Pending Invitations] button will not be visible.
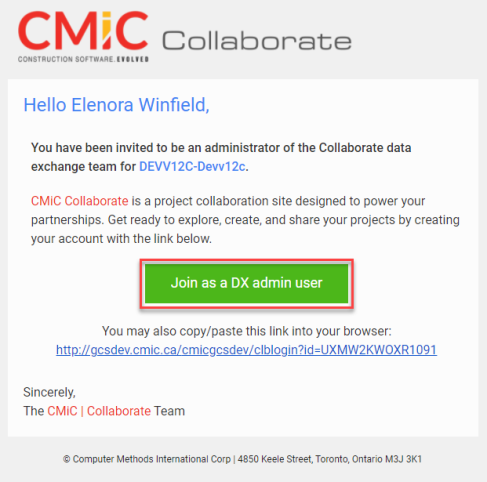
When the user receives the invitation email, they can click on the [Join as a DX admin user] button to start the registration process.
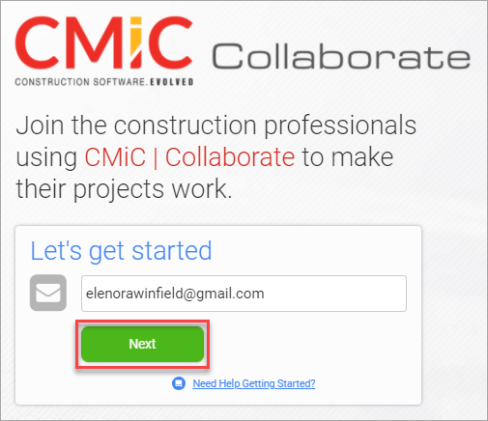
They must click on [Next] to get started.
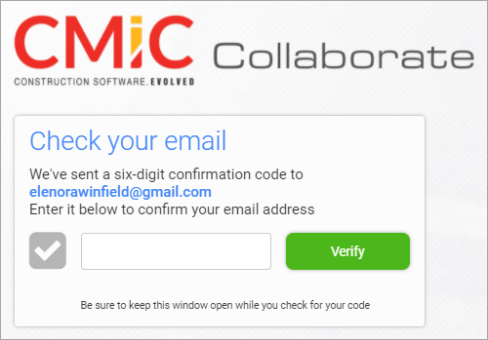
Then, they must enter the six-digit confirmation code sent to their email address and click [Verify].
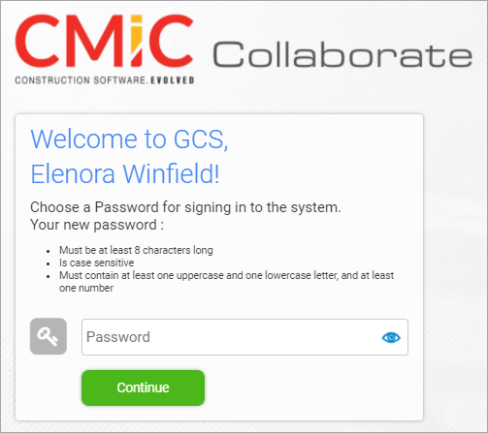
Next, they must create a user-defined password for signing into the system and click [Continue].
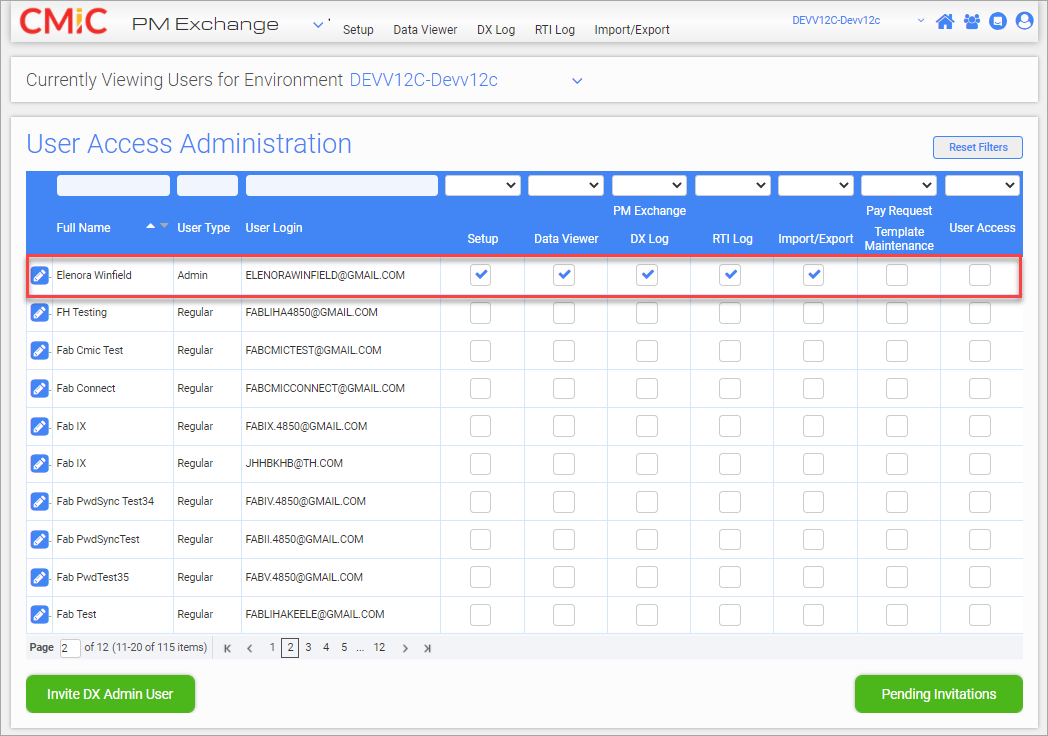
When the process is complete, the new user will be added as an Admin type user on the User Access Administration screen for the specified environment. The user automatically receives access to all of the PM Exchange applications for that environment but access settings can be adjusted as required.

By default, the Admin type user is not automatically given access to the User Access Administration screen. Access will need to be granted by checking the box for this user in the User Access column of the screen.
In addition, the Edit icon () can be used to update the user's details and access to applications and environments. Refer to Edit User Records for more information on editing a user's details.
Third-Party Environment
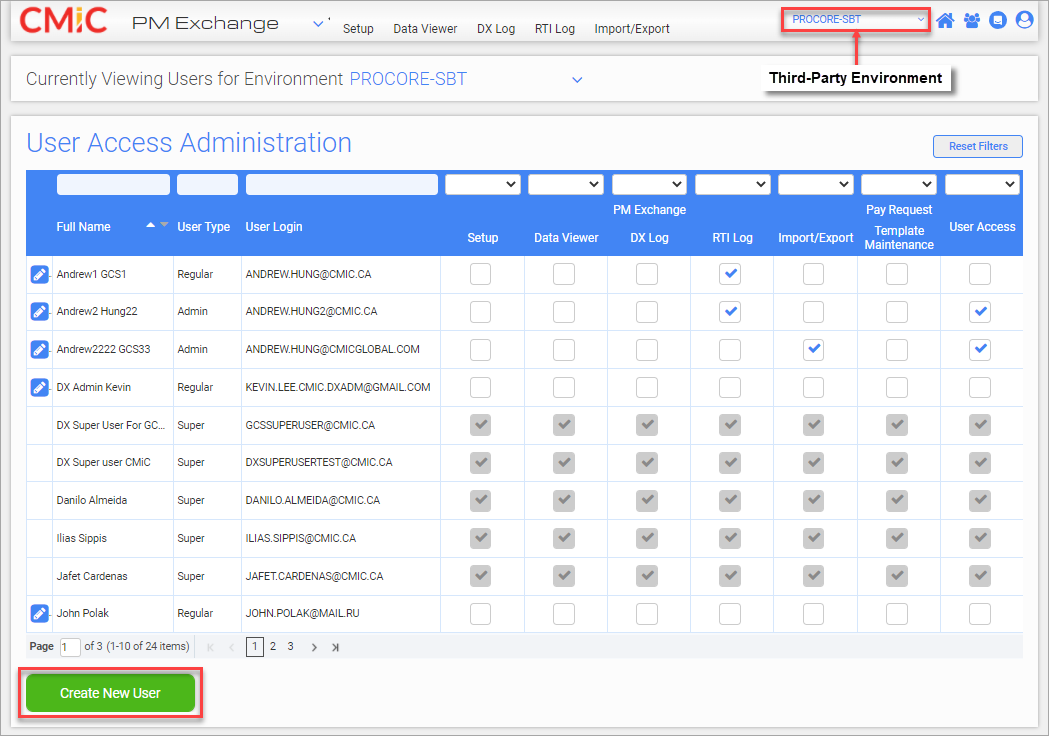
If a third-party environment is selected, then the [Create New User] button will be used to directly add a new user in the User Access Administration screen.
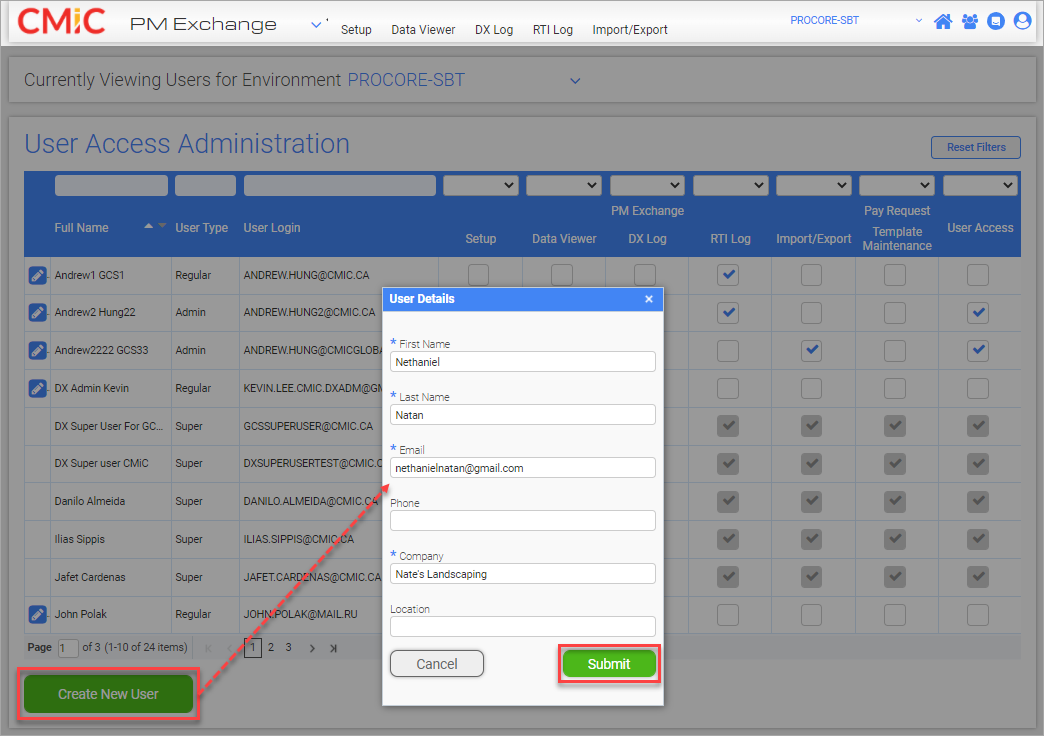
Click on the [Create New User] button to launch the User Details pop-up window. Enter the new user's details and click on [Submit].
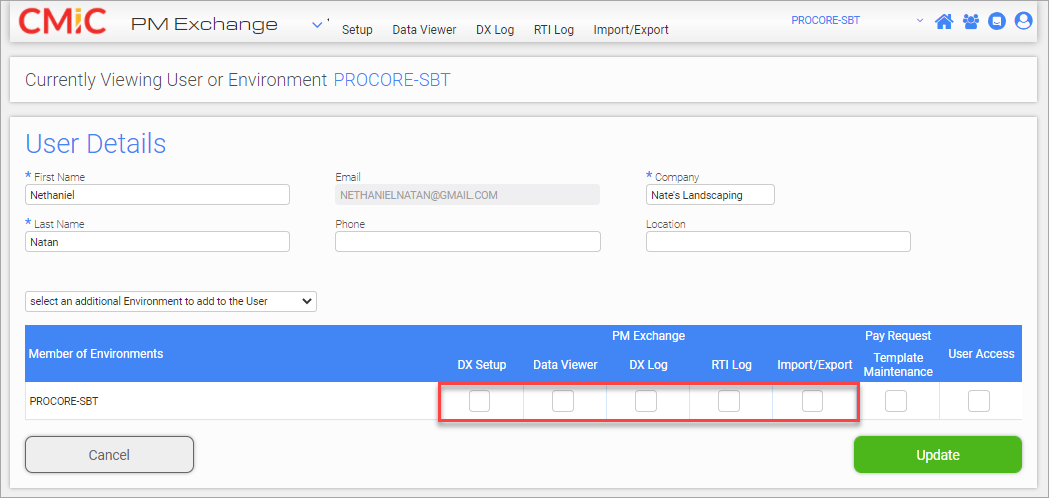
The new user will automatically be added to the selected environment without any PM Exchange applications pre-selected.
Select the PM Exchange applications to which the new user should have access in the selected environment and click on [Update].
The new user will be added to the User Access Administration screen for the selected environment with access to the specified applications. Access to the applications for this user can be updated as required from this screen. Otherwise, the Edit icon () can be used to update the user's details and access to applications and environments. Refer to Edit User Records for more information on editing a user's details.
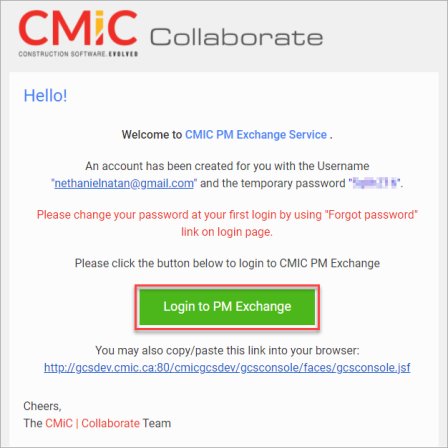
The new user will receive an email with a temporary password. This temporary password can be used to log into PM Exchange and create a new user-defined password.
Pay Request Administration
User Access Administration Screen
The Pay Request columns of the User Access Administration screen are used to provide access to the Pay Request - Template Maintenance screen and the Pay Request Control screen. Users with these security privileges can access the screen to manage templates in Pay Request, and access the screen to control default contract configuration on a project's subcontracts.
NOTE: Once access has been granted, the user will need to refresh their screen to see these screens in Pay Request. A refresh can be initiated by clicking the CMiC logo or Home icon ().
Search and Edit Records
Search User Records
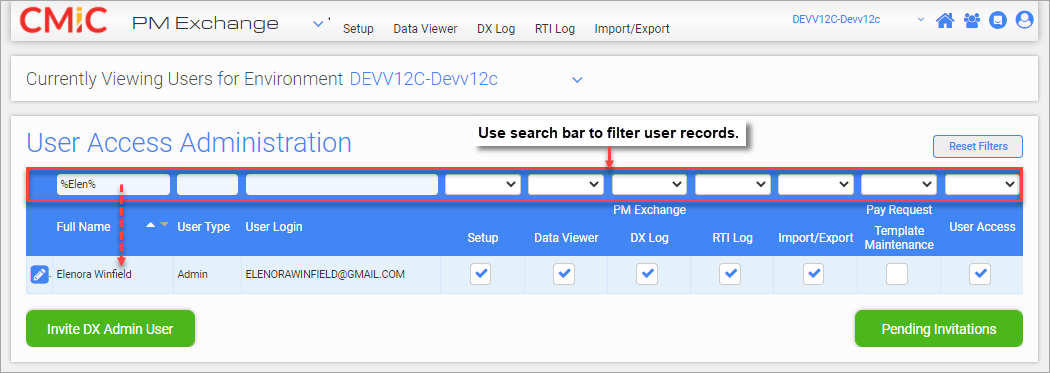
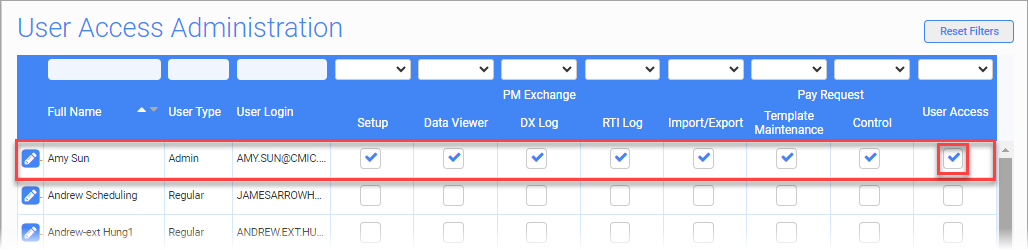
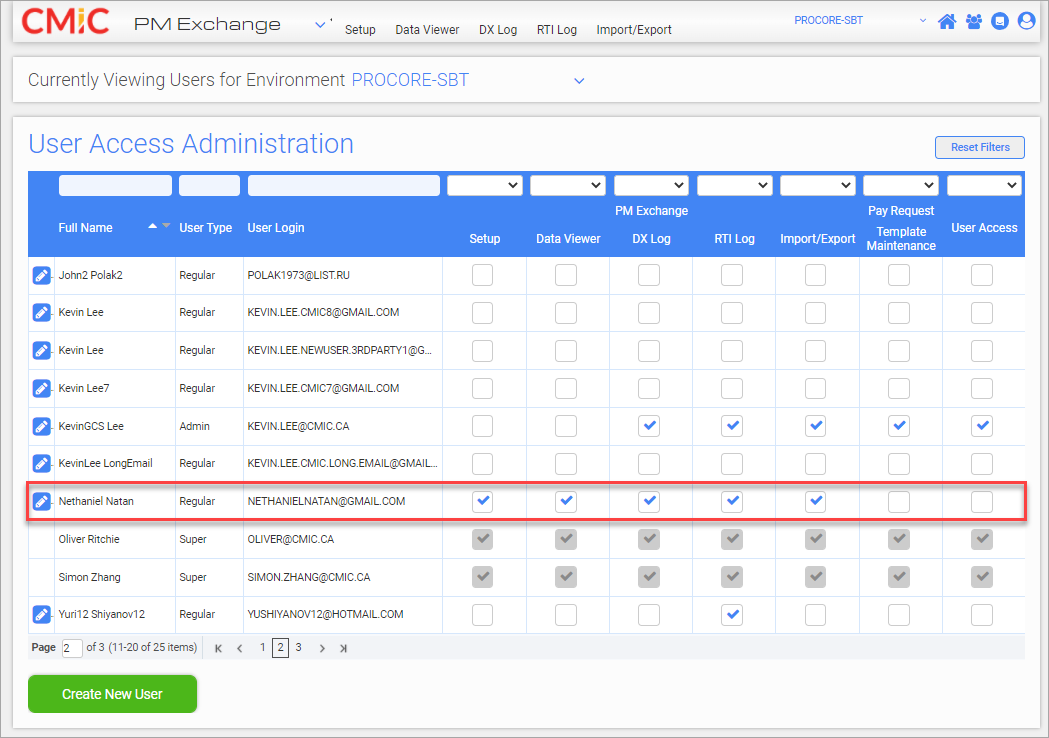
Use the search bar above the column headers to filter for specific records according to defined search criteria. Searches can be defined by user name or by access to Collaborate screens. For example, a search could be defined to filter for all users that have full access to screens in PM Exchange, as well as the User Access Administration screen (i.e. no access to Pay Request - Template Maintenance). The results are shown in the screenshot below.
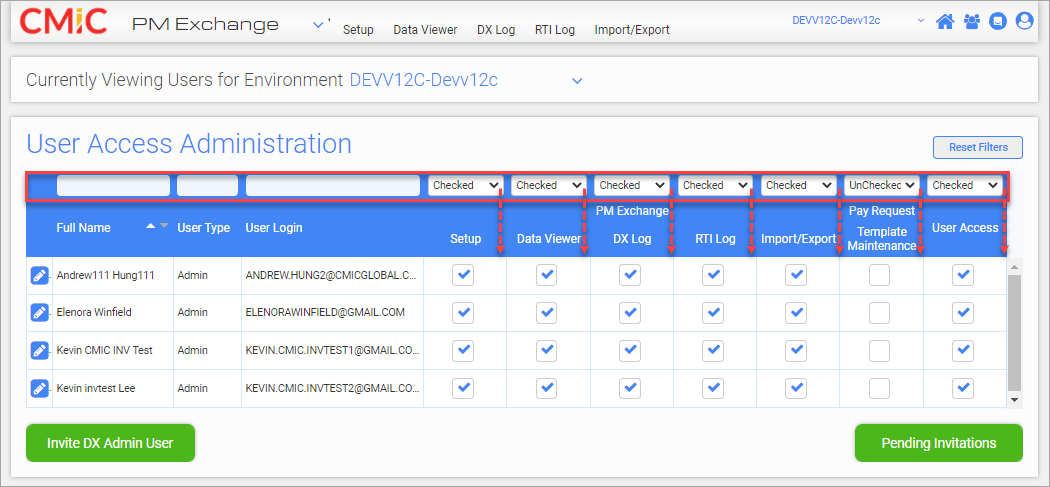
Use the [Reset Filters] button to clear the filters in the search bar and define another search.
Edit User Records
A user's record can be edited directly from the User Access Administration screen for the selected environment.
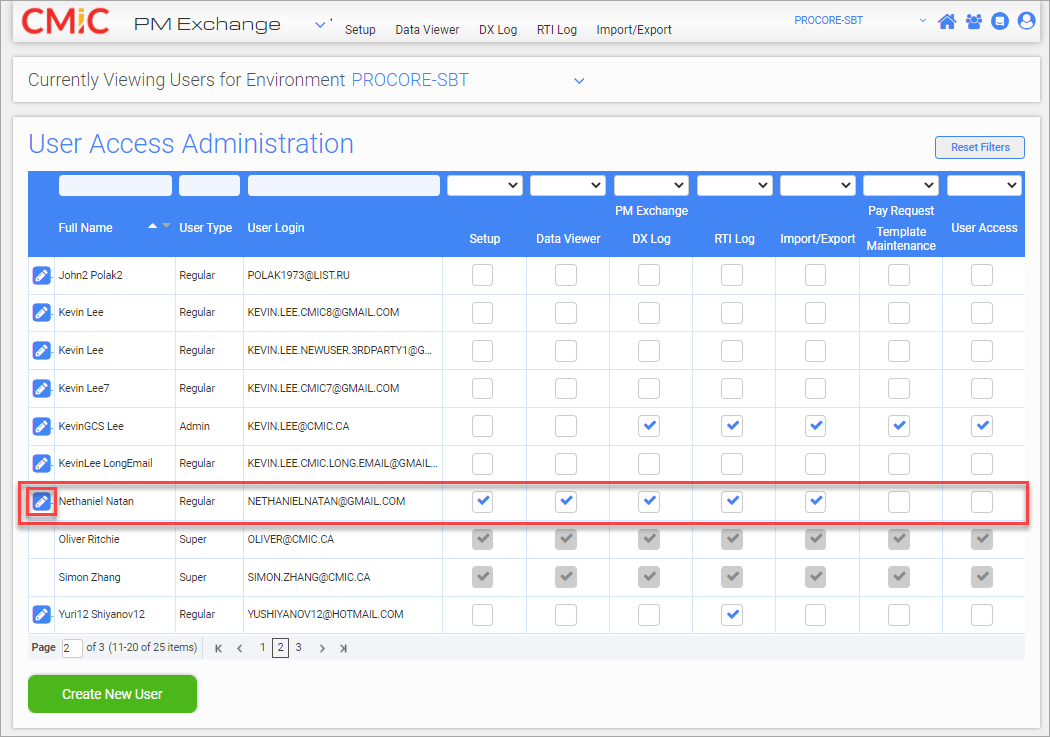
Otherwise, click on the Edit icon ( ) next to a user’s user name to edit a user's details.
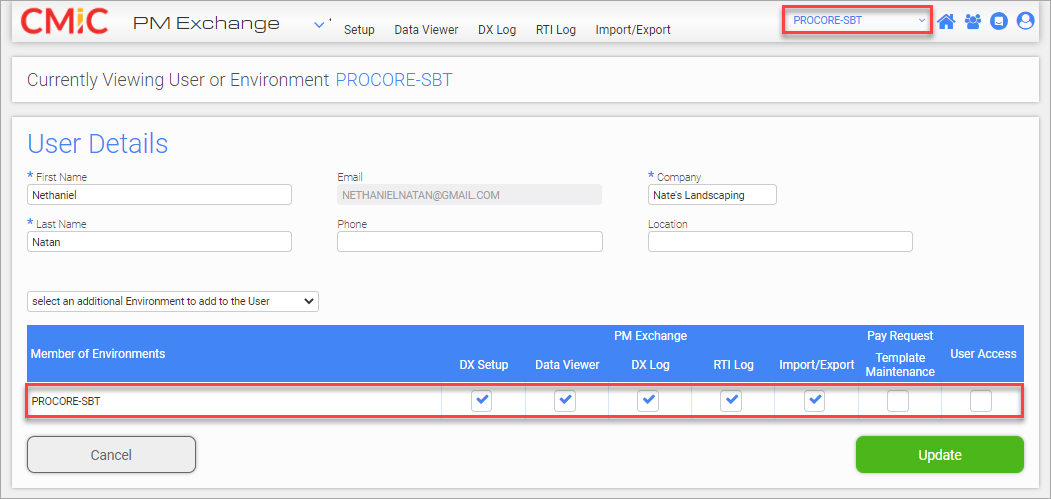
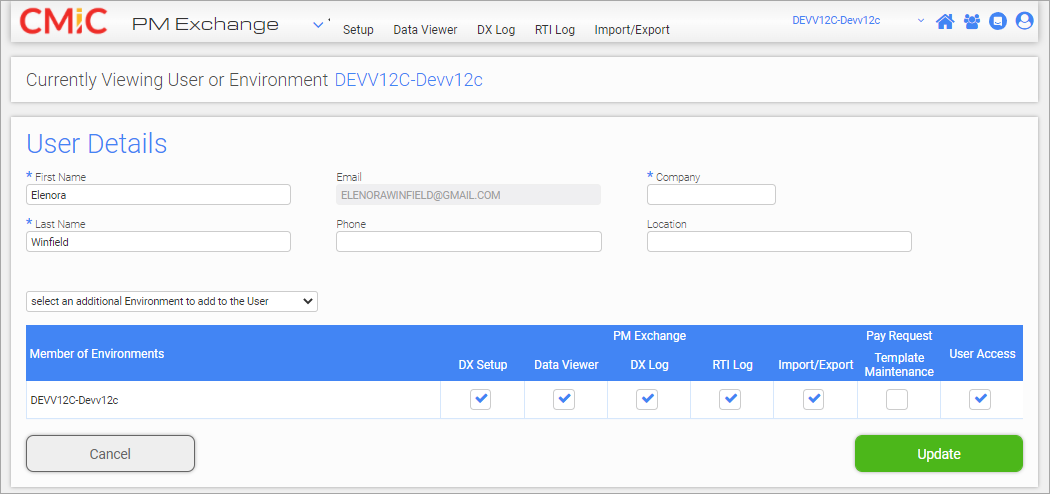
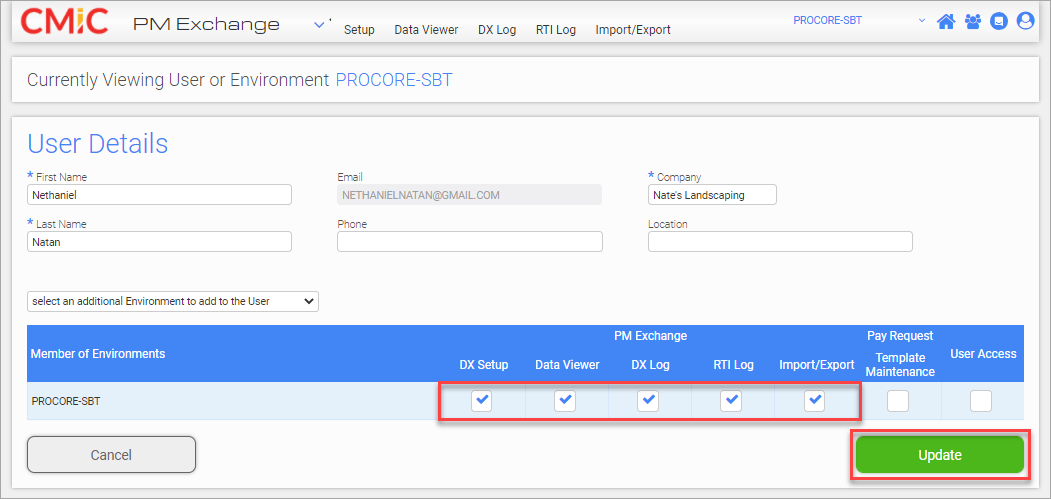
The screenshot above shows a user's details with access to five PM Exchange screens for the selected environment. Access to applications for the selected environment can be added or removed by checking or unchecking the application boxes as required and clicking [Update].
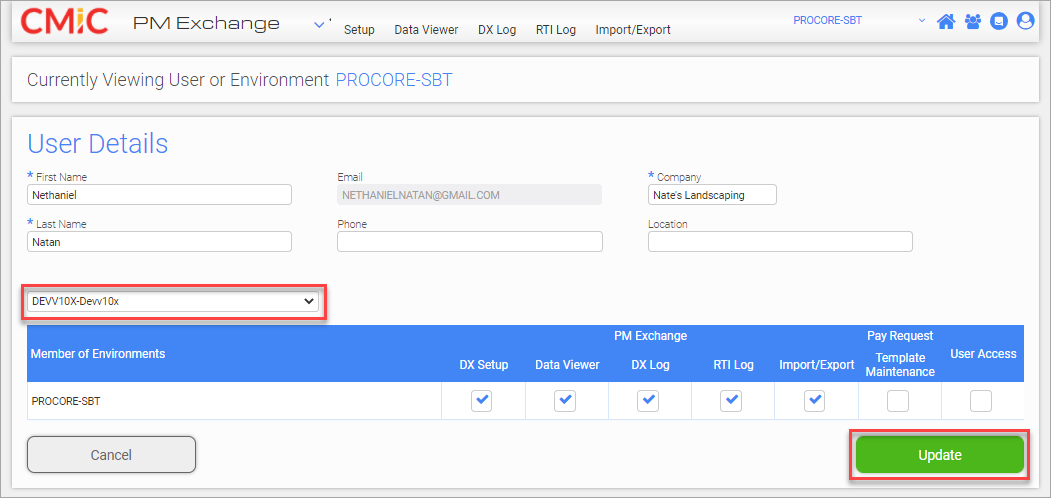
If a user requires access to PM Exchange screens in an additional environment, choose the environment from the drop-down menu and click on the [Update] button.
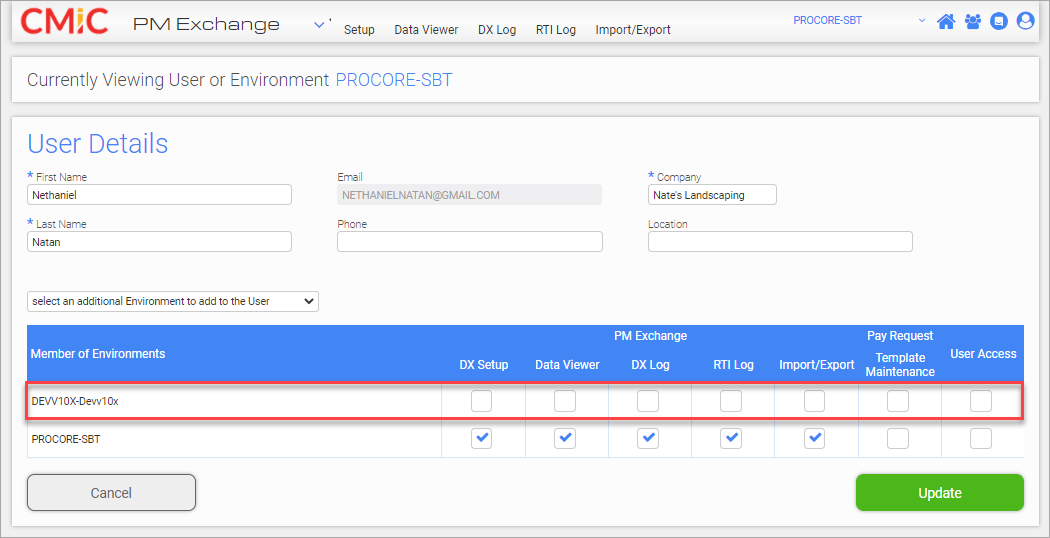
The user becomes a member of the additional environment but no applications will be checked at this point.
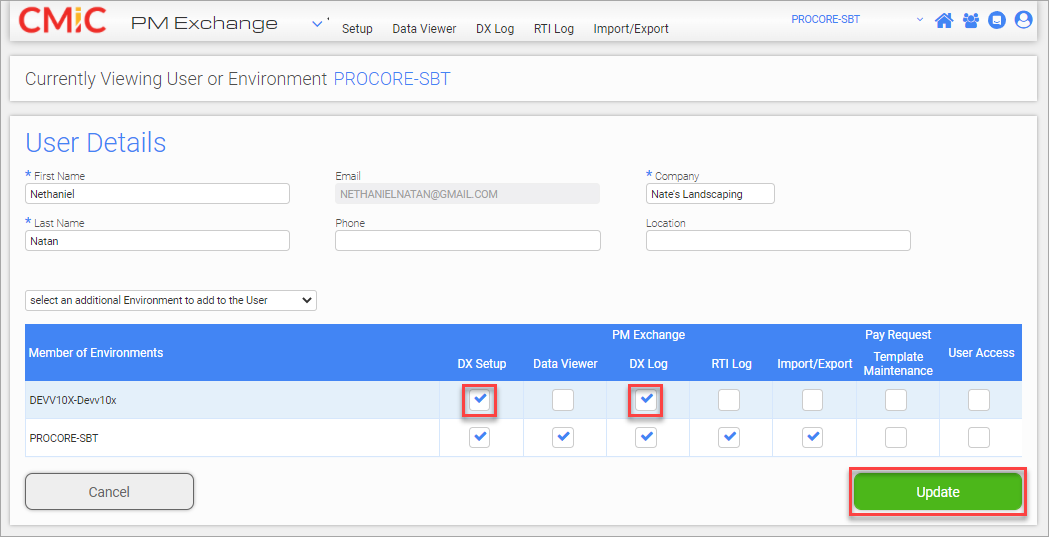
Access can be granted to applications in this new environment as required. When finished, click on [Update].
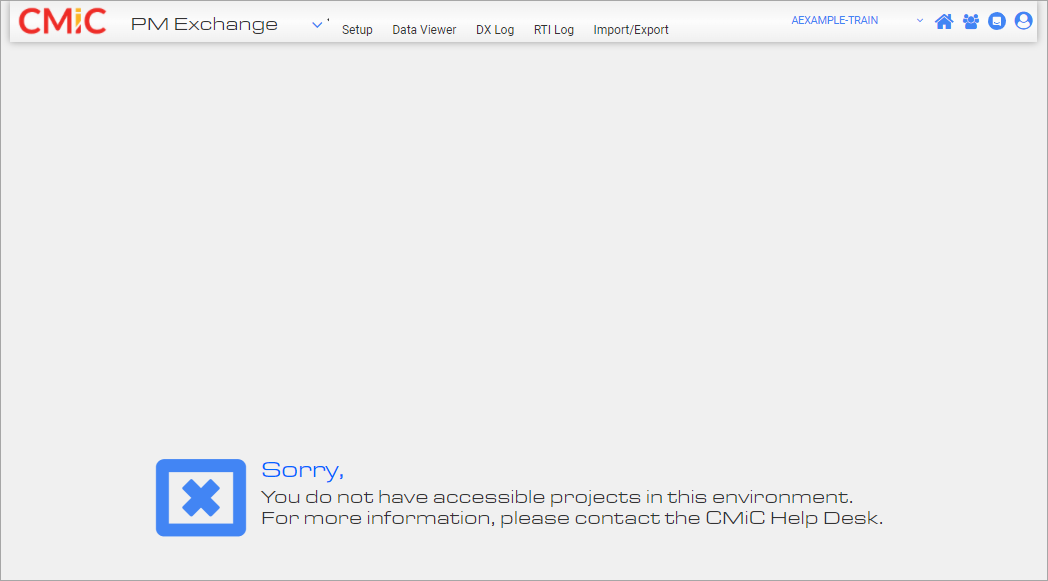
If a user attempts to access screens without the proper security privileges assigned, a system message will be issued, like the one shown in the screenshot above.