Overview
Checklists are a great tool for organizing construction projects to ensure that tasks and activities are completed on time. They can be created and customized for tracking a variety of processes and operations. For example, safety checklists can be used to help ensure that proper safety rules and procedures are being followed by foreman and crew members on the job site. Timesheet verification checklists can be used when submitting timesheets to ensure timesheets are compliant. Sign-off features are also available for approval processes such as timesheet approvals, or for record-keeping purposes such as the completion of daily checklists.
Enabling Checklist Functionality
To get started using checklists, complete the security setup described in the sections below.
Role and User Maintenance
Access to the Checklist functionality can be granted at either the role level or the user level. Users will need to be assigned two menu items: Checklist Templates menu and Crewtime Check List Setup menu. Access to the Checklist Templates menu and Crewtime Check List Setup menu can be assigned at the role level on the Security Roles screen in the E-Time module (standard Treeview path: E-Time > Security > Role Maintenance), or at the user level on the User Access screen (standard Treeview path: E-Time > Security > User Access) in the E-Time module. Users should then select the Assign Menu Items option, shown below.
Role Level
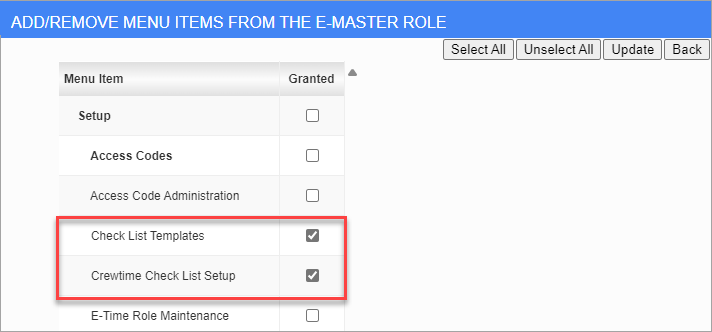
Security Roles; standard Treeview path: E-Time > Security > Role Maintenance
The screenshot above shows an example of adding the checklist menu items at the role level (e.g., E-Master Role).
User Level
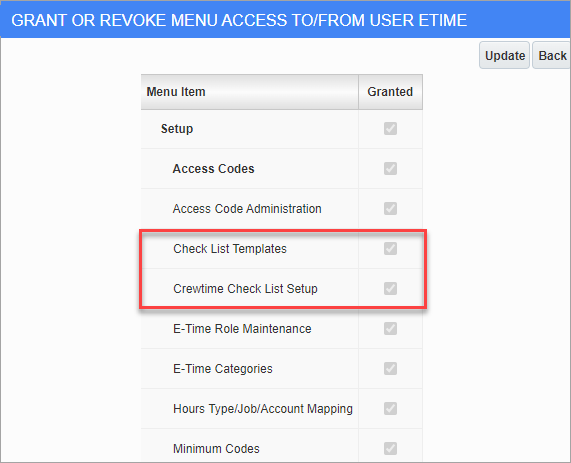
Users; standard Treeview path: E-Time > Security > User Access
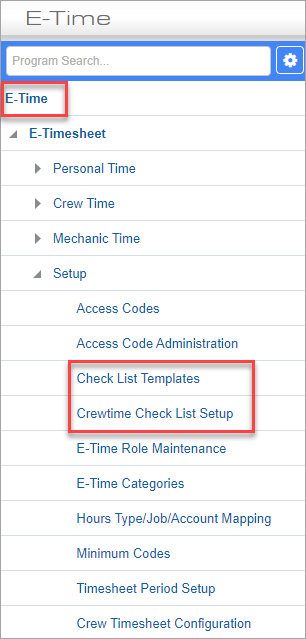
The screenshot above shows an example of adding the checklist menu items at the user level. Once access to these programs is granted, they should appear in the E-Time menu, as shown below.
Creating Checklists
Checklist Templates
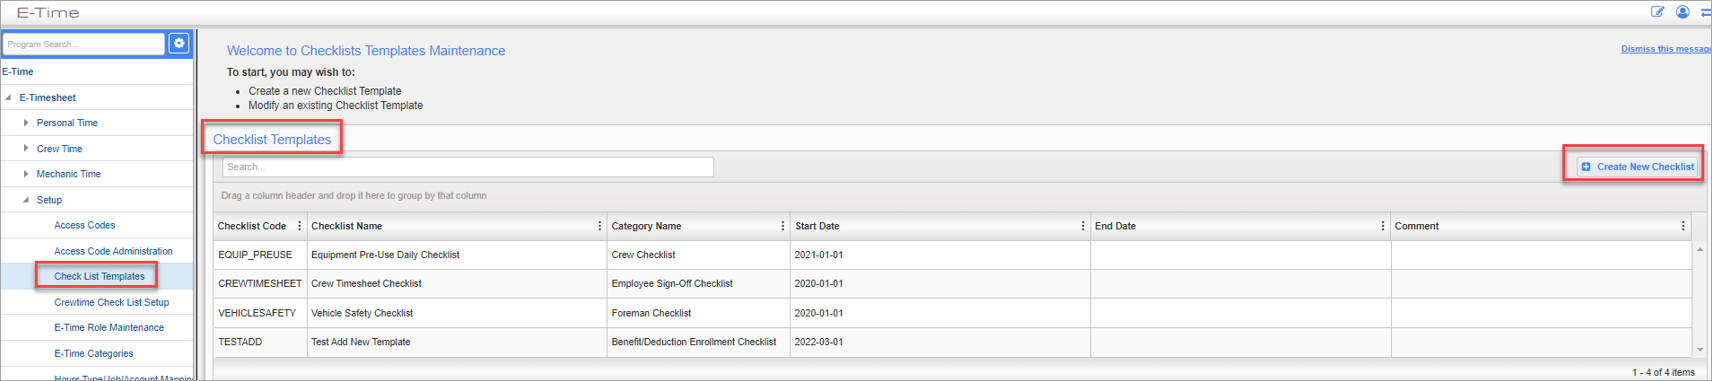
Checklists Templates Maintenance; standard Treeview path: E-Time > E-Timesheet > Setup > Check List Templates
More information about setting up checklists can be found
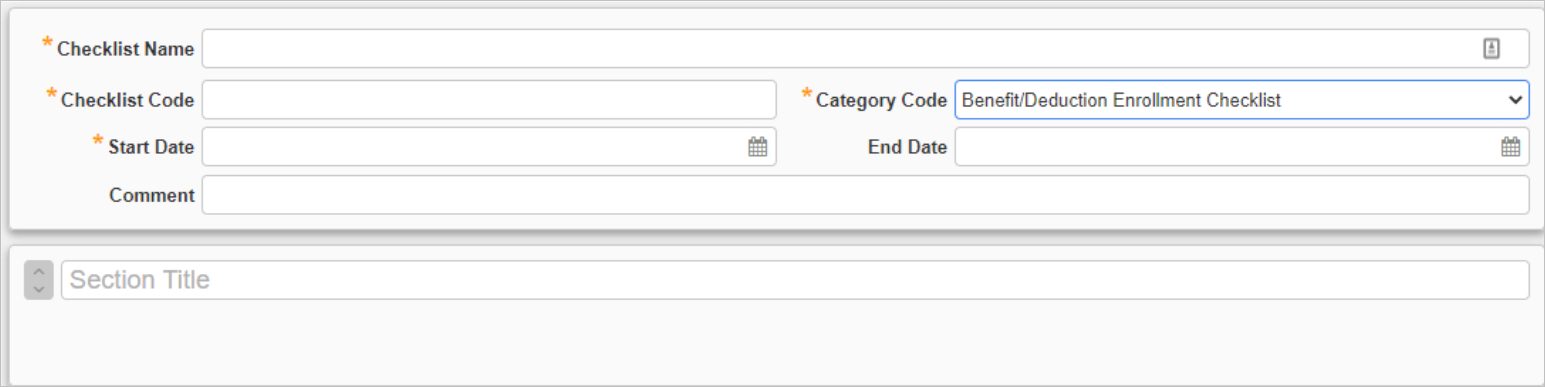
Upon clicking the [Create New Checklist] button, the user will be required to define the checklist name, checklist code, category code, start date, end date, and comment if needed.
Category Code
The Category Code field’s drop-down menu contains the following options:
-
Benefit/Deduction Enrollment Checklist: used for signing off on benefits and deductions.
-
Crew Checklist: available for any crew member when signing off.
-
Employee Sign-off Checklist: available for employees when signing off.
-
Foremen Checklist: available for foremen during the sign-off process.
Sections

Add a section title, then create questions for that section.
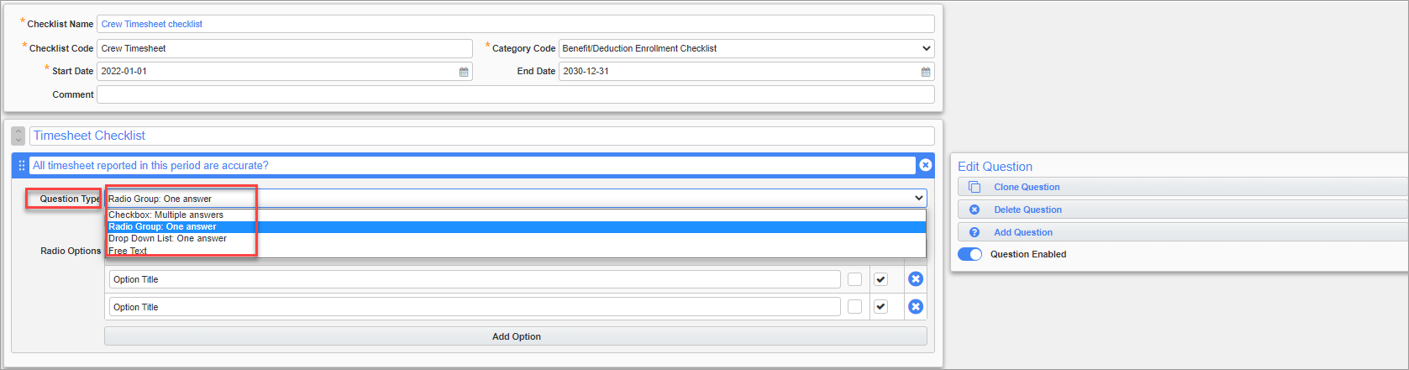
Select the question type from the Question Type drop-down menu. Permissible answer types are restricted to the following:
-
Radio Group: One answer
-
Checkbox: Multiple answers
-
Drop Down List: One answer
-
Free Text
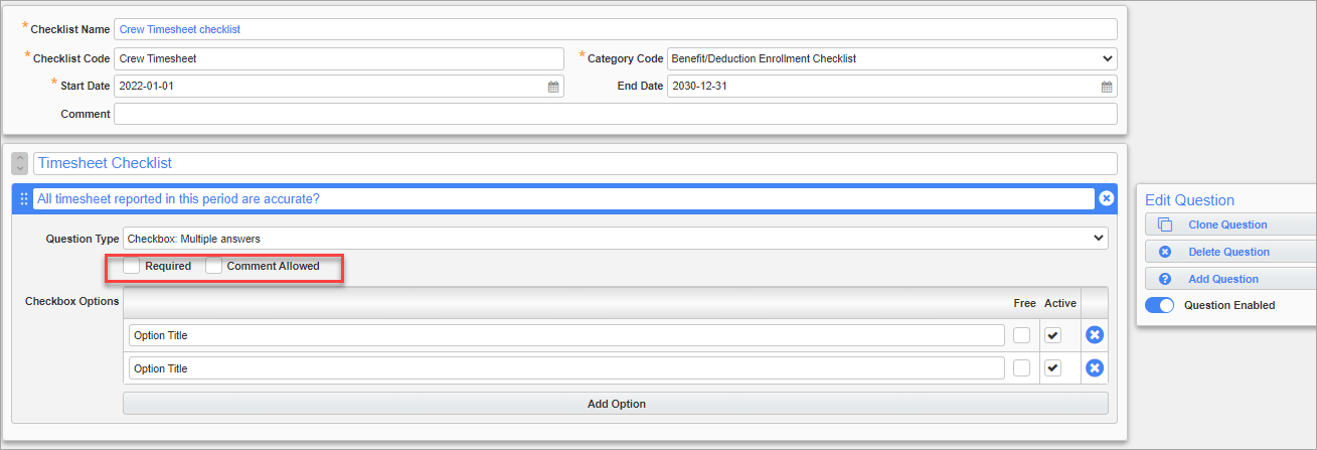
Once the answer type is selected, the question can be flagged as required using the ‘Required’ checkbox or flagged to allow comments using the ‘Comments Allowed’ checkbox.
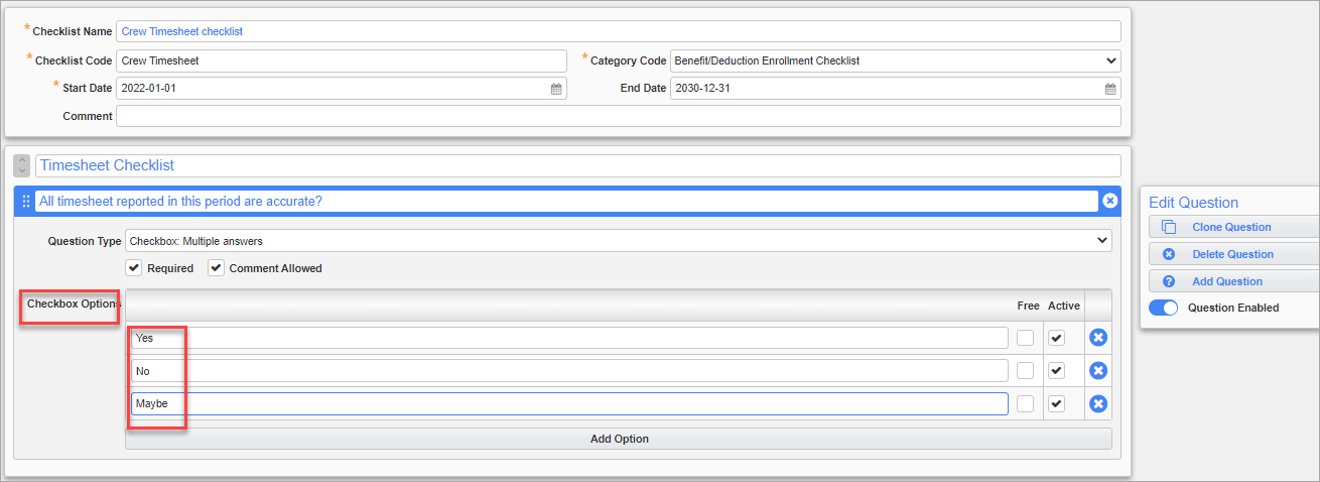
Following this, the possible checklist answers can be entered.
This process can be repeated to add more sections and questions to the template as required. Once the template has been created and saved, it can be assigned to a company, job, and crew.
Checklist Setup
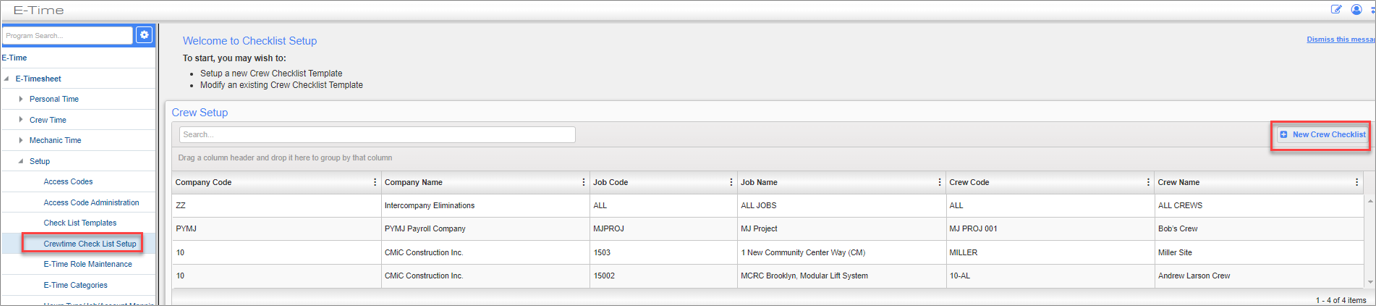
Checklist Setup; standard Treeview path: E-Time > E-Timesheet > Setup > Crewtime Check List Setup
Launch the Checklist Setup screen and click on the [New Crew Checklist] button to begin the process for assigning checklists to a specified crew. Use the drop-down menus in the Crew Checklist Setup Details section to select the company, job, and crew.
NOTE: Once a checklist is assigned in the Checklist Setup screen and used (i.e., opened), it cannot be deleted.

Checklists can be assigned to an individual crew or to all crews. When finished selecting the crew, press the [Add Detail] button in the Crew Checklists section to begin assigning checklists.
Select the crew start and end dates, as well as the checklist templates.
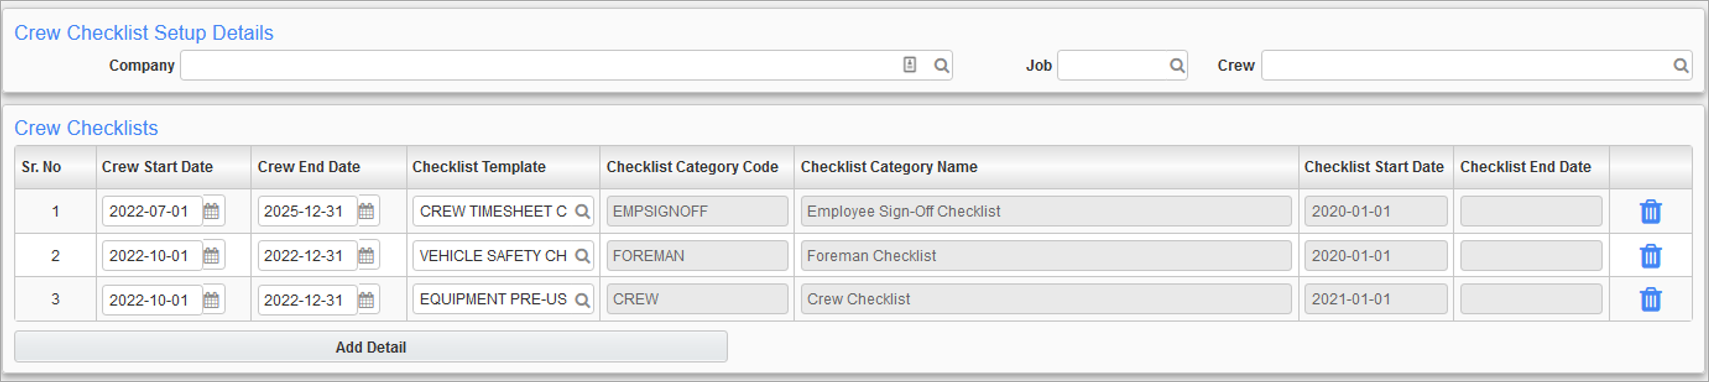
The Checklist Template field’s LOV provides a list of available checklists. Upon saving the setup details, the checklists will be available for the selected crew under the Construct CT Legacy app. In addition to crew checklists, foreman and employee checklists can also be assigned to a selected crew.
Assigning Checklists in the Construct CT Legacy App
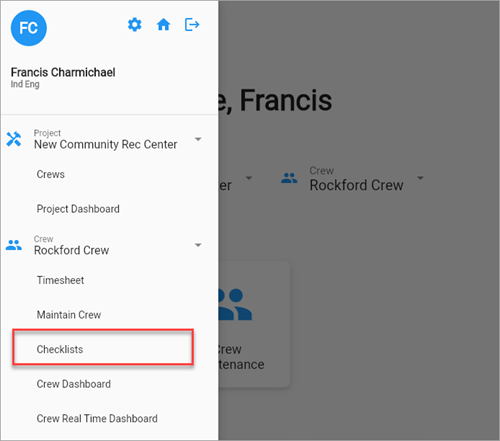
Select the Checklists option in the Construct CT Legacy menu.
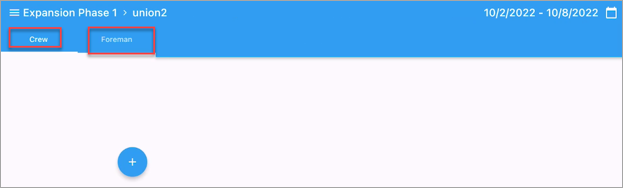
The Checklist screen will be launched with the following two tabs:
-
Crew
-
Foreman
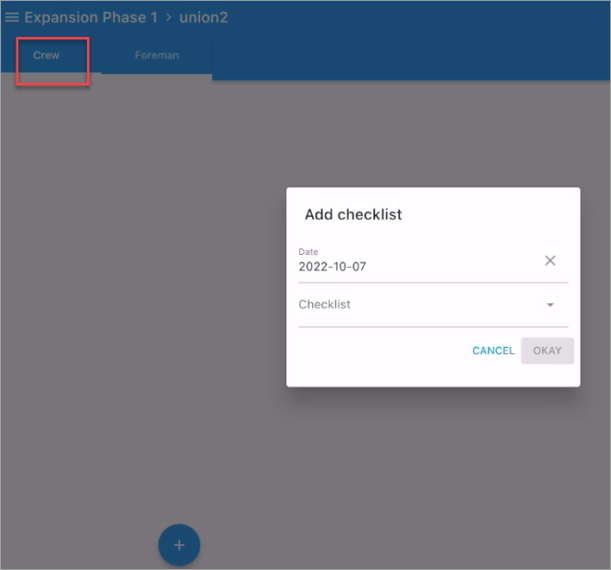
Add Checklist pop-up launched from Plus icon
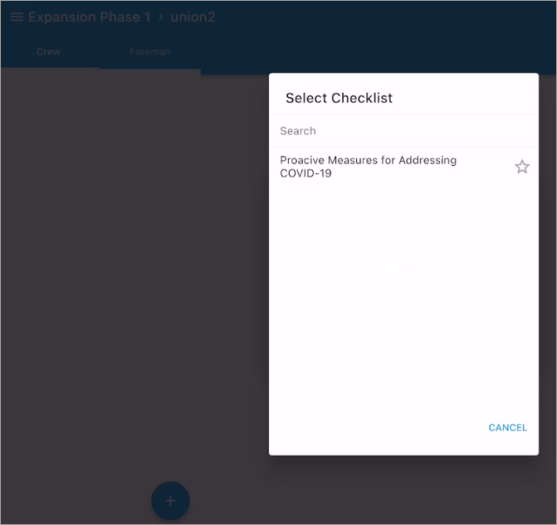
Select Checklist pop-up launched from Checklist drop-down on Add Checklist
Select the Crew tab and then click the Plus icon to add a checklist to a crew.
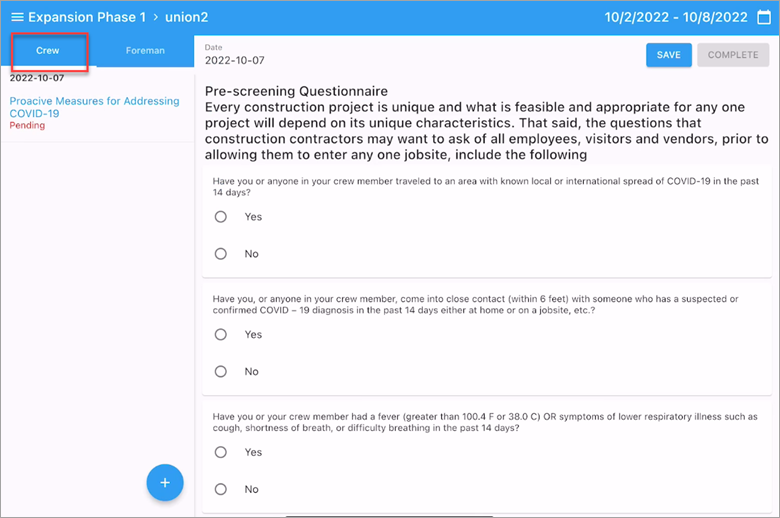
Once a checklist has been assigned to a crew, the checklist will be listed on the Crew tab. Selecting the checklist from the Crew tab will open the checklist and display the checklist questions and available answers.
A similar process is followed for adding foreman checklists under the Foreman tab.
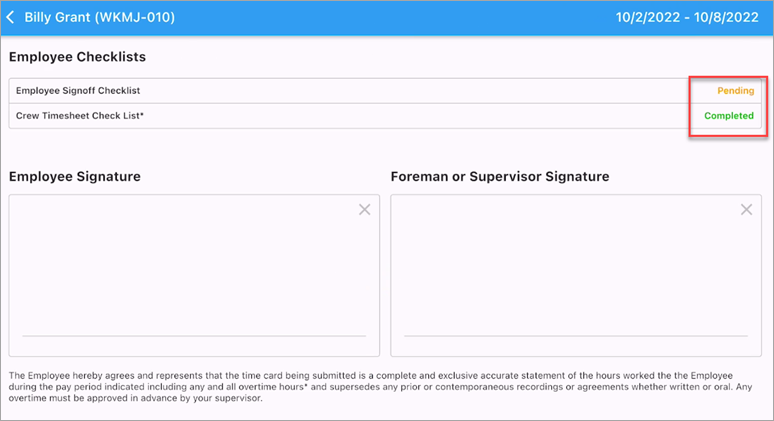
Employee Sign-Off Checklists

When an employee sign-off checklist is assigned in the Checklist Setup screen, the sign-off checklist link will be visible to employees when adding timesheets. This visibility is based on the settings in the Sign-Off field on the Crew Maintenance screen. If the Sign-Off field is set to "Daily" or "Weekly", employees will be able to view and complete the sign-off checklist. If it is set to "None", they will not see the sign-off checklist link.
Employee sign-off checklists are available under the Employee Signature screen. These checklists will show as “Pending” until they are completed for the week.
Note: These checklists are to be completed on a weekly basis, not on a daily basis.