Step 1: Create Payment Selection Code and Select Payments
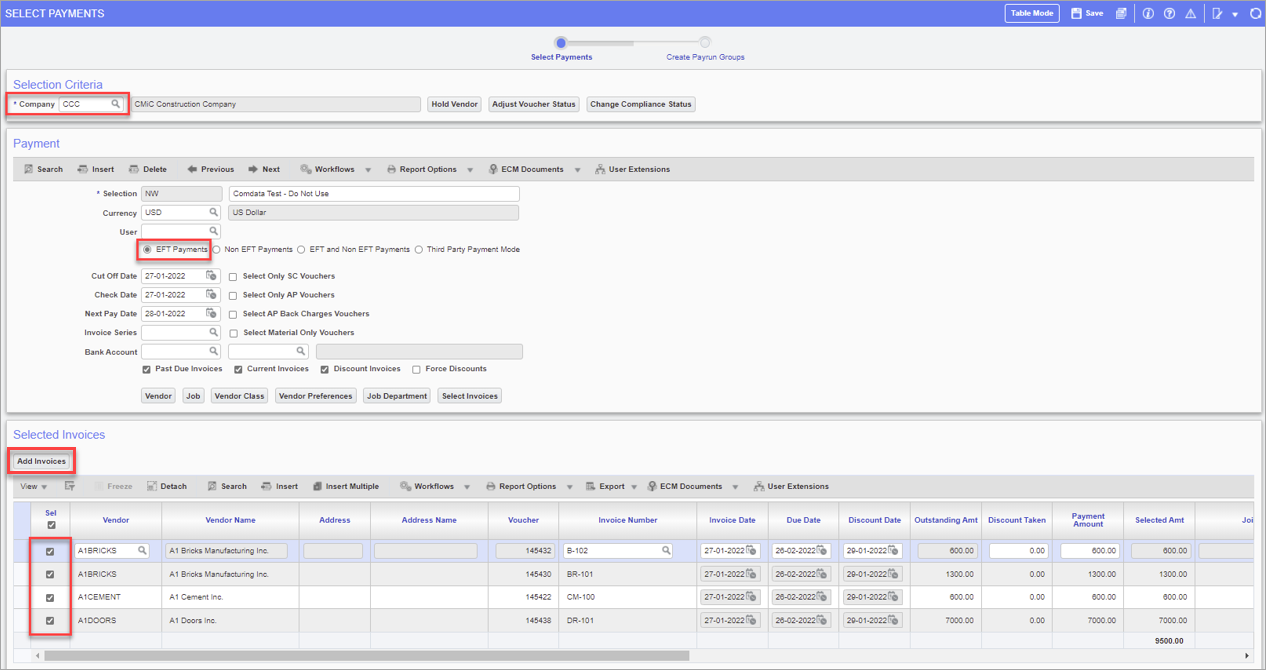
Pgm: PAYSEL – Select Payments; standard Treeview path: Accounts Payable > Payment > Select Payments
Use the Select Payments screen to create a one-time payment selection code. Select the ‘EFT Payments’ radio button and specify any other criteria by which to select invoices associated with the payment selection code. Click the Add Invoices button on the Select Payments screen to display the list of matching invoices and select which invoices to associate to the payment selection code. When finished, click on Save.
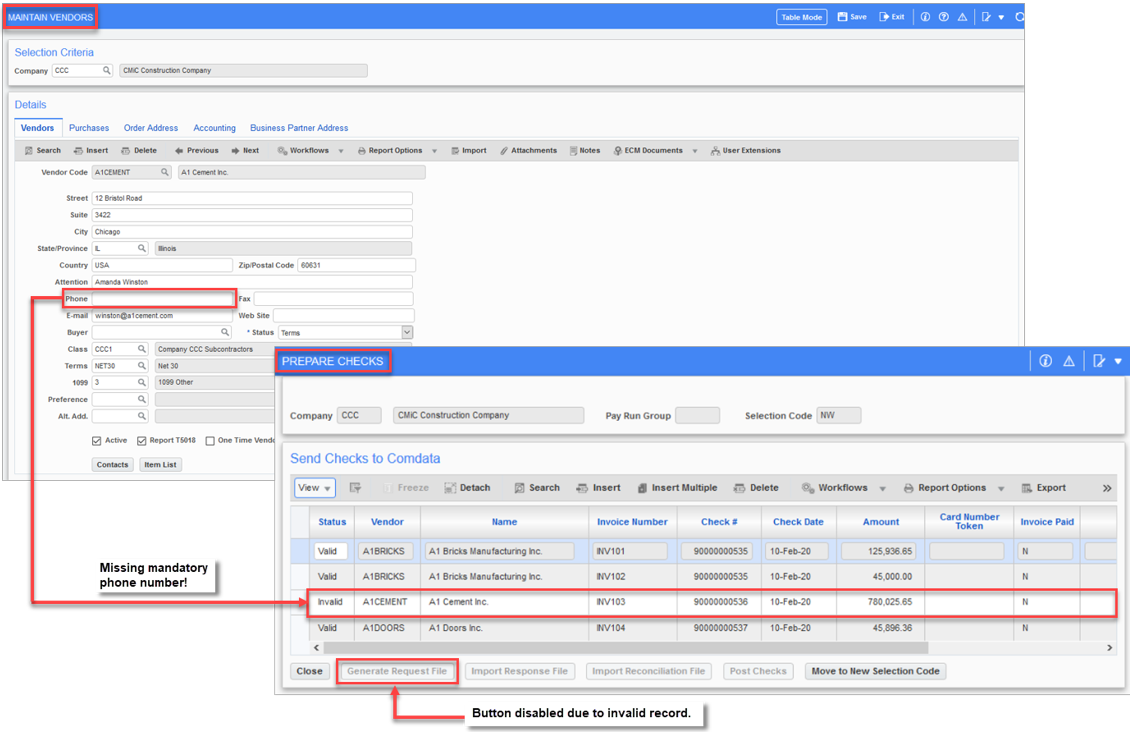
Vendor information for the invoices selected under the selection code in the Select Payments screen defaults from the Maintain Vendors screen. For records to be validated in the Comdata screen, mandatory information must be entered for vendors in the Vendors tab and the Accounting tab of the Maintain Vendors screen.
The mandatory fields to be completed in the Vendors tab are shown in the screenshot below.
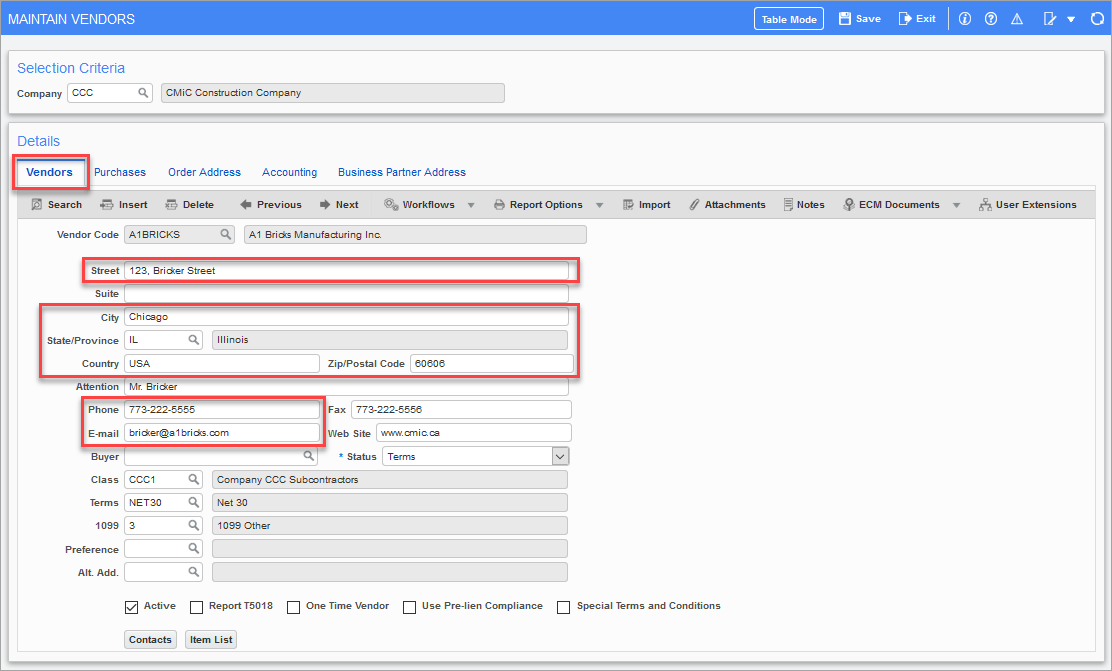
Pgm: BPVENFM – Maintain Vendors; standard Treeview path: Accounts Payable > Setup > Maintain Vendors – Vendors tab
The mandatory fields to be completed in the Accounting tab are shown in the screenshot below.
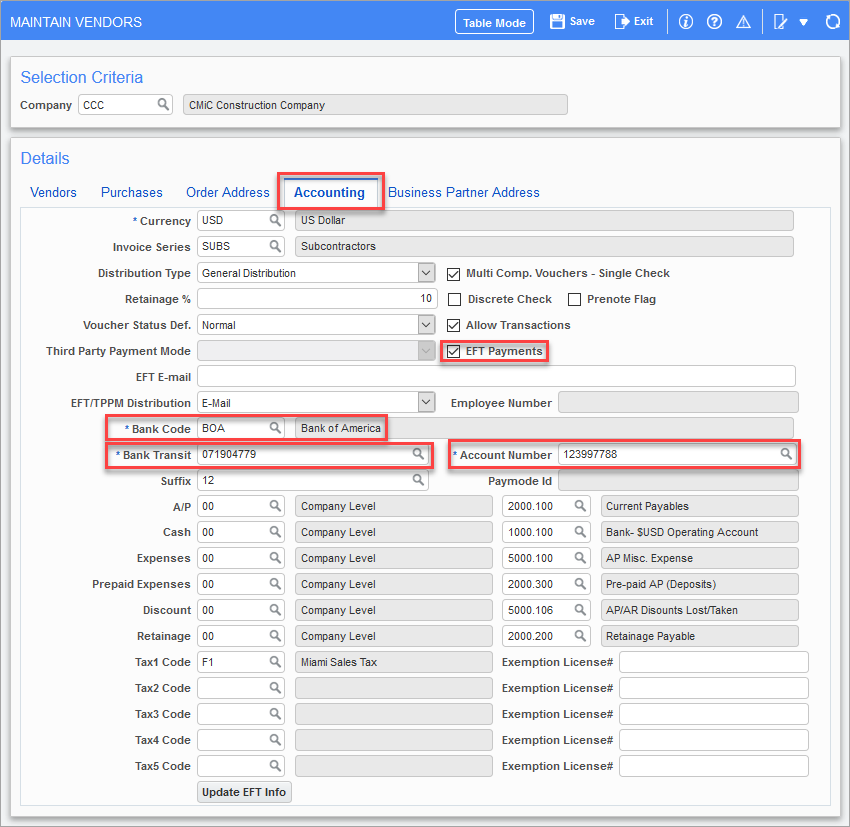
Pgm: BPVENFM – Maintain Vendors; standard Treeview path: Accounts Payable > Setup > Maintain Vendors – Accounting tab
Although banking details are not requested or processed by Comdata, when the ‘EFT Payments’ radio button is selected on the Select Payments screen, a vendor’s bank account details must also be completed in the Maintain Vendors screen. A valid bank account number can be entered in the Account Number field, or a dummy account number can be entered (e.g. #999999).
Step 2: Generate Comdata Payment/Request File
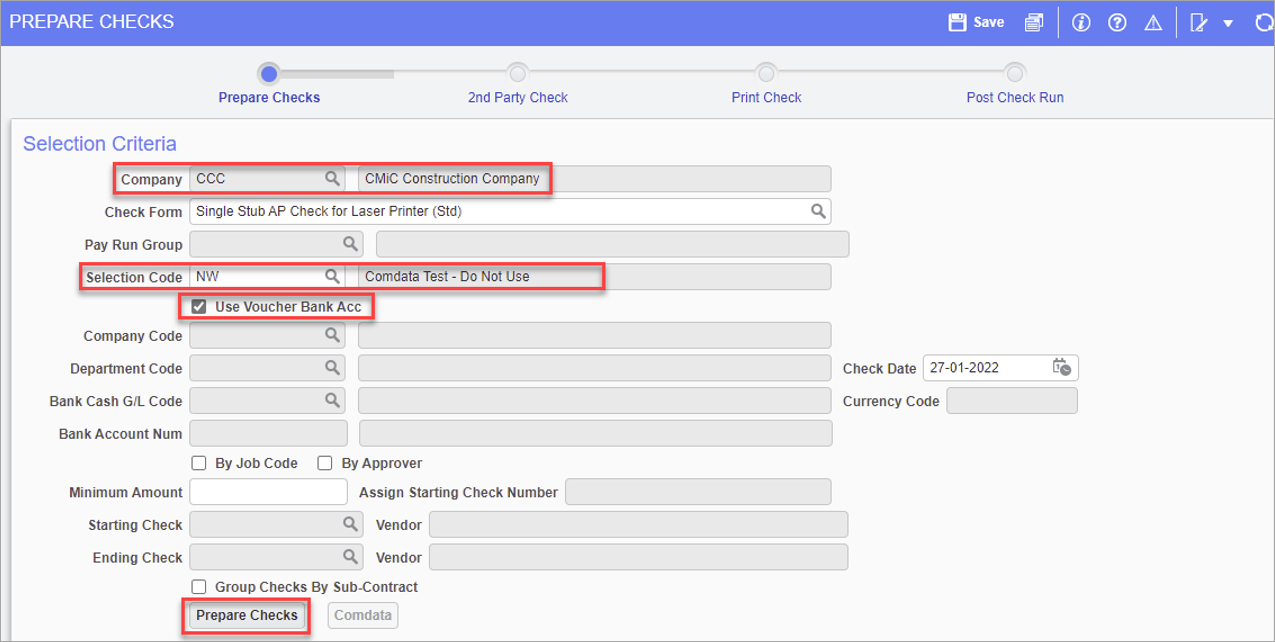
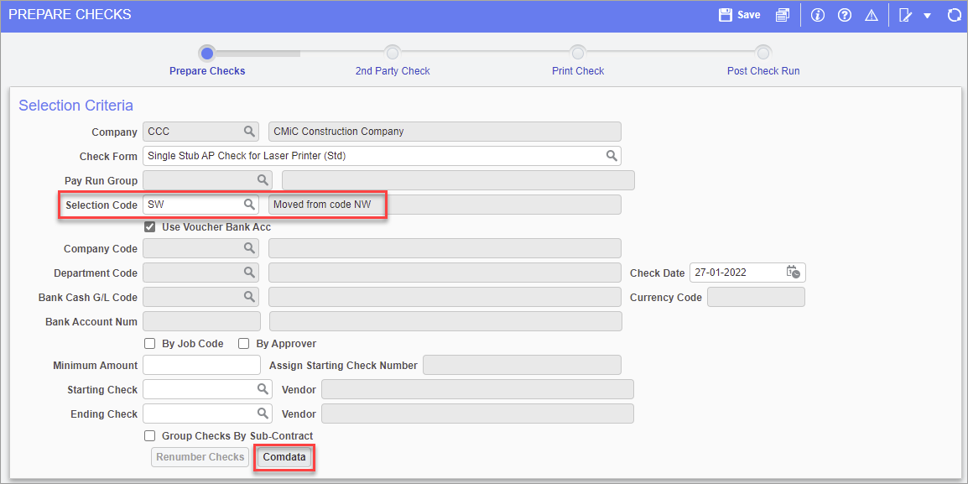
Pgm: APCHQPRE – Prepare Checks; standard Treeview path: Accounts Payable > Check > Print Checks
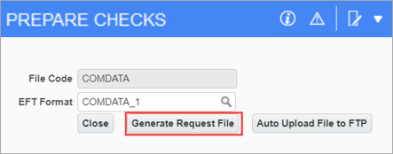
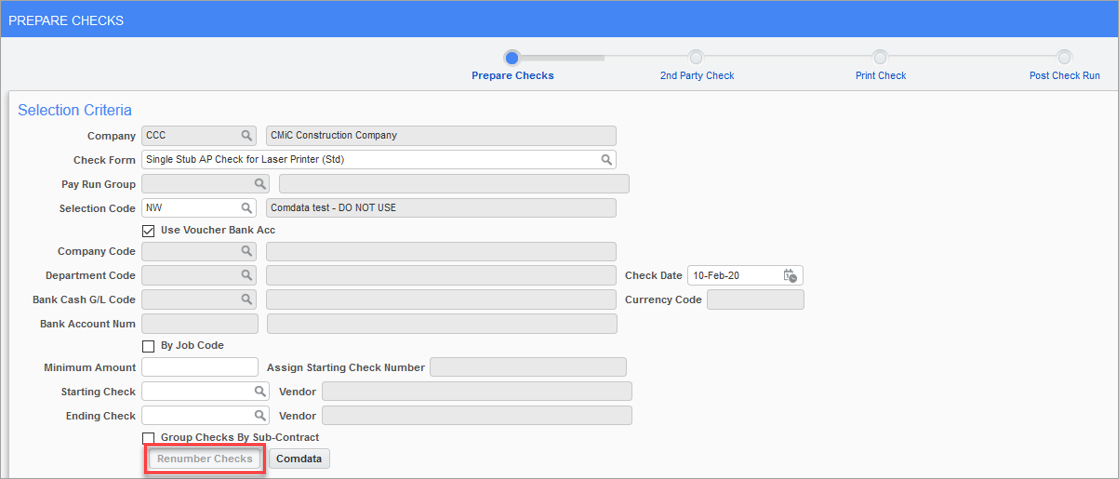
On the Prepare Checks screen, enter/select the company and selection code, and check the Use Voucher Bank Acc checkbox. Click on the Prepare Checks button.
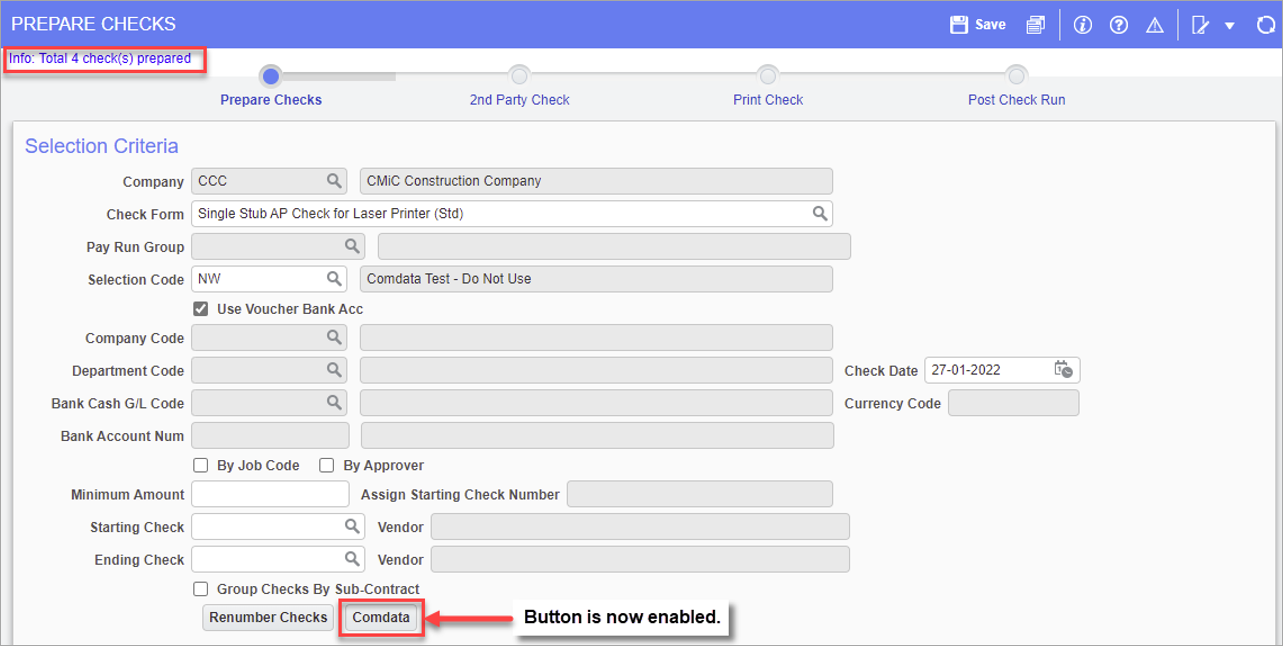
The Prepare Checks button changes to Renumber Checks. A message appears at the top of the screen to indicate the total number of checks prepared and the Comdata button becomes enabled.
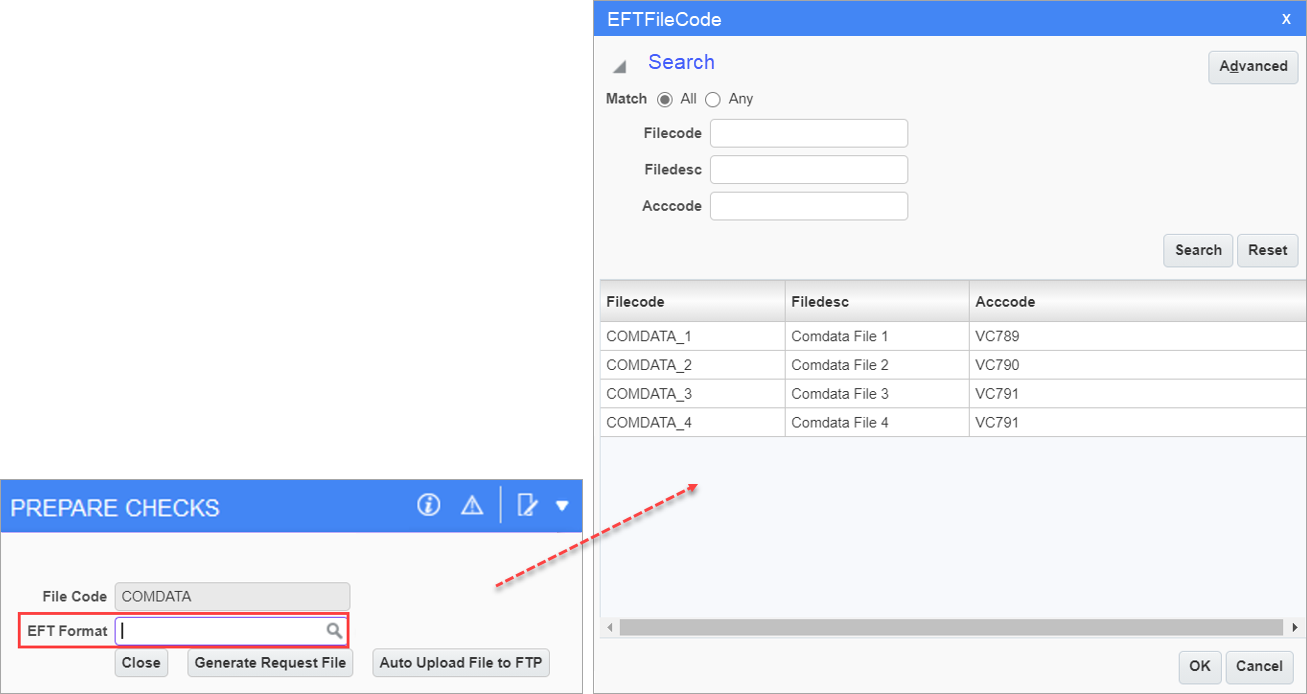
Click on the Comdata button to launch a pop-up window to initiate the payment/request file generation process.
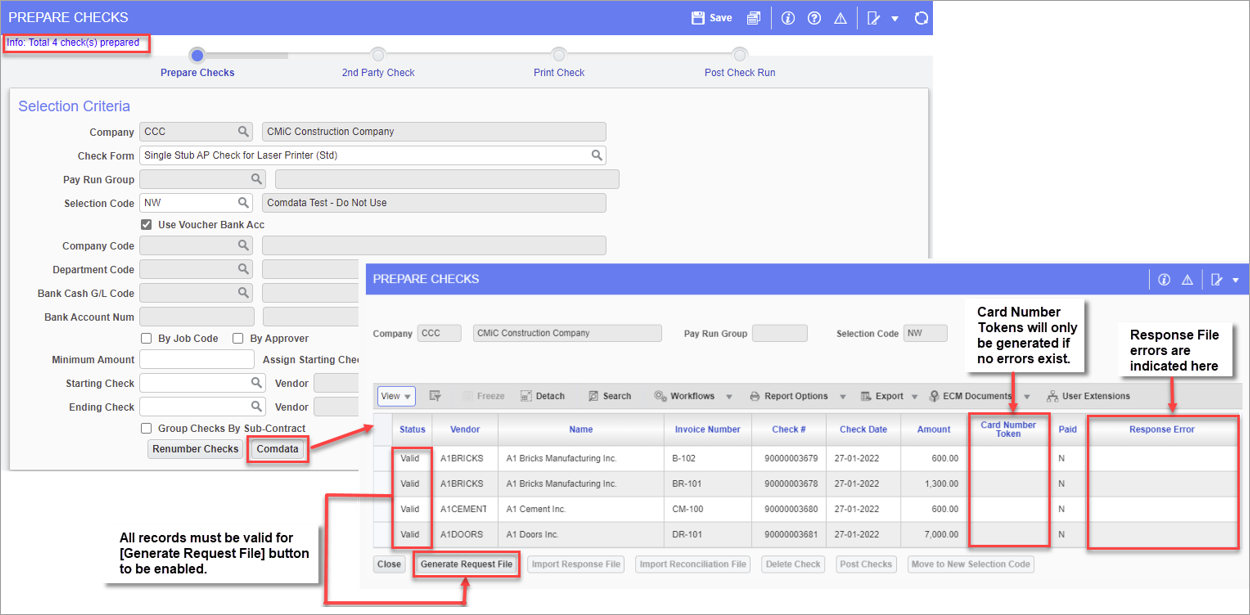
Pop-up window launched from [Comdata] button on Prepare Checks screen
All records must be valid in the Status column for the Generate Request File button to be enabled.
If mandatory fields are not entered properly in the Maintain Vendors screen, as discussed in the previous step, the Generate Request File button will not be enabled, as shown in the example below.
Once all records are valid in the pop-up window, click on the Generate Request File button to launch a pop-up window to select the EFT format.
NOTE: For details regarding the [Auto Upload File to FTP] button, refer to Comdata Automation for Upload and Import of Files.
After selecting the EFT format, click on the Generate Request File button to generate the payment/request file.
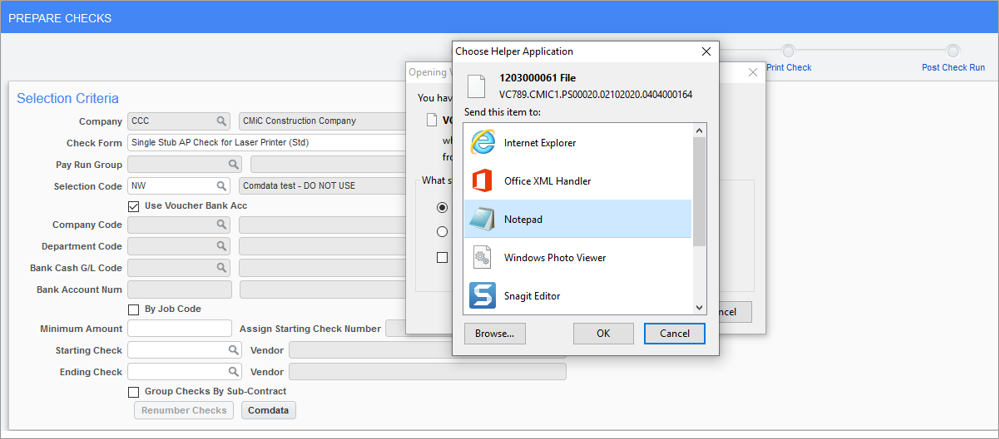
A pop-up window is launched, prompting the user to select in which program to open the payment/request file. After the payment/request file is generated, the file needs to be placed on Comdata’s FTP server.
The following screenshot shows an example of the payment/request file open in Notepad.

Example of Payment/Request File in Notepad
The payment/request file is a tab delimited text file, which follows a specific pre-defined naming convention, as outlined in the Comdata Virtual Card AP-PS20-PS21 spreadsheet. The graphic below shows an example of the naming convention.
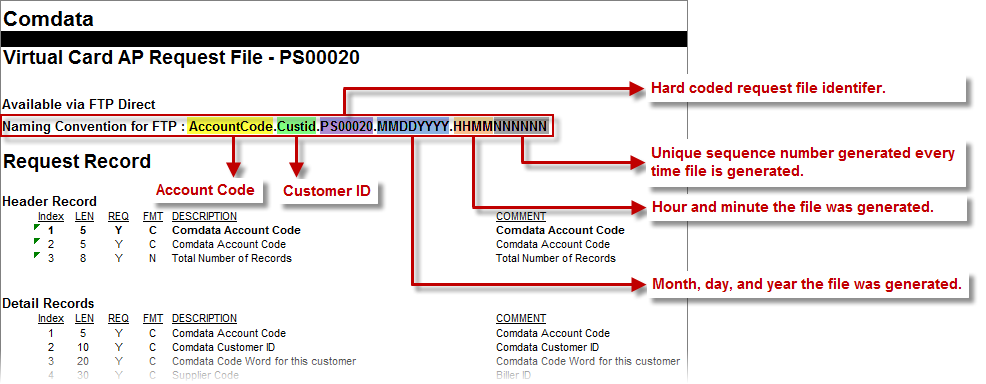
The account code and customer ID are defined on the EFT File Format screen.
NOTE The payment/request file will only be generated if all entries under the code are valid.
Once the payment/request file is generated, the system links the selection code with Comdata processing.
When the code is linked to Comdata, the following three buttons become disabled, as shown in the following screenshots:
-
Renumber Checks button on the Prepare Checks screen
-
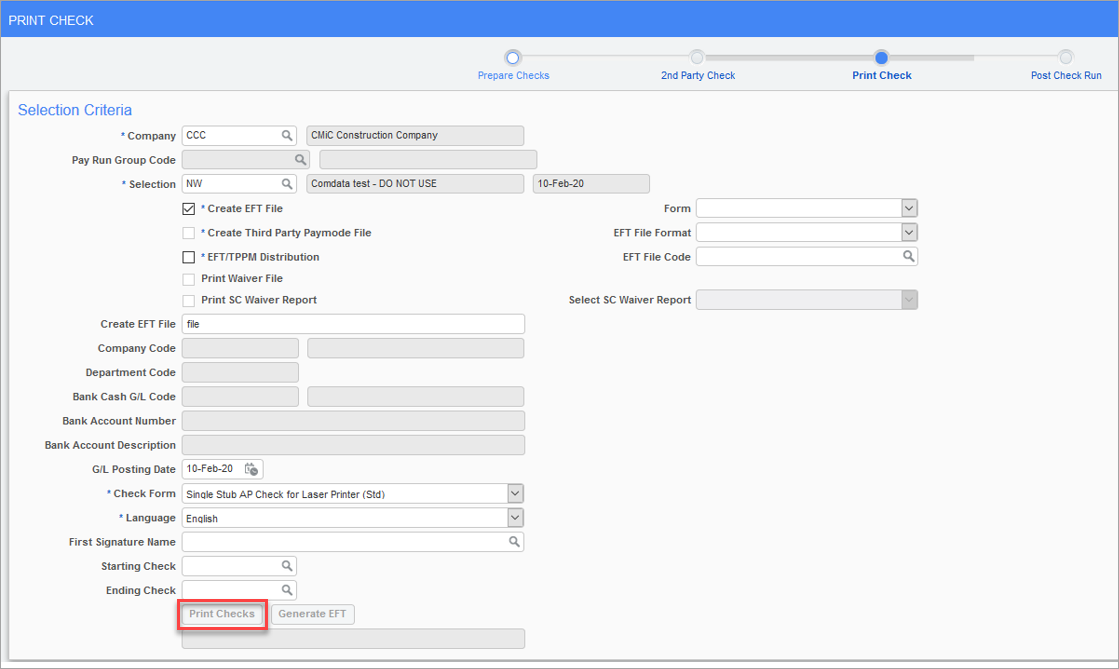
Print Checks button on the Print Checks screen
-
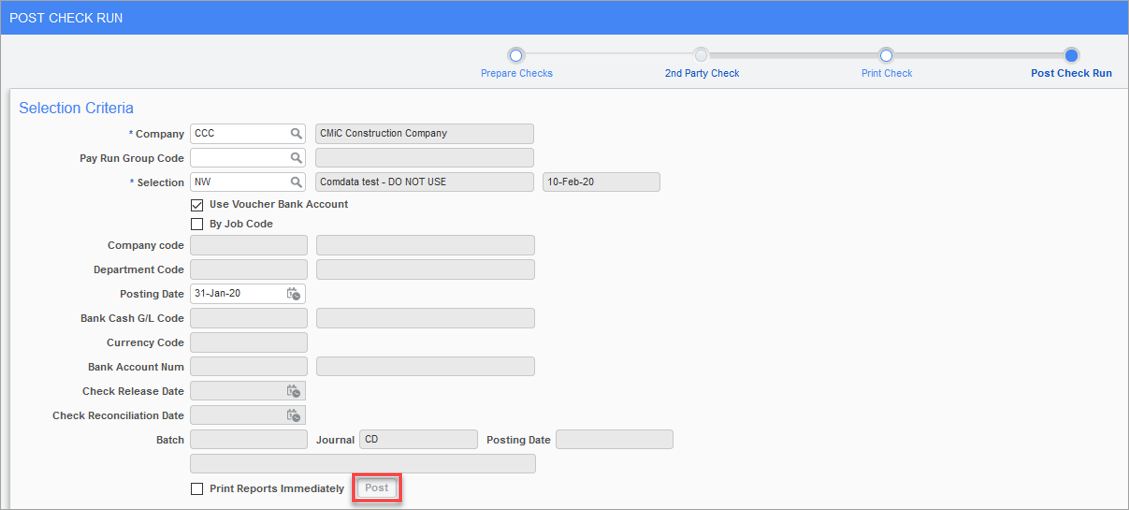
Post button on the Post Check Run screen
Once the Generate Request File button is clicked, if the user attempts to unprepare the checks on the Unprepare Checks screen, an alert will be issued, as shown in the screenshot below.
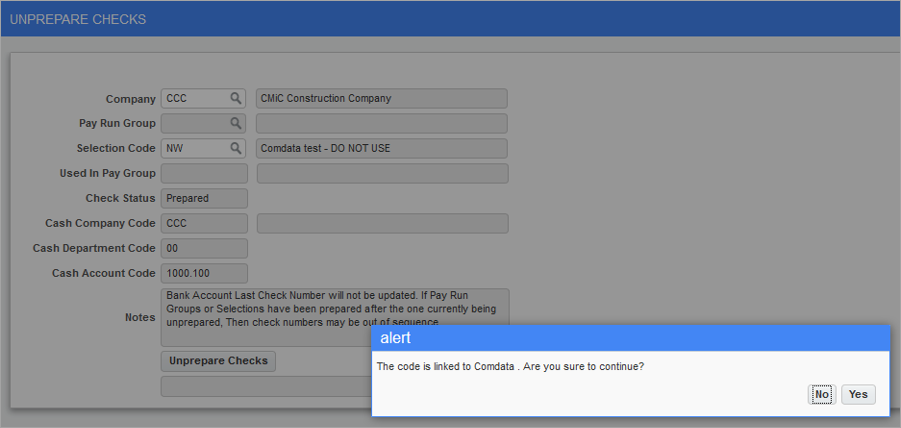
Pgm: APUNPRE – Unprepare Checks; standard Treeview path: Accounts Payable > Utilities > Unprepare Checks
Step 3: Import and Process Comdata Response File
After successfully generating the payment/request file, the user will receive a response file containing card number tokens from Comdata’s FTP server. This file needs to be imported and processed.
Click on the Comdata button on the Prepare Checks screen.
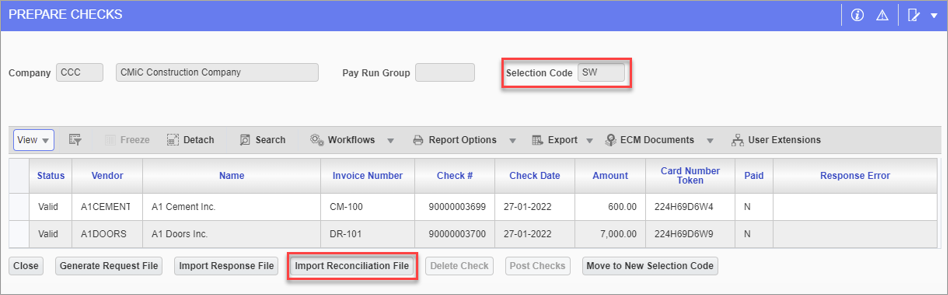
When the selection code is linked to Comdata, the Import Response File button, and the Import Reconciliation File button, and the Move to New Selection Code button become enabled in the pop-up window launched from the Comdata button on the Prepare Checks screen.
NOTE The Post Checks button is still disabled. The [Delete Check] button will be enabled when there are no card token numbers populated. Once enabled, users can delete the checks that are not required.
Click the Import Response File button to import and process the response file containing the card number tokens.

Click the Import Response File button to import and process the response file containing the card number tokens.
Pop-up window launched from [Import Response File] button
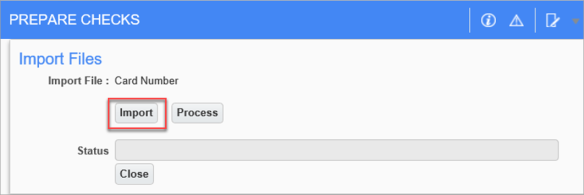
Another pop-up window will appear to import the file. Click on the Import button.
Pop-up window launched from [Import] button
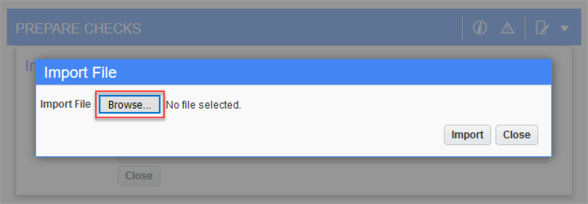
Click the Browse button and browse to select the file to import.
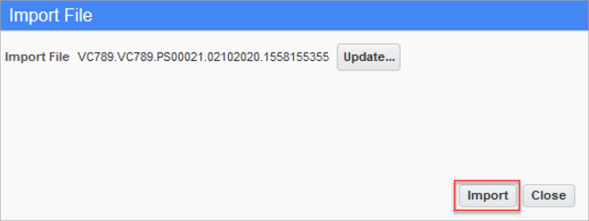
Click the Import button to import the file.
The following screenshot shows an example of the response file open in Notepad.

Example of response file containing Comdata check numbers in Notepad
The response file containing the card number tokens is a tab delimited text file, which follows the response file naming convention PS00021:
ACCOUNTCODE.ACCOUNTCODE.PS00021.MMDDYYYY.HHMMNNNNNN
For example: VC789.VC789.PS00021.02102020.1558155355
![]()
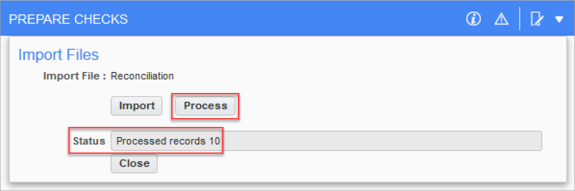
Click on the Process button to process the file.
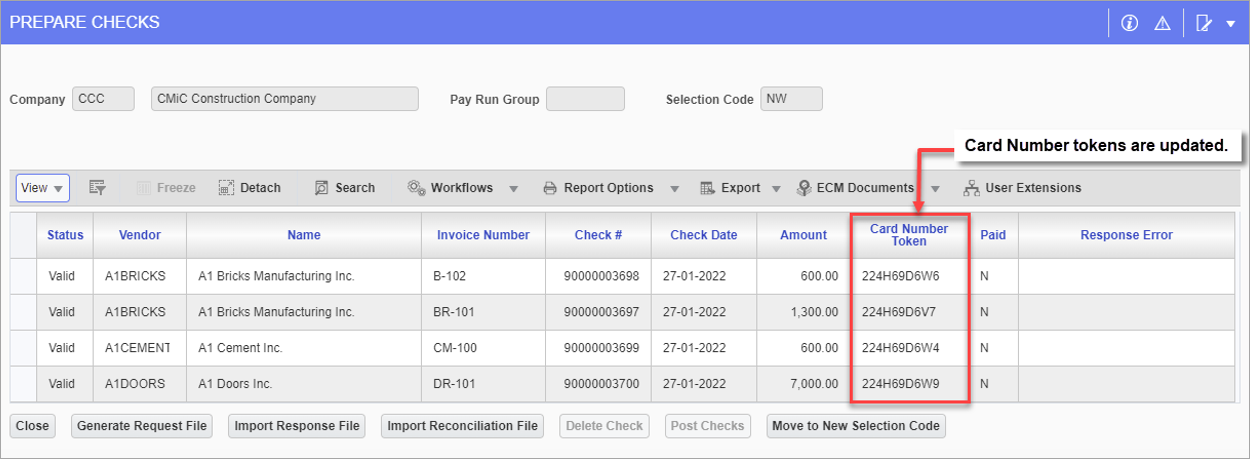
Once processing is complete, card number tokens will be updated, as shown in the screenshot above.
NOTE: After this step, if the user wishes to post the check directly, then they should use the Comdata Allow Checks feature which is described in the following section: Comdata Allow Posting of Checks After Card Number Token is Generated. The [Delete Check] button will be disabled for records with Card Token Numbers as they are linked to COMDATA processing already.
Step 4: Import and Process Reconciliation File
After the card number tokens have been processed, the next step is to import the reconciliation file from Comdata’s FTP server and process it.
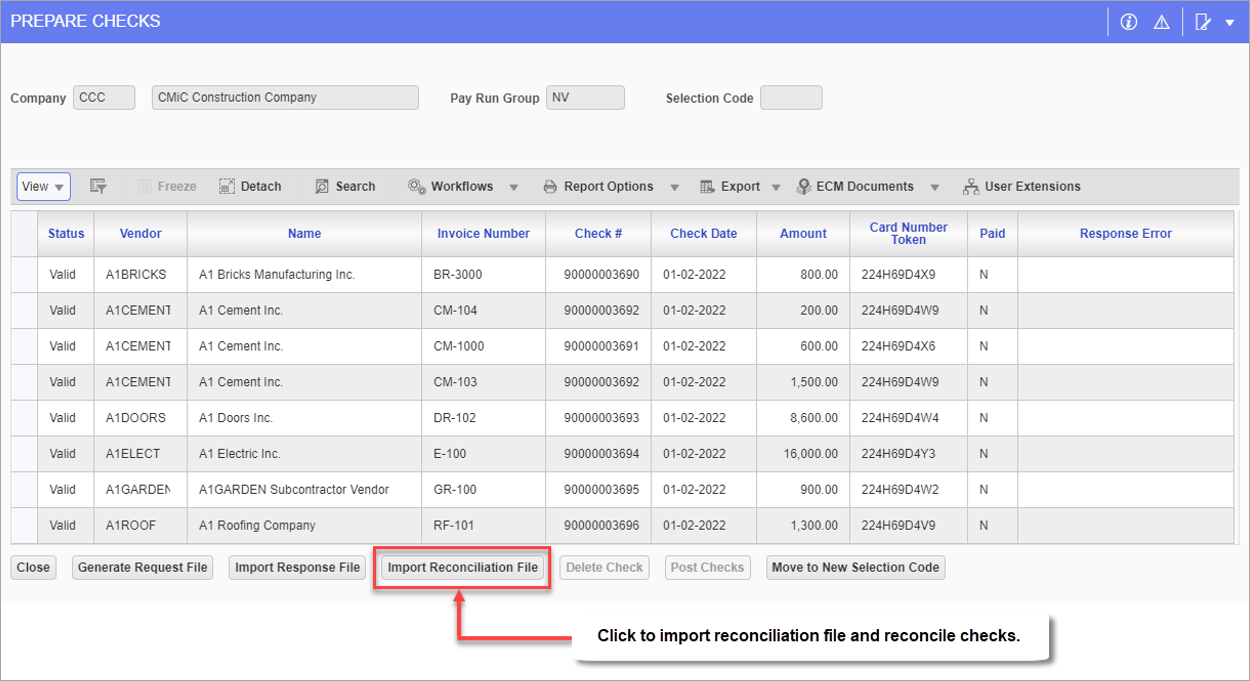
Click on the Import Reconciliation File button in the pop-up window launched from the Comdata button on the Prepare Checks screen to import the reconciliation file and reconcile the checks.
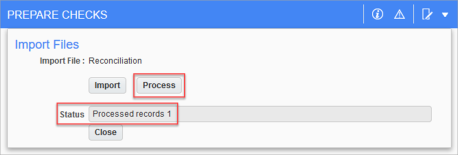
Pop-up window launched from [Import Reconciliation File] button
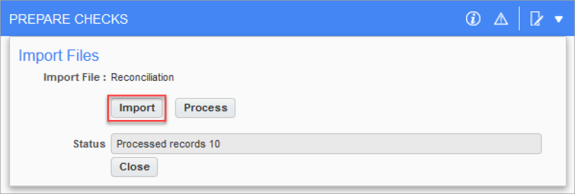
Another pop-up window will appear to import the file. Click on the Import button.
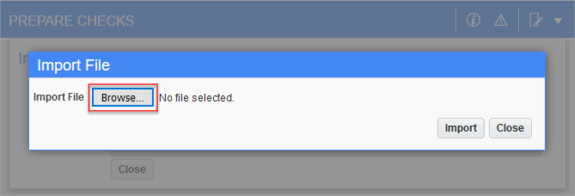
Click on the Browse button and browse to select the file to import.
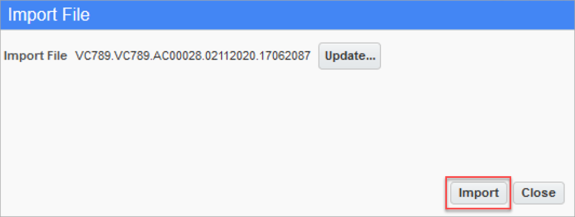
Click the Import button to import the file.
The following screenshot shows an example of the reconciliation file open in Notepad.

Example of reconciliation file in Notepad
The reconciliation file is a tab delimited text file, which follows the reconciliation file naming convention AC00028:
ACCOUNTCODE.ACCOUNTCODE.AC00028.MMDDYYYY.HHMMNNNNNN
For example: VC789.VC789.AC00028.02112020.17062087
Click on the Process button to process the file.
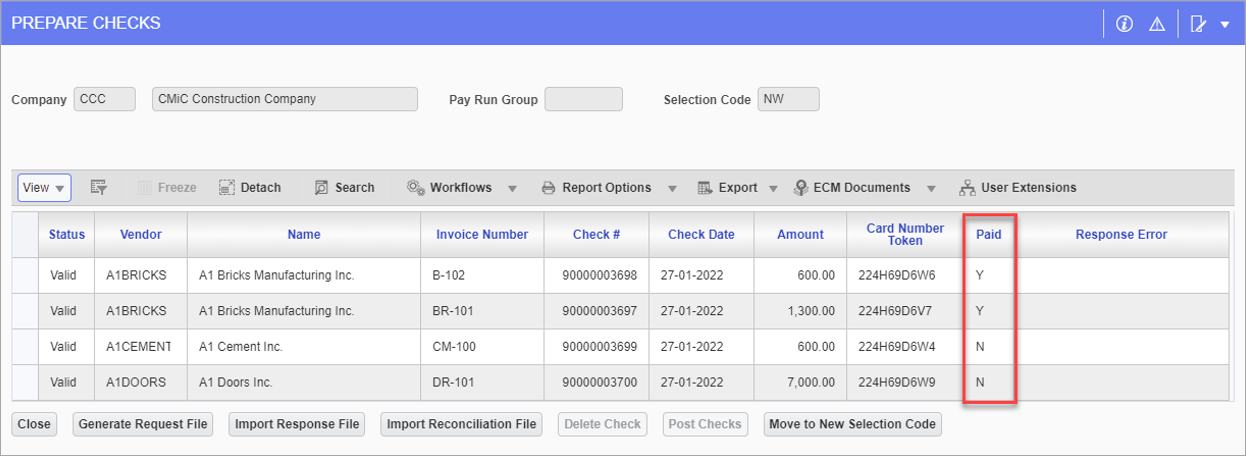
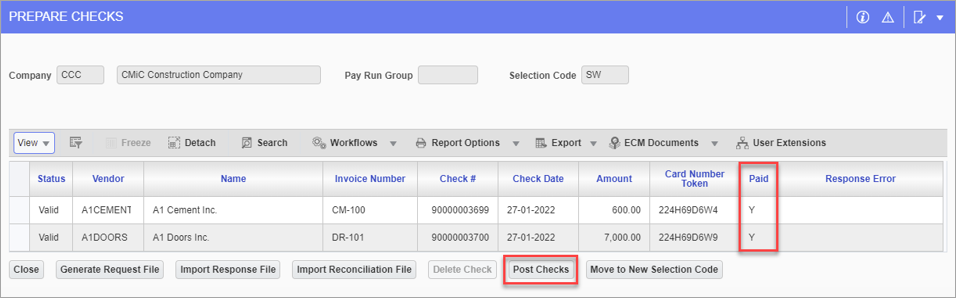
After reconciliation is processed, the values in the Invoices Paid column update based on payments made to the vendor. Records for reconciled checks will have a status of “Y”, while records for unreconciled checks will have a status of “N”, as shown in the screenshot above.
Step 5: Move Unreconciled Checks to a New Selection Code
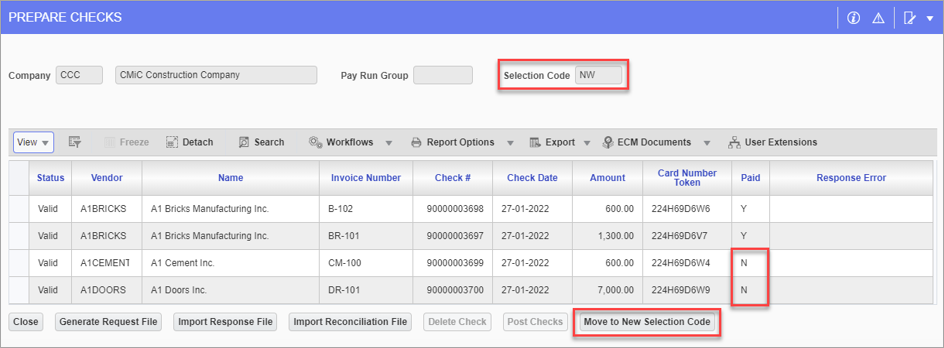
Pop-up window launched from [Comdata] button on the Prepare Checks screen
If checks are reconciled and all records are set to “Y”, then the Post Checks button becomes enabled and checks can be posted under the current selection code.
However, if some checks are unreconciled, the Invoices Paid column will contain records with a status of “N”, as shown in the screenshot above.
Unreconciled checks with a status of “N” can be grouped and moved to a new selection code so that those checks can eventually be posted when the invoices are completely paid. Once unreconciled checks are removed, the remaining reconciled checks with a status of “Y” can be grouped and posted under the current selection code.
The Move to New Selection Code button is used to move unreconciled checks to a new selection code. When records are set to “N” in the Invoices Paid column, the Move to New Selection Code button is enabled if the current selection code is linked to Comdata.
NOTE: When moving unreconciled checks to a new selection code, rather than selecting individual invoices, entire vendors are selected instead so that any invoices attached to the selected vendor whose payment is due will be moved at once. Any invoices from a selected vendor where payment is complete will not be included. Once vendors have been selected, any applicable invoices from the current selection code will be moved to the new selection code.
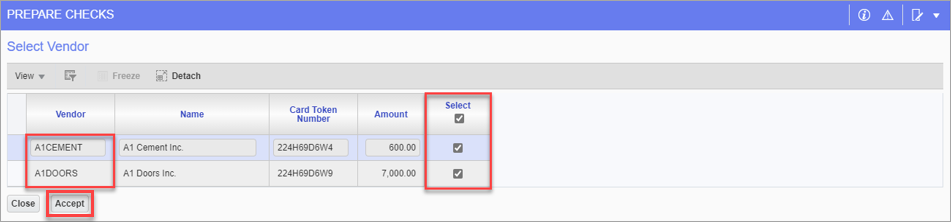
Select Vendor pop-up window launched from [Move to New Selection Code] button for selection codes
Clicking the Move to New Selection Code button launches the Select Vendor pop-up window, as shown in the screenshot above, where users can select applicable vendors. To close this pop-up window and return to the Prepare checks screen, click on the Close button. Otherwise, to move unreconciled checks of the selected vendors to a new selection code, click the [Accept] button.

Enter New Code pop-up window launched from [Accept] button on Select Vendor pop-up window for selection codes
After clicking the [Accept] button, users can enter a new selection code in the Enter New Code pop-up window.
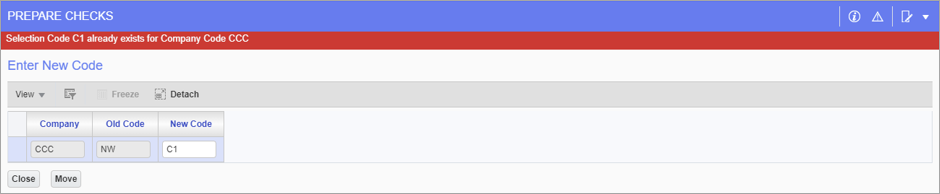
In the event where a duplicate selection code exists, an error will be issued as shown in the screenshot above.
Upon entering a new selection code in the New Code field and clicking on the Move button, the system will move the unreconciled checks from the old (original) selection code to the newly created selection code.
NOTE The payment records will contain the same data as before. The only difference is that they will be using a new selection code.
When processing is complete, the system will return to the Prepare Checks screen.
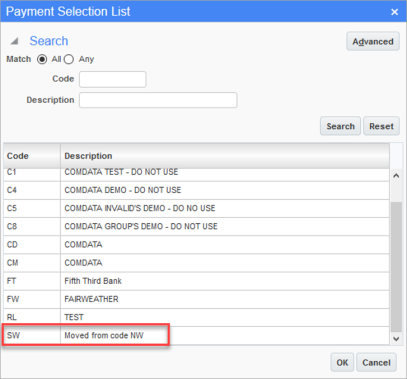
Payment Selection List pop-up window launched from Selection Code field on the Prepare Checks screen
The new selection code will be available in the Payment Selection List pop-up window launched from the Selection Code field on the Prepare Checks screen. The newly created code will have a meaningful system-generated description, which indicates under which original selection code it was created.
NOTE The new selection code will be linked to Comdata. If users wish to choose a different payment method, the check can be unprepared.
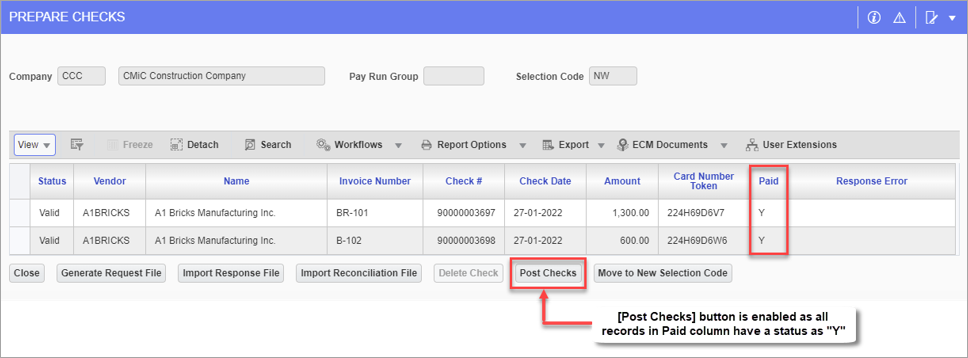
Now that unreconciled checks with an Invoice Paid status of “N” have been moved to a new selection code, only reconciled checks with an Invoice Paid status of “Y” remain under the original selection code. The Post Checks button will become enabled and the checks can be posted.
NOTE The Post Checks button will only be enabled if all the records have Invoice Paid status of “Y”.
Step 6: Post Checks
When all checks under the selection code are reconciled and have an Invoice Paid status set to “Y”, the Post Checks button becomes enabled and checks can be posted.
Click on the Post Checks button to launch a pop-up window to post checks.

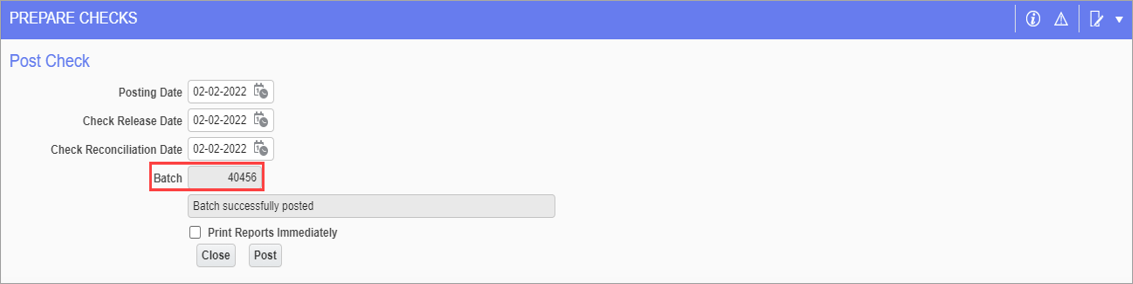
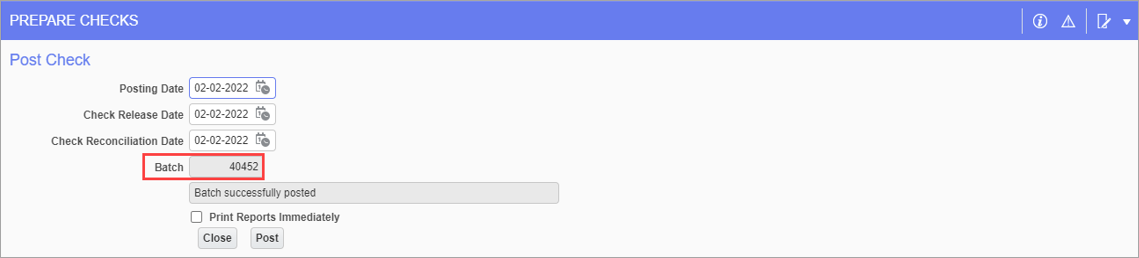
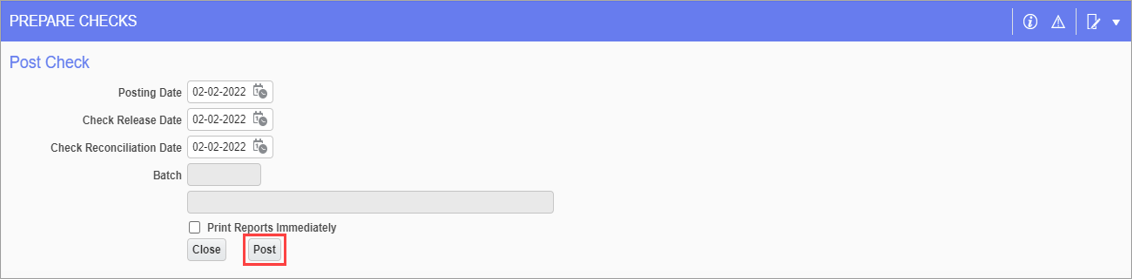
Post Check pop-up window launched from [Post Checks] button
Enter the posting date, check release date, check reconciliation date, and check the Print Reports Immediately checkbox (optional).
On successful posting, the system will return the batch number and reports to print, if the Print Reports Immediately box is checked.
Step 7: Process and Post Previously Unreconciled Checks Moved to New Selection Code in Step 5
Pgm: APCHQPRE – Prepare Checks; standard Treeview path: Accounts Payable > Check > Print Checks
NOTE This step contains procedures for processing and posting the new selection code that was created in Step 5 to move unreconciled checks from the original selection code. It summarizes importing and processing the reconciliation file (as described in Step 4) and posting checks (as described in Step 6).
Select the new selection code (created in Step 5) from the Selection Code field on the Prepare Checks screen. Next, click on the Comdata button.
Pop-up window launched from [Comdata] button on the Prepare Checks screen
Click on the Import Reconciliation File button in the pop-up window launched from the Comdata button to import the second reconciliation file provided from the Comdata FTP server and process the file.

The screenshot above shows an example of the second reconciliation file open in Notepad. It is the same file as the one in Step 4 in terms of file format but with different records. This file contains the records of the previously unreconciled checks from Step 5.
Click on the Process button to process the file.
The previously unreconciled checks are now reconciled. Since all records are now set to “Y” in the Invoices Paid column, the Post Checks button becomes enabled and the checks can now be posted.
Pop-up window launched from [Post Checks] button