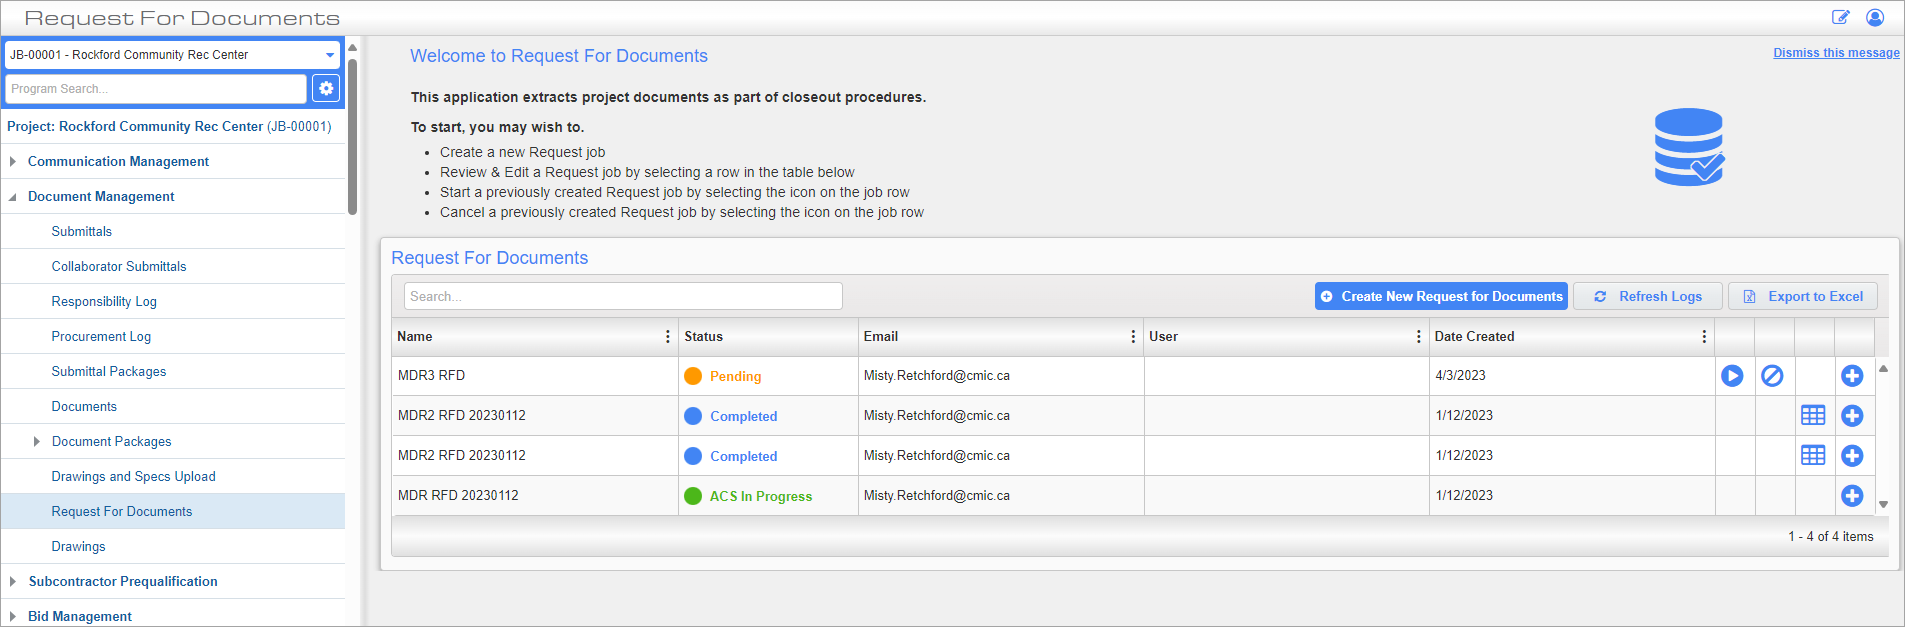
Request For Documents; standard Treeview path: CMiC Field > Document Management > Request For Documents
This screen is used to submit a Request For Documents (RFD), which extracts project documents as part of closeout procedures. Once an RFD record has been saved, it can be submitted. If objects in the RFD were selected for Auto Cold Storage, PDF documents will be generated and stored for the selected objects before the extraction process begins. The record will then be processed by the CMiC Scheduler in the Scheduler Log screen in the System Data module, which will search for any documents that match the RFD's search criteria.
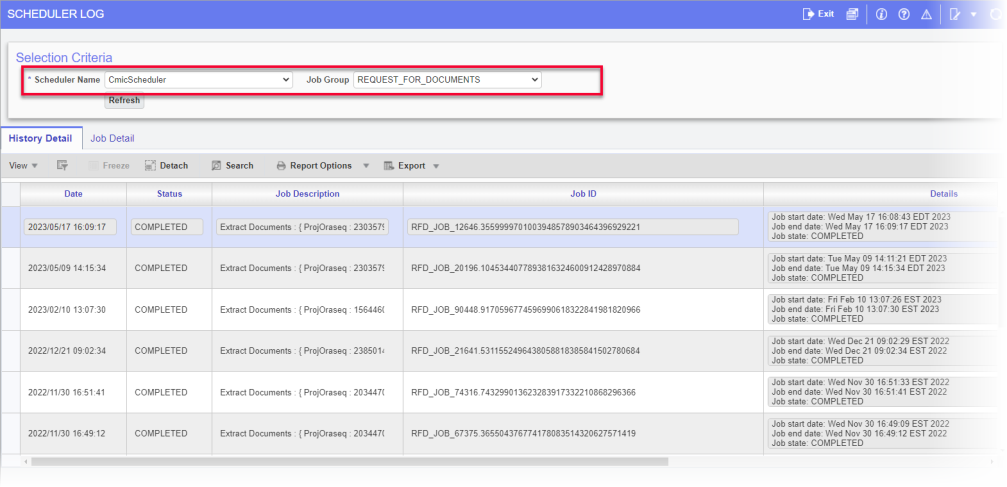
Scheduler Log shows status of RFDs
Once completed, the user is emailed a link to a zip file containing the extracted documents.
To create a new RFD, press the [Create New Request for Documents] button. To create an RFD from an existing RFD, click on the Create icon ( ). This opens a new RFD that is copy of the existing RFD that the user can make changes to. Press the [Refresh Logs] button to check for any recently submitted RFDs. Press the [Export to Excel] button to download the contents of the RFD log to a CSV file.
Creating a New RFD
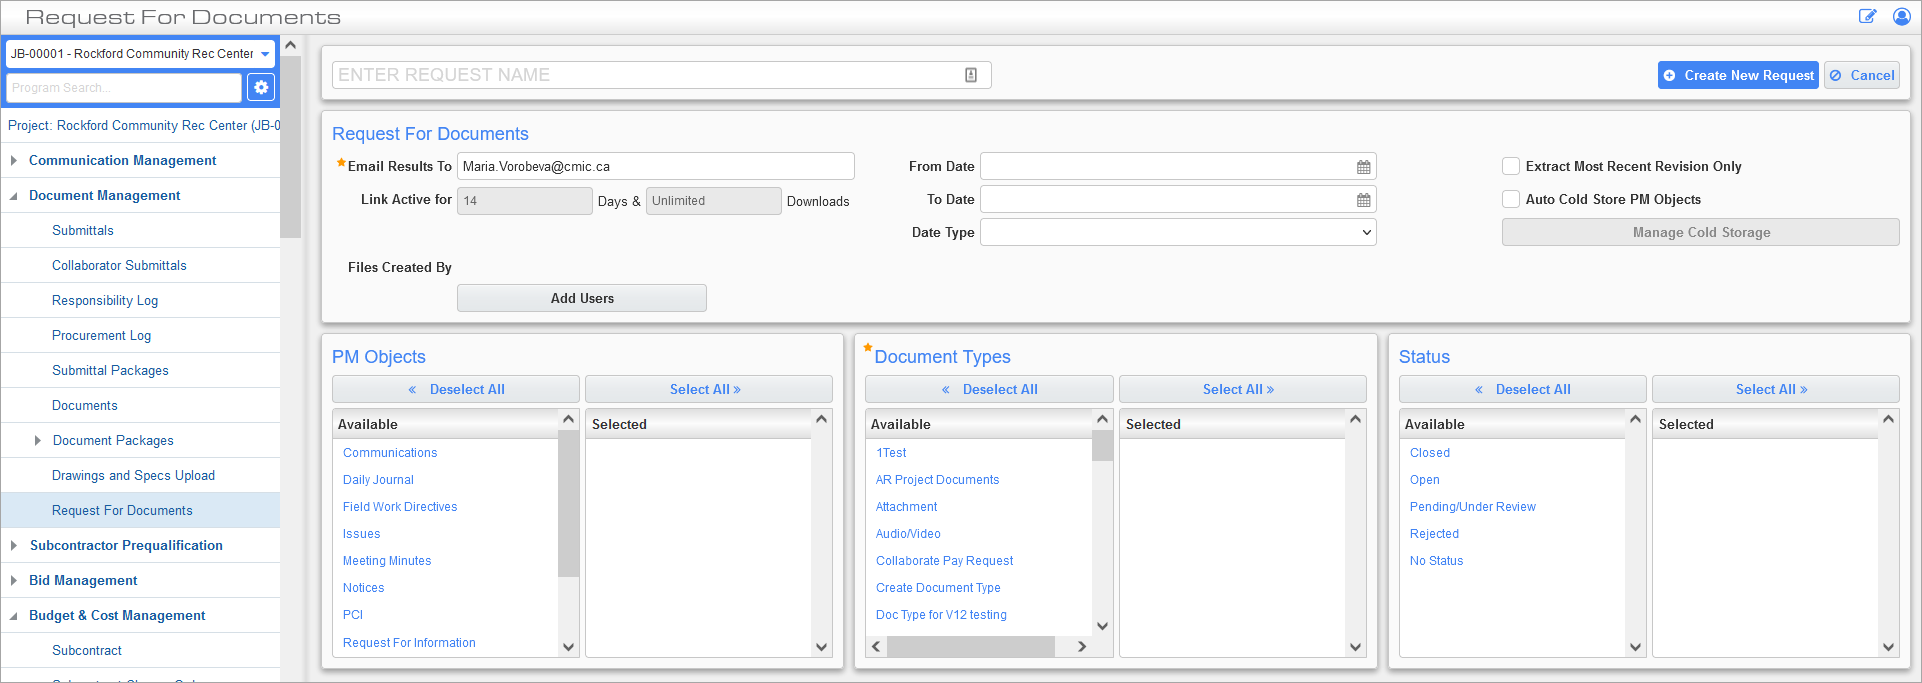
Request For Documents; standard Treeview path: CMiC Field > Document Management >Request For Documents > [Create New Request for Documents]
In this screen, enter the search criteria for the RFD. The PM Objects, Document Types, and Status sections can be used to narrow the search. Press the [Create New Request] button when finished.
NOTE: Ensure that all relevant document types and statuses associated with the selected PM object(s) are selected. The system will only extract PM records that contain attachments if the corresponding document types and statuses are specified. If no matching document types or statuses are provided, records with attachments will not be included in the extraction. Alternatively, select all document types and all statuses to ensure that the extraction includes all records with attachments.
Enter Request Name
Enter the requisition file name.
Request For Documents
Email Results To
Select which user to email the results of the requisition. This field defaults to the currently logged-in user, but it may be changed.
Extract Most Recent Revision Only – Checkbox
If the documents produced from the request have been revised, check this box to only produce the most recent revision. If this box is unchecked then a request will produce the original document and all of its revisions.
From Date, To Date, Date Type
Select a range of dates to return documents that were either created or revised during that period. Use the Date Type screen to select whether the range refers to date created or date revised.
Auto Cold Store PM Objects – Checkbox
When this checkbox is checked, it allows the user to perform Auto Cold Storage before the request extraction process.
[Manage Cold Storage] – Button
The [Manage Cold Storage] button is enabled when the ‘Auto Cold Store PM Objects’ checkbox is checked. Clicking this button launches a pop-up window used to define objects for which the ACS process will be performed.
![Pop-up launched from [Manage Cold Storage] button](../../../../Resources/Images/CMiC_Field/RFD_03_864x401.png)
Pop-up launched from [Manage Cold Storage] button
NOTE: Extraction occurs for all objects selected in the PM Objects list, but ACS only occurs for objects that have been selected in both the PM Objects list and the ACS list.
Files Created By
Select a user in this field to only return documents created by that user.
PM Objects
Select PM objects from the Available column to return documents linked to those types of object or use the [Select All] button to select all PM objects.
Document Types
Select which document types to return. Document types can be set in the Document Options Setup screen. Ensure that all relevant document types associated with the selected PM object(s) are selected. The system will only extract PM records that contain attachments if the corresponding document types are specified. If no matching document types are provided, records with attachments will not be included in the extraction. Alternatively, use the [Select All] button to select all document types to ensure that the extraction includes all records with attachments.
Status
As some documents have statuses, select the status to return. Ensure that all relevant statuses associated with the selected document type(s) are selected. Alternatively, use the [Select All] button to ensure that the extraction includes records with all statuses.
Scheduling a Pending RFD
Pressing the [Create New Request] button will return the user to the RFD log screen. An RFD can be scheduled for extraction by using the Scheduler icon ( ) on any of the pending record rows, which will have a status of "Pending" or "ACS Pending", depending on whether ACS needs to be performed before the document extraction process.
RFD with ACS Pending Status
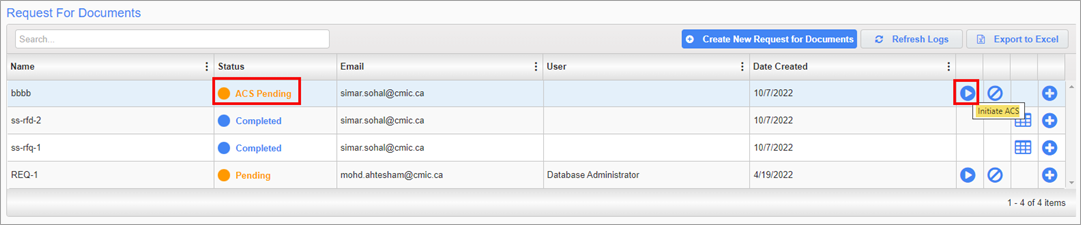
If objects in the RFD were selected for the ACS process, the record will appear with a status of "ACS Pending". The Scheduler icon () will appear on the record's row to initiate the ACS process.

While the ACS is processing, the status will appear as "ACS in Progress".

Once completed, a status of "ACS Completed" will be displayed in the Status column and the Scheduler icon will be available. Press the Scheduler icon to schedule a job to complete the RFD extraction process. From here, the process is the same as for processing a pending RFD.
RFD with Pending Status

If no objects were selected for the ACS process, then the RFD will have a status of "Pending", and the Scheduler icon will be available. To run a pending RFD, press the Scheduler icon. An RFD can be cancelled using the Cancel icon ( ).
).

Once the icon has been pressed, the job is submitted to the Job Scheduler and the RFD is given a status of "Scheduled".

When the document extraction job begins, an email is sent to the user that says, "Your request has been accepted and in progress". At this point, the RFD has a status of "In Progress". If there has been an error during the job, the RFD appears in the log with a status of "Failed".

Downloading an Archive
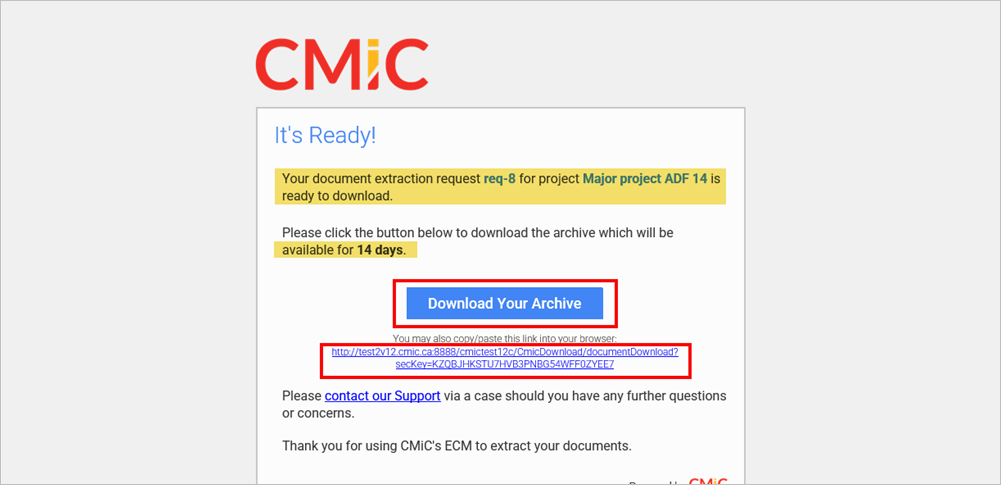
When the document extraction job is complete, the user will receive an email with a link to download a zip file containing the documents, and the log status will display "Completed". The link is valid for 14 days. An example of this email is shown below. Job details for any "Failed" or "Completed" jobs can be reviewed by clicking the Job Details icon ( ) next to the desired job.