Overview
This
NOTE: For changes required to individual screens, Lite Editor is used, as updates made using this tool are program specific and will not impact the prompts in other programs.
Customizing Prompts/Messages
Prompts can be customized for screens throughout CMiC Field at four different levels:
-
organizational level
-
user level
-
project level
-
user and project level
Each of these levels can also be defined by language if required. This allows for the translation of the standard CMiC software to different languages. The language that the user will see is set within their local browser.
NOTE: Users should consult with CMiC Support before customizing prompts in other languages.
The ability to change the system boilerplate is limited by the following privilege: ‘Messages - Update text messages for different users’. This privilege is managed in CMiC Field.
Setting the Privilege
The privilege to change prompts on a global basis can be assigned to either a user’s role or directly to a user. This privilege allows the user to change prompts for any user. By default, a user is allowed to change their own prompts. To restrict this functionality, access to this program must be restricted for the user.
Security is assigned on either the Role Maintenance screen or the User Access screen, depending on if this privilege is being assigned by role or directly to the user. In either case, the privilege is assigned by selecting the “Assign Privileges” action. For more information, please refer to Security Roles and User Access.
The screenshot below shows an example of assigning the privilege to a role on the Role Maintenance screen.
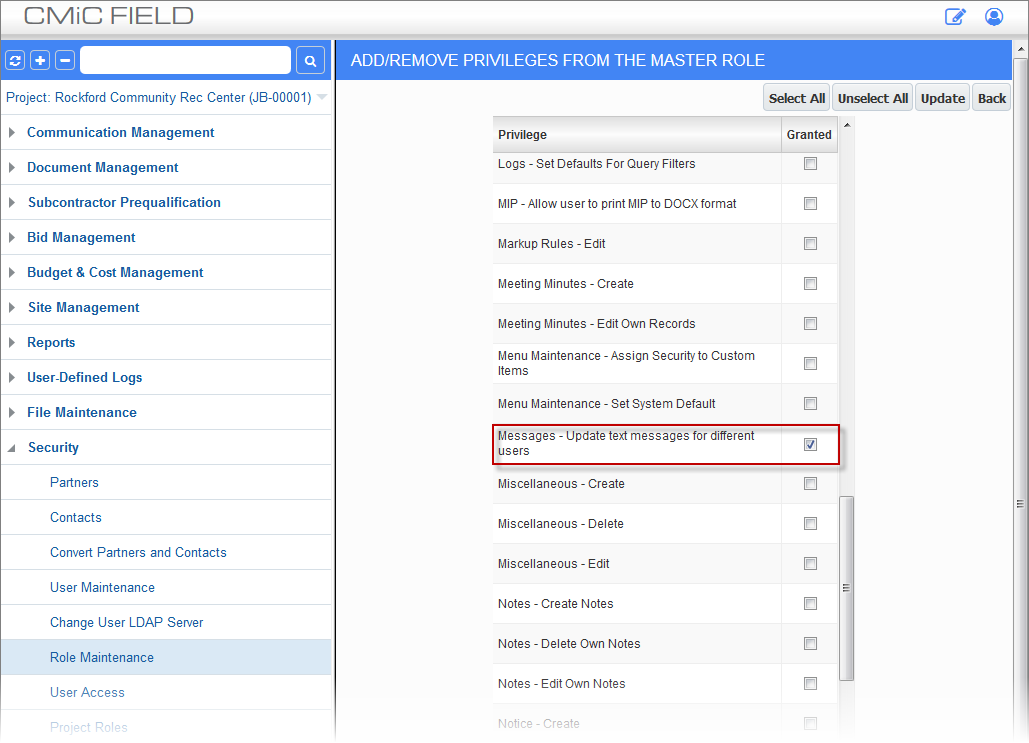
Role Maintenance; standard Treeview path: CMiC Field > Security > Role Maintenance
Updating Prompt Maintenance
Prompts are maintained on the Prompt Maintenance screen in CMiC Field.
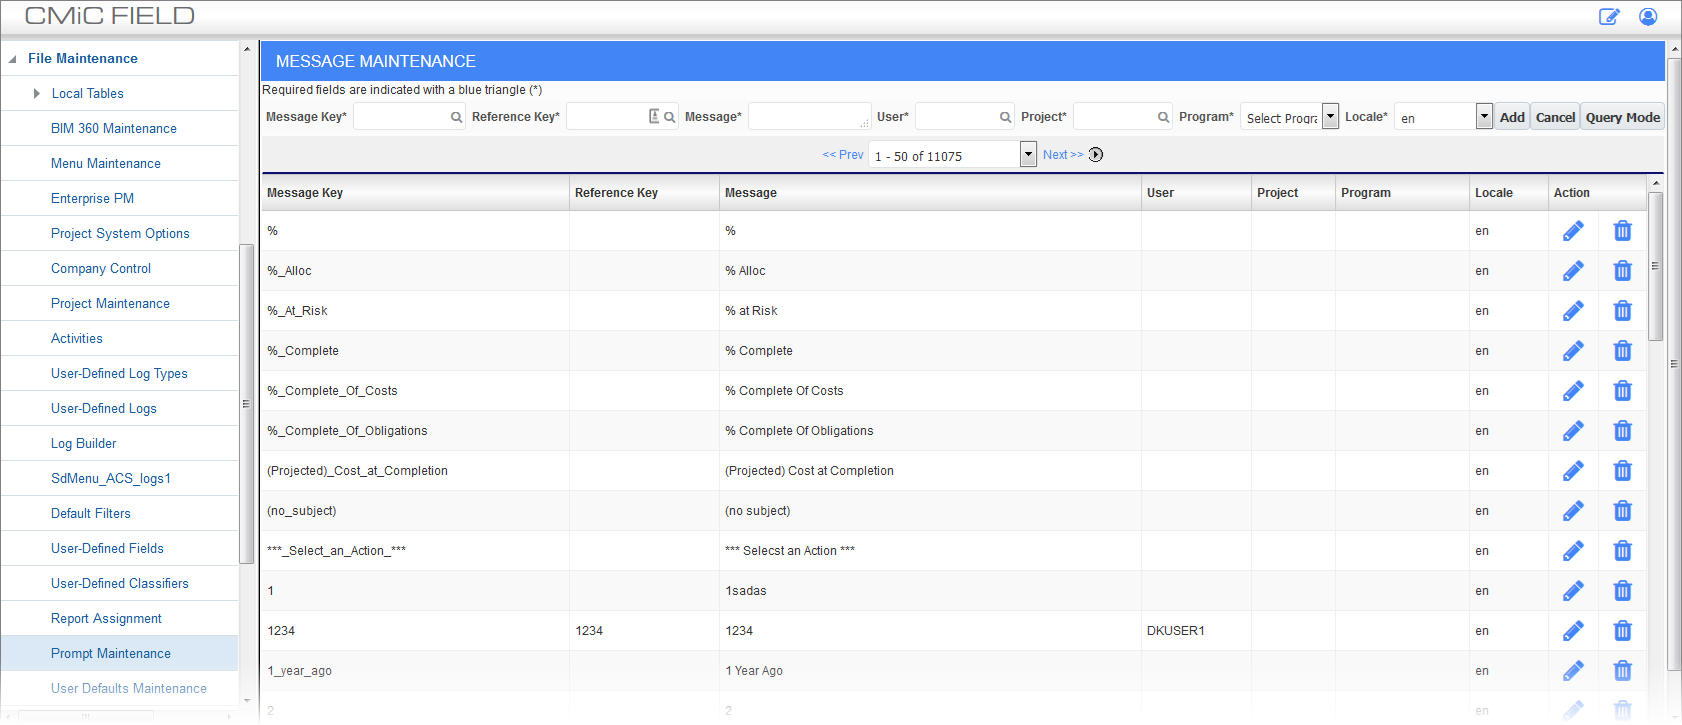
Prompt Maintenance; standard Treeview path: CMiC Field > File Maintenance > Prompt Maintenance
When the Prompt Maintenance screen first opens, it displays all the prompts/text in CMiC Field. The top portion of the screen is used for querying prompts and for editing prompts that are selected in the display area of the screen. The lower portion of the screen is used to display query results and for selecting prompts to be edited.
Message Key
This is the actual code used by the message. The message key should not be modified. Only message text should be modified.
Reference Key
This field is no longer required.
NOTE: This field was previously used to reference fields with field security but is no longer required since Lite Editor enables users to review fields with field security and determine which prompts need to be changed.
Message (Text)
This is the text that displays when a screen uses the message key. This is the prompt shown on the screen.
User
This field identifies a user that has customized message text.
Project
This field identifies a project that has customized message text.
Program
This field identifies a program (screen) that has customized message text.
Locale
This field indicates the language, for example “en” is English, “fr” is French. These codes are the standard language codes used by browsers].
[Query Mode] – Button
Press this button to enter query mode. The fields along the top of the screen will change color to indicate they are in query mode. Enter a query in either the Message Key or Message fields. The percent symbol “%” can be used as a wild card. Once a query is entered, press [Execute Query].The display area in the lower portion of the screen will display the results of the query.
For Users with Privilege to ‘Update Text Messages for Different Users’
Use the [Query Mode] button to search for a message. Find the message to be updated in the display area and press the Edit icon ( ) in the message’s row. The message’s values will be displayed in the fields in the top portion of the screen.
Changing Prompts Globally
-
Enter the new message.
-
Once complete, use the [Update] button to save the changes.
Creating Prompts for a Specific User or Project
-
Enter the new message.
-
If this prompt is intended for a specific user, enter/select the user’s name.
-
If this prompt is intended for a specific project, enter/select the project code.
-
If this prompt is intended for a specific user on a specific project, enter/select both fields.
-
Once complete, use the [Add] button to create the new record.
Updating Prompts for a Specific User or Project
-
Update the message.
-
Once complete, use the [Update] button to save the changes.
For Users without the Privilege
Use the [Query Mode] button to search for a message. Find the message to be updated in the display area and press the Edit icon ( ) in the message’s row. The message’s values will be displayed in the fields in the top portion of the screen.
-
Enter the new message.
-
The user’s name will default in the User field and cannot be changed.
-
If this message is intended for a specific project, enter/select the project code.
-
Once complete, use the [Add] button to create the new record.
Technical Implementation
-
This feature will not change the boilerplate on logs.
-
Specific project functionality is applied according to the user’s current project and some programs (mostly maintenance screens such as the Project Maintenance screen) allow the user to select a project. In this case, the boilerplate will match the user’s current project settings.
-
This feature enables a global change to the system but there may be cases where the boilerplate does not change. If this is the case, please enter a low priority issue to CMiC Support, indicating the program and the specific field that does not change.