Overview
Auto-Indexing helps streamline the PM upload process, by providing an automated way to deal with document classifiers or metadata fields which are blank and need to be manually filled in. This application automatically transfers the object's metadata to the attachment's metadata. Initially, mapping must be done for binding the object to the document type and its fields.
-
The mapping is used by the upload routine to fill in the PM document classifier and/or metadata.
-
For example, in the case of an RFI, you could map the RFI number into the first classifier and the RFI description into the the second classifier.
Prerequisites
The Auto-Indexing application and its mapping settings are managed by system administration. For mappings, the following conditions should be fulfilled:
-
This is a license-based application. The data will be transferred only if the licensing flag is enabled. If the licensing flag is disabled, no data will be transferred.
-
Mappings should be completed using the steps provided below. Refer to Security Settings for details on assigning access to the [Show Mapping] button.
Functions
-
Mapping of object to document types.
-
Upload the new attachment and transfer the metadata to mapped fields of selected document type.
How it Works
Phase 1- Mapping Phase:
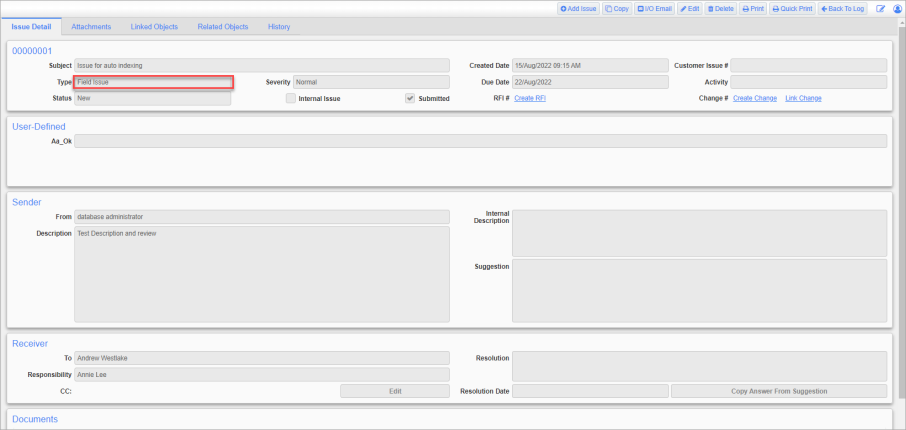
1. Navigate to the Attachment tab of an existing PM object which needs to be mapped.
2. Click the [Show Mapping] button to launch the Mapping pop-up window.
![Screenshot of Attachment tab wit [Show Mapping] button highlighted.](../../../Resources/Images/CMiC_Field/Autoindexing.png)
3. In the Mapping pop-up window, select a document type from the CMiC Document Type field’s drop-down menu. A list of object columns from the selected PM object type will be listed in the Mappings section of the screen.
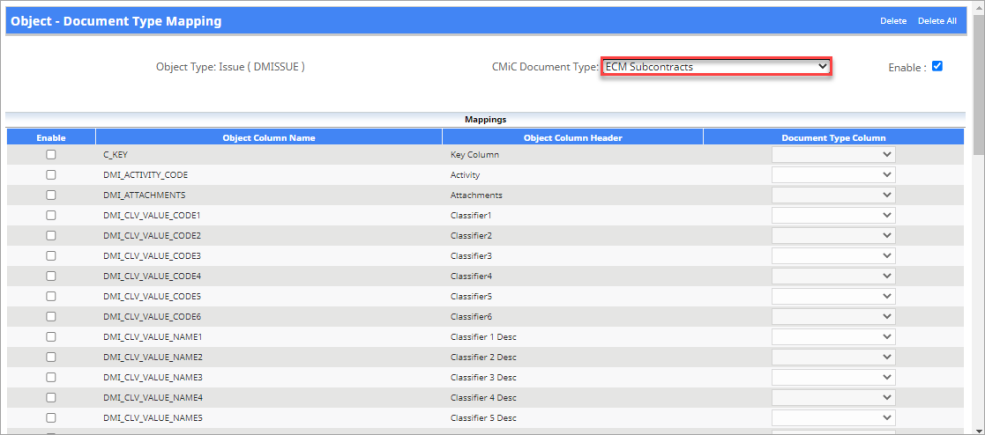
Pop-up window launched from [Show Mapping] button
4. Check the ‘Enable’ box on each corresponding object column row, which will enable the mapping of that object column with a document type column. For each enabled row, select a document type from the Document Type Column field’s drop-down menu. A maximum of 10 mappings can be selected.
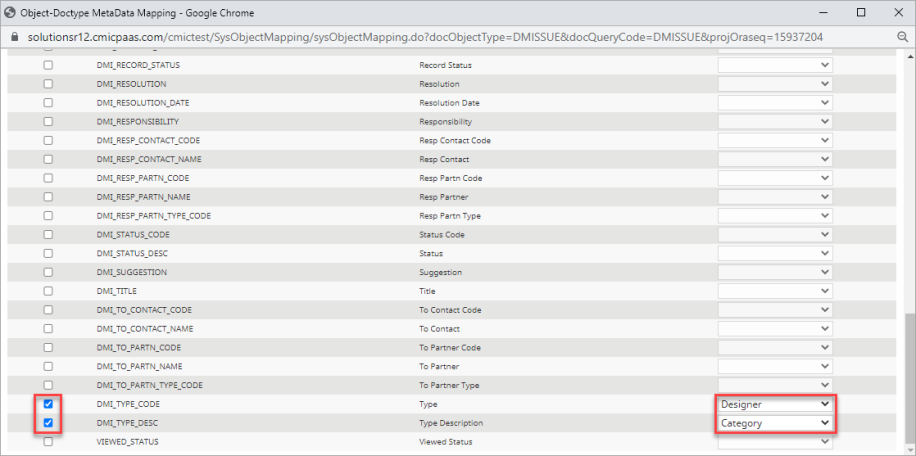
5. Once mapping selections have been completed, click the [Save] button. The [Save] button is only enabled after updates are made to the mapping.
![Screenshot of Object - Document Mapping with [Save] button highlighted.](../../../Resources/Images/CMiC_Field/Autoindexing_6_944x272.png)
Note: While one object type can map to multiple document types, one document type can map to only a single object type.
6. The [Delete] button is used to delete the mappings for a selected document type.
![Screenshot of Object - Document Mapping with [Delete] button highlighted.](../../../Resources/Images/CMiC_Field/Autoindexing_3_892x294.png)
7. The [Delete All] button is used to delete all mappings for the current object.
![Screenshot of Object - Document Mapping with [Delete All] button highlighted.](../../../Resources/Images/CMiC_Field/Autoindexing_4_901x297.png)
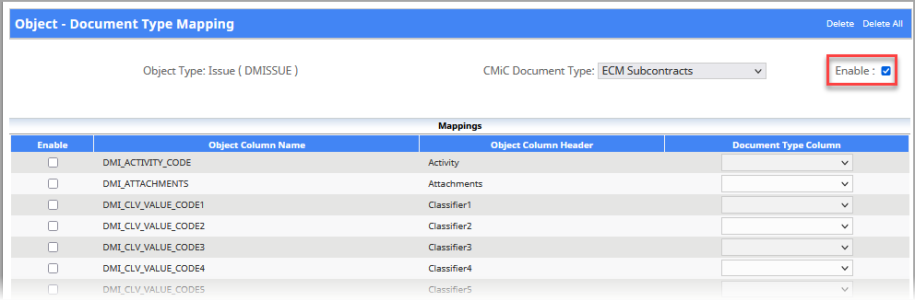
8. The 'Enable' checkbox is used to enable/disable the metadata transfer. To disable the Mapping functionality, uncheck the 'Enable' checkbox and press [Save].
Note: The [Show Mapping] button will not work if launched from anywhere except explained above. Don't do the mapping while adding new object.
Phase 2 - Upload Attachment:
1. Navigate to the Attachment tab of the PM object which has mapping enabled and click the [Upload Multiple] button to open the Upload Multiple pop-up screen.
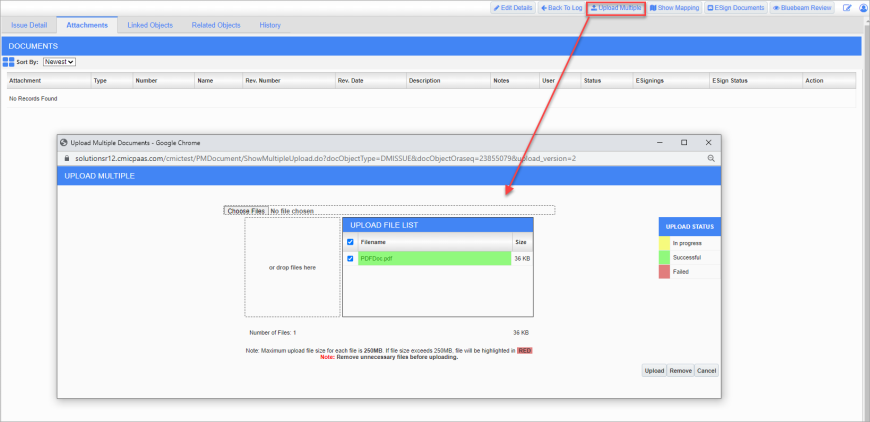
2. Upload an attachment and select the document type that has been mapped.

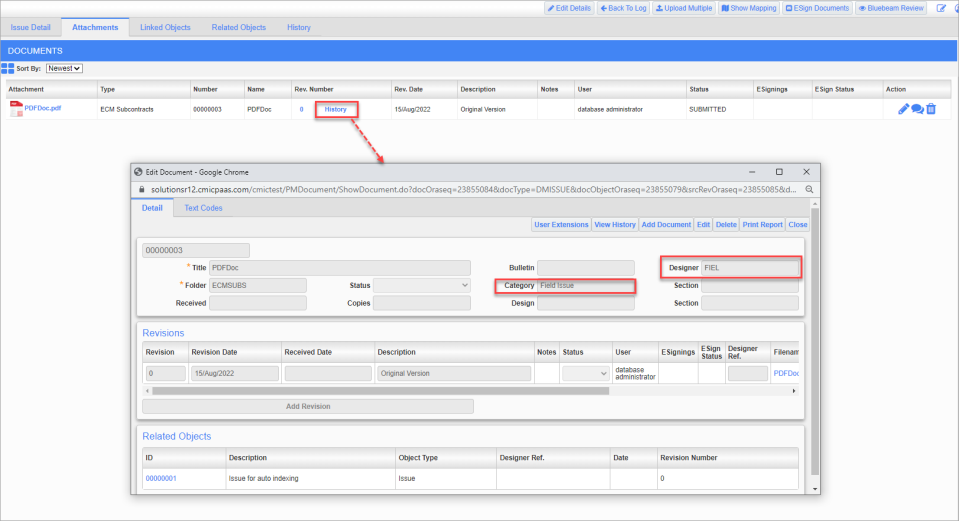
3. To verify the metadata transferred, review the history details of the attachment by clicking on the PM object’s Attachments tab and clicking on the History link.
Security Settings
Access to the [Show Mapping] button is controlled by the checkbox ‘Documents – Show Mapping’ using the CMiC Field - Security Roles screen (or CMiC Field - User Access) under 'Assign Privileges'.
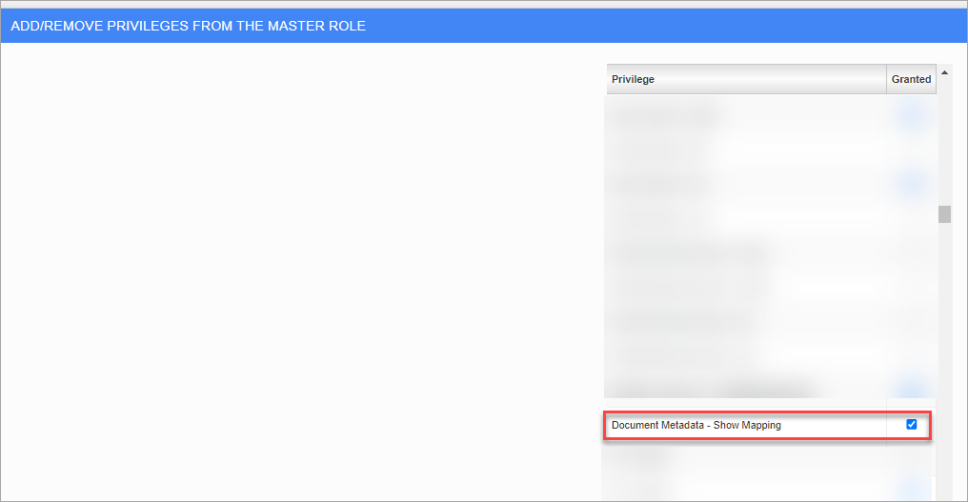
When checked, the [Show Mapping] button becomes accessible.