This process describes how to set the default check format and print a check.
Set Default Check Format
-
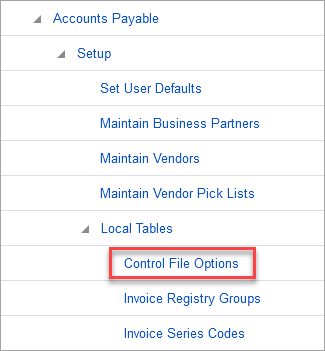
First, open the Control File Options screen under the Local Tables sub-menu of Accounts Payable.
-
Select the Check tab, select the LOV next to the Name of Check field, and select the required format. In this case, the format is "Double Stub AP Check for Laser Printer (Std)".
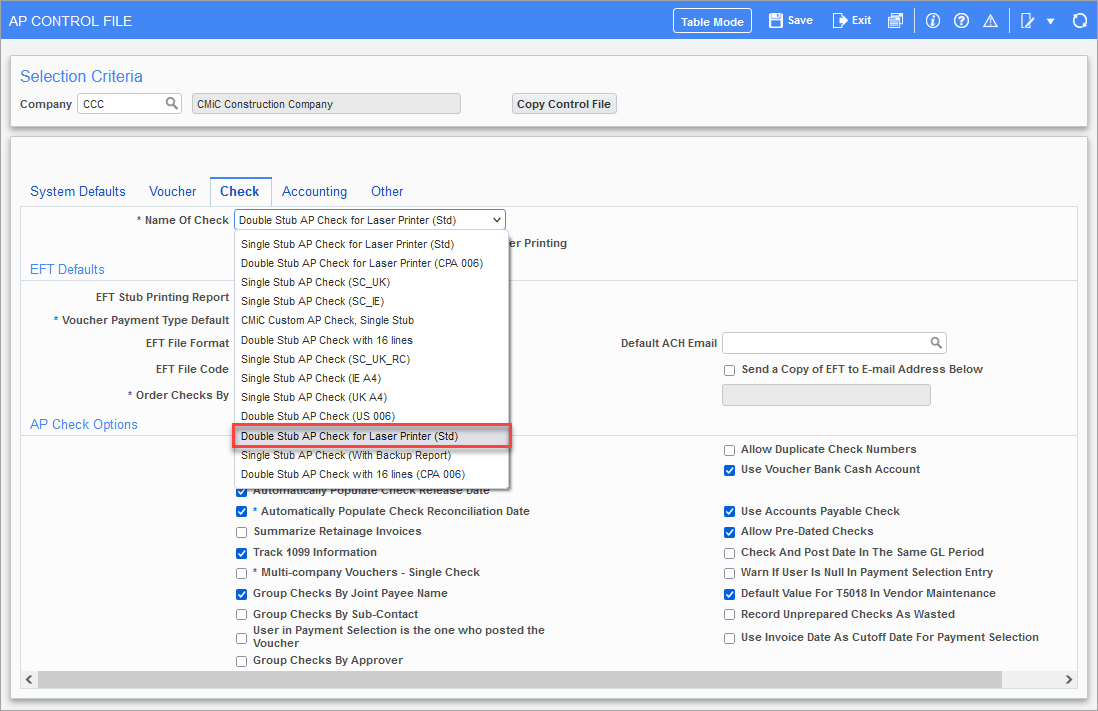
Pgm: APCTRLFM – AP Control File; standard Treeview path: Accounts Payable > Setup > Control File Options – Check tab
Print Checks
-
Select payments in the Select Payments screen (standard Treeview path: Accounts Payable > Payment > Select Payments). For more information on invoice selection, please refer to Accounts Payable - Payment Process.
-
Navigate to the Prepare Checks screen found under the Check sub-menu in Accounts Payable (standard Treeview path: Accounts Payable > Check > Print Checks). Ensure that the proper value is selected for the Check Form field and then press Prepare Checks.
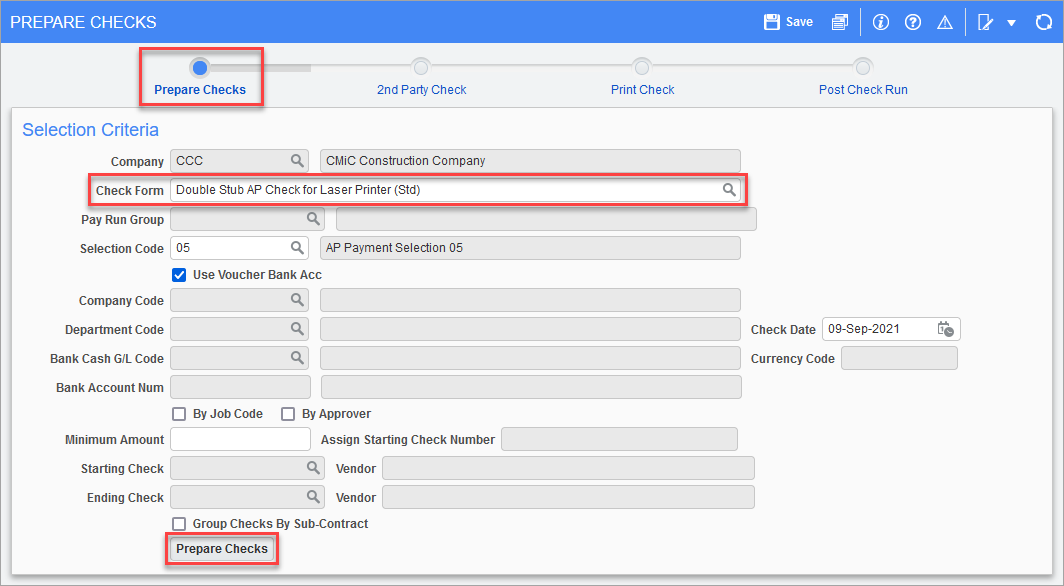
Pgm: APCHQPRE – Prepare Checks; standard Treeview path: Accounts Payable > Check > Print Checks – Prepare Checks node
-
Move to the Print Check node of the train. Verify the value for the Check Form field is the correct version, then press the Print Checks button.
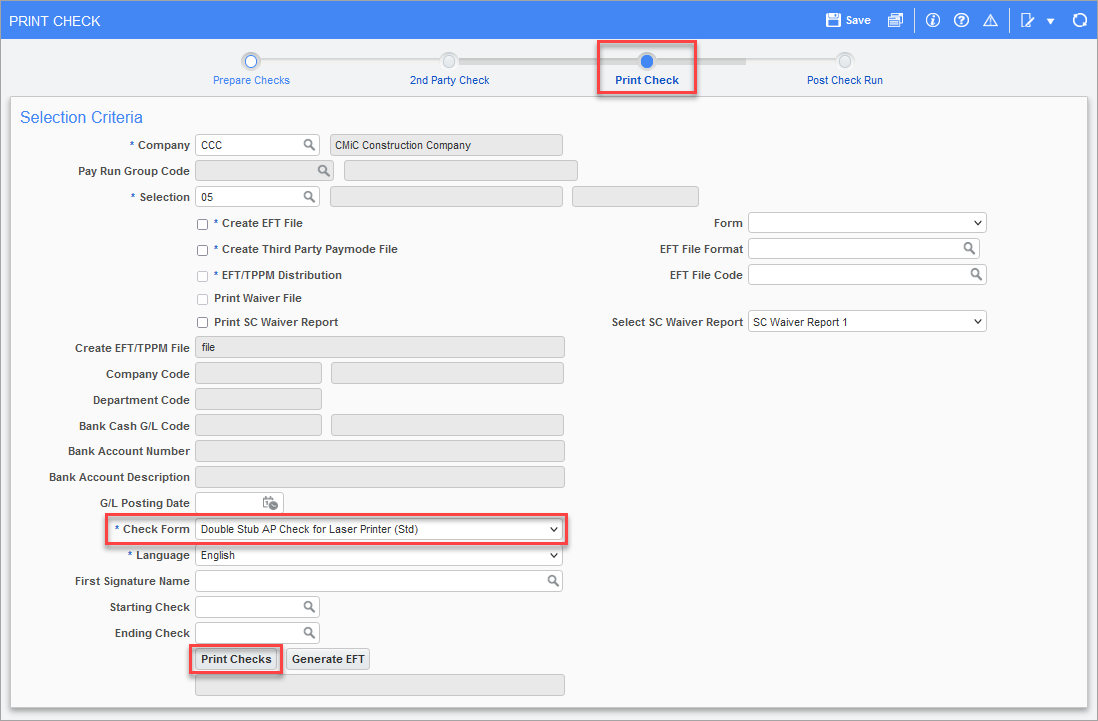
Pgm: APCHQPRE – Print Check; standard Treeview path: Accounts Payable > Check > Print Checks – Print Check node
-
Ensure the format is set to PDF and then press the Run Report button.

-
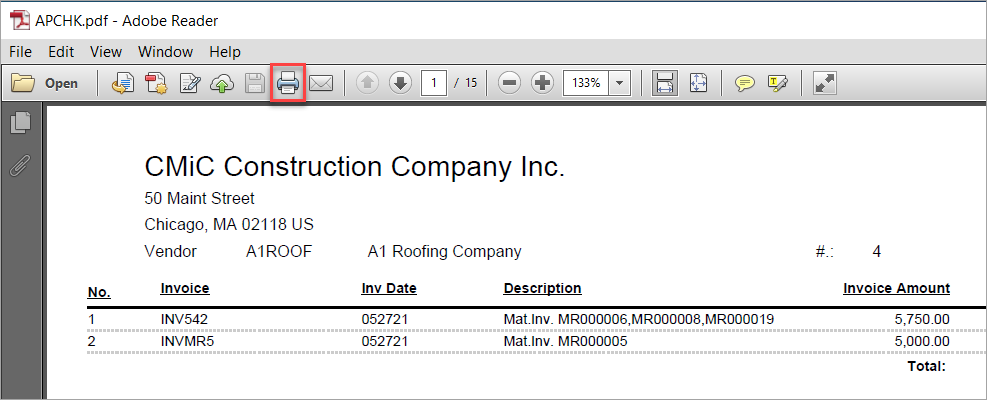
Download and open the file with Adobe Reader and select the Print icon to open the Print Configuration pop-up window.
-
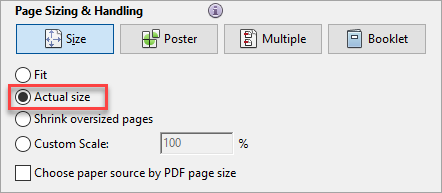
Select the 'Actual Size' radio button for the size option and then select Print to print the check.
For more information about printing checks, please refer to Accounts Payable - Verifying a Check's Print Settings.