Overview
This feature is used to add a BI visualization to a UIRuntime program in Lite Editor using a BiFrame.
Process
Add a Visualization
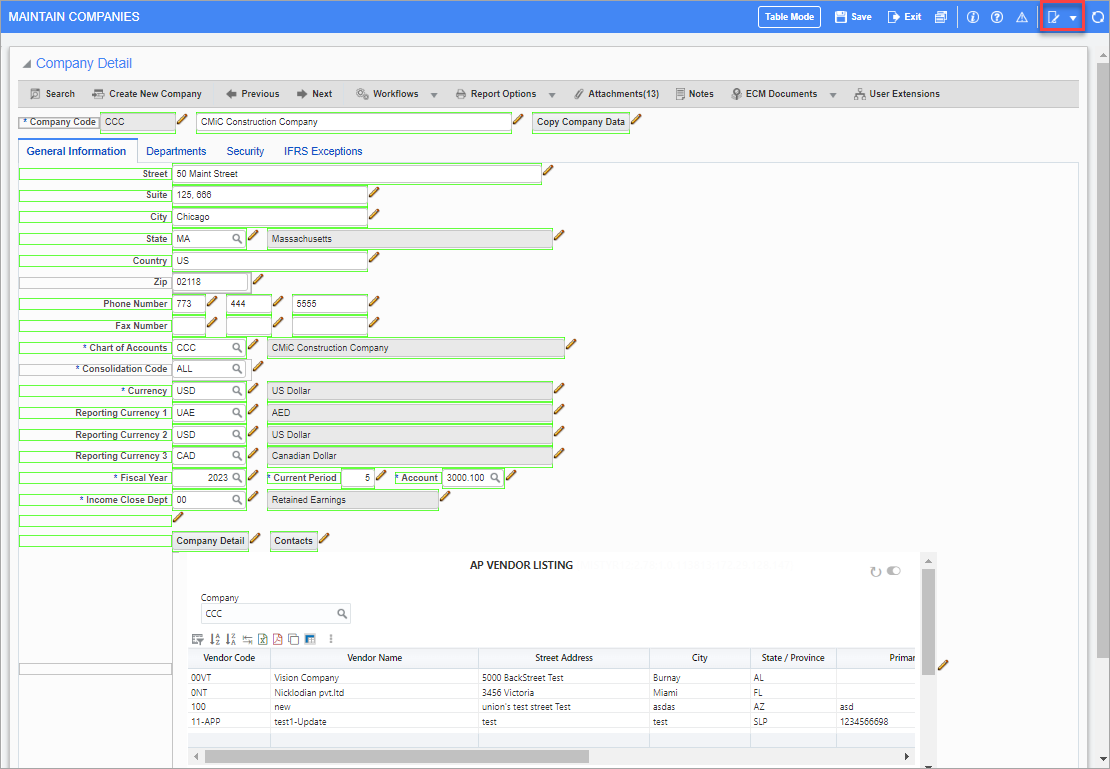
The following example shows the process for adding a BI visualization to the Maintain Companies screen in the General Ledger module.
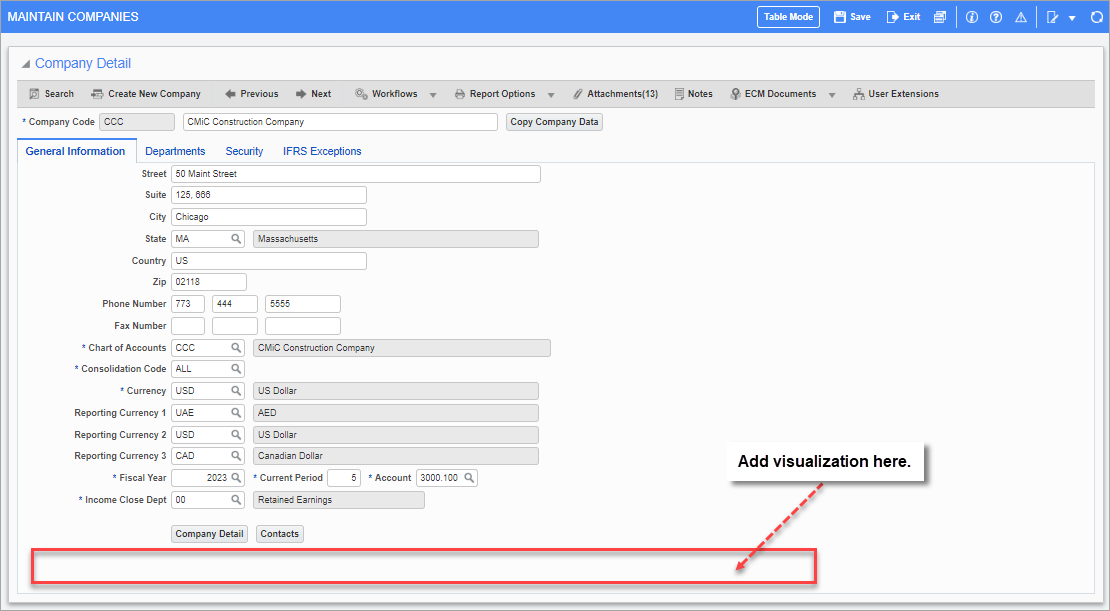
Navigate to the screen where you would like to add a BI visualization.
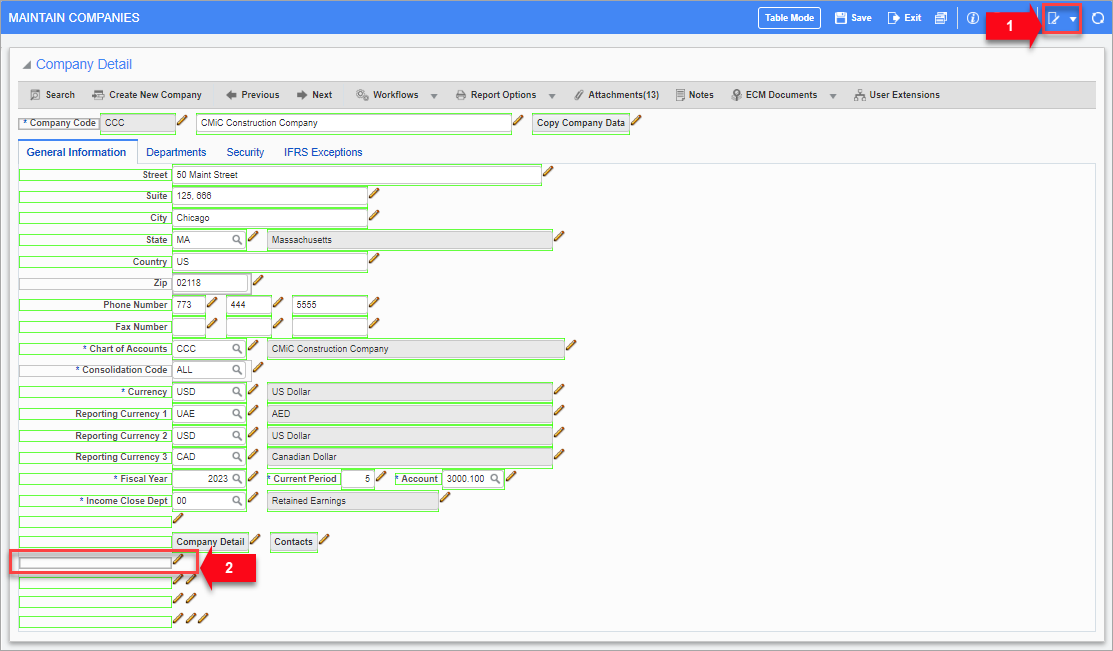
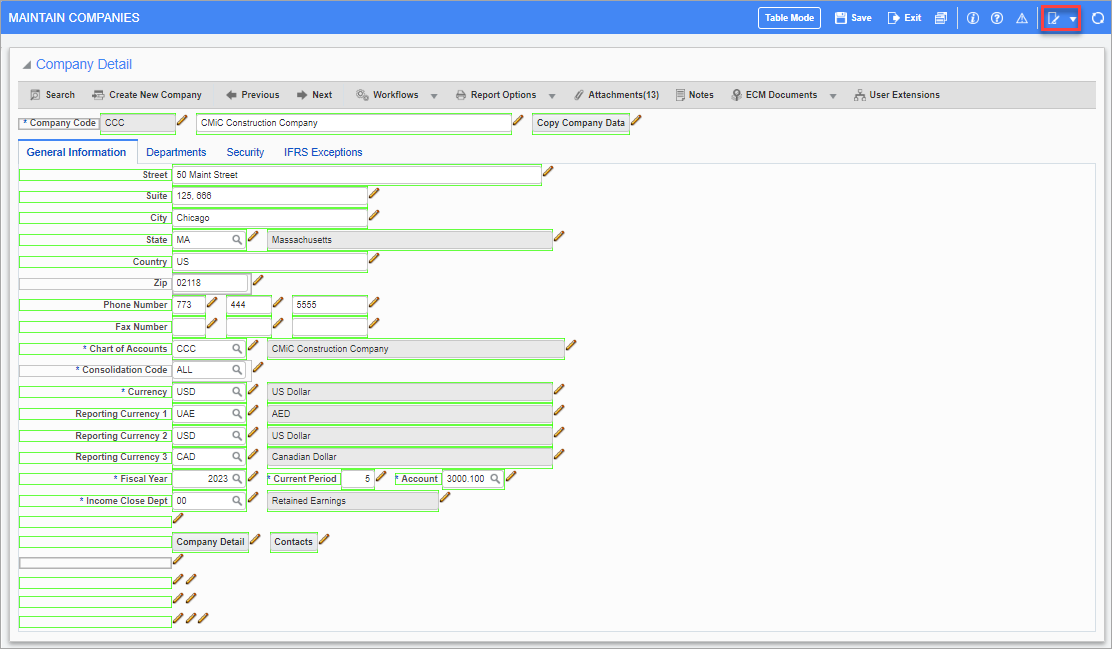
Click on the [Lite Editor] button on the console to put the screen in Edit mode. Once the screen is in Edit mode, click on a field's Edit icon ( ) to open the Lite Editor pop-up window.
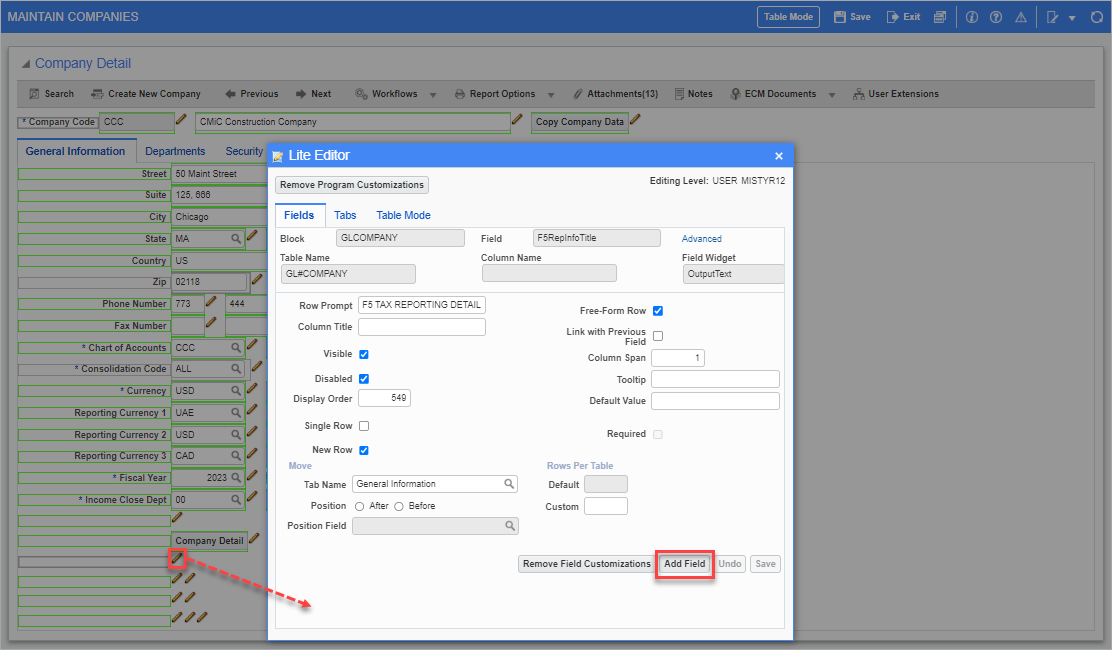
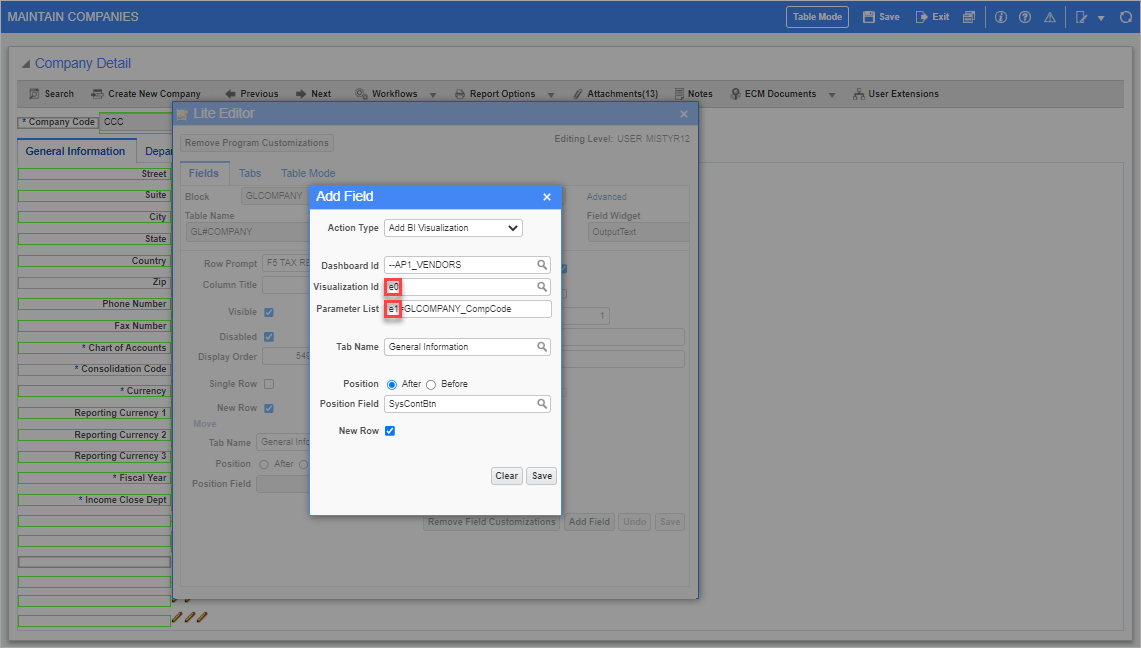
In the pop-up window, click on the [Add Field] button.
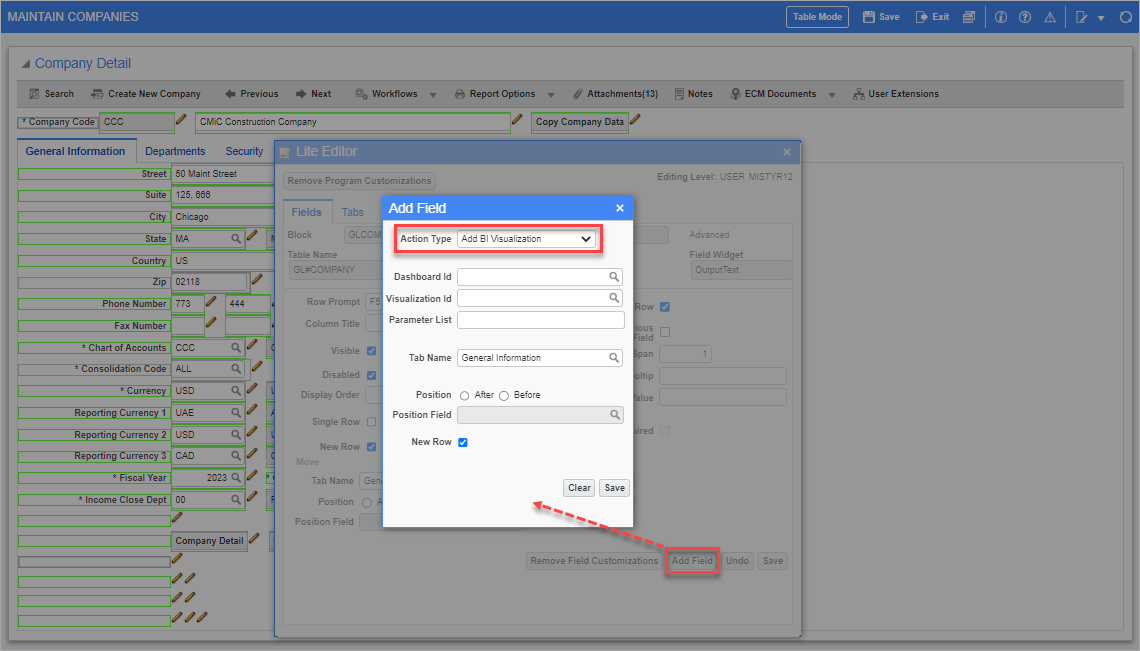
In the Add Field pop-up window, select "Add BI Visualization" in the Action Type field's drop-down menu.
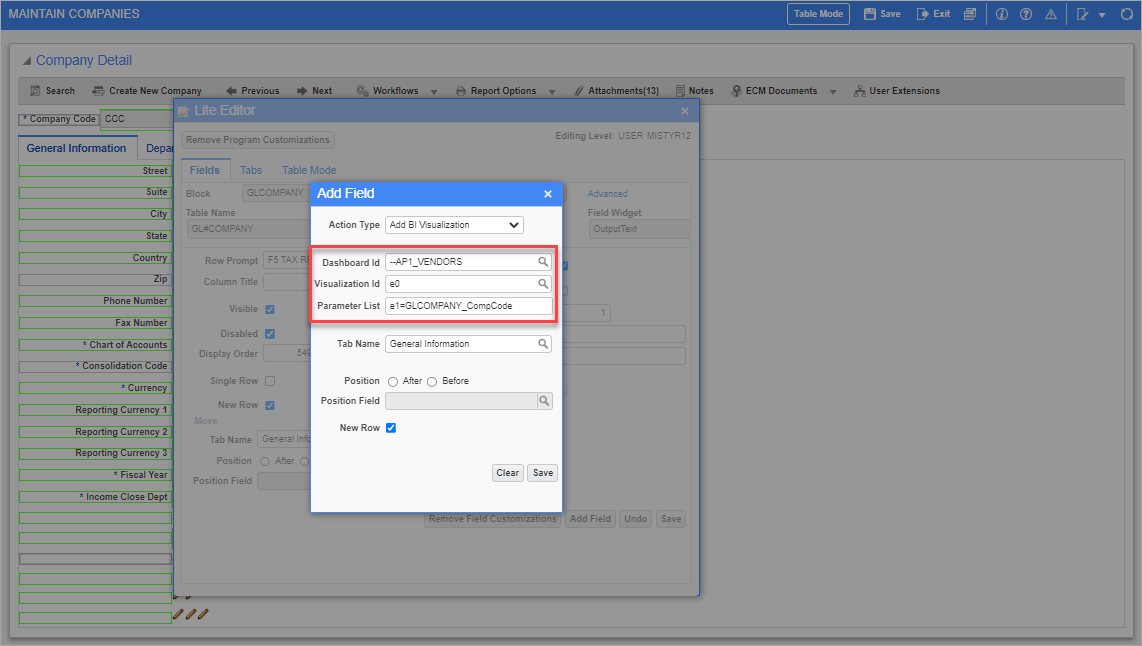
Next, enter the visualization's identification details in the Dashboard Id, Visualization Id, and Parameter List fields.
NOTE: If the list of dashboards available in the Dashboard Id field is limited to the CMiC default data source or BI reports from a custom data source, then verify the security roles assigned to dashboards in the Assign Roles screen. For a dashboard to be available in the Dashboard Id field, users must hold the same security role that has been assigned to the dashboard. Refer to Assign Roles to Dashboards – Dashboard Security for more information.
The visualization ID and parameter list name are obtained from BI Dashboard Builder. To learn more about where these values are located, refer to Copy the Visualization ID and Parameter List Name in BI Dashboard Builder.
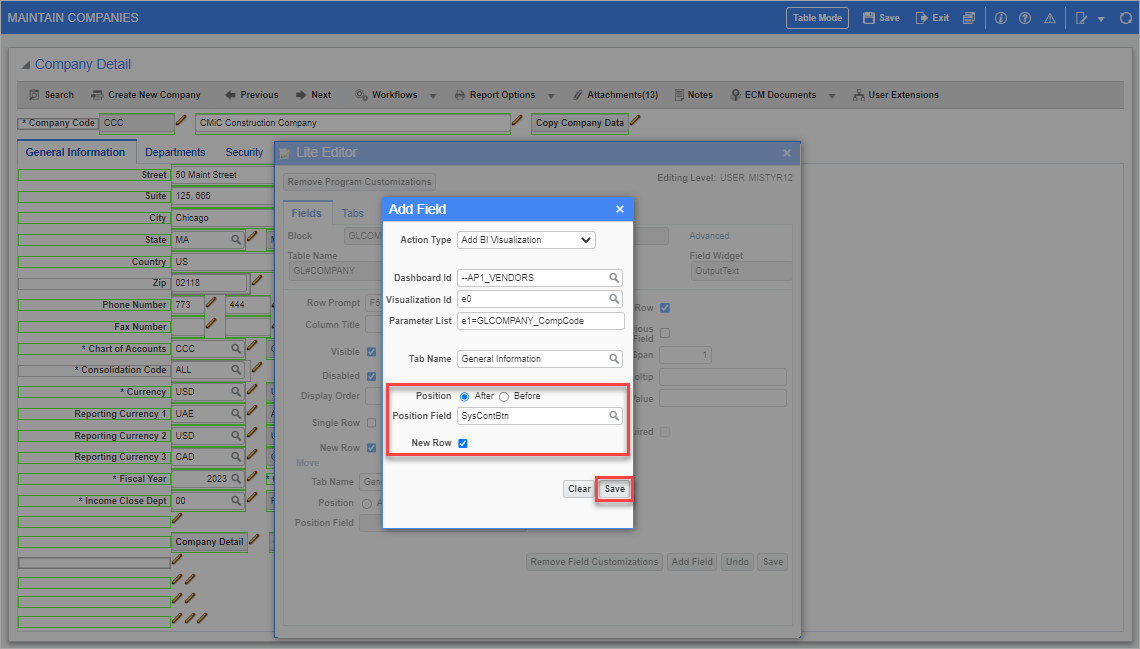
Verify the position of the visualization on the screen by using the Position radio buttons and the Position Field. Depending on the position of the visualization on the screen, check the 'New Row' checkbox to start it on a new row. When finished, click on [Save].
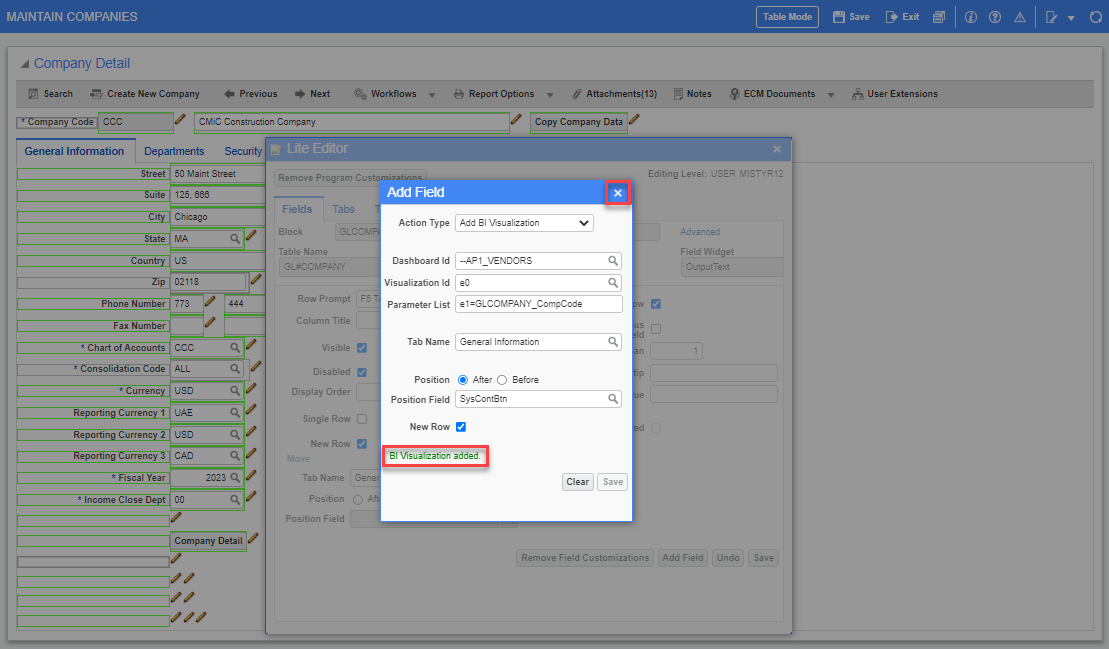
After clicking [Save], a confirmation message will appear to confirm the visualization was added. Click on the Close icon ( ) in the Add Field pop-up window to return to the Lite Editor pop-up window.
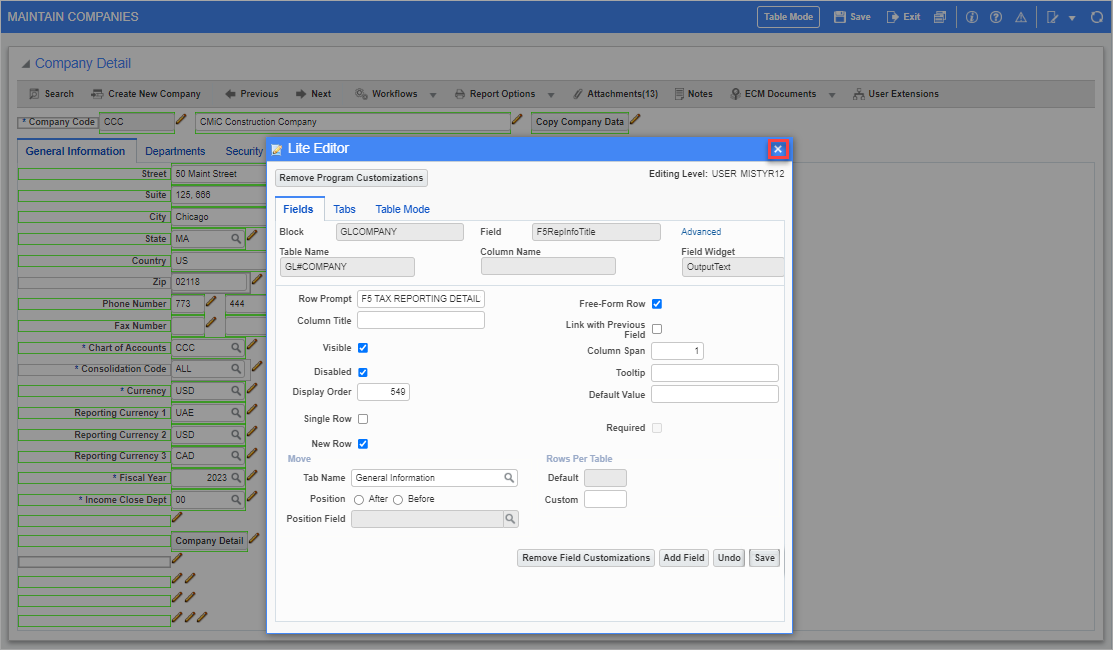
In the Lite Editor pop-up window, click on the Close icon.
Click on the [Lite Editor] button in the console to return the screen to View mode.
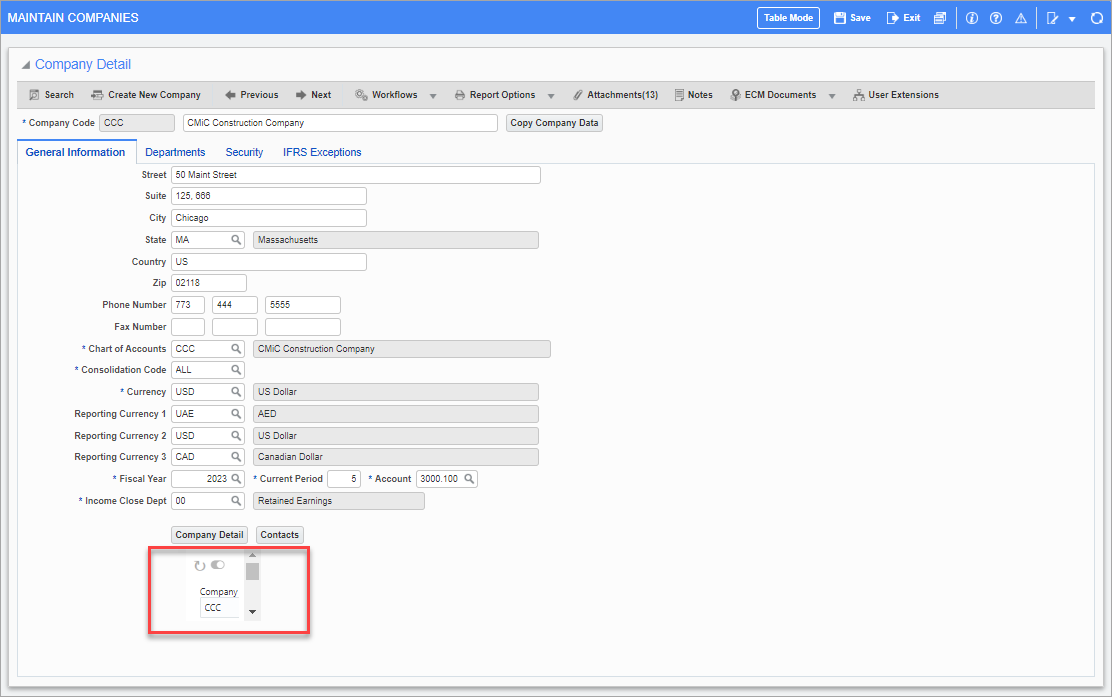
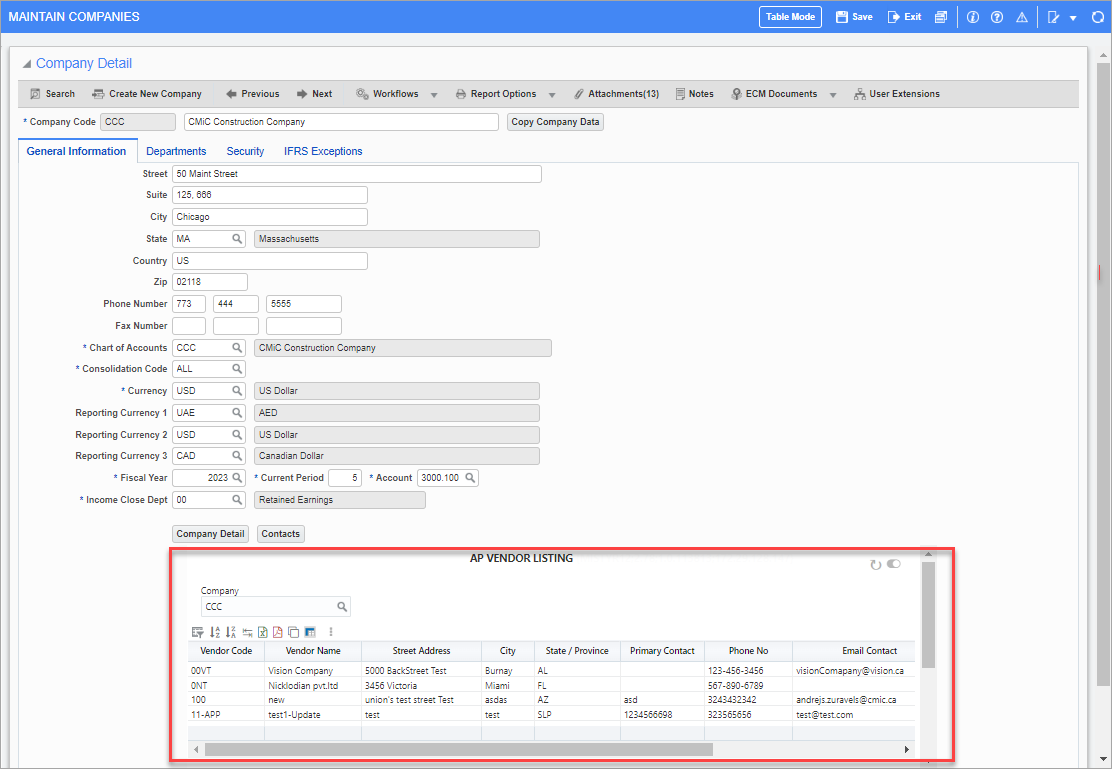
Refresh the screen. Once the screen has re-loaded, the visualization will be displayed in the specified location. The visualization may appear small at this point because the size still needs to be determined.
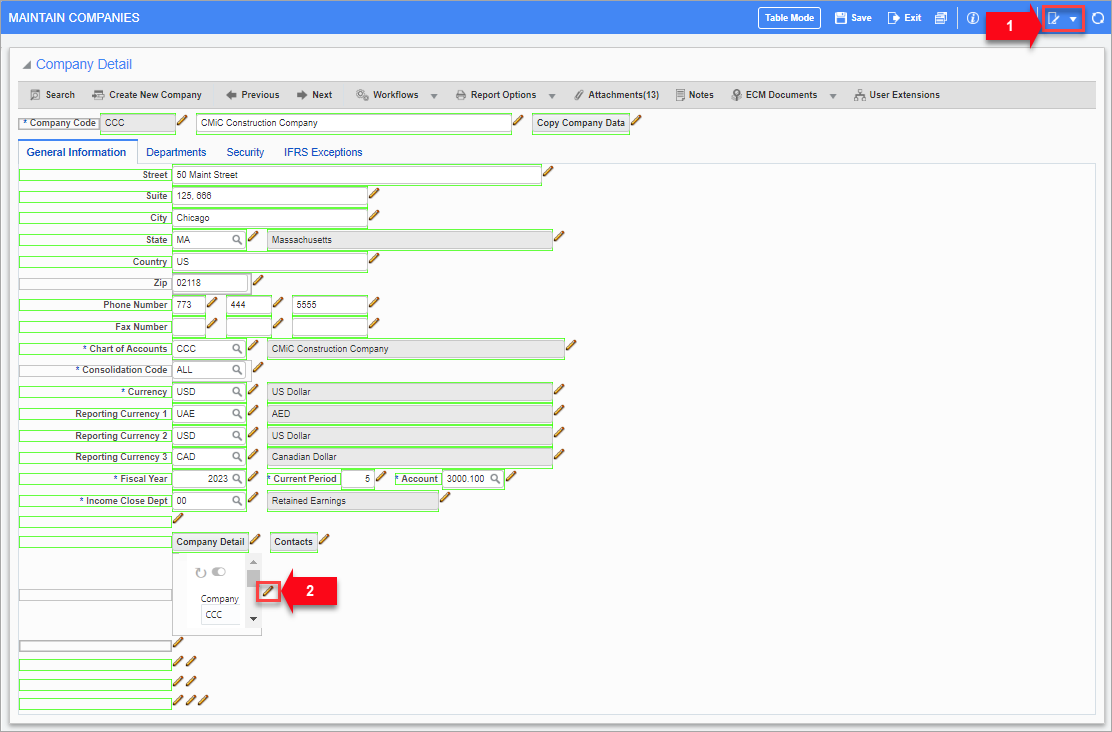
Click on the [Lite Editor] button in the console to put the screen in Edit mode again. Once the screen is in Edit mode, click the Edit icon next to the visualization to open the Lite Editor pop-up window.
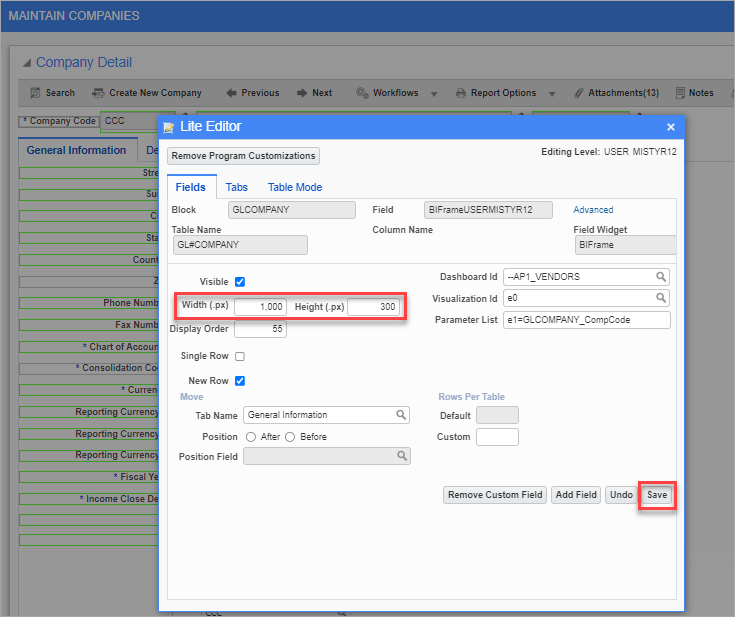
In the Lite Editor pop-up window, adjust the size of the visualization using the Width (.px) and Height (.px) fields, as shown above. When finished, click on [Save].
Click on the [Lite Editor] button in the console to return the screen to View mode.
Refresh the screen. The size of the visualization will be adjusted to reflect the specified height and width values. Complete any additional adjustments to the width and height until the visualization is displayed as desired.
Copy the Visualization ID and Parameter List Name in BI Dashboard Builder
The values that are entered in the Visualization Id and Parameter List fields in the Add Field pop-up window in Lite Editor are located in BI Dashboard Builder. The subsections below show you where you can find these values and copy them.
Visualization ID
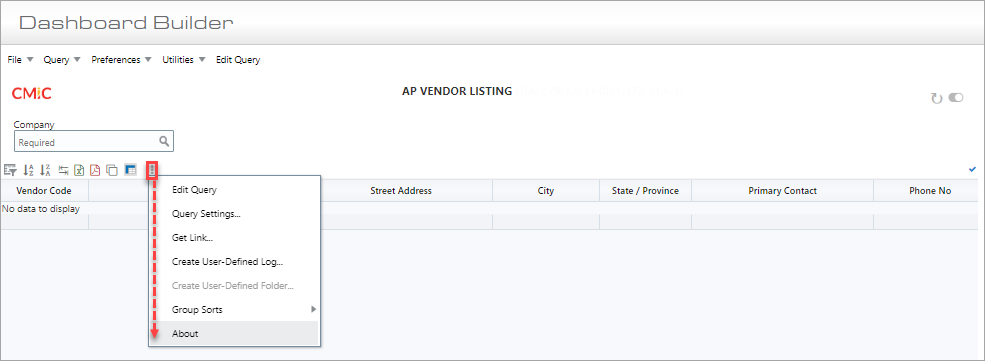
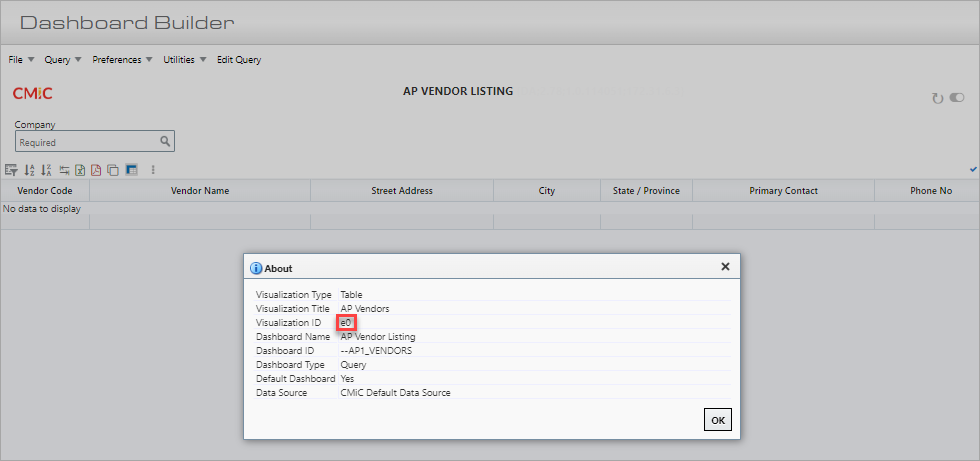
BI Dashboard Builder - Obtaining Visualization ID
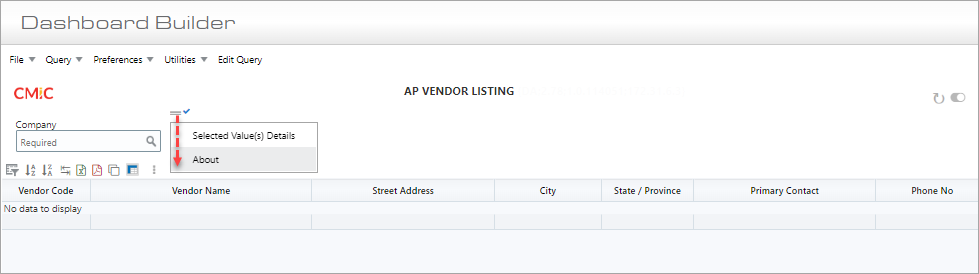
The visualization ID can be obtained from the About menu option in the Visualization Menu (e.g., e0), as shown in the screenshots above.
Parameter List
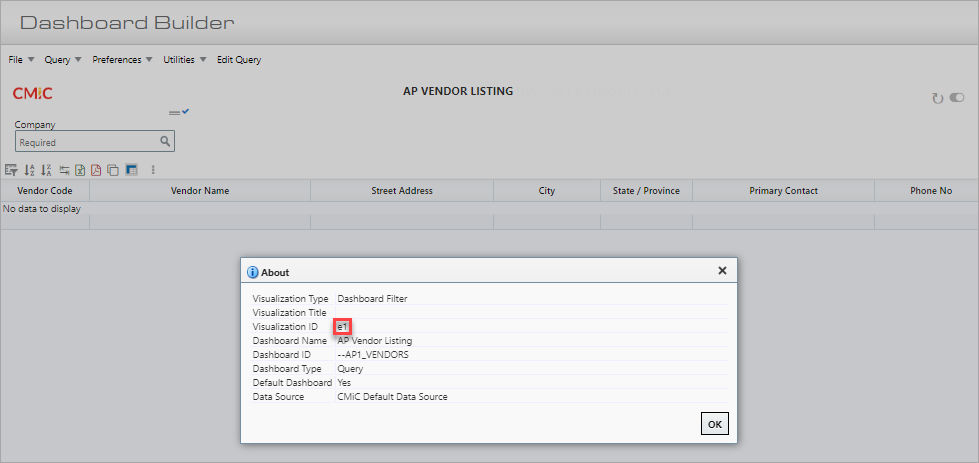
BI Dashboard Builder - Obtaining Parameter Name
The parameter list is a reference to a field which value you need to pass to the page filter. The format in the parameter list should be VisualizationID = BlockName_FieldName.
The VisualizationID in the parameter list can be obtained from the page filter’s About menu option (e.g., e1), as shown in the screenshots above.
The BlockName_FieldName can be found in one of two ways:
-
If the field is editable, place the cursor into the field and click the About icon. The About pop-up window should have the block name and field name.
-
If the field is not editable, place the cursor into another field that is editable and click the About icon. The About pop-up window should have the program name and block name.
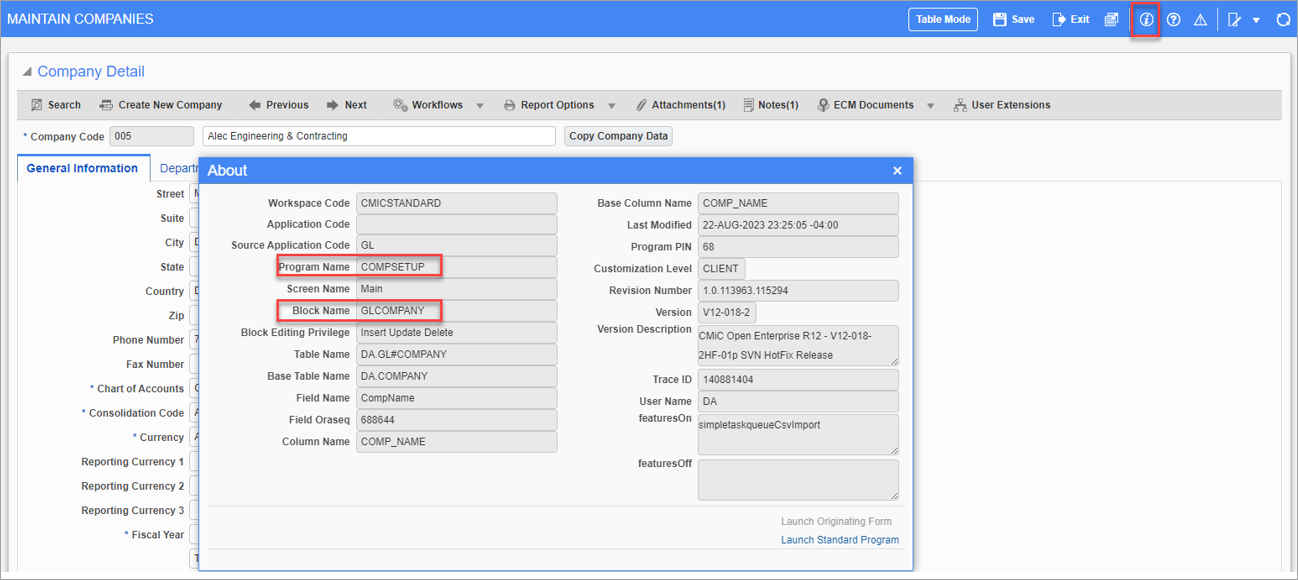
The screenshot above shows the program name and block name highlighted in the About pop-up window.
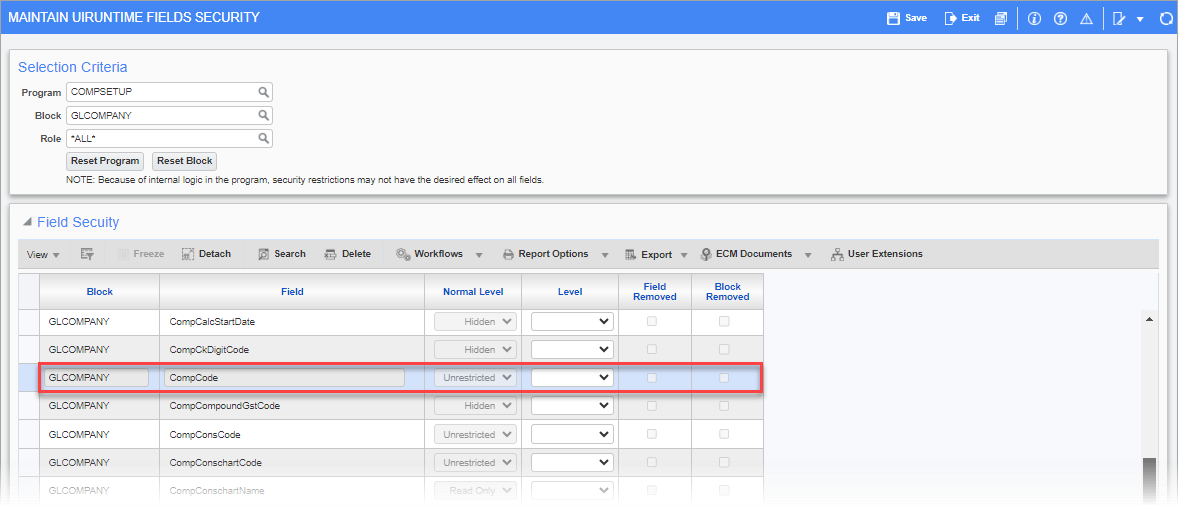
Pgm: SDFLDSEC – Maintain UIRuntime Fields Security; standard Treeview path: System > Security > Field Security > UIRuntime Programs
Next, navigate to the Maintain UIRuntime Fields Security screen in the System Data module, and search for the field name. In this case, COMPSETUP is the program, GLCOMPANY is the block name and CompCode is the field name.
The parameter list should be e1 = GLCOMPANY_ CompCode.
Remove a Visualization
To remove a visualization that has been added to a UIRuntime program, click on the [Lite Editor] button in the console to put the screen to Edit mode. Click the Edit icon next to the visualization to open the Lite Editor pop-up window. In the Lite Editor pop-up window, click on [Remove Field Customizations] button. Click on the Close icon to close the pop-up window. Click on the [Lite Editor] button in the console to return the screen to View mode and refresh the screen. The visualization will no longer be displayed on the screen.