Using the UI Console tool, mobile versions of named consoles can be used instead when using Enterprise through a mobile device.
To create a mobile version of a named console, follow the instructions provided by the Customizing & Editing Consoles section, then follow these instructions when going to save the mobile version.
Create Mobile Console

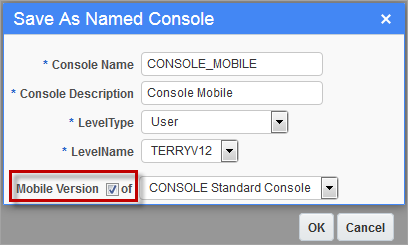
To save the customized console as a mobile version of the named console, click [Save As]. In the Save As Named Console pop-up window, shown above, check the ‘Mobile Version’ checkbox. Once the ‘Mobile Version’ checkbox is checked, the corresponding field will default to the console used as the base for the customized version, and the Console Name and Console Description fields will default to a recommended name and description for the new named console.
Since the ‘Mobile Version’ checkbox is checked, when a user on a mobile device logs into Enterprise with the console for which this mobile version was created, the system will detect that a mobile device is being used and that a mobile version of the Console exists, and it will load the mobile version instead.
Specify Mobile Version of Console

To specify a mobile version of a named console, so that the mobile version is loaded whenever the named console is selected through a mobile device, log into Enterprise with the named console for which its mobile version will be specified. Click the [Edit Mode] button, at the end of the console’s tabs, and then click the [More Edit Options] button. As shown in the above screenshot, use the Mobile Version field to select the Console’s mobile version, then click the [Save] button.
Remove Mobile Version Association from Named Console

To remove the mobile version specification from a named console, log into Enterprise with the named console for which its mobile version specification will be removed. Click the [Edit Mode] button, at the end of the console’s tabs, and then click [More Edit Options]. As shown in the above screenshot, use the Mobile Version field to select “None”, then click the [Save] button.