File – Menu
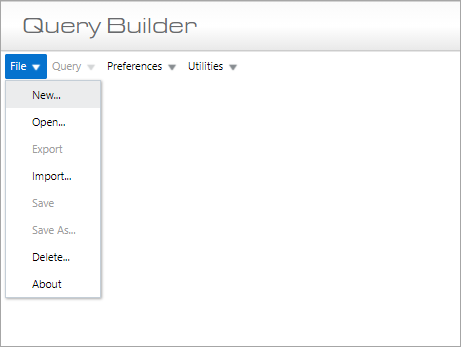
File drop-down menu
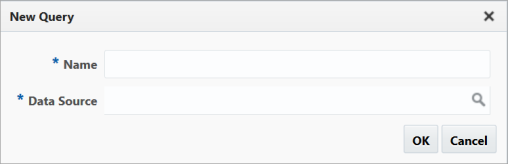
Use the New Query pop-up window to create a new query.
Name
Enter a name for the new query.
Data Source
Enter/select the data source to be used for the new query. A data source contains the folders (i.e., tables/views) to use to create the query’s table visualization. Table visualizations can either use data from a single folder, or data returned by joined folders.
After clicking [OK], the new query is loaded and ready to have a table visualization added.
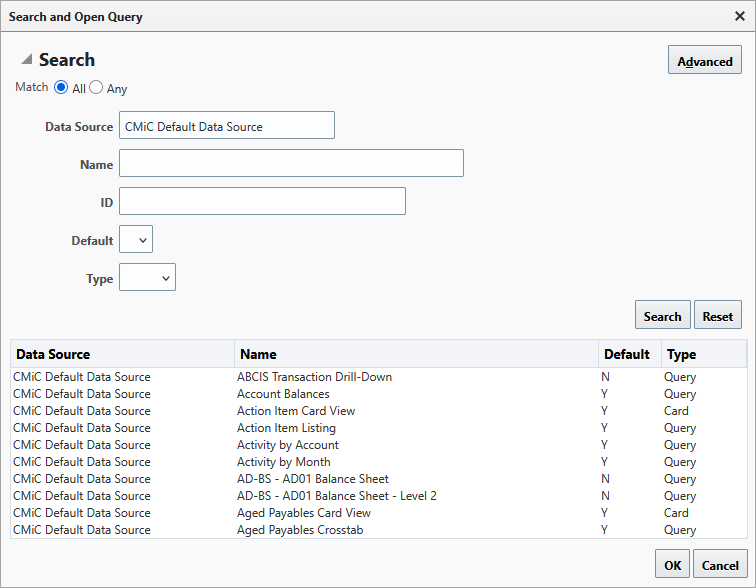
Use the Search and Open Query pop-up to search for and select a query/card to open.
NOTE: When BI Query Builder is accessed for the first time, none of the provided default queries/cards will be available to any user, until they are granted appropriate security access.
Use the Data Source and/or Name search fields to find a particular query or card, and note that the following wildcard characters can be used:
-
% (any string of characters)
-
_ (any single character)
Use the Default field to filter whether the query/card is a default provided with the system. Available options are “Y” or “N”.
Use the Type field to filter search by “Query” or “Card”.
Use the [Advanced] button to switch the pop-up to Advanced Search mode, shown below.
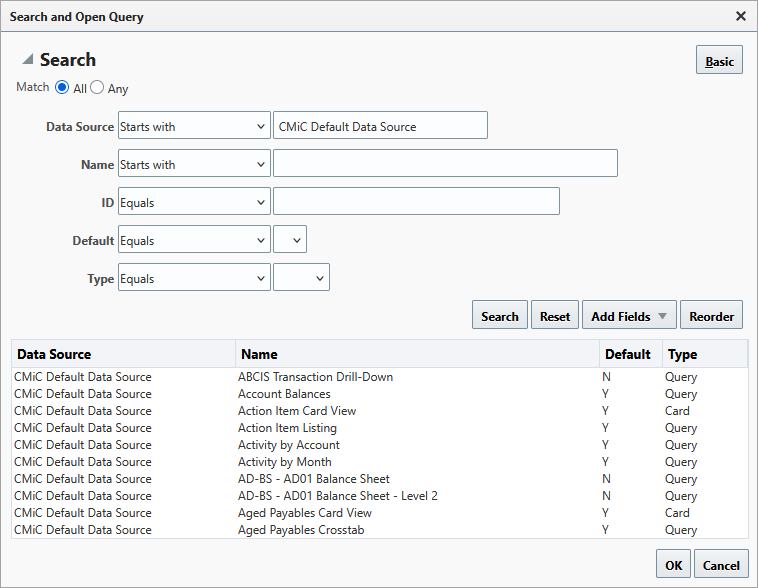
Advanced Search mode pop-up window
In Advanced Search mode matching operators can be used, search fields can be added, and search fields can be reset and reordered.
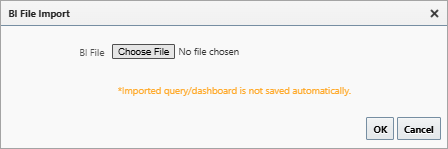
Use the Export and Import functionality is used to copy queries from one Enterprise environment to another. For instance, if queries are created in the Test/Development environment, they can be copied to the Production environment using this functionality.
This option is used along with the Export option to copy queries from one Enterprise environment to another.
Saves changes to query.
NOTE: The user will be unable to save a query if errors exist (missing fields, missing folder, etc.) and will be required to resolve these errors before the query will save. This functionality prevents broken visualizations from becoming corrupted to the point that they become unrecoverable.
![]()
Opens the Save As pop-up window, which can be used to create a copy of the current query by saving it with a different name.

Use the above Search and Delete Query pop-up window to search for and delete a query/card.
Use the Data Source and or Name search fields to find a particular query/card, and note that the following wildcard characters can be used:
-
% (any string of characters)
-
_ (any single character)
Use the [Advanced] button to switch the pop-up to Advanced Search mode, where matching operators can be used, and search fields can be added and reordered.
Use the Type field to filter search by “Query” or “Card”.
Use this option to display information about the application and its server.
Query – Menu
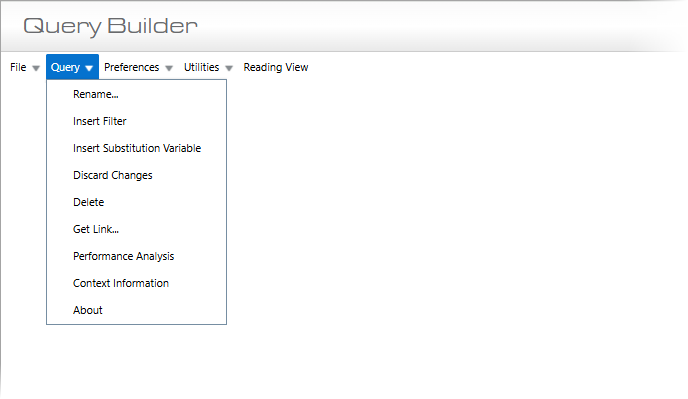
Query drop-down menu
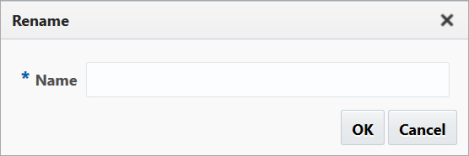
Use the above Rename pop-up window to rename the query.
This option is available if the screen is in Edit Mode. It is used to add a page filter to a query to dynamically control the data displayed by the query during runtime. Refer to Insert Filter (Page Filter) for more information on adding and configuring page filters.
NOTE: Dashboard filters in a query can be rearranged by drag n' drop, however, users must go to the dashboard filter's properties panel to configure its width (the height is not modifiable).
This option is available if the screen is in Edit Mode. It is used to filter visualizations using
substitution variables to which substitution value expressions have been applied. Refer to Insert Substitution Variable for more information on adding and configuring a substitution variable.
This option launches a pop-up window which prompts the user to confirm the discarding of all unsaved changes. Click [OK] to revert the query back to the way it was before the unsaved changes.
This option launches a pop-up which prompts the user to confirm the deletion of current query. Click [OK] to permanently delete it.
This option launches a pop-up window which displays the URL for the query, which can be right-clicked and copied using the context menu that appears.

The Performance Analysis pop-up window summarizes the performance of the dashboard. Each row in the pop-up window represents a visualization. Hovering your mouse over an individual row will highlight the corresponding visualization with an outline in the dashboard.
This feature allows users to analyze the load time of specific visualizations on their BI reports. The performance analysis helps users narrow down the visualizations that take long to load. It also shows the folders and calculated fields that are employed by each visualization
To learn more about improving the performance of your BI reports, refer to BI Dashboard Builder - Designing Fast BI Reports.
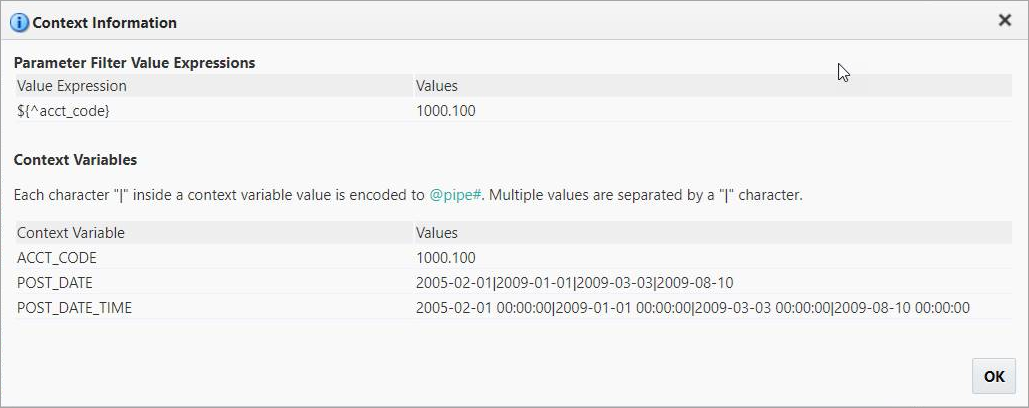
This pop-up window is used to show context variables and values, as well as filter value expressions and values.
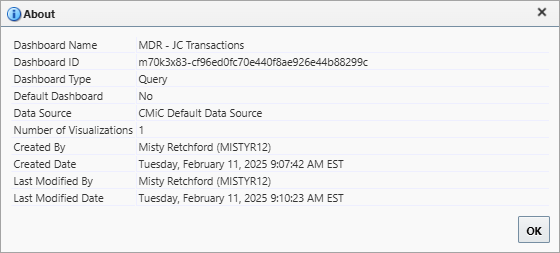
This pop-up window is used to display information about the application and its server.
Preferences – Menu
Preferences drop-down menu
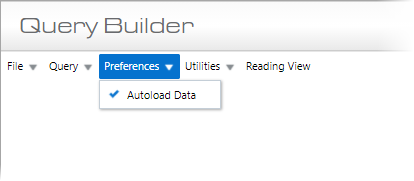
The Autoload Data checkbox is intended for query developers, to allow them to build queries faster, without waiting for data to load while building. This checkbox is a user setting of the Query Builder tool and is not an attribute of a query. The checkbox will stay checked or unchecked for each user (as it’s the user’s setting) and will apply to all queries (as it’s the tool’s setting).
When launching a query via URL, the data will always be loaded.
NOTE: An option does not exist to turn autoload data on or off when a query is launched via URL.
By default, this checkbox is checked for the user.
If checked, when a query is loaded, data is automatically loaded for the table visualization. Otherwise, when a query is loaded, the table visualization will not be loaded with data, and to do so requires clicking the Refresh icon  . This is handy when building a query, and you wish for it to load quickly.
Utilities – Menu
Utilities drop-down menu
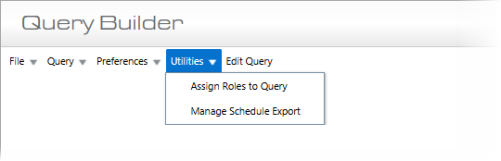
Assign Roles to Query – Query Security
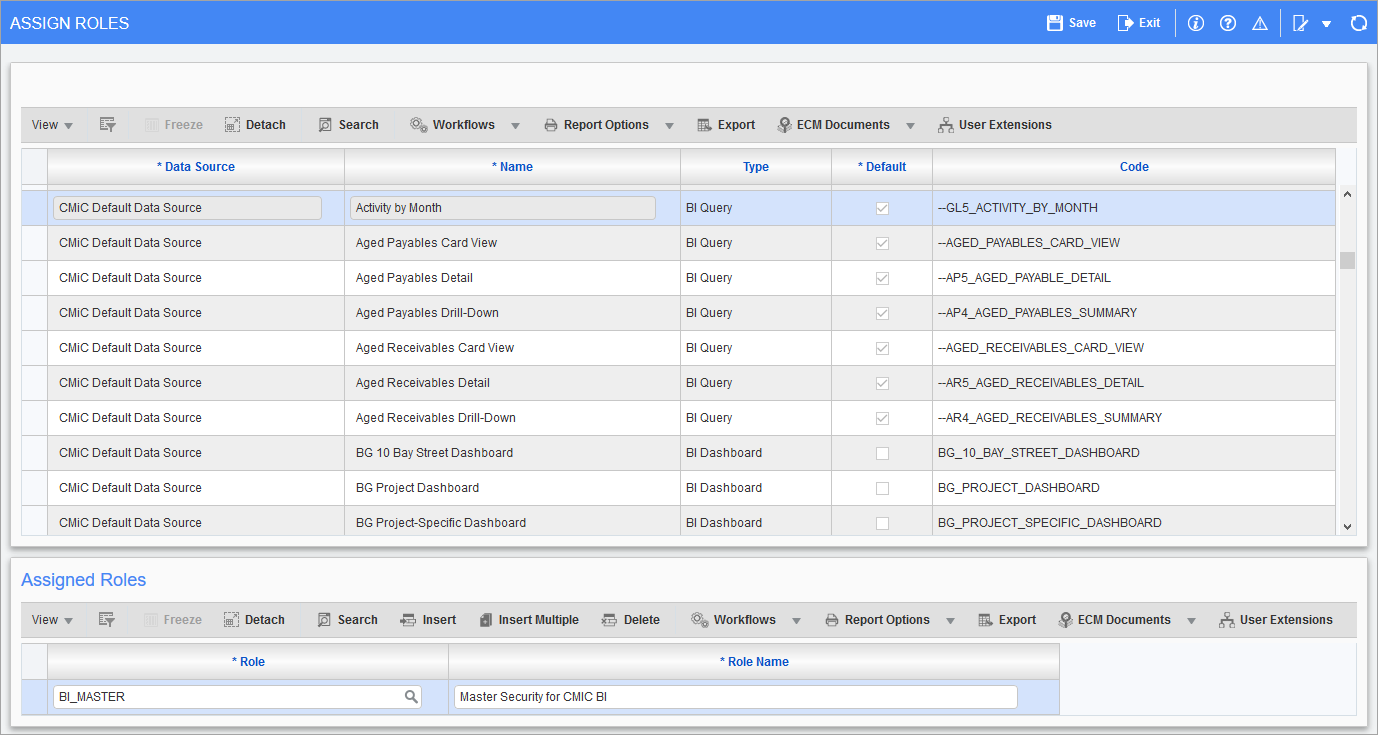
Assigning security roles to queries
To grant a user access to a query, the security role to which the user belongs must be assigned to the query. This can be done using the “Assign Roles to Query” option under the Utilities menu of BI Query Builder (shown above), by an administrator with the system privilege BISECMNG. This option is available without opening a query. Depending on security setup, the administrator’s security role may also need to be assigned to the Assign Roles to Query program using the Assign Roles to Programs screen in the System Data module, as shown in the screenshot below.
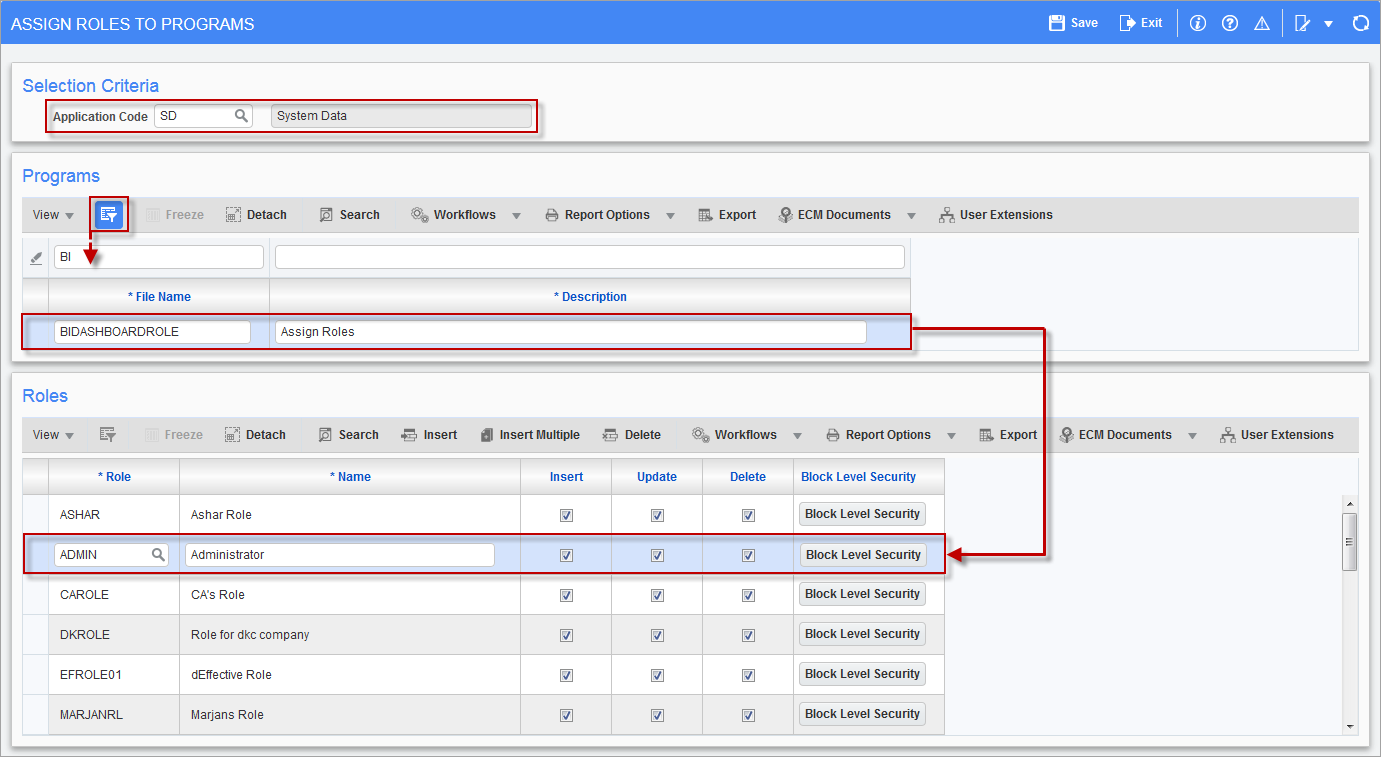
Pgm: FORMROLE – Assign Roles to Programs; standard Treeview path: System > Security > Roles > Assign Roles to Programs
This option launches the Scheduler Log screen. All scheduled reports are tracked in the Scheduler Log screen in the System Data module, where users can review, verify, and manage upcoming report executions. This centralized view offers transparency and control over all automated deliveries. For users who also have the SDSLDELJOB privilege, the Scheduler Log goes a step further by allowing deletion of scheduled jobs directly from the interface. For details on using this log, refer to System Data - Scheduler Log. To learn more about scheduling an export, refer to Schedule Export.
[Reading View] – Button
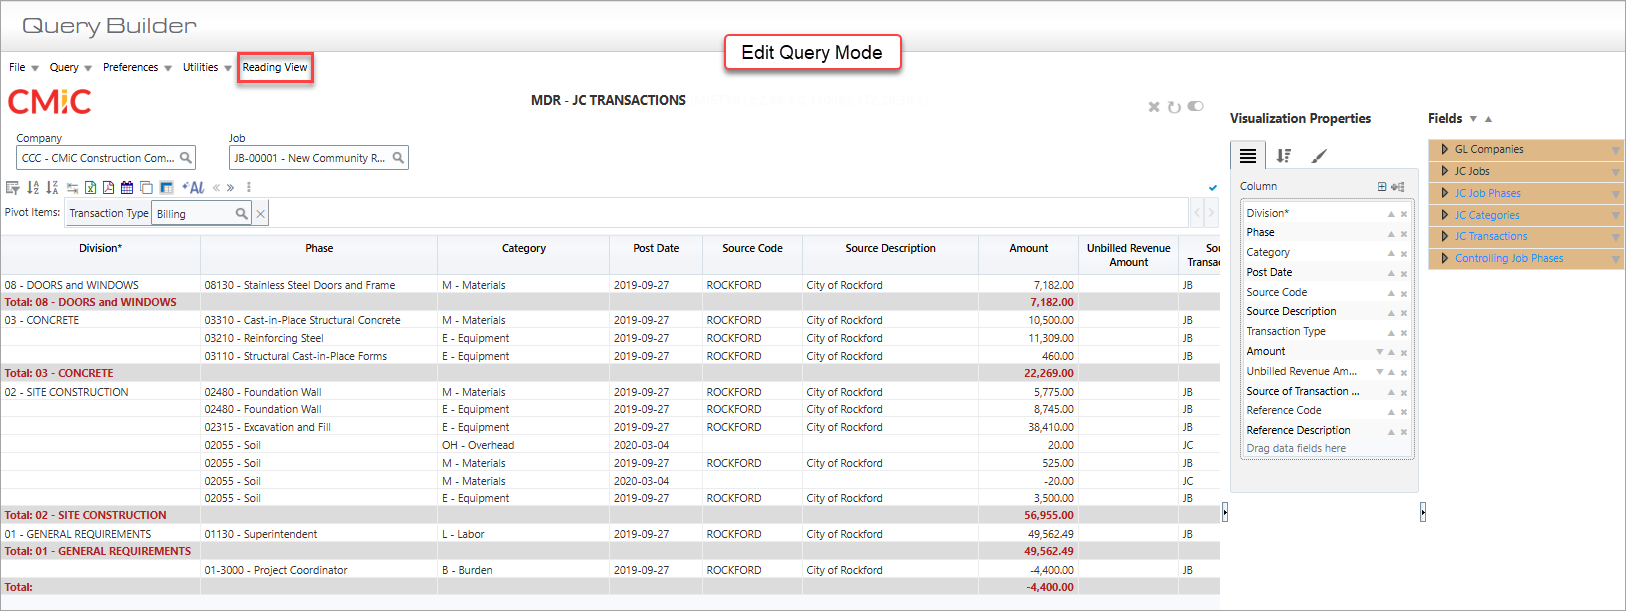
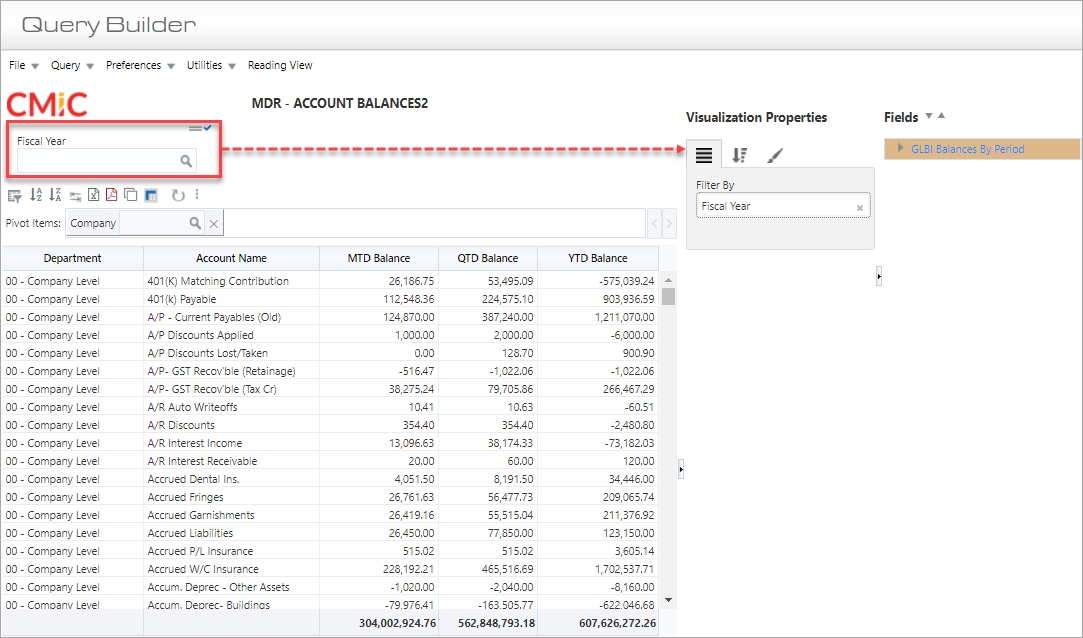
If the [Reading View] button is visible, the screen is in Edit Query mode, as shown above, and the Visualization Properties and Fields panes are available to create and edit queries.
Click the [Reading View] button to switch the screen to Reading View mode, which displays the query as it would be displayed to end-users, for review and testing purposes.
[Editing View] – Button
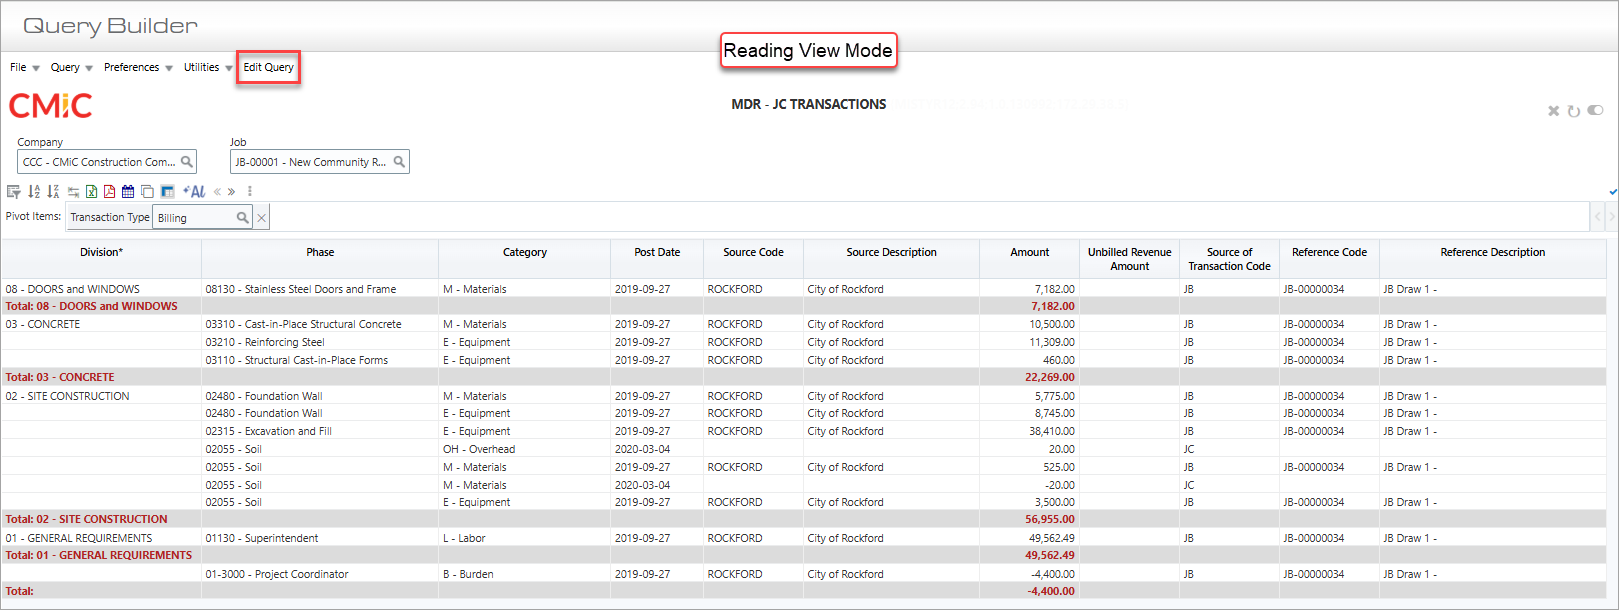
If the [Edit Query] button is visible, the screen is in Reading View mode, as shown above, and the Visualization Properties and Fields panes are not available. In Reading View mode, the query is displayed as it would be to end-users for review and testing purposes.
Click the [Edit Query] button to switch the screen to Edit Query mode, which is used to create and edit queries.