Overview
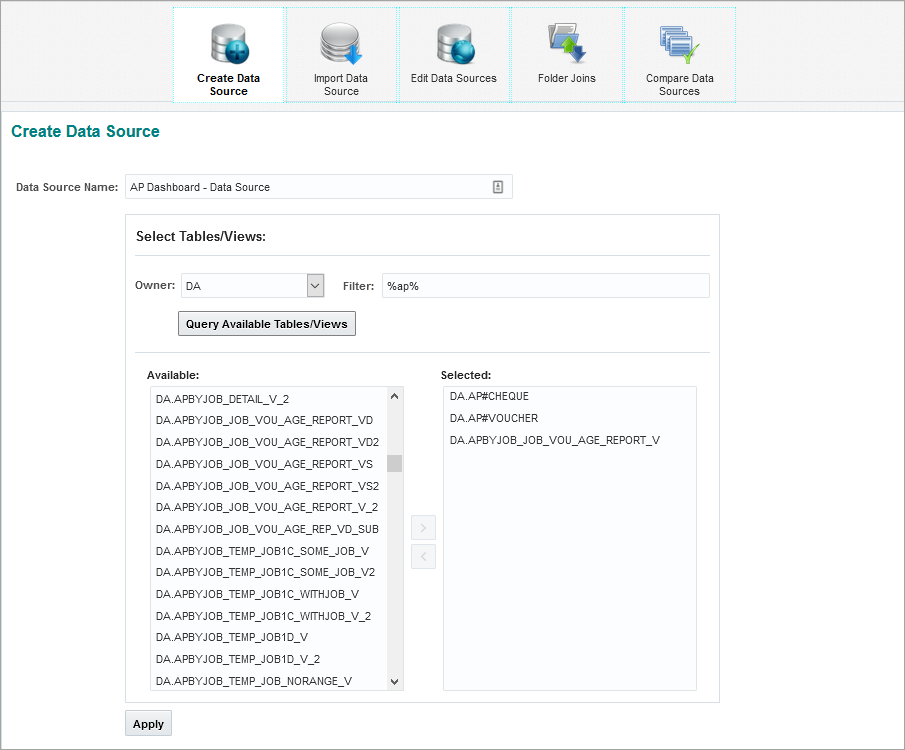
Create Data Source Screen
The Create Data Source screen of BI Catalog Builder is used to create a new data source to add to the catalog of data sources available for the BI Dashboard Builder tool. The list of created data sources is available on the Edit Data Source screen.
Using this Screen
This screen would typically not be required, as the default data source provided with this application, CMiC Default Data Source, has been created to contain nearly all the tables and views in the system, with nearly all the joins that could be required between them optimally predefined. If CMiC Default Data Source is insufficient, because a different join type is required or a table\view needs to be added to it, it is recommended that a copy of CMiC Default Data Source is created for modification and use.
NOTE: It is recommended that CMiC Default Data Source is not modified, as patch installations and hotfixes update this default data source, overwriting any changes made to it and making any dependent dashboards unusable.
For details about creating a copy of CMiC Default Data Source, please refer to Copy (Data Sources, Business Areas, Folders) for more information.
If a new data source is required, and it does not make sense for it to be a copy of CMiC Default Data Source, then this screen would be used to create it, as outlined by the following steps.
NOTE: For CLOB type table/view columns, Catalog Builder will generate calculated fields that will truncate CLOB values if they are longer than 4000 characters, adding “[TEXT TRUNCATED]” to the truncated value if truncation occurred. Users can modify this calculation if necessary. This applies when fields are being generated, such as when a new data source is created on the Create Data Source screen or when a data source is edited on the Edit Data Source screen using the context menu options “Edit Business Area” or “Refresh”.
Creating Data Source – Steps
The following three steps are taken to create a new data source when it does not make sense for it to be a copy of CMiC Default Data Source.
Step 1: Create Data Source

First, the following actions are performed via the Create Data Source screen:
Part 1: Data source is created and defined.
Part 2: Data source’s business areas are created and defined.
Step 2: Edit Data Source

Second, the following actions are performed via the Edit Data Source screen:
-
Provide more meaningful names for folders and files of new data source’s business areas.
-
Set the default aggregate function for the fields.
-
Set which fields are visible in the BI Dashboard Builder tool, for simplification’s sake.
Step 3: Modify Folder Joins

Third, the Modify Folder Joins screen is used to define the joins between the tables/views that will return the desired data to be charted in the BI Dashboard Builder tool.