Overview
NOTE: The following procedure is the new Vertex installation process, which takes effect starting with the October 2024 Vertex release. If installing a version of Vertex prior to October 2024, please refer to our previous set of installation instructions here.
As of October 2024, the new Vertex installation process involves using a new v10 or v12vertexinstall utility, zipped with the Vertex zip file.
To help guide you through this new installation process, step-by-step instructions are provided below. If you have any additional questions, please reach out to your account manager.
Download Vertex Update File and Installation Utilities
Use the following steps to download the latest Vertex update file, which also includes the new installation utilities. These utilities will always be provided in the zip file. Once the correct install utility has been set up, you only need to install the Vertex update zip file for subsequent release installations.
-
Download the Vertex update zip file (e.g., vertex-2024-10-OCT-R2.zip) from the CMiC FileShare site.
-
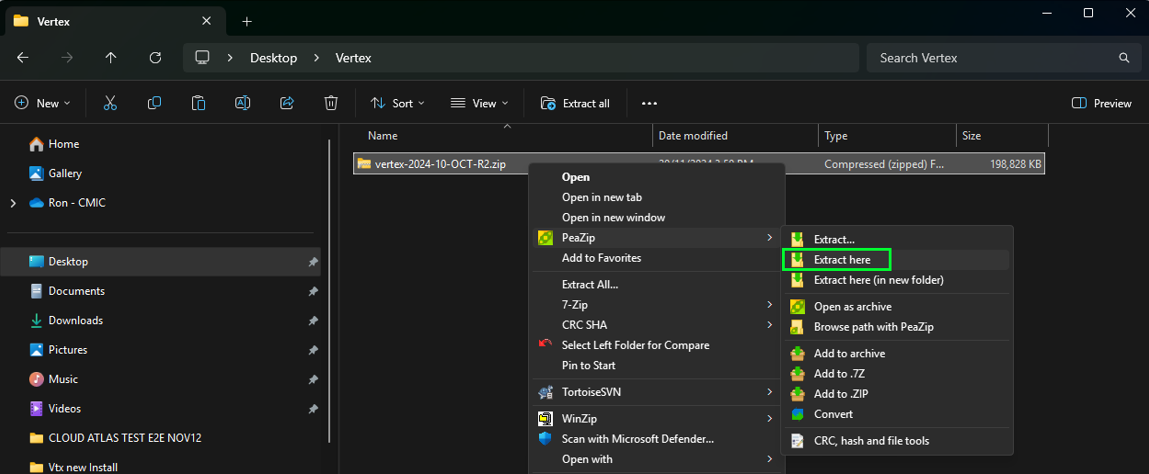
Right-click on the zip file and select “Extract here” to extract the contents directly to the current folder.
-
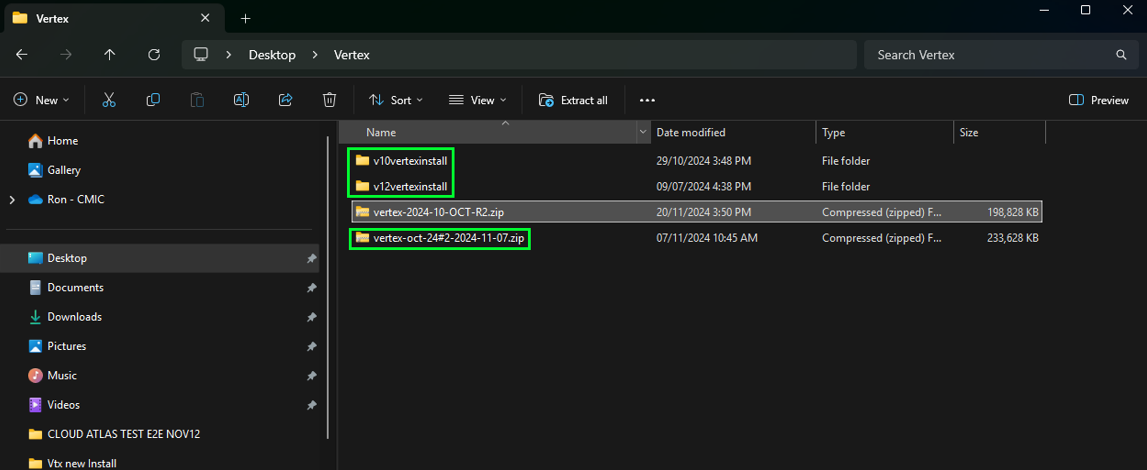
There should be 3 extracted files:
-
v10vertexinstall folder (v10x Vertex installation utility)
-
v12vertexinstall folder (v12 Vertex installation utility)
-
Vertex update zip file (e.g., vertex-oct-24#2-2024-11-07.zip)
-
-
Depending on the system version you are using, either v10 or v12, copy the relevant folder for the Vertex installation utility (e.g., v10vertexinstall or v12vertexinstall) to the drive where the Vertex updates will be installed (e.g., D drive). This directory will house the scripts required to install the Vertex update zip file.
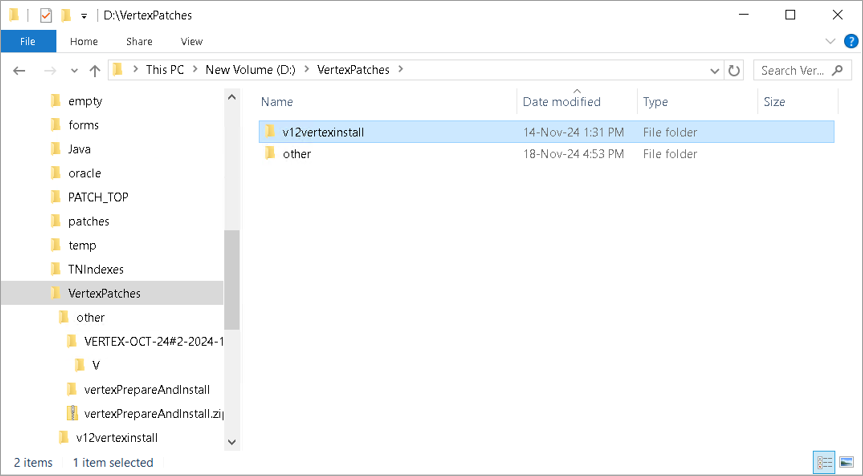
Example: The folder “v12vertexinstall” has been copied into a folder (e.g., VertexPatches) on the D drive of this server.
-
Copy the Vertex update zip file into a separate folder on the same drive (e.g., D drive). This is the folder where the Vertex updates will be installed. It will contain the actual Vertex update zip files that will be installed whenever there are updates (usually monthly).
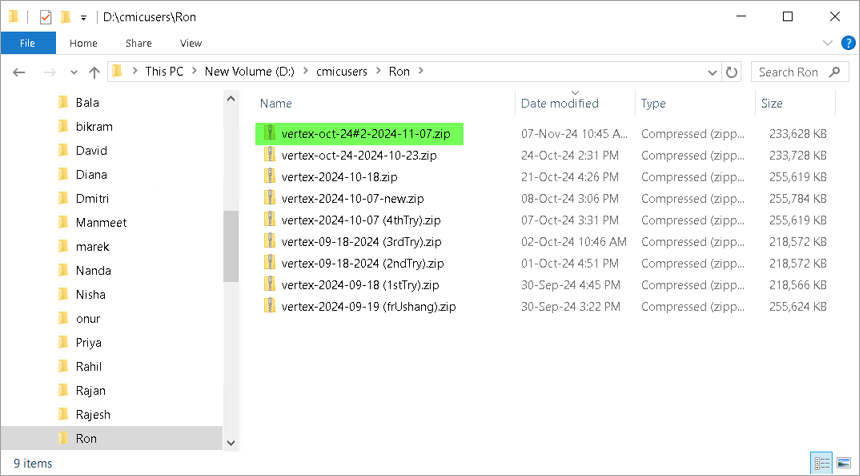
Example: The Vertex update file “vertex-oct-24#2-2024-11-07.zip” has been copied to the D drive in a separate folder on this server.
Install Vertex Update
Use the following steps to install the latest Vertex update.
-
Open the Command Prompt as Administrator.
-
Enter and run the command below to change the path to where the file “vertex_install.bat” exists (inside of the copied vertexinstall folders).
Example:
-
cd /d D:\<InstallUtilityFolder>\v12vertexinstall (for v12)
-
cd /d D:\<InstallUtilityFolder>\v10vertexinstall (for v10)

Example: cd /d D:\VertexPatches\v12vertexinstall
-
-
On the next line, enter and run the command below to initialize the installation:
vertex_install.bat D:\<VertexZipFolder>\<ZipFileName>(space)<Environment>
Where:
-
<VertexZipFolder> = Folder where the Vertex zip file is copied
-
<ZipFileName> = Full name of the file including “.zip”
-
<Environment> = Server/environment folder name
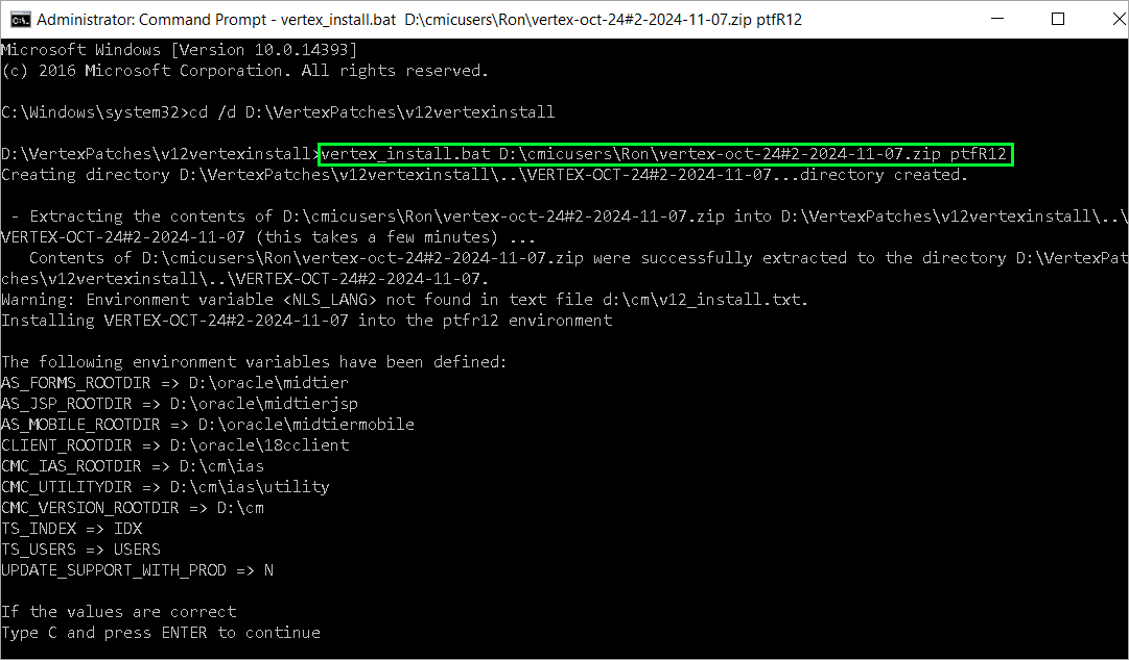
Example command:
vertex_install.bat D:\VERTEX\vertex-oct-24#2-2024-11-07.zip <Environment>
-
-
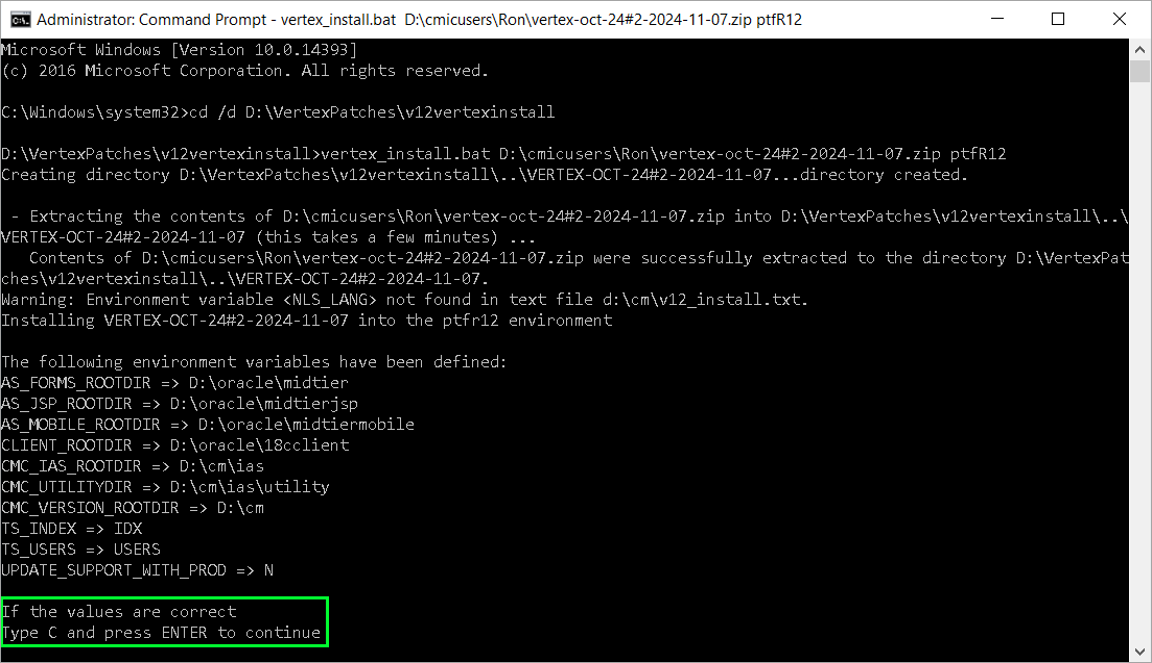
After extracting the file, the environment variables will be listed. A prompt will display if the values are correct. Type c and press Enter.
-
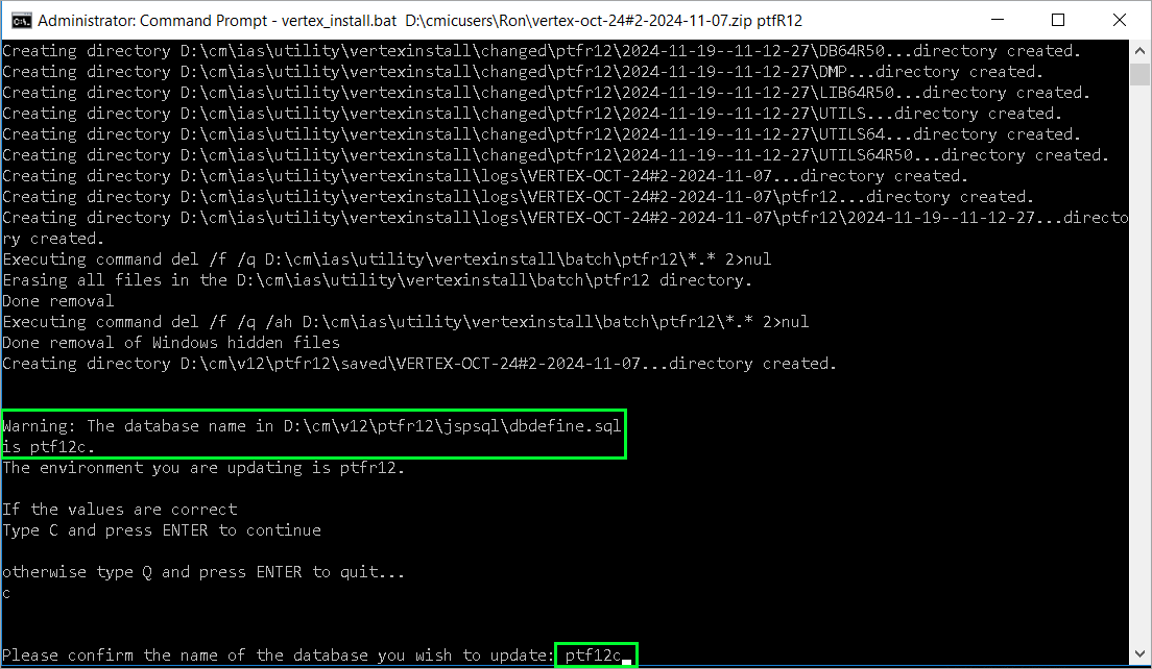
Directories will be created, and the utility will detect the database name. A prompt will display if the values are correct. Type c and press Enter. Then type the correct database name.
-
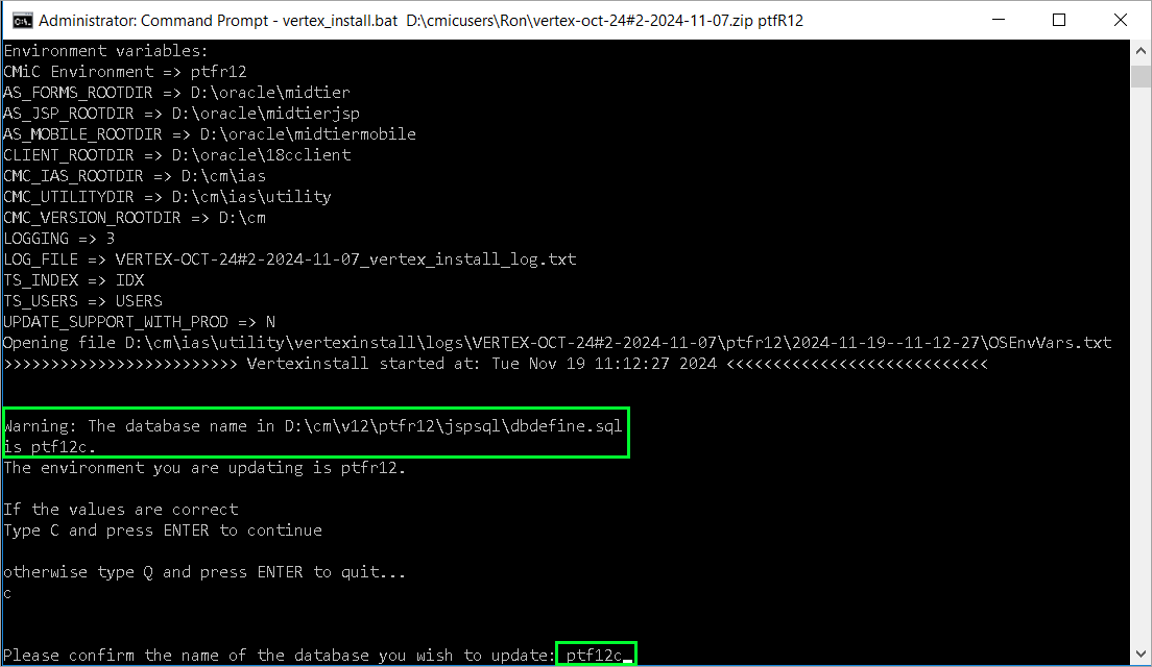
The Vertex update will continue, and another prompt will display if the values are correct. Type c and press Enter. Then type the correct database name for the second time.
-
The Vertex update installation will proceed and should be successful.
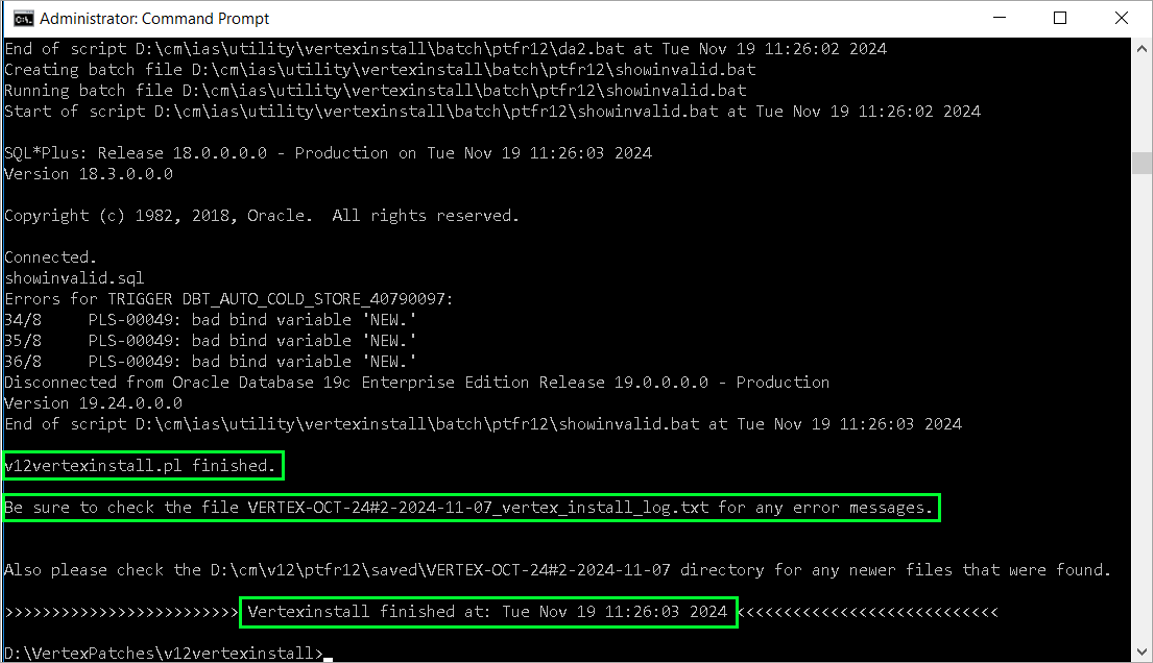
-
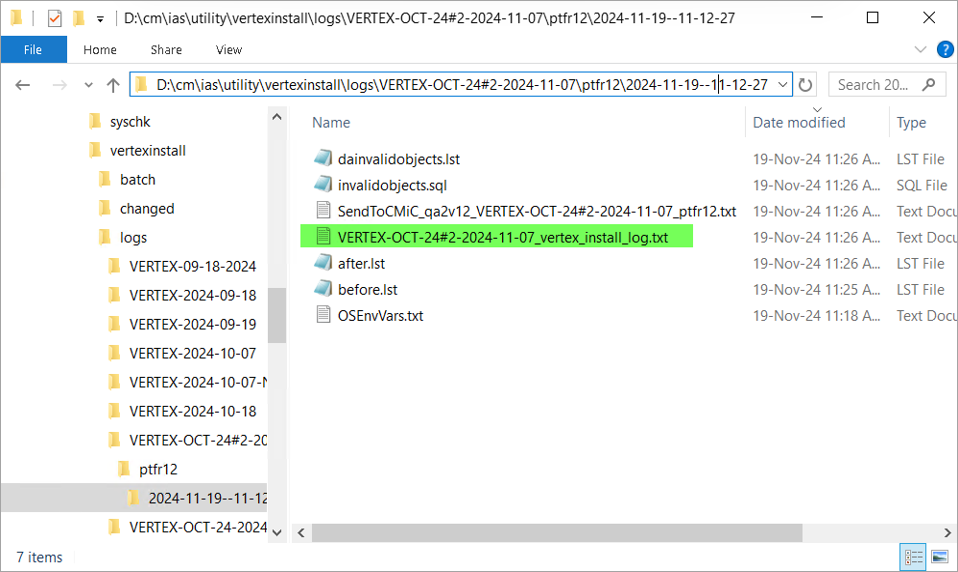
Execution logs will be created under the path:
D:\cm\ias\utility\vertexinstall\logs\<ZipFileName>\<Environment>\<timestamp>
Where:
-
<ZipFileName> = Vertex zip file name used without the “.zip”
-
<Environment> = Server/environment folder name used
-
<timestamp> = Time and date of installation
-
-
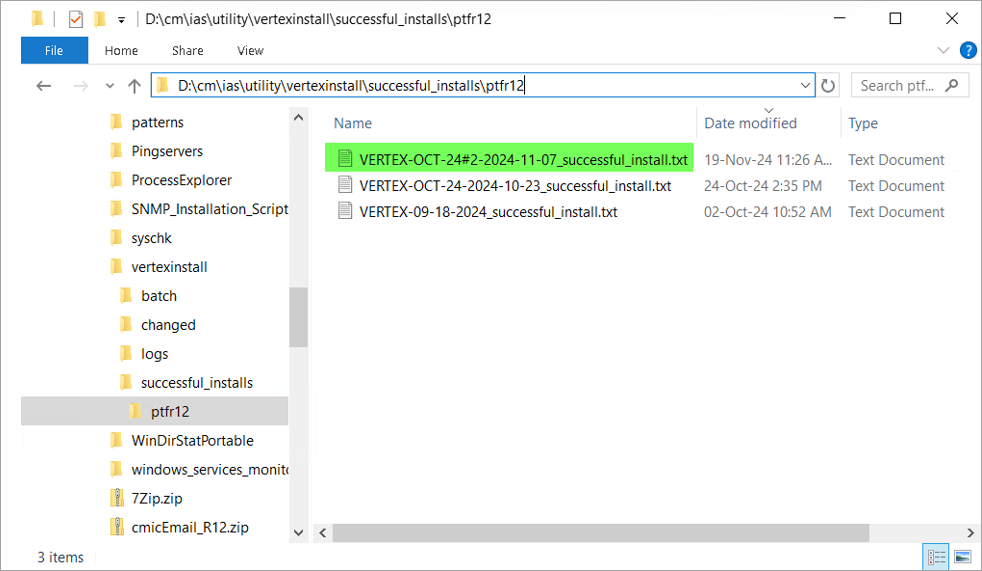
A text file about successful installation will be created under the path:
D:\cm\ias\utility\vertexinstall\successful_installs\<Environment>
-
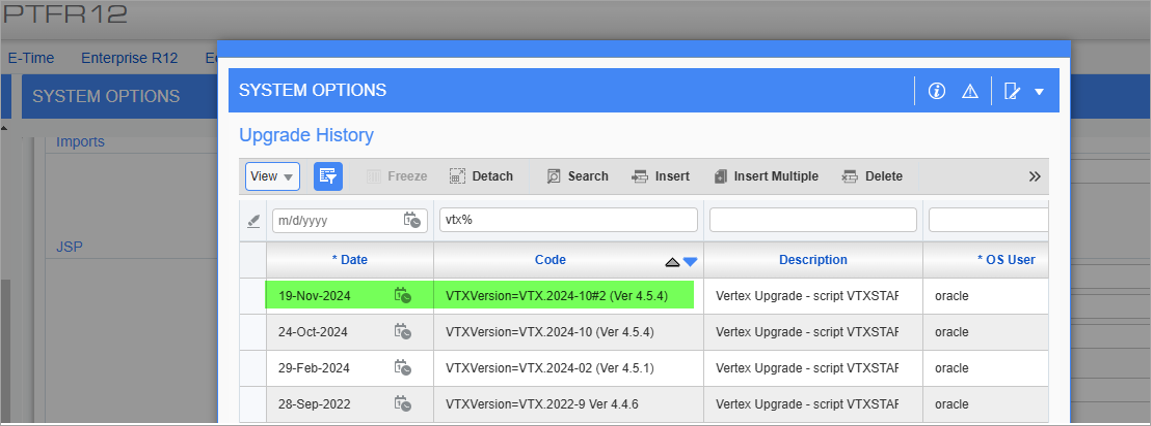
Verify successful Vertex update installation by logging into the CMiC software and navigating to System > Setup > System Options in the System Data module. Under the General tab, scroll down to the Patch Info section and click on the [Upgrade History] button. In the Upgrade History pop-up window, locate Vertex (vtx) entries by using the Query by Example function.
Additional Command Parameters
The following additional parameters are useful for various Vertex installation situations (e.g., installation on Linux machines). These optional parameters can be added after the <Environment> parameter of the vertex_install.bat command.
cmicroot
If the cmic root is not the default D:\cm path, the parameter “cmicroot=<Path>” can be added to the command:
vertex_install.bat
D:\<VertexZipFolder>\<ZipFileName>(space)<Environment>(space)cmicroot=<Path>
Where <Path> is the intended path to the cmic root.
Example 1: On a Windows server, the cmic root path is E:\cm.
vertex_install.bat D:\vertex\vertex-oct-24#2-2024-11-07.zip env cmicroot=E:\cm
Example 2: On a Linux server, the cmic root path is /opt/cm.
vertex_install.sh /opt/ias/vertex/vertex-oct-24#2-2024-11-07.zip env cmicroot=/opt/cm
script
The Vertex installation has two stages: copy files from patch to the Vertex installation folder of the environment, and update the database.
Users have the option to proceed or bypass the database update step on each Vertex installation by adding “script=<yes|no>” to the command:
vertex_install.bat
D:\<VertexZipFolder>\<ZipFileName>(space)<Environment>(space)script=<yes|no>
Where <yes> will proceed with the database update and <no> will bypass the step.
NOTE: By default, or by using the standard command, the parameter is always set to “script=yes”.
Example: When there are a few instances of the Vertex installation, and the database update will be skipped on the next installation.
vertex_install.bat D:\vertex\vertex-oct-24#2-2024-11-07.zip env script=no
issue
This additional parameter is useful when a user installs the Vertex update with a corresponding CMiC 360 issue or SF Case created for the task. When this parameter is used, there will be additional steps performed after installation:
-
Installation logs will be zipped automatically:
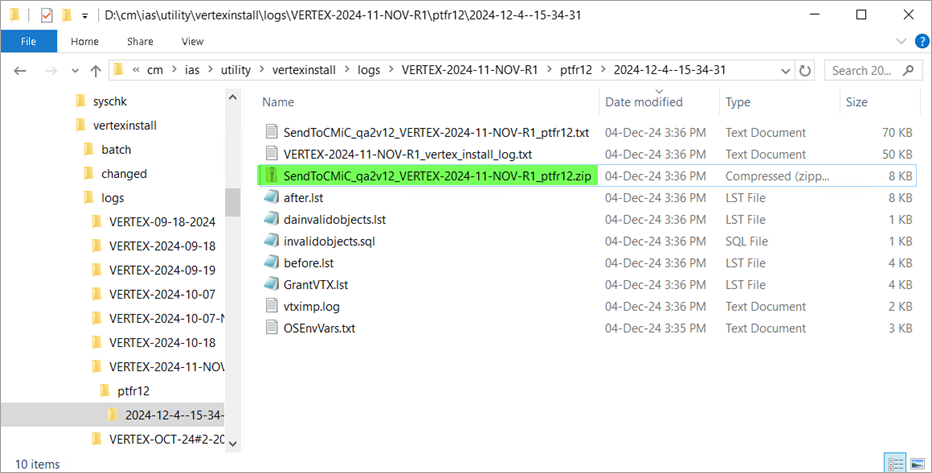
-
The zipped logs will be sent as an attachment in an email from dbaservices@cmic.ca to patchlogs@cmic.ca.
This can be done by adding “issue=<360issue#>” or “issue=<SFcase#>” to the command:
vertex_install.bat D:\<VertexZipFolder>\<ZipFileName>(space)<Environment>(space)issue=<360issue#> or <SFcase#>
Where <360issue#> is the issue number in CMiC 360, and <SFcase#> is the issue number in Salesforce.
Example 1: When an installation report is needed for a CMiC 360 issue:
vertex_install.bat D:\vertex\vertex-oct-24#2-2024-11-07.zip env issue=12.12345
Example 2: When an installation report is needed for an SF Case (Salesforce):
vertex_install.bat D:\vertex\vertex-oct-24#2-2024-11-07.zip env issue=12345678
Troubleshooting
The following section will help you troubleshoot any potential issues that may arise.
Should I install Vertex on a non-JSP server?
No, you should not install the new Vertex on MIDTIER/FORMS and MOBILE/API servers. Vertex must only be installed and run on a JSP server.
NOTE: If you are currently running Payroll in FORMS, please reach out to your account manager for further assistance.
How do I prevent the Vertex installation from re-running the database update for each installation?
You can bypass the database update step for each Vertex installation by using the “script” command parameter. If you add "script=no" to the command, it will not update the database. Otherwise, if you use "script=yes", it will always update/run it on each installation. Refer to script in the Additional Command Parameters section for more information.
What should I do if Weblogic is blocking the Vertex installation?
If Weblogic is blocking the Vertex installation, you may see an error message similar to the one shown below. The name of the file which fails to copy will vary.
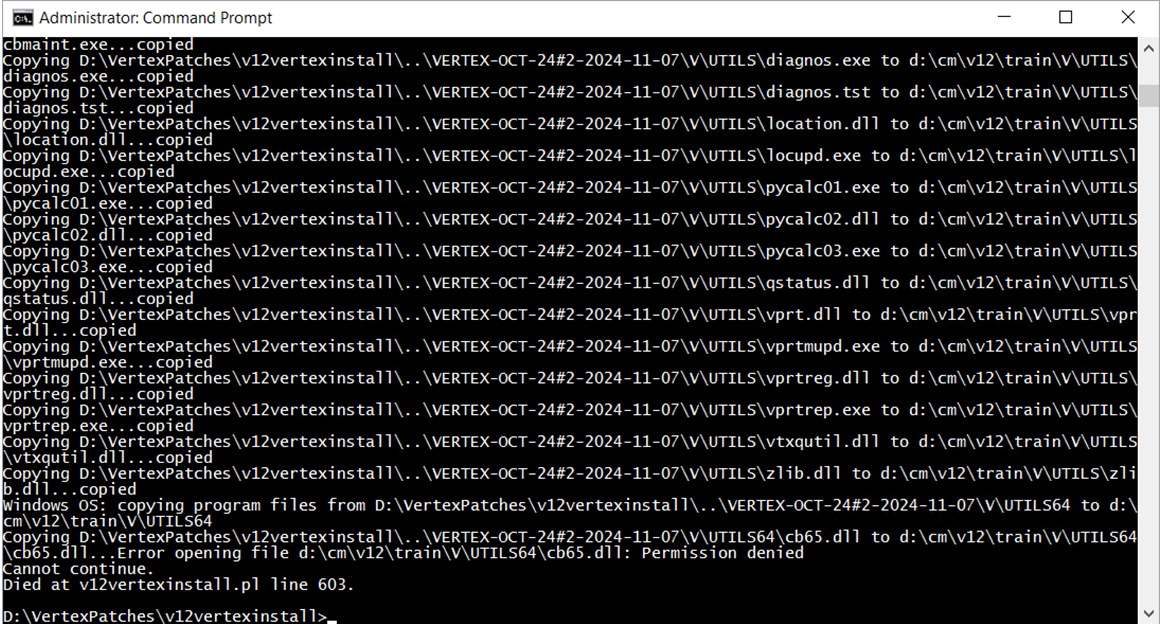
This issue is triggered when someone runs a payroll in the system, which causes Weblogic to place an OS lock on a file in the Vertex folder.
The Vertex installation attempts to update the Vertex folder by copying/replacing a file, but due to this OS lock the file cannot be updated and the Vertex installation fails.
There are two options available for resolving this issue:
-
Shut down/restart Weblogic. This should be done after hours to minimize disruption.
-
Use Process Explorer to identify the process which has locked the file, which is most likely the Weblogic process. Close the Weblogic process to unlock the file.