Bank Reconciliation
Pgm: BANKRECFM – Bank Reconciliation; standard Treeview path: System > Global Tables > Electronic Reconciliation > Bank Reconciliation Query
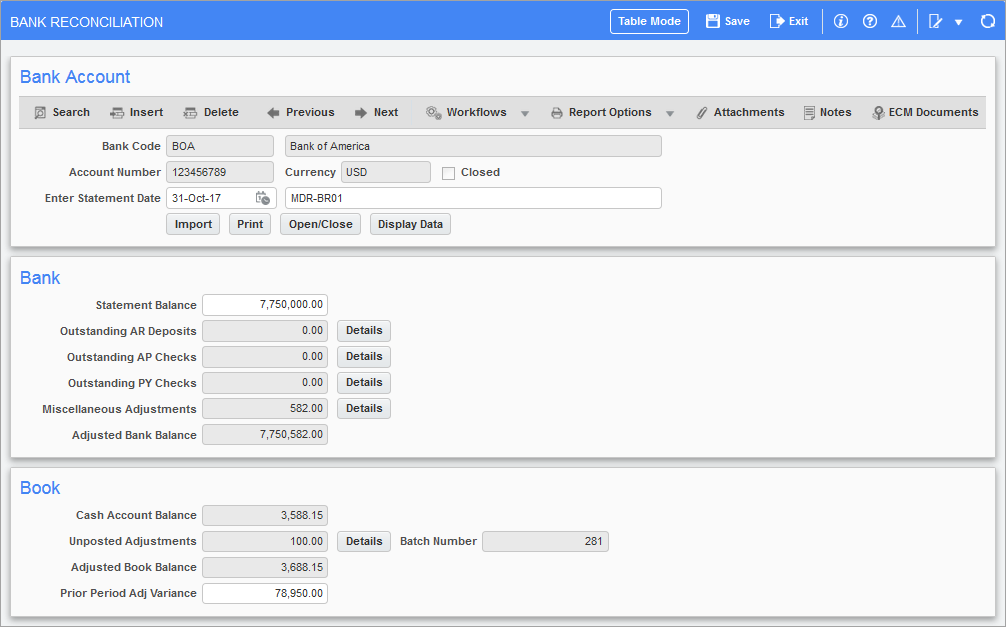
The purpose of reconciliation is to account for differences between the actual bank balance and the balance recorded in your accounting system. This is done by reviewing AP and AR checks to determine which were not deposited, and by entering adjusting transactions to make the book cash account balance equal to the bank balance. AP and AR clerks can manually flag checks and receipts as reconciled within the AP and AR modules, or alternatively, bank reconciliation can be performed by a GL administrator using the Import function in this program. Depending on your organization’s practices, bank reconciliation can be performed three ways:
AP/AR/PY Clerk Manual Reconciliation – Method 1
The AP, AR and PY modules require that clerks manually flag checks, vouchers and receipts to be reconciled. Within the Bank section of the Bank Reconciliation screen, the GL administrator can see if there are any Outstanding AR Deposits, AP Checks, PY Checks, or Miscellaneous Adjustments, and have the clerks reconcile these amounts within their respective screens.
GL Manual Reconciliation – Method 2
GL administrators can use the Bank Reconciliation program to manually reconcile any outstanding AR Deposits, AP Checks and PY Checks by selecting the [Details] button on the Bank Reconciliation screen (Bank section) and manually flagging the boxes to reconcile.
GL Import – Method 3
The Import function in the GL Bank Reconciliation program allows the GL administrator to import Electronic Bank Reconciliation files and statements for processing, overriding the manual entry of reconciling checks and receipts. Select the bank you are reconciling for and click the [Import] button to upload the file. Click [Process] to process the reconciliation. The Alert and Status fields display messages to verify that the import and process ran successfully, or if there is an error.
For more information on Method 1 and Method 2, please refer to General Ledger - Bank Reconciliation for carrying out the steps of reconciliation within the Enterprise system.
The following section briefly describes Method 3 for importing Bank Reconciliation files.
Bank Check Reconciliation

Pgm: BACHKREC – Bank Check Reconciliation; standard Treeview path: System > Global Tables > Banking > Bank Reconciliation
This screen allows the user to import and process bank reconciliation files to electronically reconcile checks. CMiC supports many bank file formats for the reconciliation of checks. Refer to General Ledger - List of Bank Reconciliation Formats for more information.
NOTE: The Bank Check Reconciliation screen is the same program that is launched from the [Import] button on the Bank Reconciliation screen.
Bank
Select the bank you are reconciling for using the LOV.
File Format
When a bank is selected, the Bank Check Reconciliation import file format for that bank will automatically default in the File Format field. Each bank has its own bank reconciliation import file format, which is specified on the Banks Maintenance screen (standard Treeview path: System > Global Tables > Banking > Banks). Multiple accounts can be combined into one input file.
Verify Check Paid Date – Checkbox
If ‘Verify Check Paid Date’ is checked, date verification will be performed to verify the date in the bank reconciliation file compared to the actual check date.
If this option is unchecked, date verification will not be performed, and the program will only verify the check number and check amount.
[Import] – Button

Pop-up window launched from the [Import] button on the Bank Check Reconciliation screen; standard Treeview path: System > Global Tables > Banking > Bank Reconciliation
Click on the [Import] button to import the reconciliation file for the selected bank. The number of “Total Records Inserted” will appear in the upper left-hand corner of the screen. Close the Import File pop-up window by clicking the [Close] button and then click on the [Process] button.
[Process] – Button
After the file has been successfully imported, click on the [Process] button to begin the reconciliation process. The processing status will be displayed in the Status field. To verify the reconciliation process, users can print out the Reconciliation Reports (standard Treeview path: System > Global Tables > Banking > Electronic Reconciliation > Reconciliation Report).
Reconciliation Report
Pgm: BA1000 - GT Bank Reconciliation Report; standard Treeview path: System > Global Tables > Banking > Electronic Reconciliation > Reconciliation Report
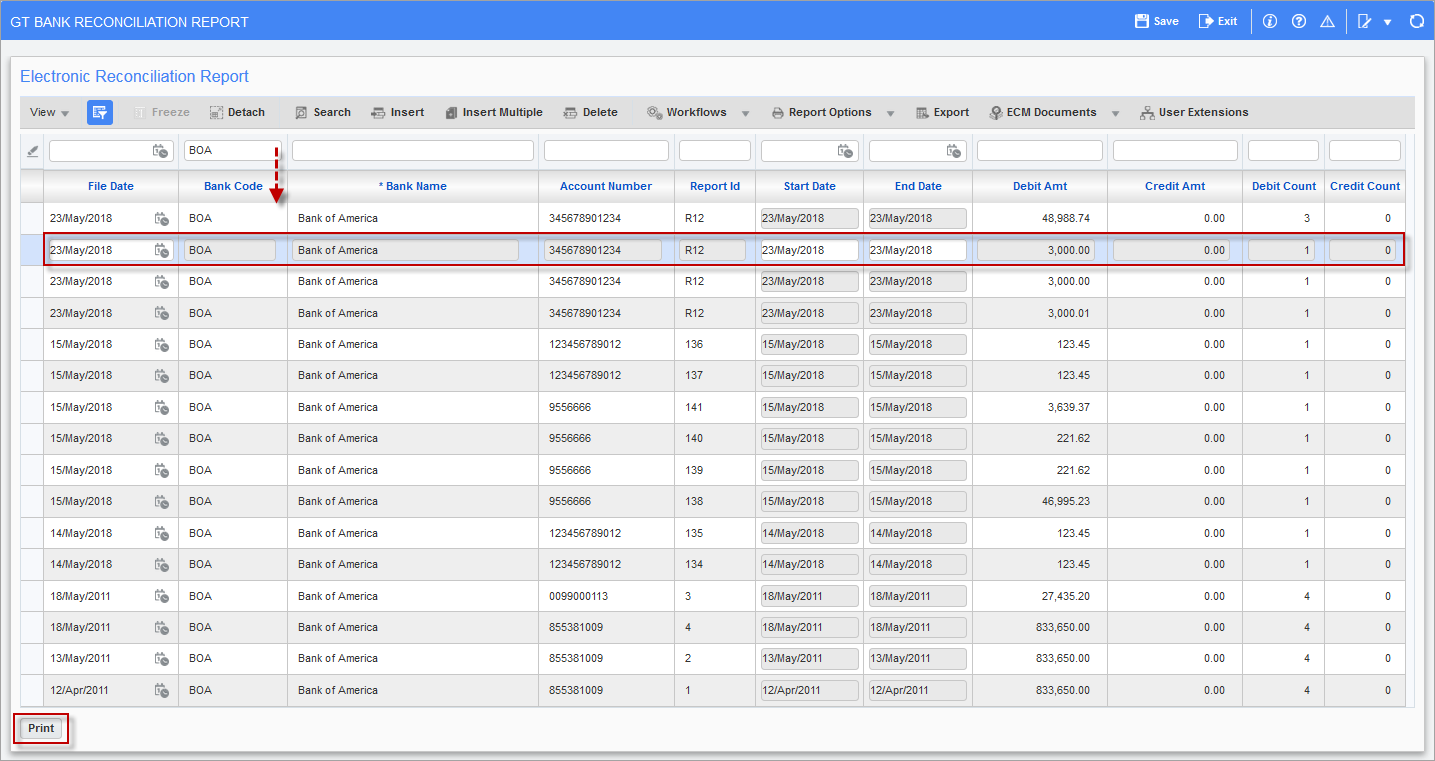
The GT Bank Reconciliation report screen is used to verify the reconciliation process. The system creates a separate report for each bank account. Select an Electronic Reconciliation Report and click the [Print] button to print out the report. The following screenshot shows an example of an Electronic Bank Reconciliation Report.

Example of an Electronic Bank Reconciliation Report (BA1000)