Overview
Many of the UIRuntime screens have an interface that allows users to print reports associated with the screen. The following steps illustrate how to use this feature.

The following illustrates an example of setting up a Form Letter Definition in the Purchase Order Entry screen.
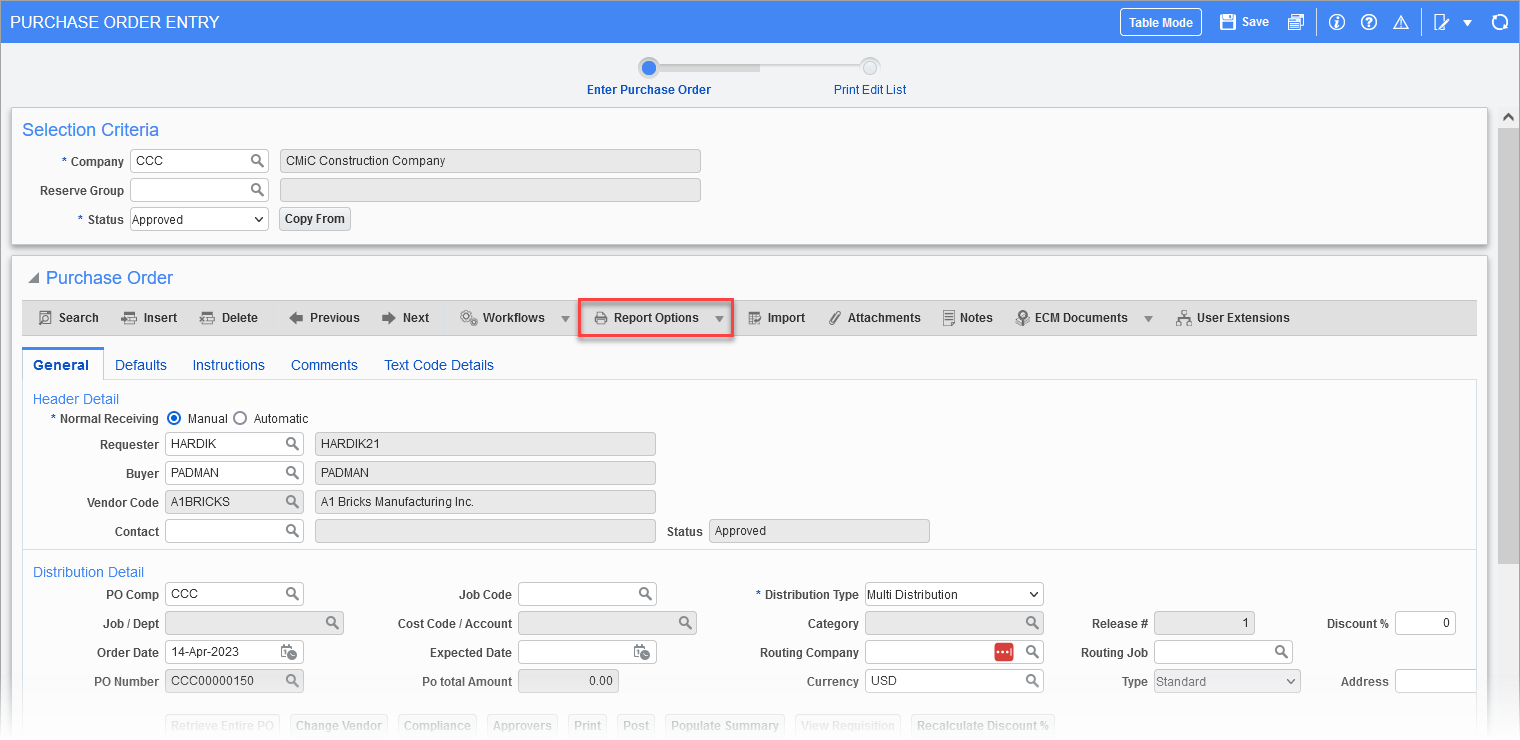
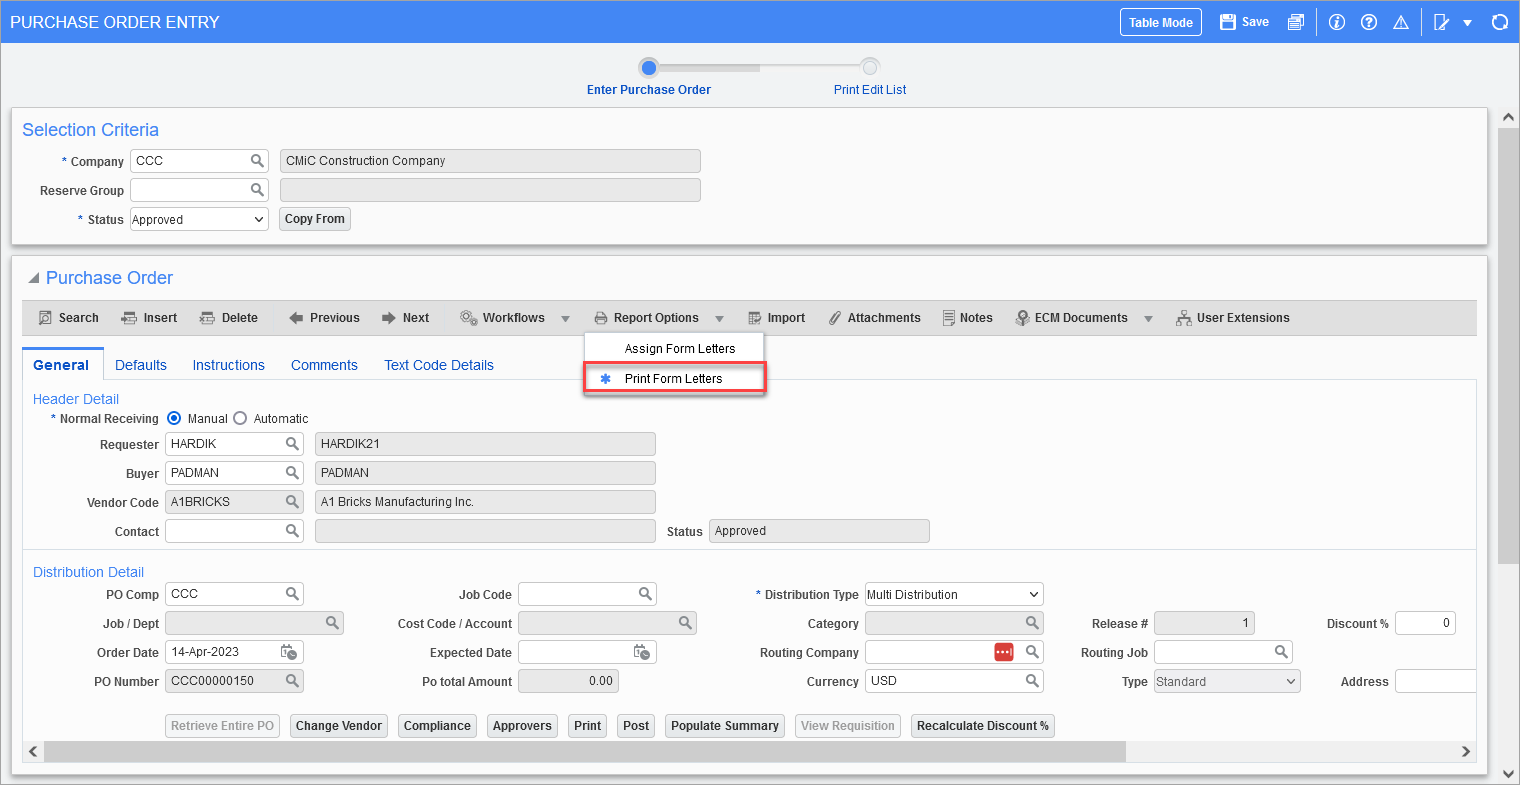
We open the individual purchase order in Forms mode and print using the [Report Options] button in the Block Toolbar of the Purchase Order section, using a custom Form Letter Definition.
NOTE: The general guideline for setting up a Form Letter Definition is documented in steps 1 to 3 of Microsoft® Integration Package - Create MIP Word® Document using Microsoft Word® Based Template.
Process
-
Create the Form Letter Definition. Users who want to use a custom view to build upon the report need to register the data source. Once the view to be added is known and we know that the view is not registered yet, we need to insert the record in the Register Form Letter Data Source.
NOTE: Public cloud customers only have access to the views in the CMIC_REPORT_VIEWS schema. Enterprise customers have access to views in the DA schema.
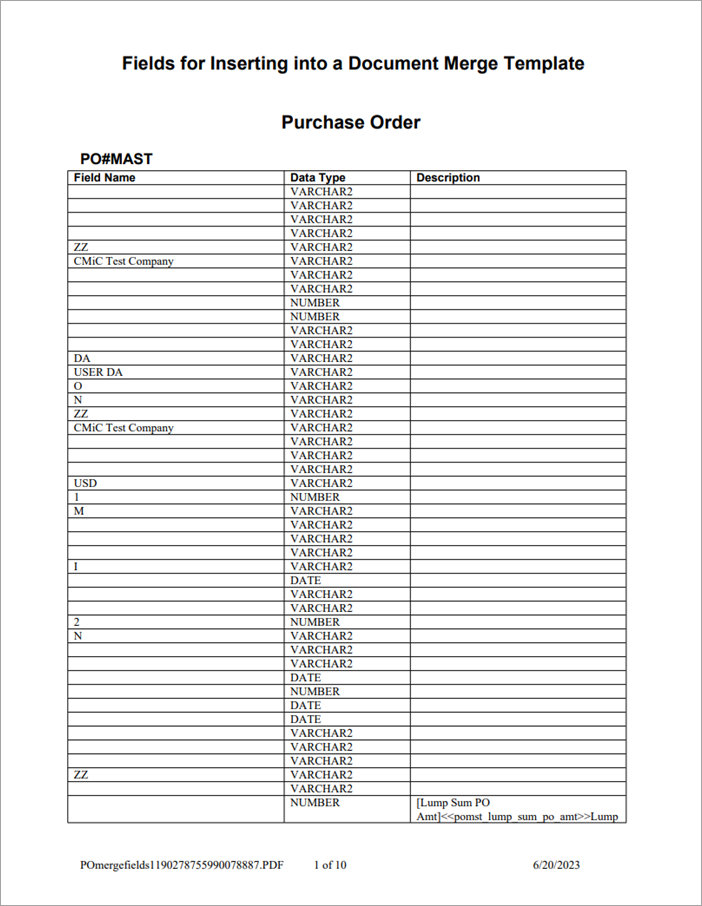
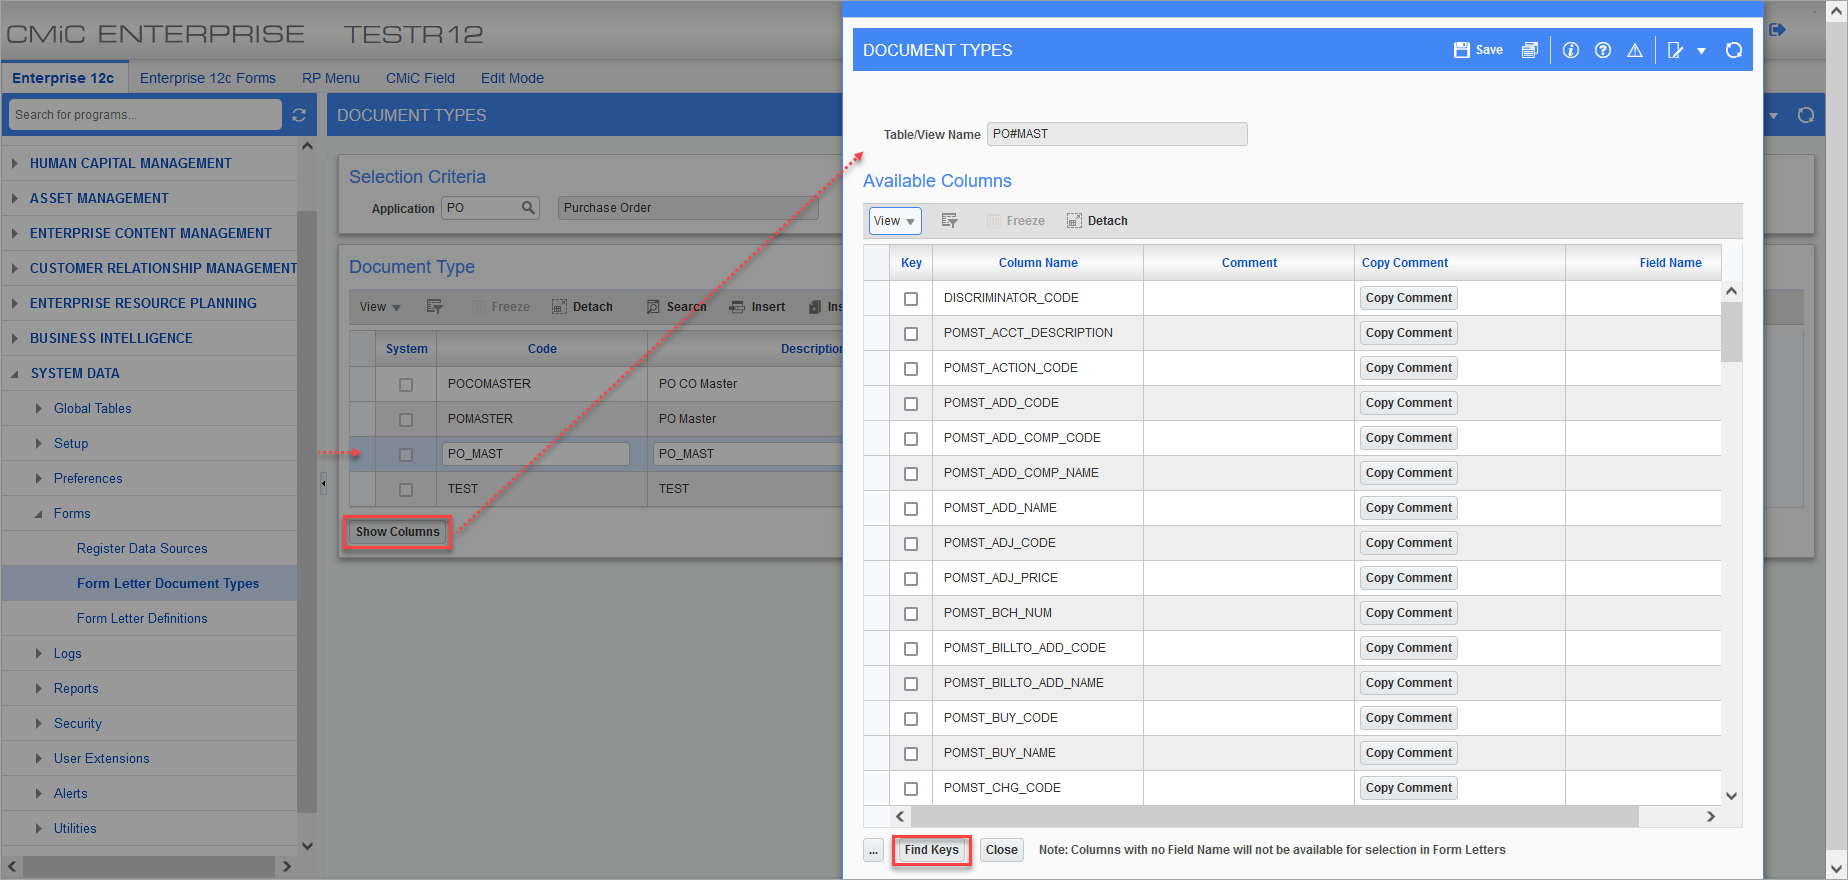
The screenshot below shows registration of the view PO#MAST as a data source.
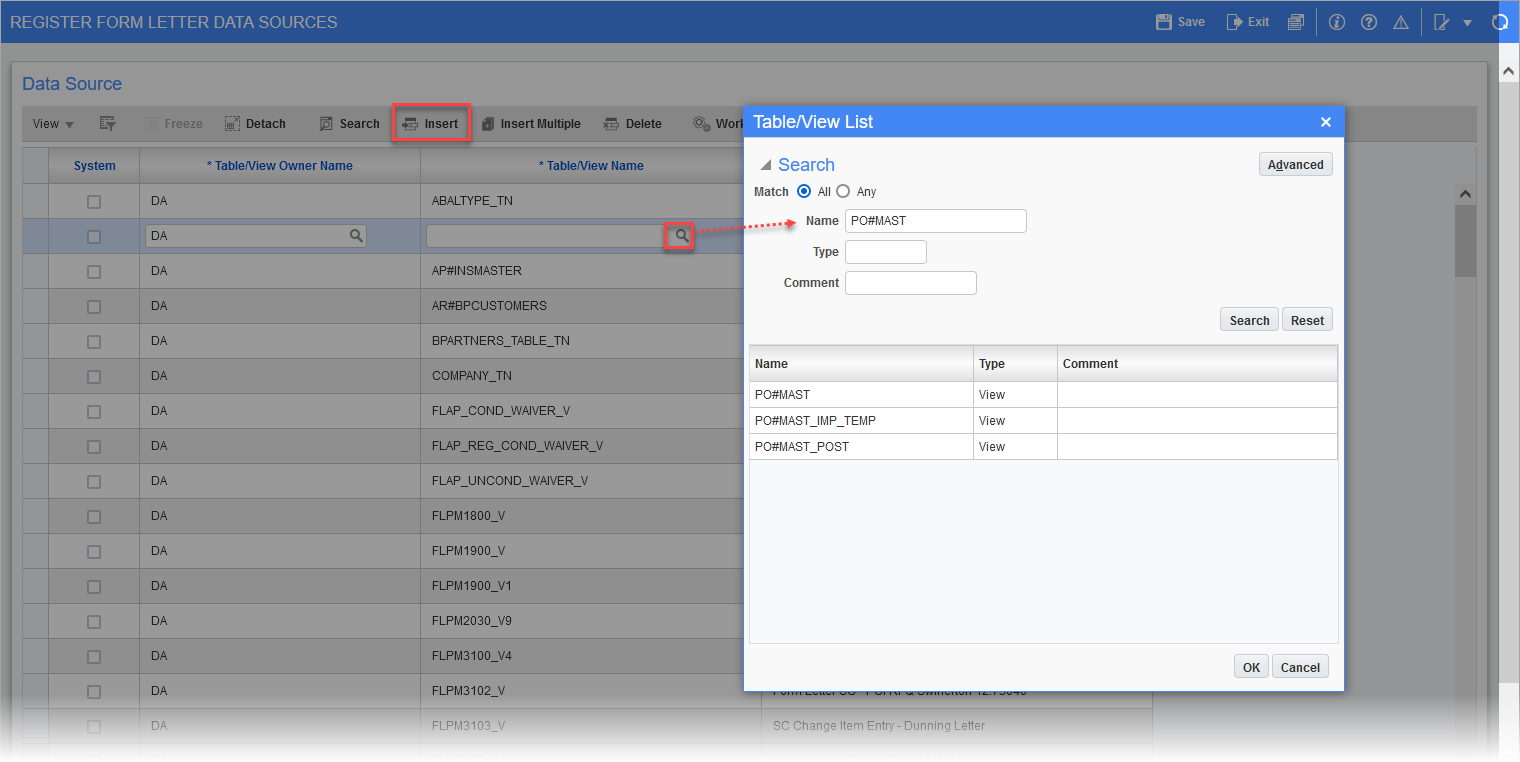
Pgm: SYSDREG - Register Form Letter Data Sources; standard Treeview path: System Data > Forms > Register Data Sources
-
Create a Form Letter Type associated with the data source you added. Please see System Data - Form Letter Document Types.

Pgm: SYSDOCTP – Form Letter Document Types; standard Treeview path: System > Forms > Form Letter Document Types
-
Next, create a Form Letter Definition on top of the Form Letter Type.
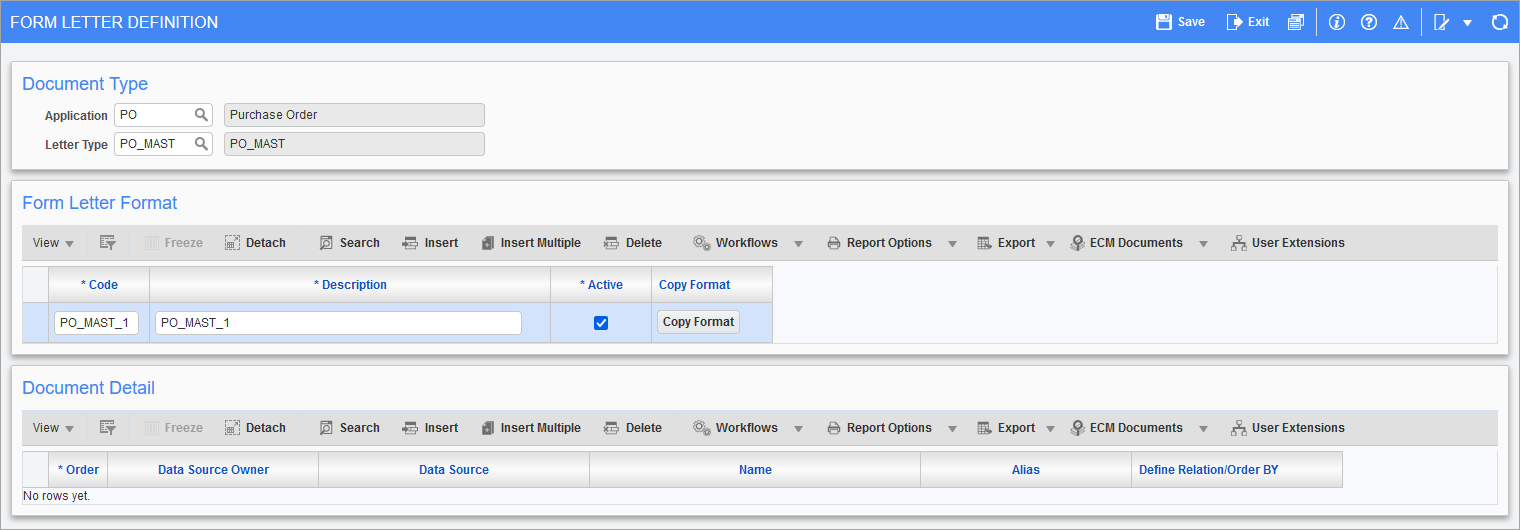
Pgm: SYSRPDOC – Form Letter Definitions; standard Treeview path: System > Forms > Form Letter Definitions
Optionally, users may want to join the view associated with the Form Letter Type with other views added in Registered Data Sources. Please see System Data - Form Letter Definitions.
In addition, see Microsoft® Integration Package - Create MIP Word® Document using Microsoft Word® Based Template in a situation where a MIP document template is needed for the Form Letter definition. For example, this would be needed for all Cloud customers or new R12 Enterprise customers' installations to work.
-
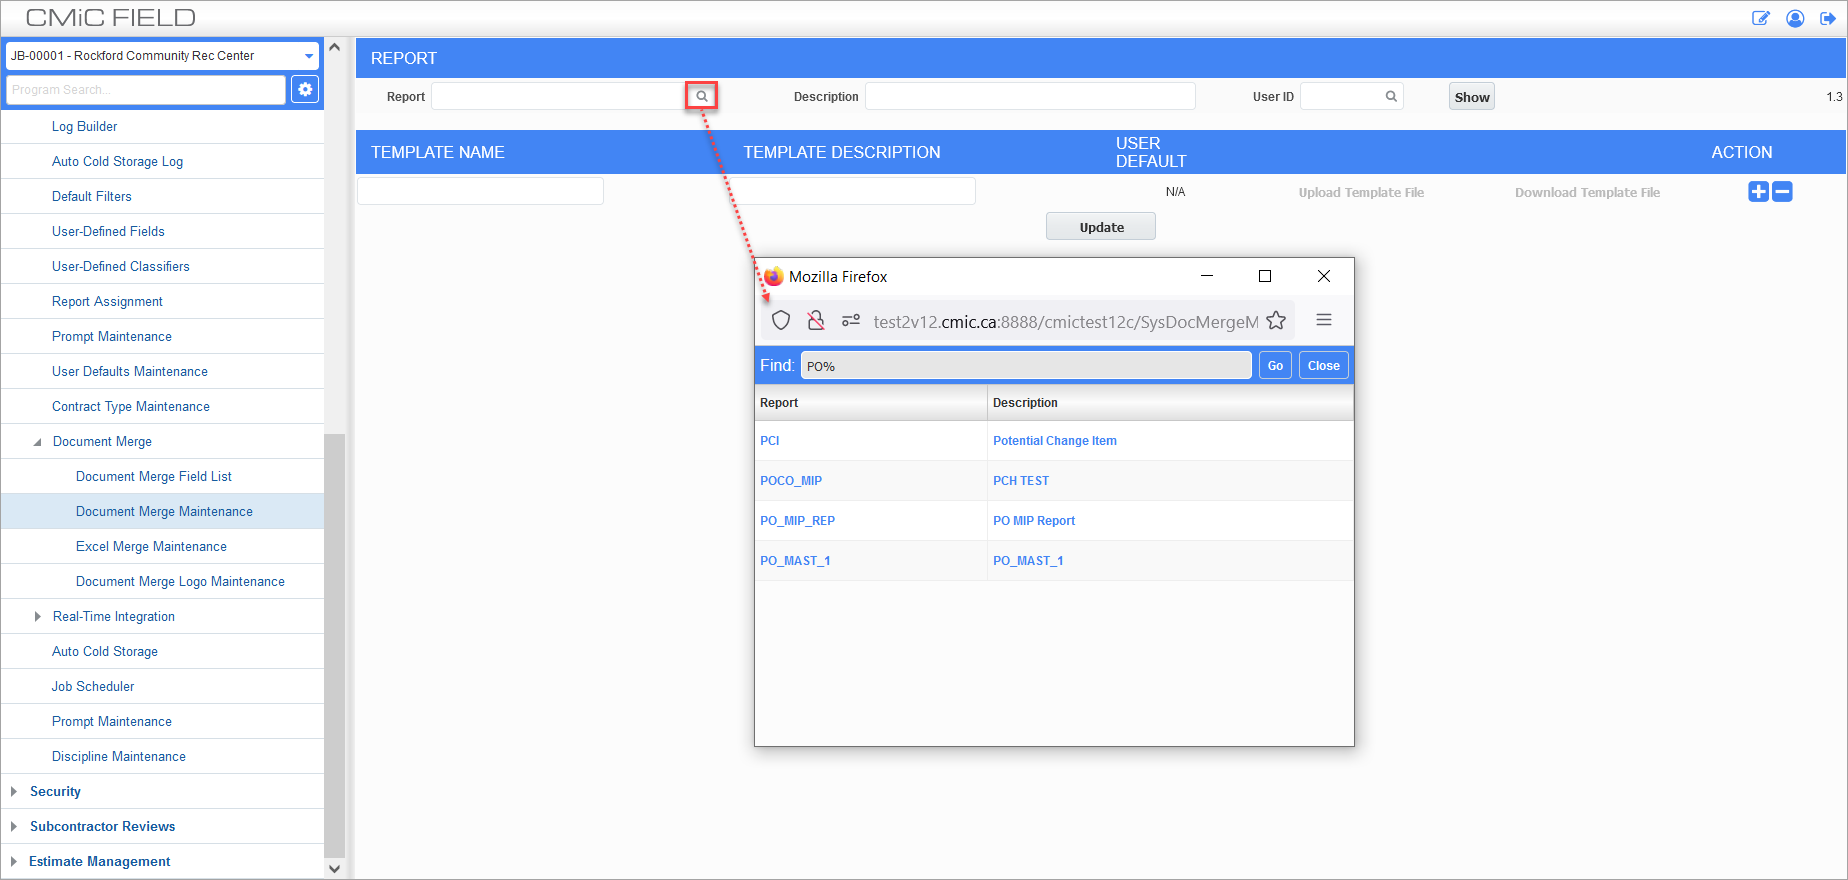
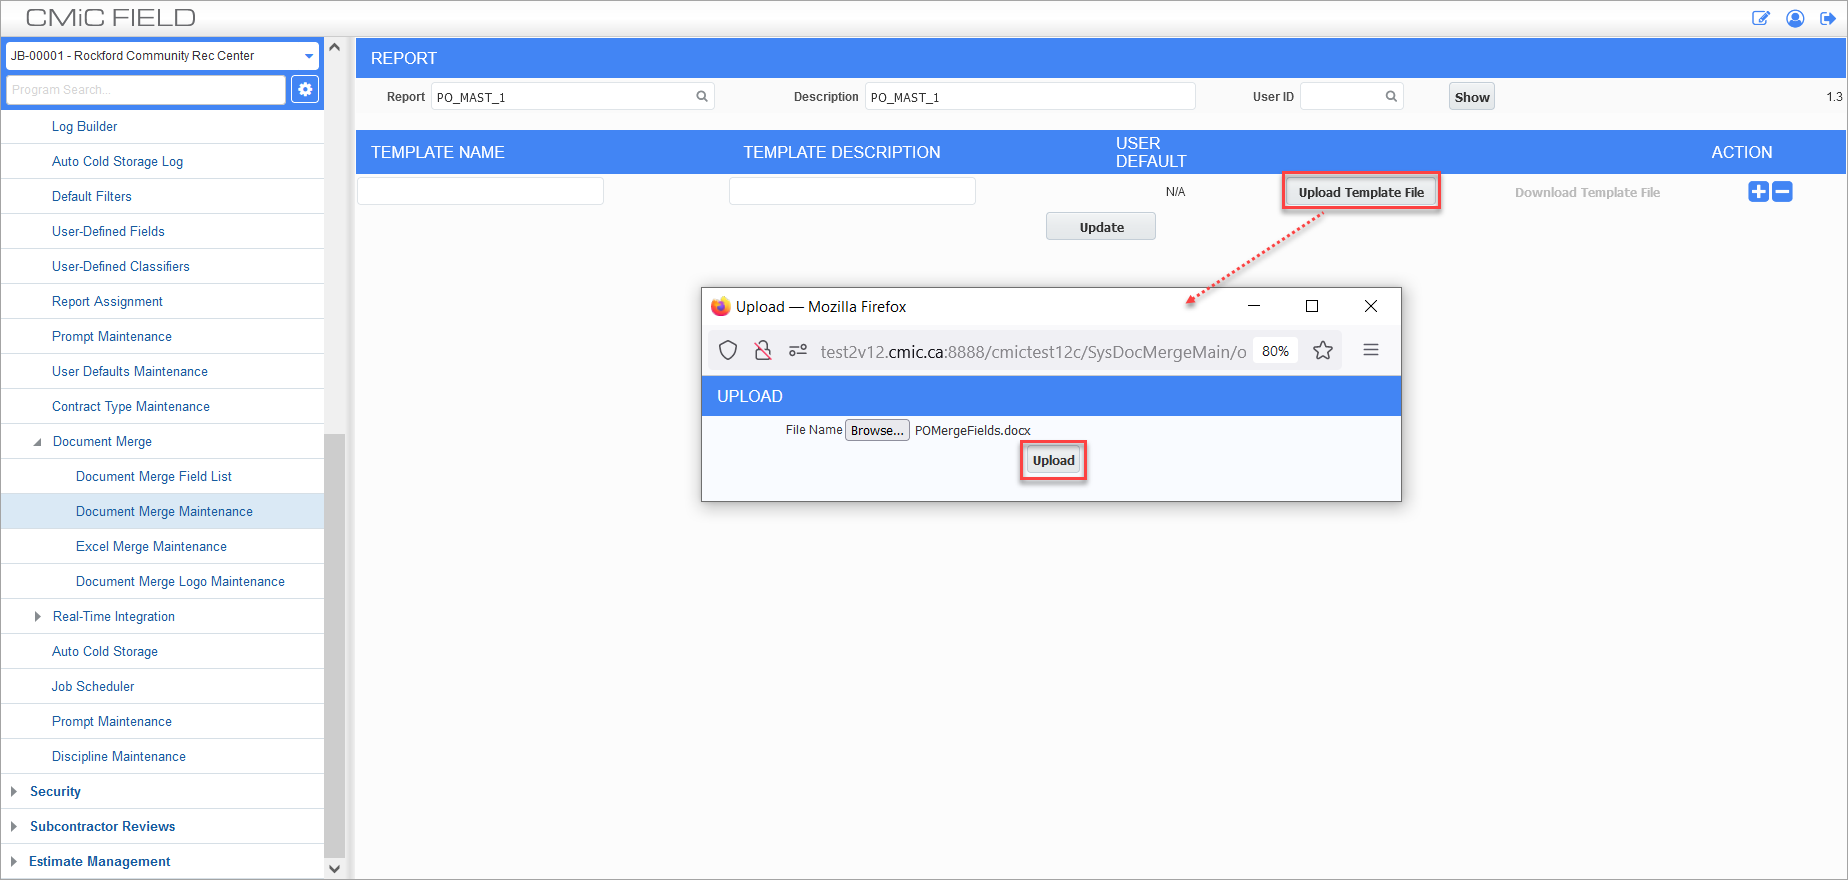
When the above steps are completed, the Form Letter Definition you created will be listed in CMiC Field > File Maintenance > Document Merge > Document Merge Maintenance, where you can upload the template.

-
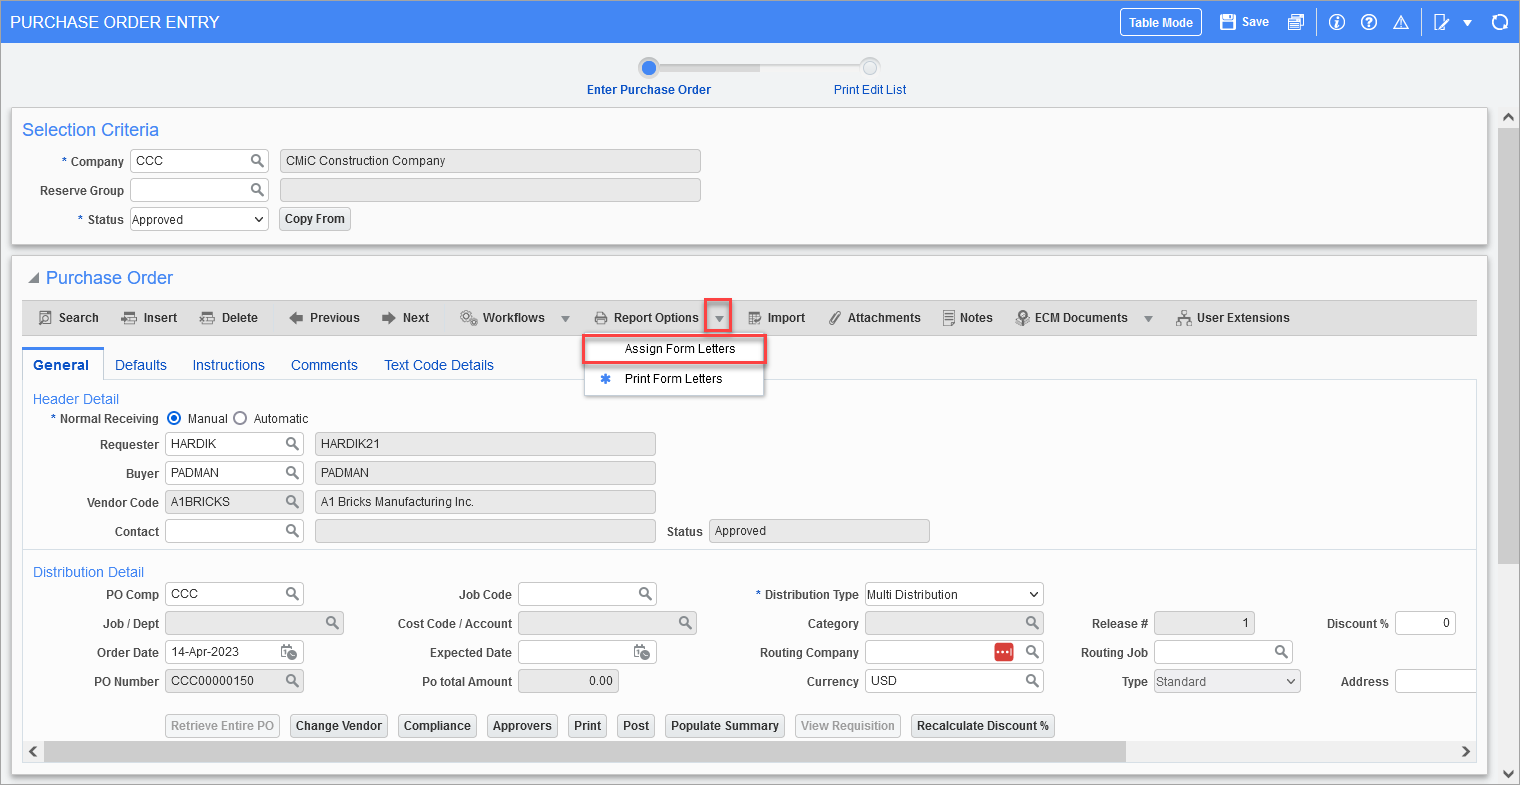
We can review the mapping in the Enter Purchase Order screen.
When you click on the [Report Options] button directly when no Form Letters have been successfully mapped in the program block of the UIRuntime program, you will see the error message “Form Letters are not setup for this program block” as shown below.

-
Click on the triangle immediately to the right of [Report Options] and two options come up – “Assign Form Letters” and “Print Form Letters”. Choose “Assign Form Letters”.
-
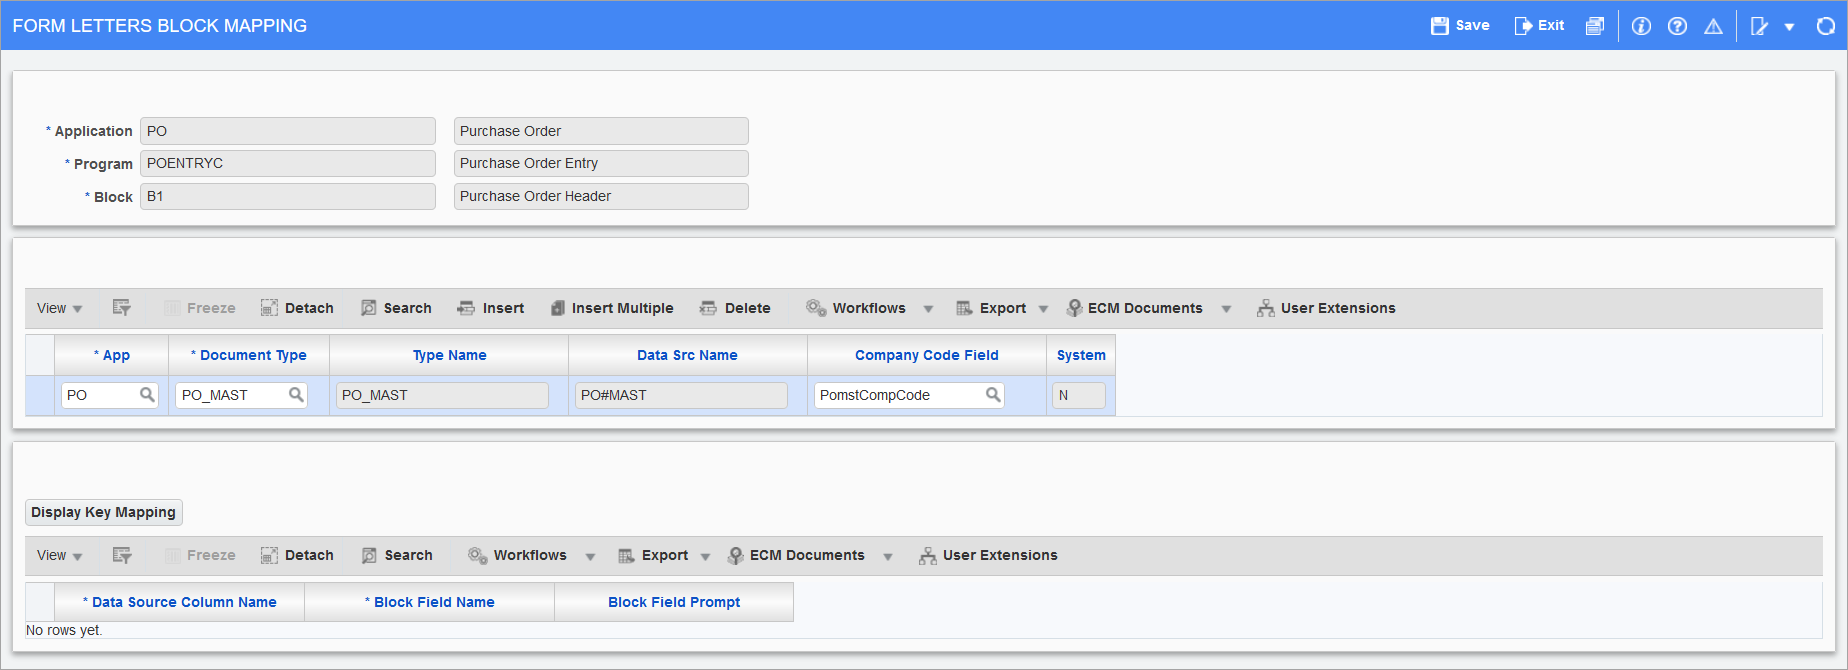
The next screen that comes up is where the user would specify the Form Letter Type. In addition, the Company Code Field is to be specified in this screen.
-
When the user clicks on the [Display Key Mapping] button, there is no change to the screen.

-
This is an indication that the document type has not been identified with the key fields needed for mapping with the UIRuntime program (the Enter Purchase Order screen in our example).
In this scenario, we will need to revisit the Form Letter Document Type screen, choose the document type we created, click on [Show Columns], then click on [Find Keys] in the next screen.
-
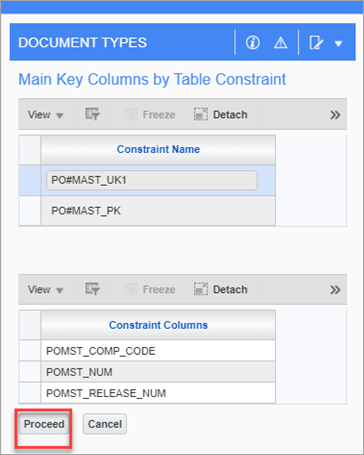
This brings up the columns that are registered to the constraints identified to the database view that the Document Type is based on. Choose the constraint and click [Proceed].
NOTE: This screen may be skipped if only one constraint is identified for the view.
-
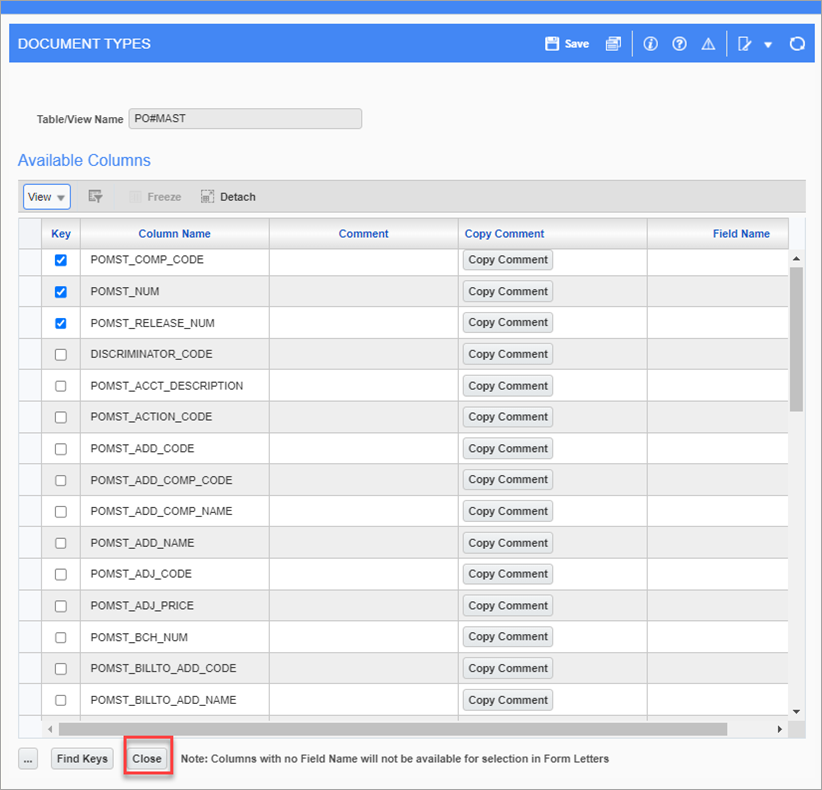
The columns involved in the constraint will be checked. Click [Close].
-
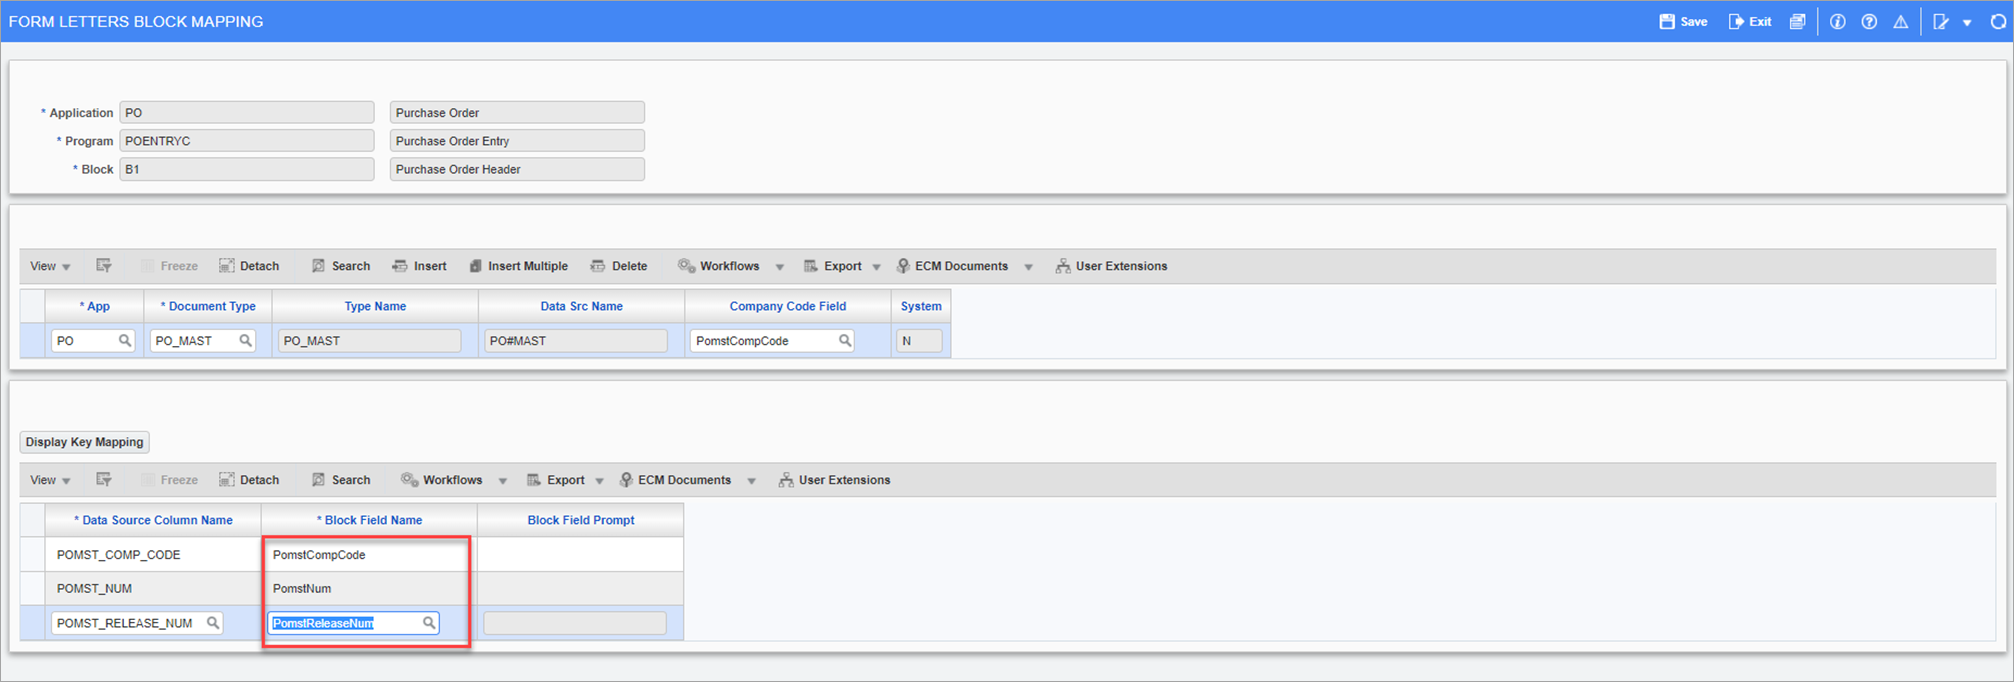
In the Form Letters Block Mapping screen, after clicking the [Display Key Mapping] button, the key fields now show up listed under the Data Source Column Name column.
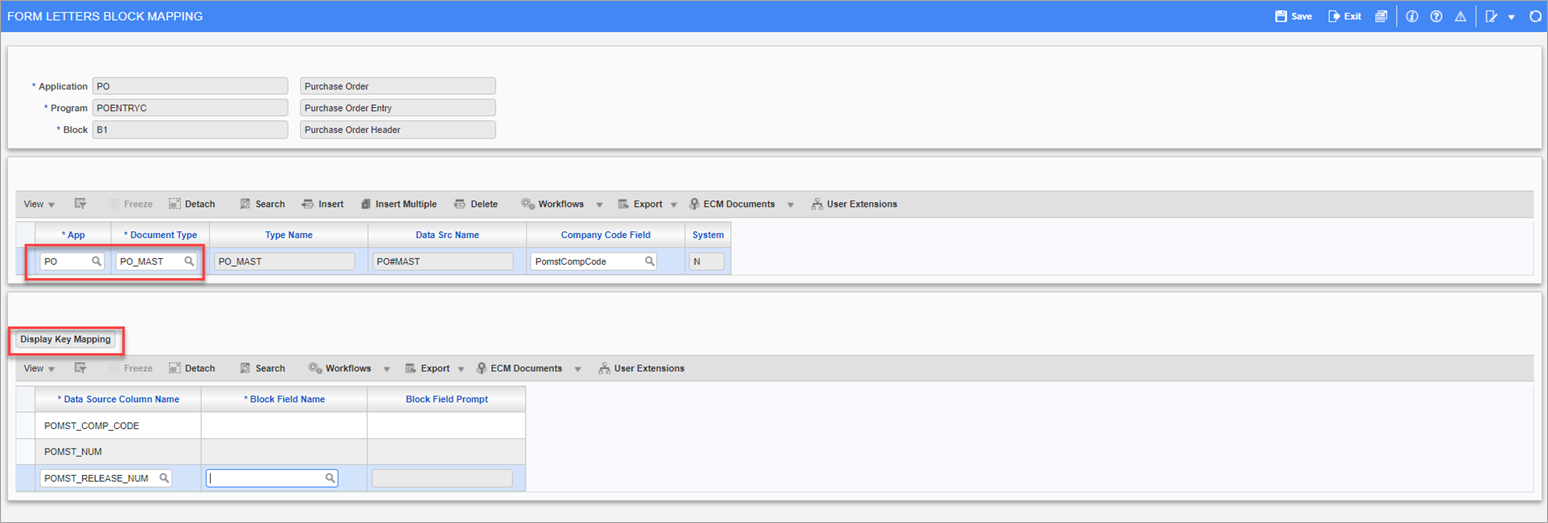
-
Fill in the names of the fields in the Block Field Name column to map with the corresponding entries listed in the Data Source Column Name column.
-
Once done, click [Save].
Navigate back to the Purchase Order Entry screen and select “Print Form Letters” under the [Report Options] button.
-
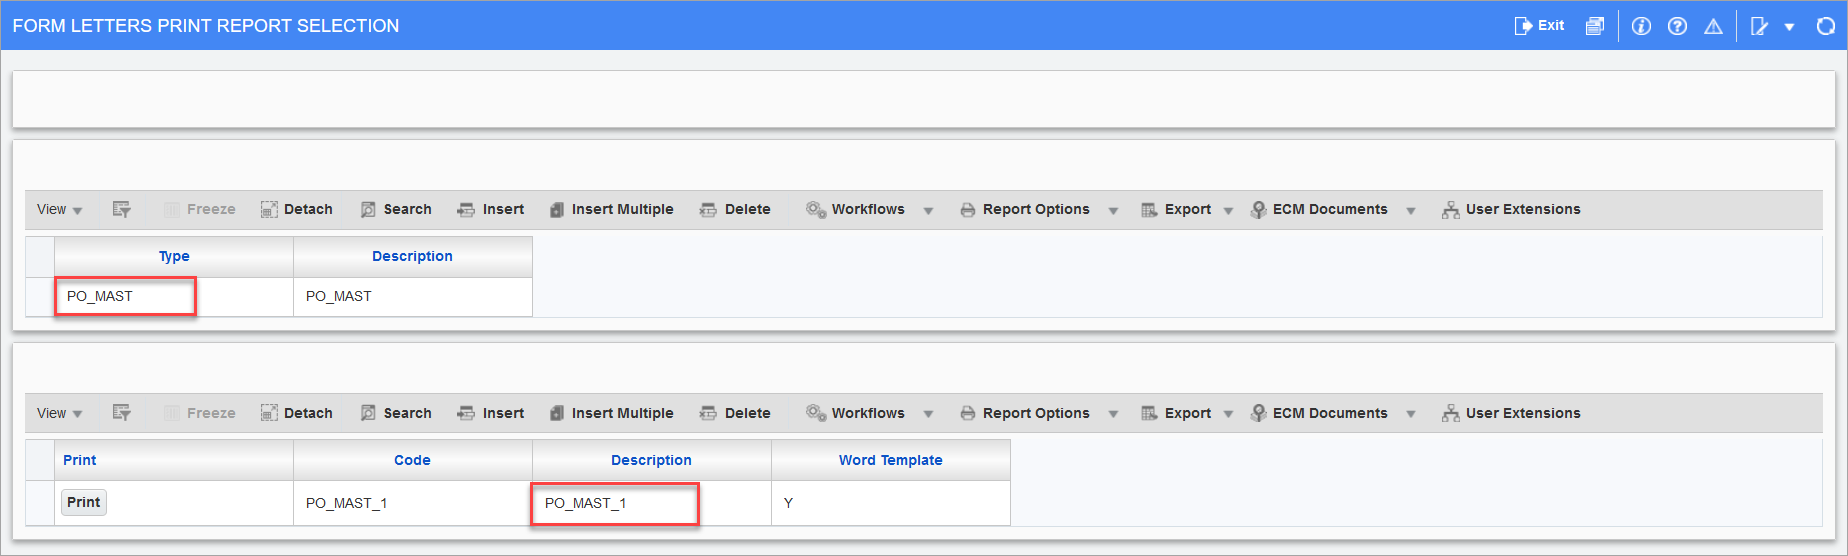
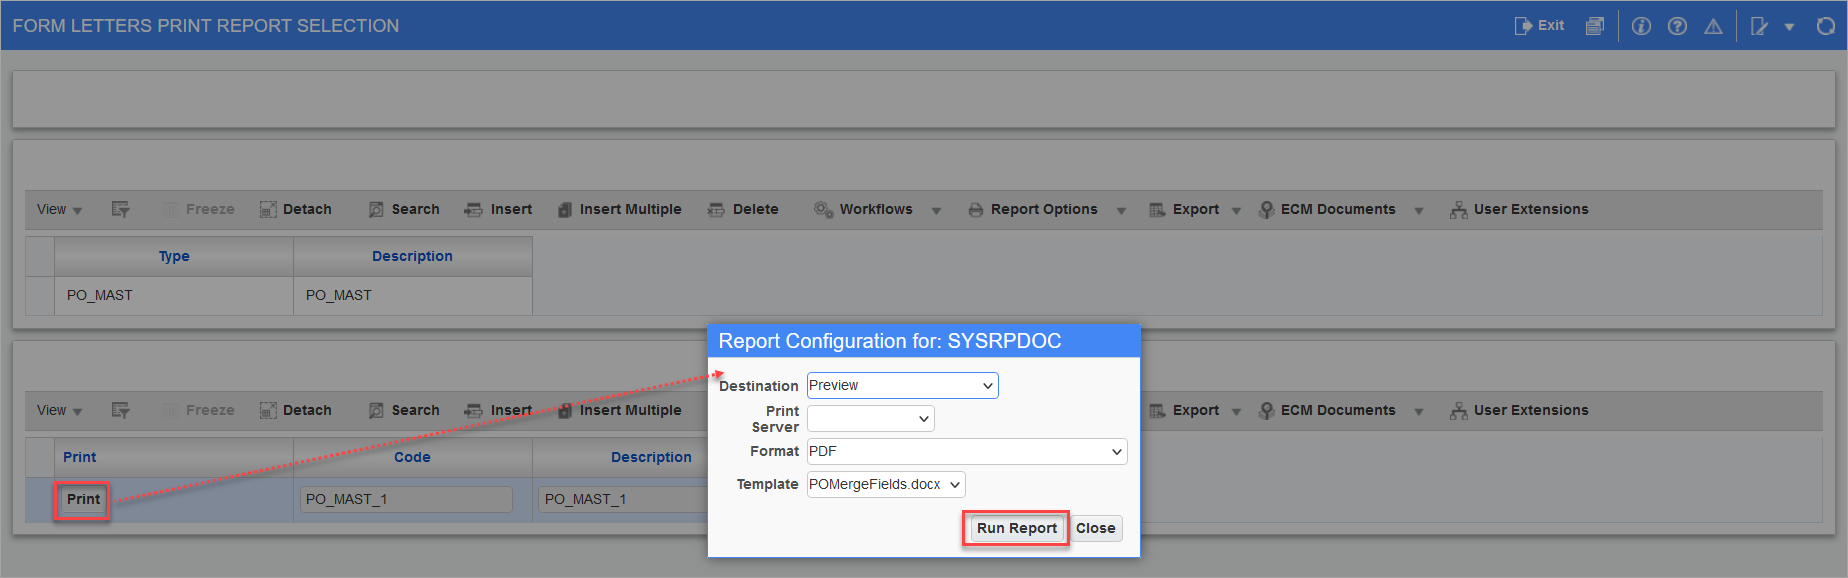
In the Form Letters Print Report Selection screen, the top section contains the available Form Letter Document Type(s) and the bottom section lists the available Form Letter Definition associated with the Form Letter Type selected.
-
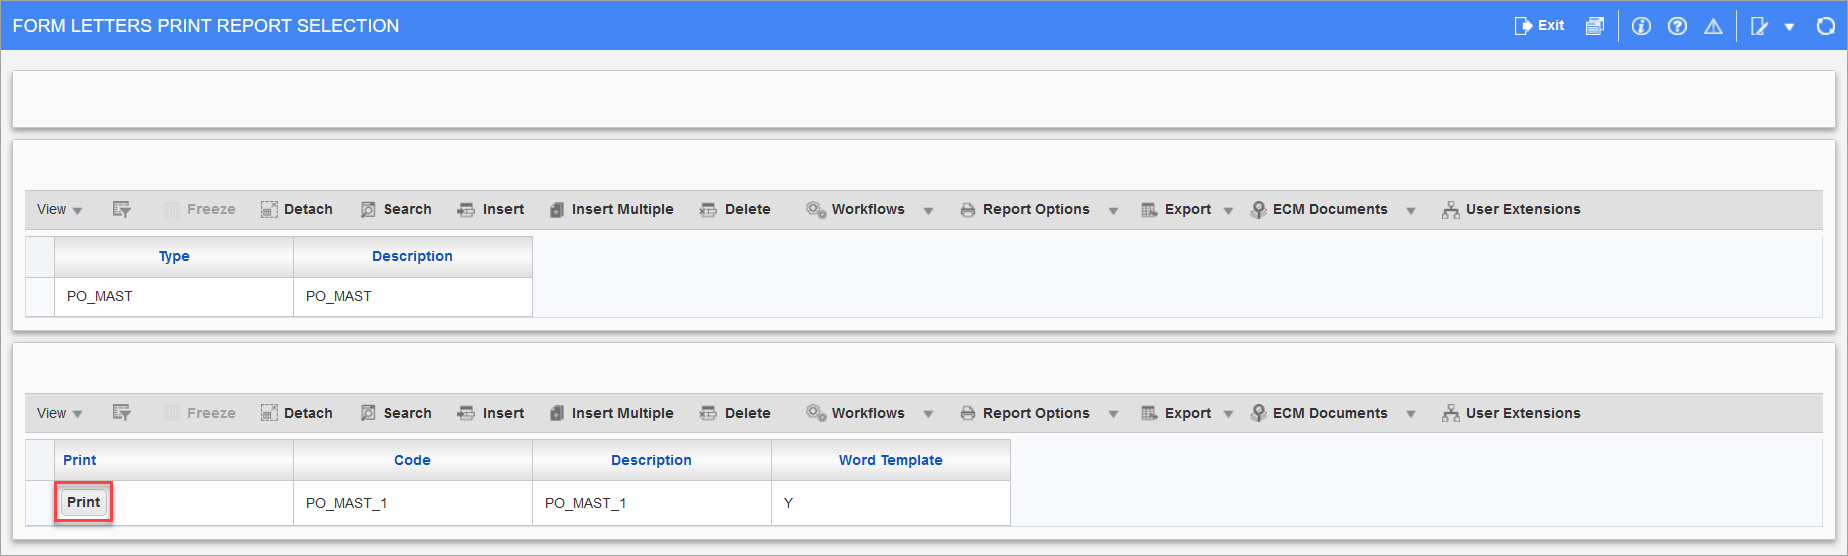
Click [Print].
NOTE: In this example, a MIP template is set up, which is listed on the Template field in the Report Configuration pop-up window.
-
The document prints out the results.