Pgm: PMSCFM – Subcontract Maintenance; standard Treeview path: Subcontract Management > Contracts > Enter Subcontract/Change Order
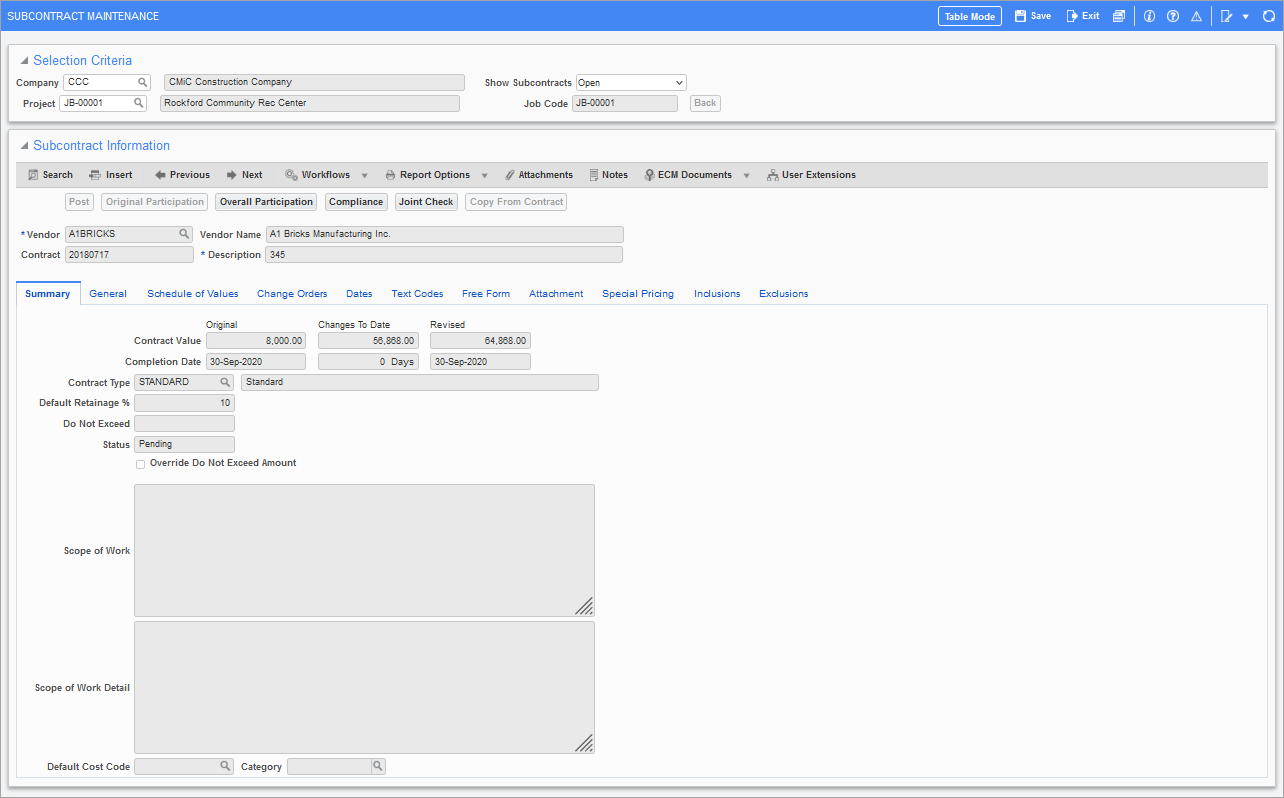
The Subcontract Maintenance screen is where the details of the Subcontract are entered, some of which are applicable to the Accounts Payable and Job Costing modules.
The Subcontract Maintenance screen may also be used to enter Subcontract Change Orders directly.
Use this screen to enter a name for the Subcontract, assigning tasks (SOVs) against the job, and assigning the vendor who will be working on the Subcontract.
Since a Subcontract can be changed through Change Orders, to keep the historical details of a Subcontract, a Subcontract is associated to a Change Order Number.
When a new Subcontract is created, referred to as the base Subcontract, behind the scene it is associated to the “000” Change Order Number. The Schedule of Values for the original (base) Subcontract are displayed on the Schedule of Values tab and the Subcontract’s original contract value is displayed by the Original field on the Summary tab.
If any Change Orders were posted to change the details of a Subcontract, details about the Change Orders are displayed on the Change Orders tab and the revised contract value is displayed by the Revised field on the Summary tab.
NOTE: If the Account Payable Control File's 'Allow Only Single Job Per Voucher' checkbox is checked, the Subcontract must be created with the 'Schedule Level/Retainage Release' checkbox checked on the General tab.
Selection Criteria
Company
Company under which Subcontract is entered.
Project
Project for which Subcontract is entered.
Show Subcontracts
This field is used to restrict what Subcontracts are displayed by their status. Select "Open" to only view open Subcontracts, "Closed" to only view closed Subcontracts, or "Both" to view both open and closed subcontracts.
Job Code
This display-only field displays the job associated to the project and subcontract.
[Back] – Button
This button is enabled if the user was brought here via the [SCO] button on the Detail tab of the Potential Change Items screen, in order to navigate back to the Potential Change Items screen (standard Treeview path: Change Management > Change Orders > Enter PCI).
Subcontract Information
This section is used to enter a Subcontract’s details or to enter a Change Order against the Subcontract via the Change Orders tab.
Vendor, Vendor Name
Select the vendor who will be performing the work on this Subcontract. The selected vendor should not be marked as a "One Time Vendor", nor should they be "Inactive" or set to "Not Allow Transactions". Once the vendor is entered, the system will default the currency and default retainage % set up for the vendor. Once the record has been saved, the Vendor field can no longer be edited.
Contract, Description
This is the subcontract code that identifies this Subcontract, which must be unique by company/vendor. In other words, two jobs cannot utilize the same contract code for the same vendor. Once the record has been saved, the Contract field can no longer be edited.
Since a Subcontract can be changed through Change Orders, to keep the historical details of a Subcontract, a Subcontract is associated to a Change Order Number. When a new Subcontract is created, behind the scene it is associated to the "000" Change Order Number. The Contract Code and Change Order Number are used together throughout the system to identify the Subcontract with respect to any Change Orders against it.
NOTE: If the SC Number is unique by job, then two vendors cannot have the same SC Contract Code on the same job. If the SC Number is unique by vendor, then two vendors can have the same SC Contract Code on the same job.
[Post] – Button
This button is enabled for unposted Subcontracts to post them.
NOTE: The [Post] button is only enabled for users that are project contacts and have the Post Subcontract project role privilege granted to them.
Once a subcontract is posted:
-
Changes to the Subcontract must be entered via Change Orders.
-
The Contract Date, Post Date, Start Date, and End Date fields are locked.
-
The job associated with the Subcontract is updated with committed costs for each Schedule of Values line.
-
It cannot be deleted, and must instead be voided.
[Original Participation] – Button
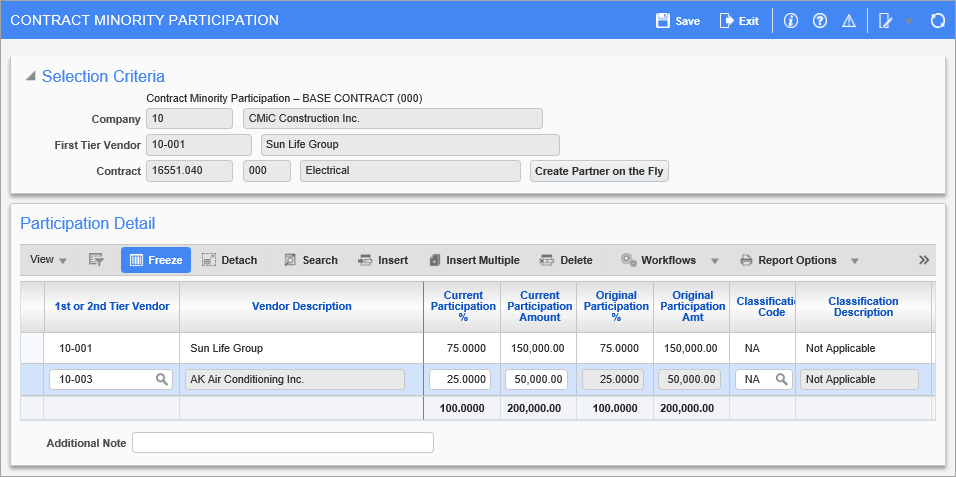
Pop-up window launched from the [Original Participation] button on the Subcontract Maintenance screen
If a Subcontract is going to be handled by more than one vendor, use this button’s pop-up to enter participant percentages for the first tier vendor and the second tier vendors, which determine how an RFP’s amount is distributed to each of the participating vendors.
When entering an RFP against a Subcontract, the participation percentages/amounts that will carry over to the Voucher can be reviewed via the [Participation] button on the Enter Request for Payment screen (standard Treeview path: Subcontract Management > Payments > Enter Request for Payment), as shown below:
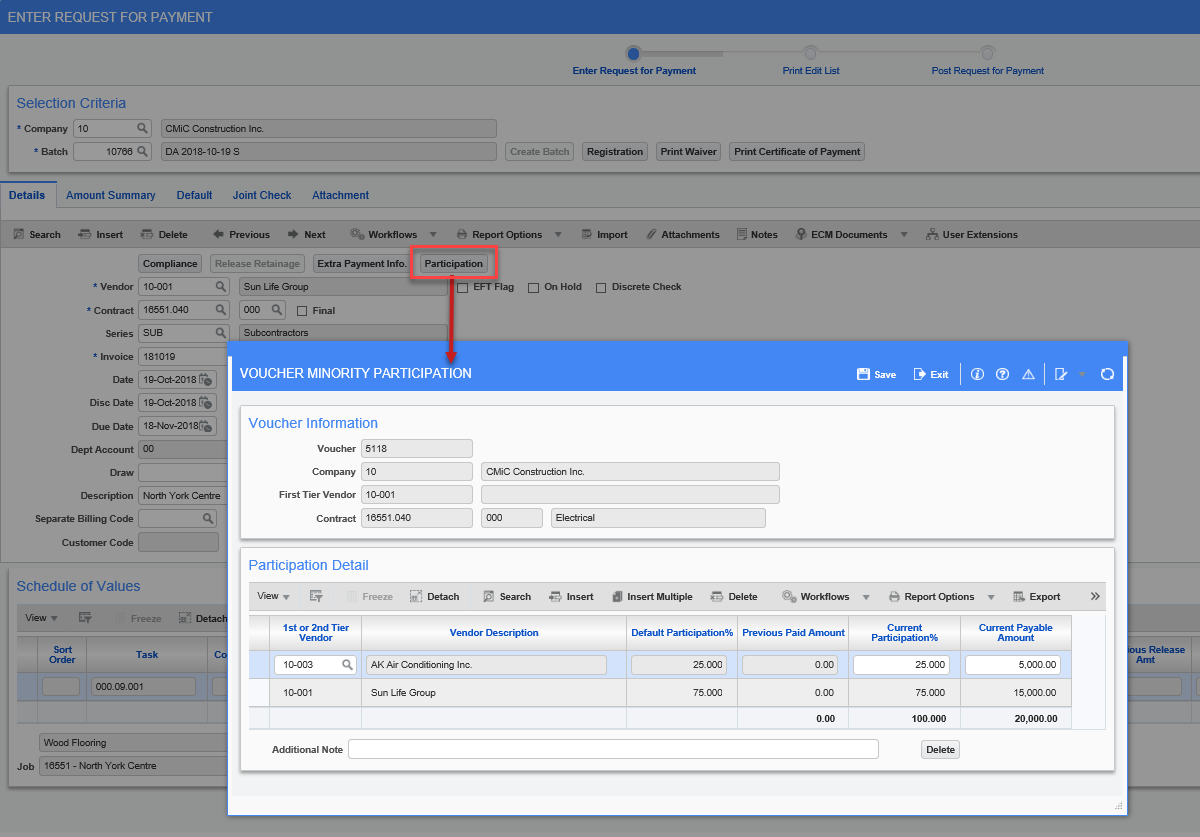
Pop-up window launched from the [Participation] button on the Enter Request For Payment screen
If the second tier vendor(s) are not known before the Subcontract is entered and posted, enter the first tier vendor with a “100” percent in the Current Participation % field, then when the participation details for the second tier vendor are known, enter them using a Change Order via the [CO Participation] button on the Change Orders tab.
NOTE: Second tier vendors must have been entered in the system as either business partners or project partners.
This button is enabled until the Subcontract is posted, after which the [Overall Participation] button becomes enabled to view the participation details.
After a Subcontract is posted, the participation can be changed via a Change Order, using the [CO Participation] button.
[Overall Participation] – Button
This button is enabled if the Subcontract has been posted. Its display-only pop-up is used to view the Subcontract participation details.
After a Subcontract is posted, its participation details can be changed via a Change Order, using the [CO Participation] button.
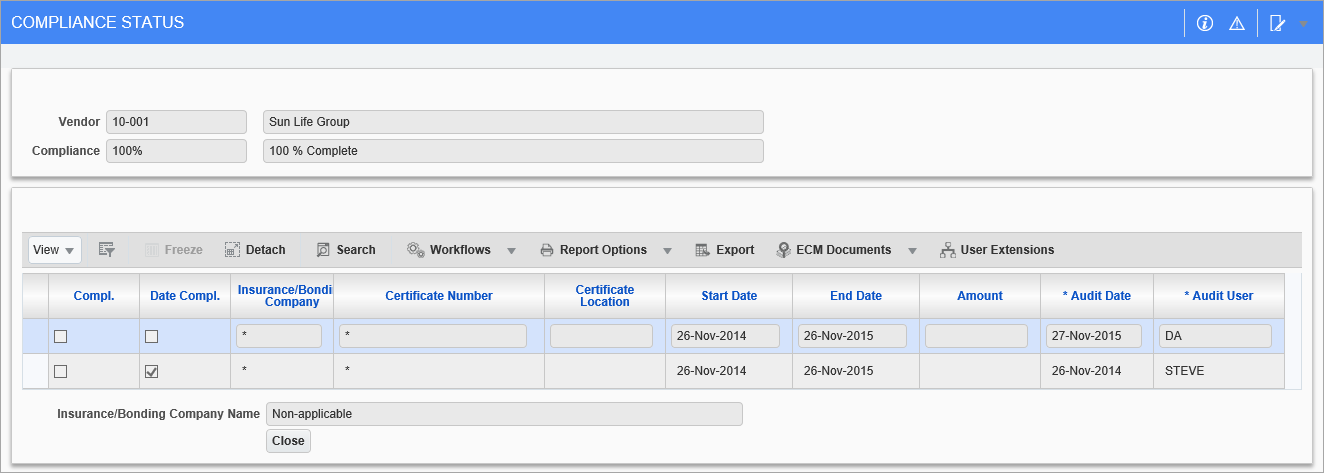
[Compliance] – Button
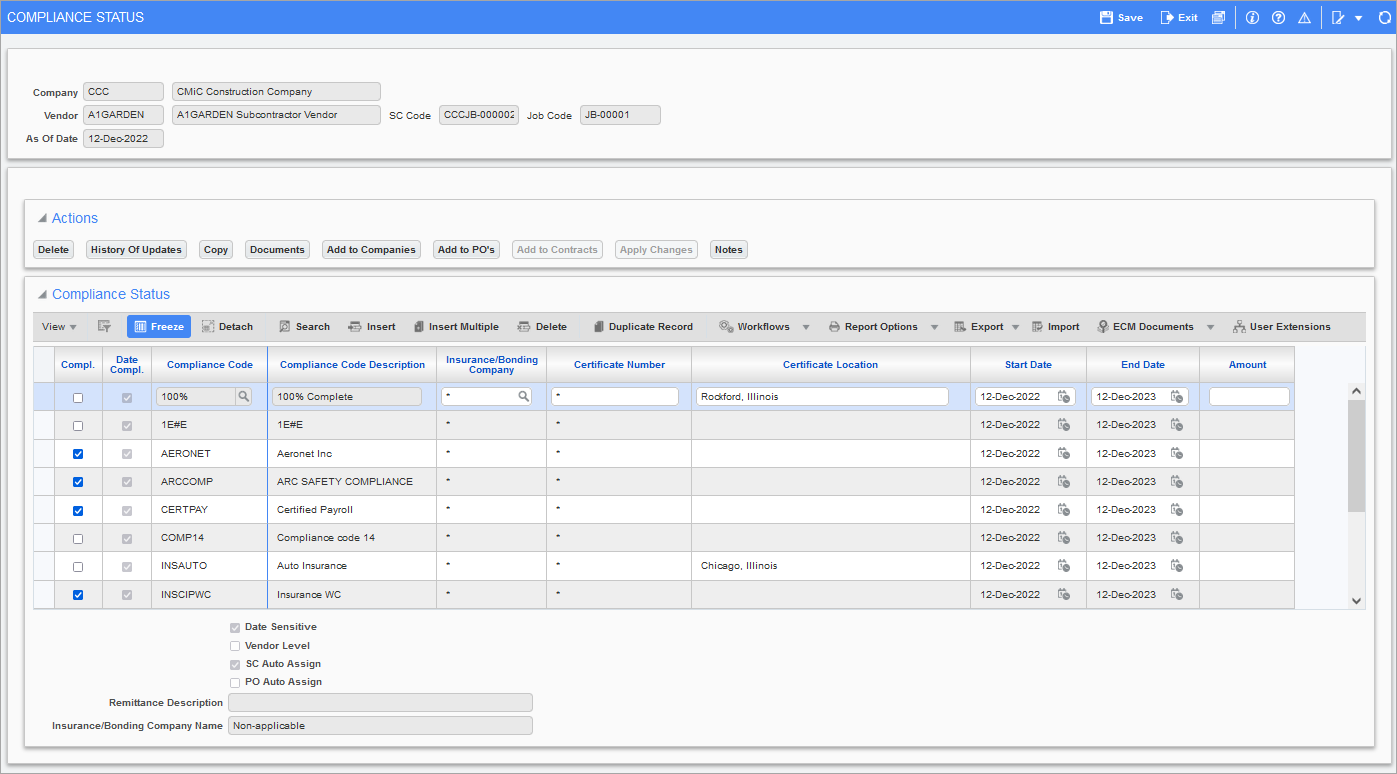
Pgm: INSINFO – Compliance Status pop-up; standard Treeview path: Subcontract Management > Contracts > Enter Subcontract/Change Order – [Compliance] button
This pop-up is also launched via the [Compliance] button on the Change Compliance Status screen (standard Treeview path: Subcontract Management > Status > Change Compliance Status), and it is also available in the Accounts Payable and Purchase Order modules. What it displays and what functionality is available depends on where this pop-up was launched.
When launched from the Subcontract Maintenance screen (standard Treeview path: Subcontract Maintenance > Contracts > Enter Subcontract/Change Order), this pop-up displays the Subcontract’s compliance codes at the subcontract level, which default to vouchers against the Subcontract. The compliance codes displayed were automatically added to the Subcontract based on the defaults set up for the vendor at the system, company or job (Compliance tab of Enter Job screen) level, or they were manually added to this particular Subcontract.
Since these compliance details are at the subcontract level, the [Add to Companies], [Add to POs], and [Add to Contracts] buttons are disabled. The [Apply Changes] button is enabled, however, to allow changes to be propagated to existing RFPs/Vouchers against the Subcontract.
This pop-up window can be used to:
-
Add or delete default compliance codes to or from a subcontract. These default compliance codes default to any new Vouchers against the Subcontract.
NOTE: Compliance codes on a Subcontract are referred to as defaults, as they have no impact on the Subcontract. These default compliance codes default to RFPs (Vouchers in Accounts Payable) against the Subcontract, and only affect the ability to make payments against the corresponding Vouchers in the Accounts Payable module.
-
Change the compliance status (compliant/non-compliant) of a subcontract’s default compliance code, which becomes the code’s default status for the Subcontract. The compliance code and its default compliance status will default to any new RFPs/Vouchers against the Subcontract. This is useful, for instance, if a vendor fulfills a compliance code’s requirement and the user wants to set the compliance status of that compliance code to compliant, so that any new RFPs/Vouchers created against the Subcontract will have that compliance code’s status default to compliant.
-
Once a compliance code’s default status is changed, the [Apply Changes] button can be used to propagate the change to the existing RFPs/Vouchers against the subcontract, en masse.
-
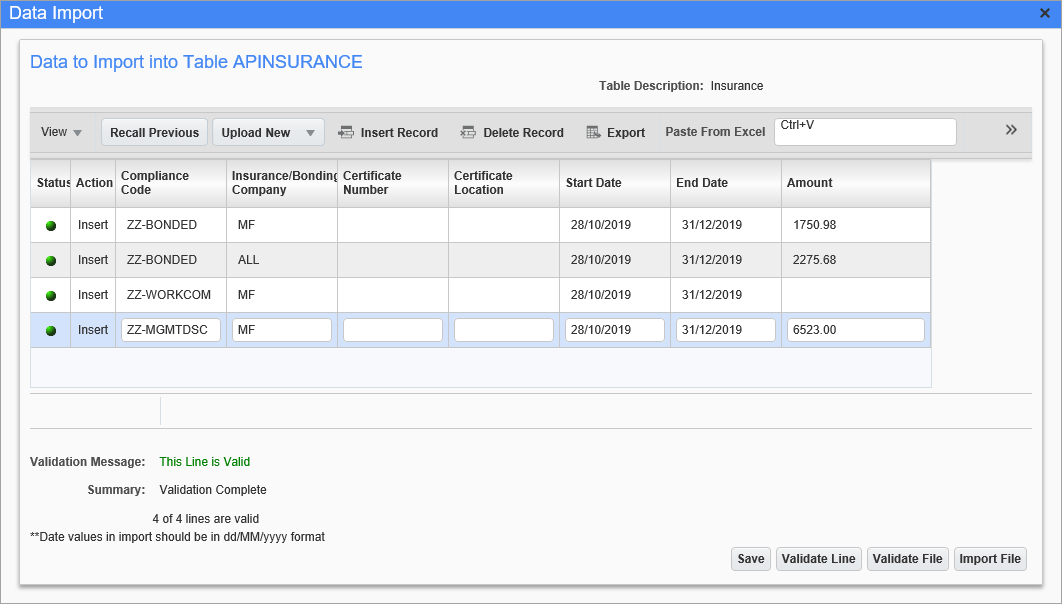
Import insurance compliance records into subcontracts using the [Import] button on the Standard Toolbar.
![Screenshot of the [Import] button on the toolbar of the Compliance Status pop-up window](../../../../Resources/Images/SC_12c/Contracts_4.png)
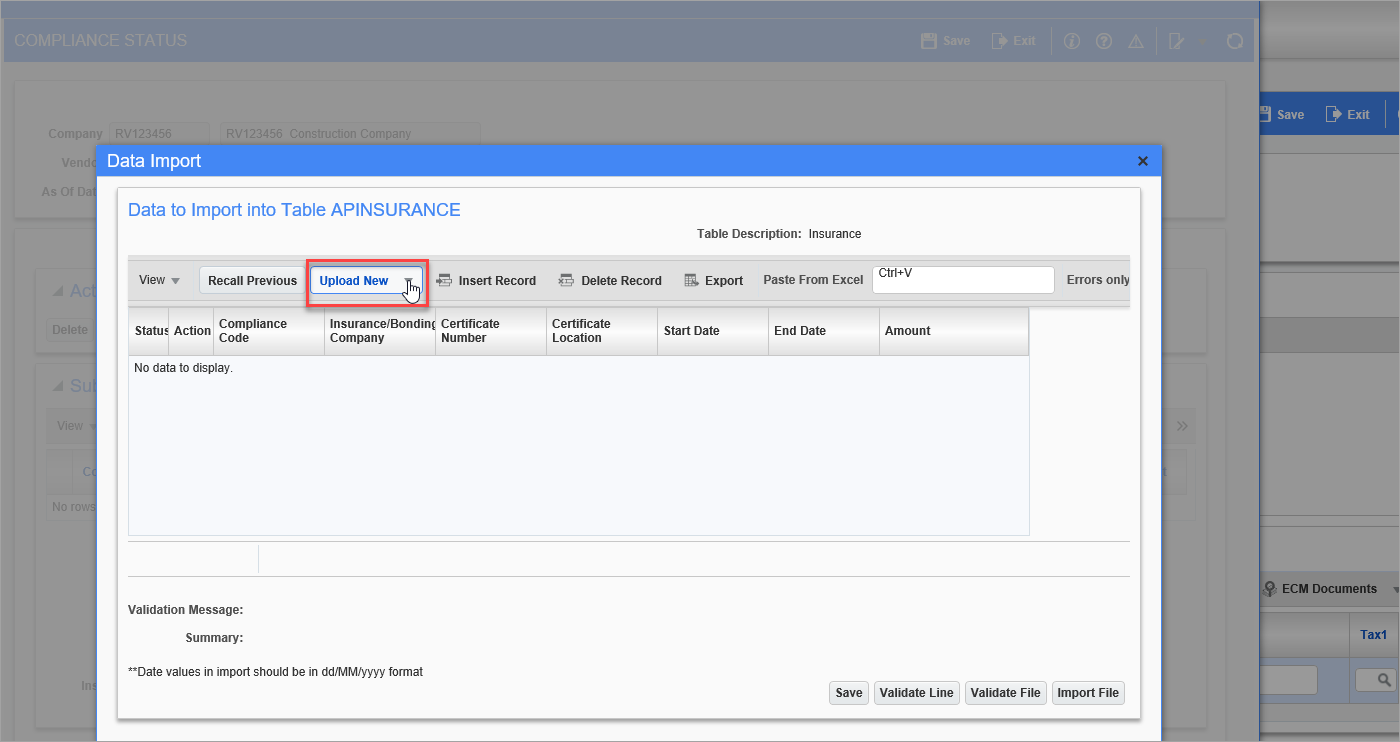
This is the standard import functionality that is available in other programs, where users can download a CSV template and upload the file with data or copy and paste the data from MS Excel.
Actions

[Delete] – Button
Used to delete a selected compliance code.
[History Of Updates] – Button
Pop-up window launched from [History of Updates] button launched from the Actions section of the Compliance Status pop-up screen
Used to view the history of changes to a selected compliance code.
[Copy] – Button
Use the [Copy] button to copy the compliance code to a target vendor.
[Documents] – Button
The Documents pop-up can be used to maintain reference details (doc number, date, description, and amount) about documents associated to the selected compliance code.
[Add To Companies] – Button
Disabled when this pop-up (Compliance Status) is launched from the Enter Subcontract screen, as it is only enabled when the pop-up is launched for a vendor at the system level.
[Add to POs] – Button
Disabled when this pop-up (Compliance Status) is launched from the Enter Subcontract screen, as it is only enabled when the pop-up is launched for a vendor at the system or company level.
[Add to Contracts] – Button
Disabled when this pop-up (Compliance Status) is launched from the Enter Subcontract screen, as it is only enabled when the pop-up is launched for a vendor at the system or company level.
[Apply Changes] – Button
This button is enabled if the pop-up was launched at the system, company, or subcontract level.
At the subcontract level, which this pop-up is at, this button is used to update the details of compliance codes assigned to the RFPs (Vouchers in AP) against the Subcontract. For example, this button can be used to change a compliance code’s compliance status (‘Compliance’ checkbox) en masse for all RFPs/Vouchers against the Subcontract.
This is done by examining every RFP/Voucher associated to the Subcontract, and if any of these RFPs/Vouchers have the compliance code and the Insurance Company and Certificate # fields matching, the compliance code’s details will be updated using these details.
To change the compliance status (‘Compliance’ checkbox) of a compliance code assigned to a single RFP/Voucher, use the Change Compliance Status screen (standard Treeview path: Subcontract Management > Status > Change Compliance Status).
NOTE: For RFPs/Vouchers, a compliance code is added or updated only if the Voucher’s payment status is “Compliance Hold (C)”. A Voucher is automatically assigned the “Compliance Hold” payment status when it is posted, and the system determines that it is not compliant. Once the payment status is changed to a different status, compliance codes can no longer be added to, or updated for the Voucher via this screen.
[Notes] – Button
Used to view or add a note to the selected compliance code.
[Joint Check] – Button
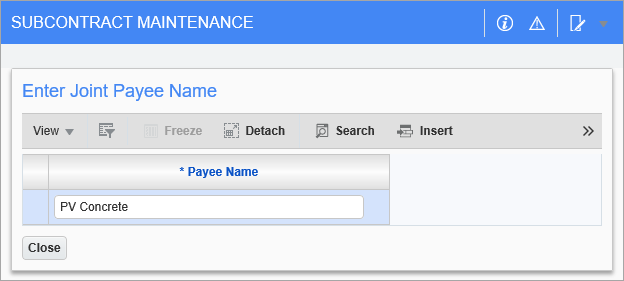
Pop-up window launched from [Joint Check] button on the Subcontract Maintenance screen
The joint payees added to the Subcontract via this pop-up window, shown above, default to the Joint Check tab of the Enter Request For Payment screen, as shown below.
NOTE: The joint payee will be validated against the Business Partner LOV if the 'Enable Joint Payee Validation' box is checked on the Financials tab of the System Options screen. For more information, please refer to System Data - System Options - Financials - Tab.
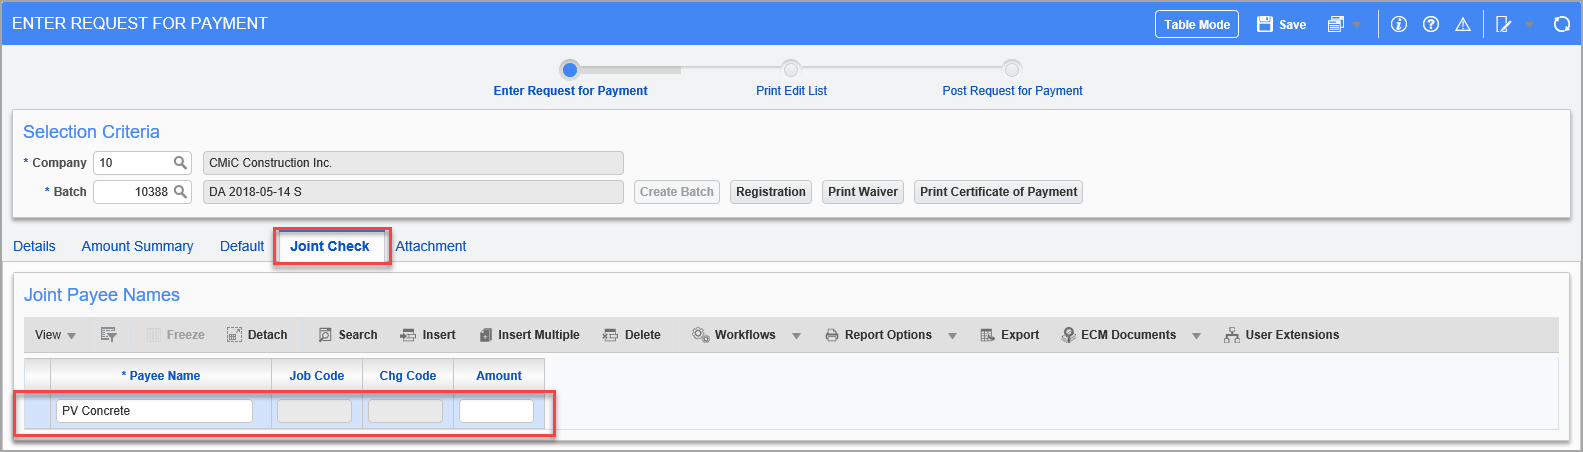
Pgm: SCPAYREQ – Enter Request For Payment; Subcontract Management > Payments > Enter Request For Payment - Joint Check tab
[Copy From Contract] – Button
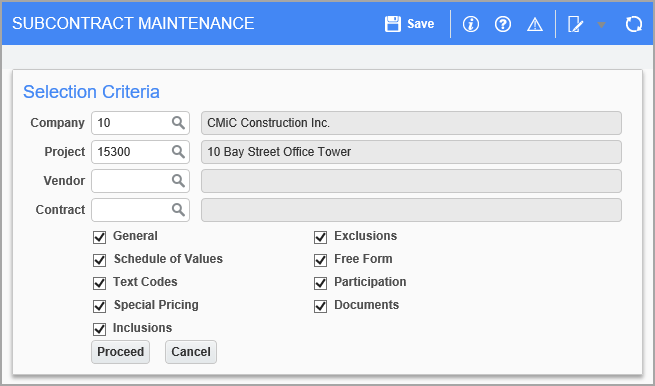
Pop-up window launched from [Copy From Contract] button on Subcontract Maintenance screen
This button is enabled for unposted Subcontracts, to create a Subcontract record using the details from a similar, existing Subcontract.
In the pop-up, select the existing Subcontract with the details to be copied using the Company, Project, Vendor and Contract fields.
Next, select which details from the existing Subcontract to copy over to the new Subcontract using the checkboxes and click [Proceed].
Business Rules of Copy Process
-
When copying from a different project, the ‘Documents’ checkbox option is not applicable (cannot copy documents from a different project).
-
Tax codes in the SOV lines will be copied as long as they exist in the target company. The system solely looks at the characters making up tax code when determining if they exist in the target company – it does not attempt to figure out if matching codes actually represent the same tax, e.g., Tax code “01” can be “Illinois Tax” in one company and “Federal Tax” in another company.
-
The “Default Taxes” related business rule does not apply during the copy process – the schedule line
is copied from the source “as is” – without defaulting tax codes based on this rule as it normally happens during manual record creation. -
Job code from source SOV line can only be used if it matches or is a sub-job of the target Subcontract’s associated job. Otherwise, the system will attempt to use the target Subcontract’s associated job.
-
Cost code and category codes must exist in the master files in order for a schedule line to be copied over.
In case the cost code or category is not found in the master file, the system skips the SOV line and continues on to the next one. -
When any cost code or category involved is inactive, the system will not create the SOV line using it.
-
The system may establish the following JC structures during the process if necessary:
a) Assign phase to job – DA.JCJOBHPHS (Phase Setup block in Assign Job Phases screen)
b) Assign category to job phase – DA.JCJOBCAT (Category block in Assign Job Phases screen)
NOTE: No structures will be created if phase or category in question is inactive.
-
When SOV lines are being created, the system checks for potential duplicates and will not create the record if a duplicate was found. Task codes can be repeated, however, when the system finds the exact same existing schedule record (within that Subcontract), it will not create it. “The exact same” means that the record would appear the same when queried in the screen (same value for Task Code, Name, Job, Cost Code, Category, Unit, WM, Rate, Amt, Taxes, etc.).
-
Expense code will only be copied if it exists in the target company and has allocation defined for the target company as well. If the code is found to be invalid, the Expense Code field will remain blank.
-
The system will always attempt to add non-existent data only, as opposed to always adding new lines.
Thus, copying twice or three times from the same Subcontract will not cause data to be doubled/tripled. The rule applies to all Subcontract details copied. -
Contract type will only be copied if it exists in the target company. The system will not create the contract type if it is not on file.
-
Text code record will only be created if it is valid in respect to target company.
-
Free form data will only be copied if “Free Form” is in use (at least one free form field prompt defined).
-
Participation record will only be copied if the second tier vendor code is valid for the target company.
-
Participation amount is derived based on the current Subcontract’s value.
[Attachments] – Button
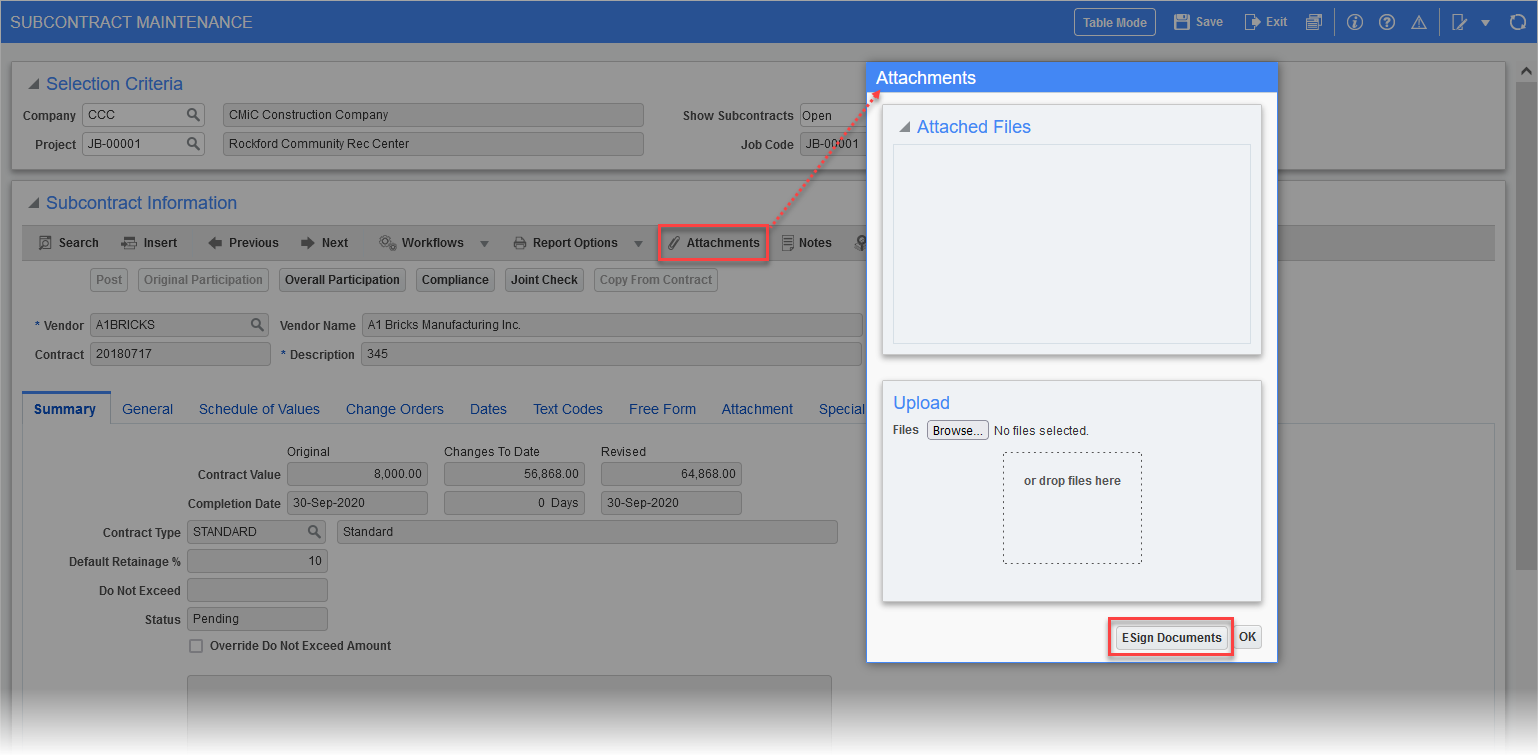
Pgm: PMSCFM – Subcontract Maintenance; standard Treeview path: Change Management > Change Orders > Enter Subcontract/Change Order - [Attachments] button
Users can access the [ESign Documents] button in the Attachments pop-up window that can be accessed by clicking the [Attachments] button. Users can then proceed with Esigning for CMiC Field screens.