Scheduling 2.0 - Using Scheduling 2.0
NOTE: Scheduling 2.0 has been deprecated and is no longer supported by CMiC. See Product End of Support for further details.
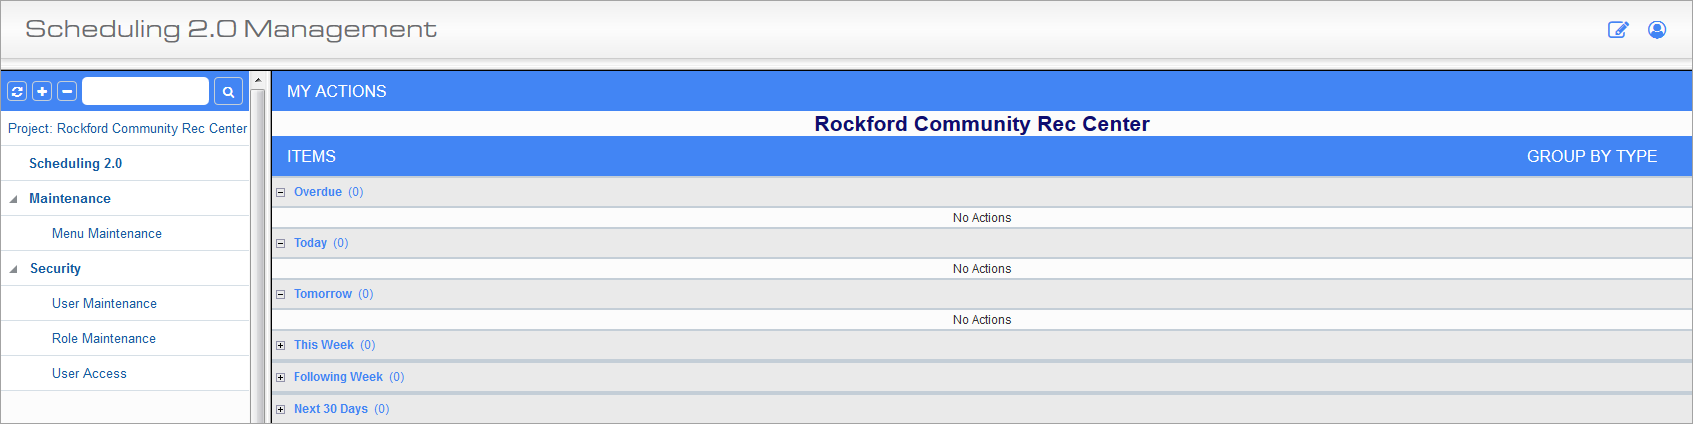
Scheduling 2.0 Management
The Scheduling 2.0 Treeview consists of the Scheduling 2.0 screen, and nodes for the Menu Maintenance and Security screens.
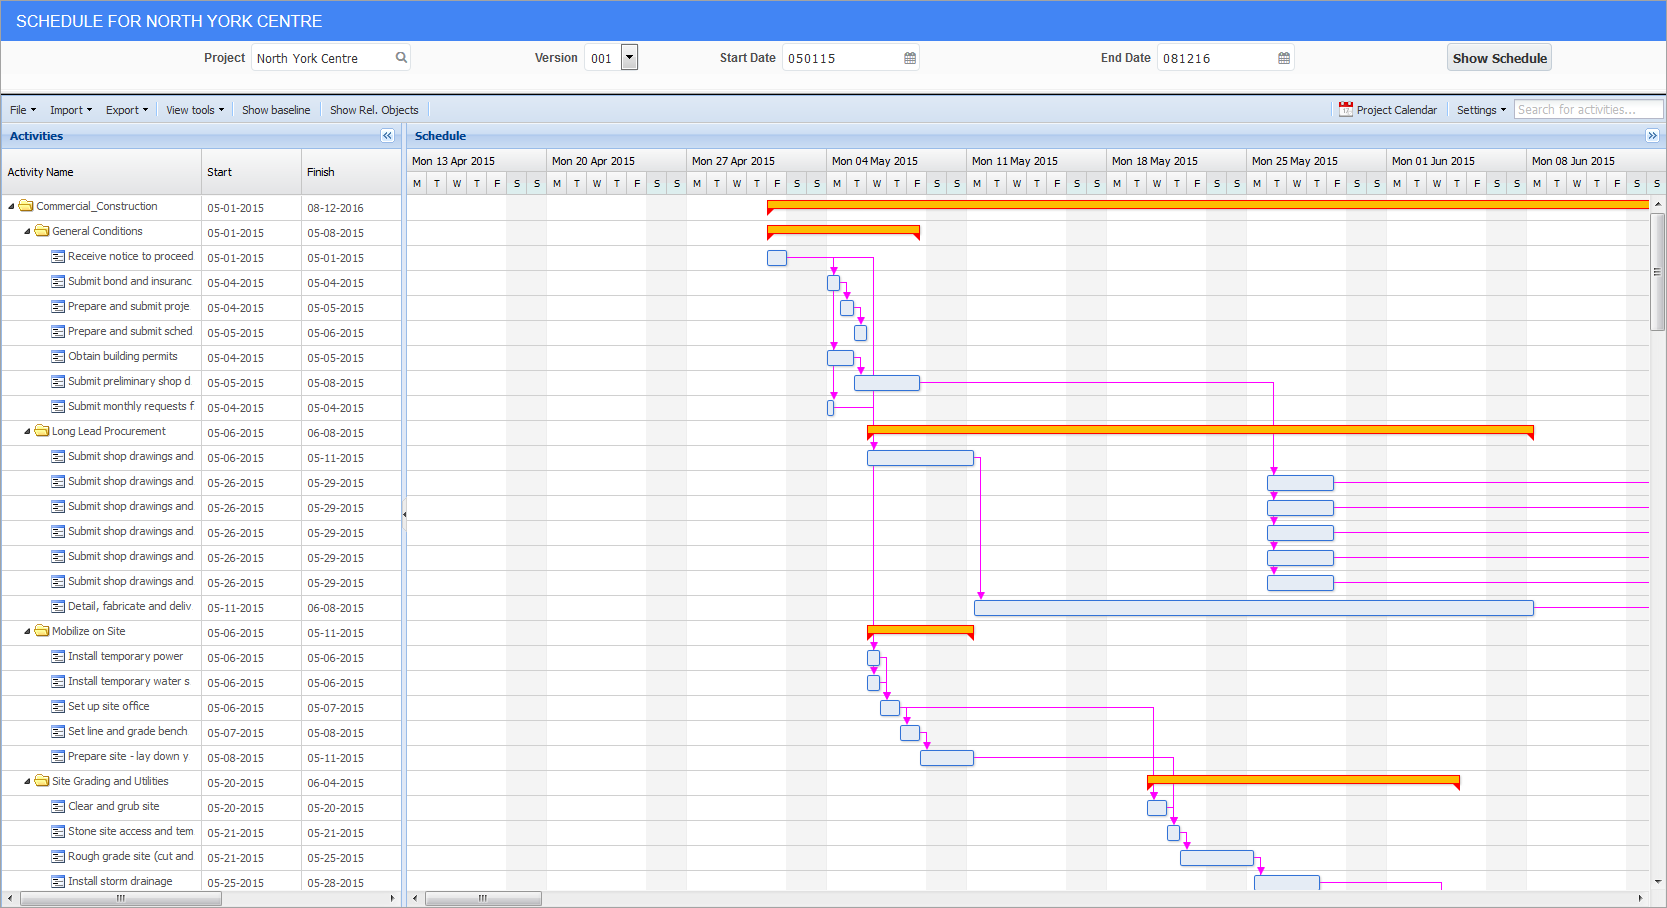
To launch the scheduler, click on the program link. The schedule is launched in a separate window.
Schedule; standard Treeview path: Scheduling > Scheduling 2.0
The schedule is loaded in view mode unless the user has the security privilege to edit. The security privilege ‘Scheduling 2.0 – Edit Mode’ is available for this purpose.
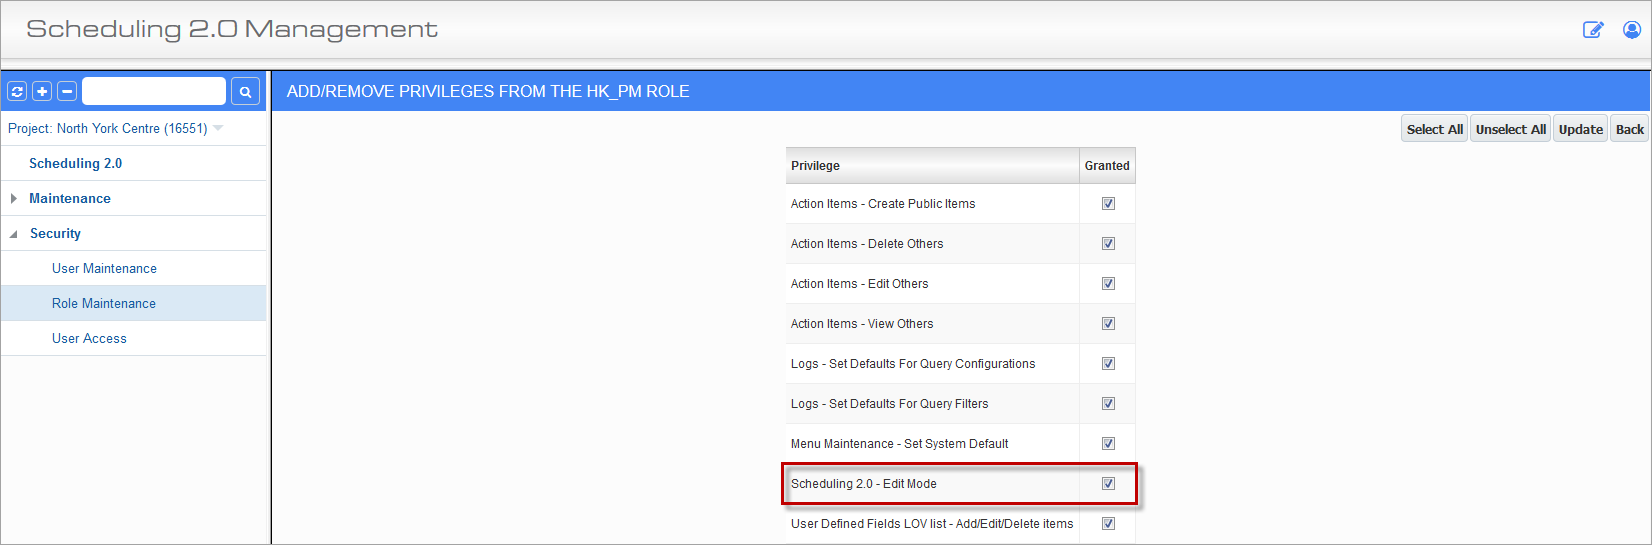
Add/Remove Privileges; standard Treeview path: Scheduling > Security > Role Maintenance
The Scheduling 2.0 screen is separated into the header section which displays the current project name, version, start date, and end date. The start date and end date formats are based on the user preferences in CMiC Enterprise. The [Show Schedule] button is also located here.
[Show Schedule] – Button
[Show Schedule] is a refresh of sorts. You can refresh the schedule using this, or you can select start and end dates to view in the schedule, then press the [Show Schedule] button. It will show the schedule starting from two weeks before the start date entered and four weeks ahead of the end date entered.
The menu area is in the header section as well, with each menu having a drop-down arrow to sub-menu items. In the lower pane, is the Activities section to the left and the Schedule section to the right.