Scheduling 2.0 - Schedule
NOTE: Scheduling 2.0 has been deprecated and is no longer supported by CMiC. See Product End of Support for further details.
The schedule is made up of a number of activities which can be inter-dependent. It is the depiction of the project management tasks – when they start and finish, which task is dependent on the other, which task has to finish before another can start, what lag time is built in for contingency, etc.
The background of the schedule consists of white and grey vertical bars. The white represents the working days, and the grey represents the non-working days. Working and non-working days are defined through the calendar.
When work days are changed to non-working days, this causes adjustments in the schedule – the activity end date will be extended. When non-working days are changed to working days, the schedule may be adjusted accordingly.
The schedule must have at least one activity.
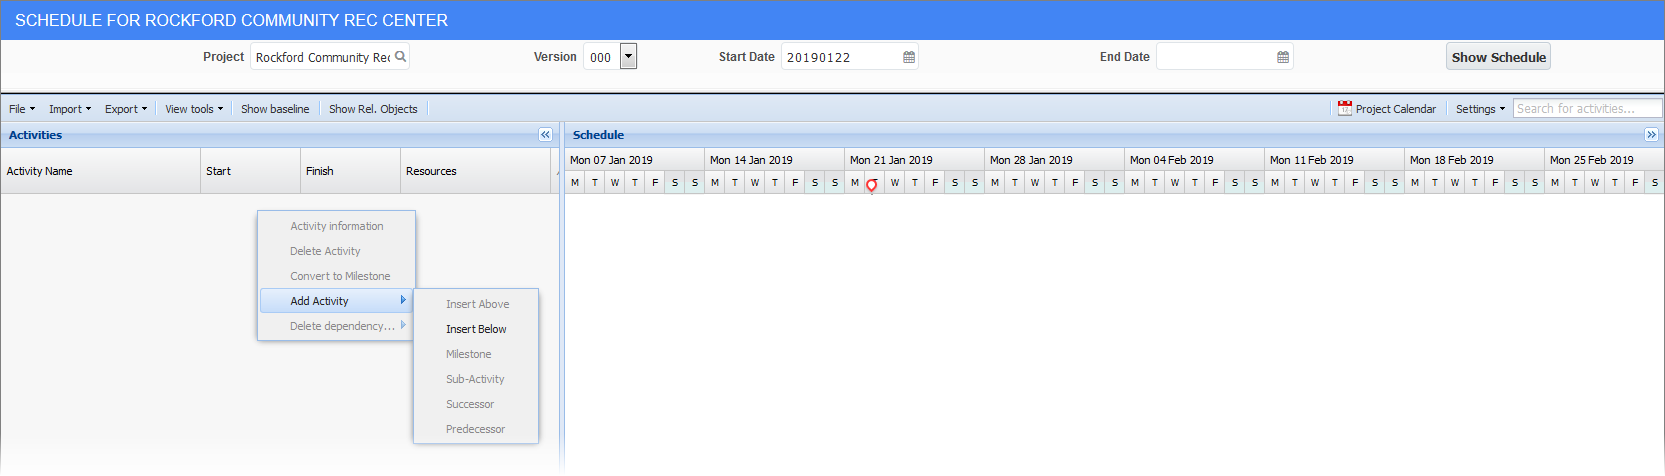
The activity is created by right mouse-clicking anywhere in the Activities section or the Schedule section.
A menu is displayed with a number of options. Only the highlighted option Add Activity > Insert Below is applicable to a new schedule.
Once the activities are created and saved, more substantive data can be added to the schedule, using the right mouse-click. Even more options will be enabled.
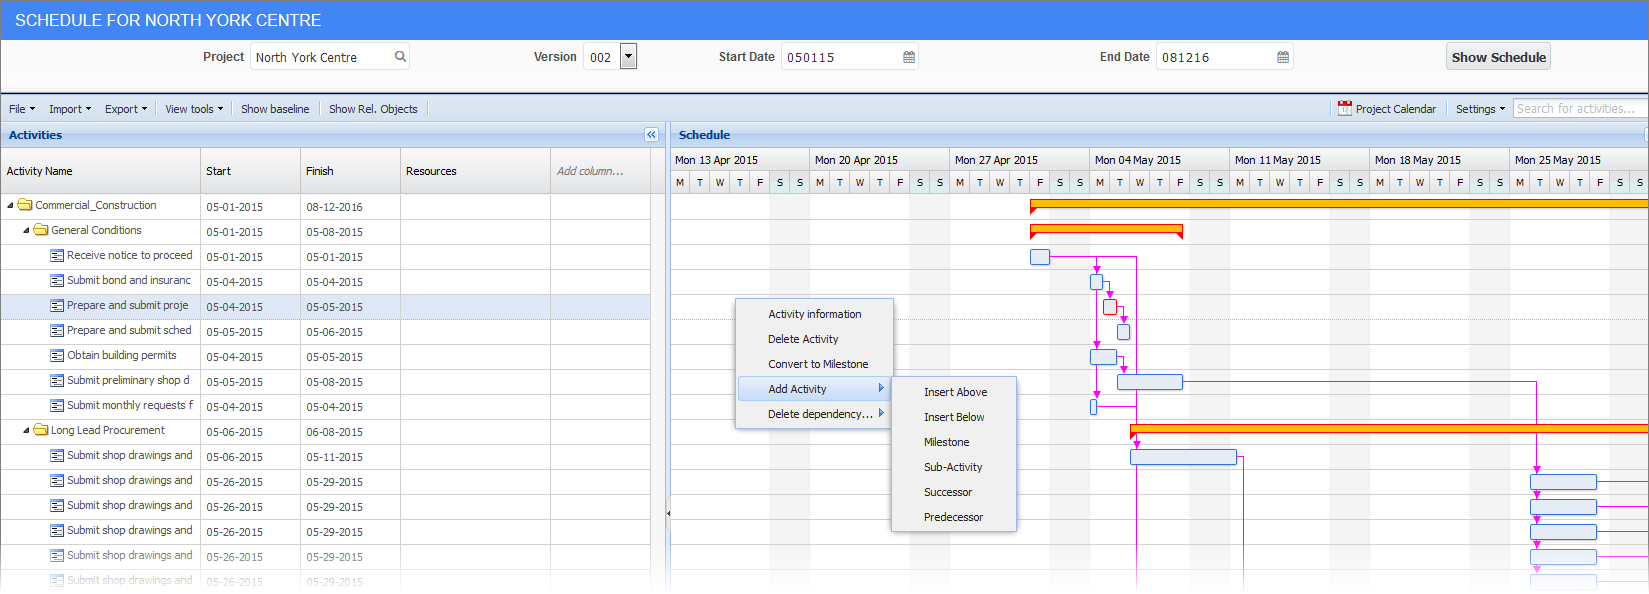
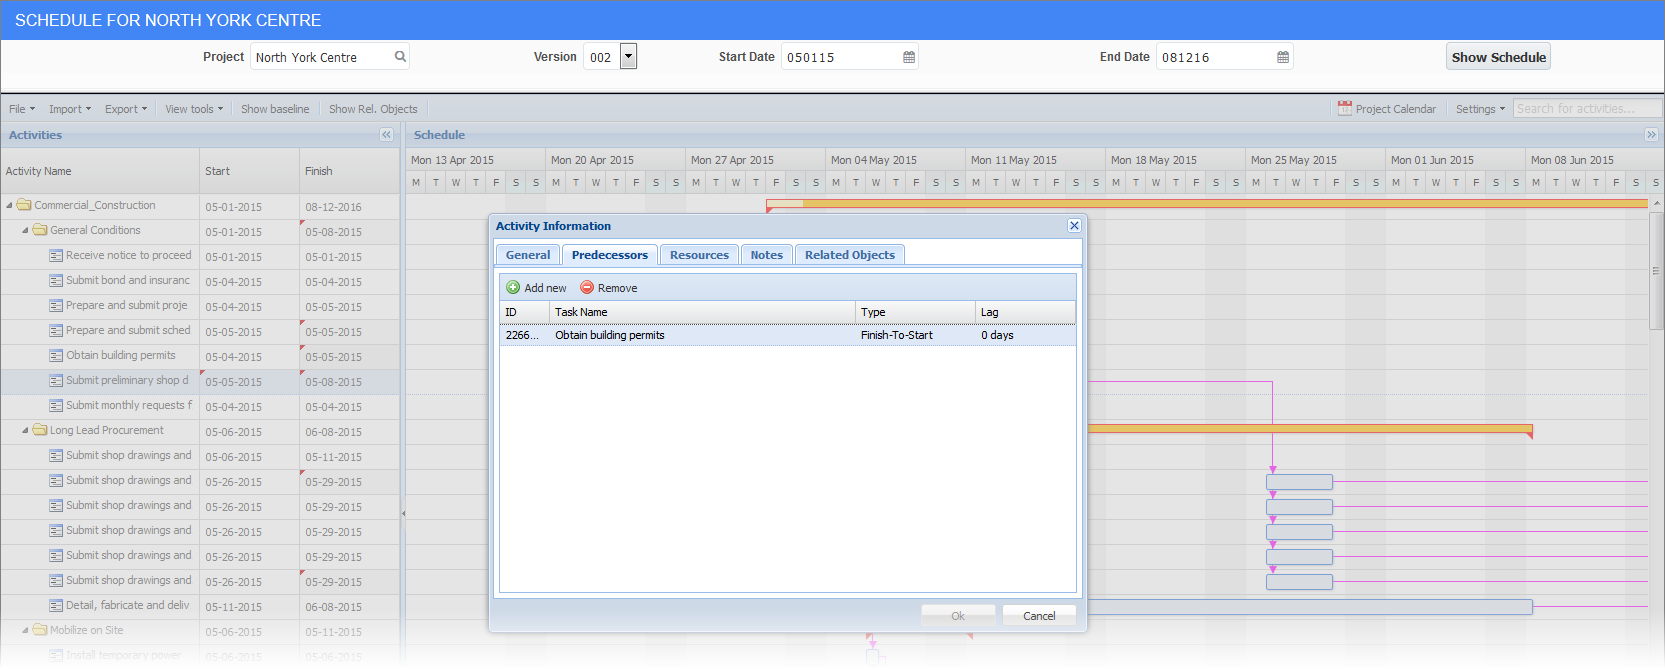
A right mouseclick on the activity bar and then clicking Activity Information gives more detailed information in the Activity Information pop-up window:
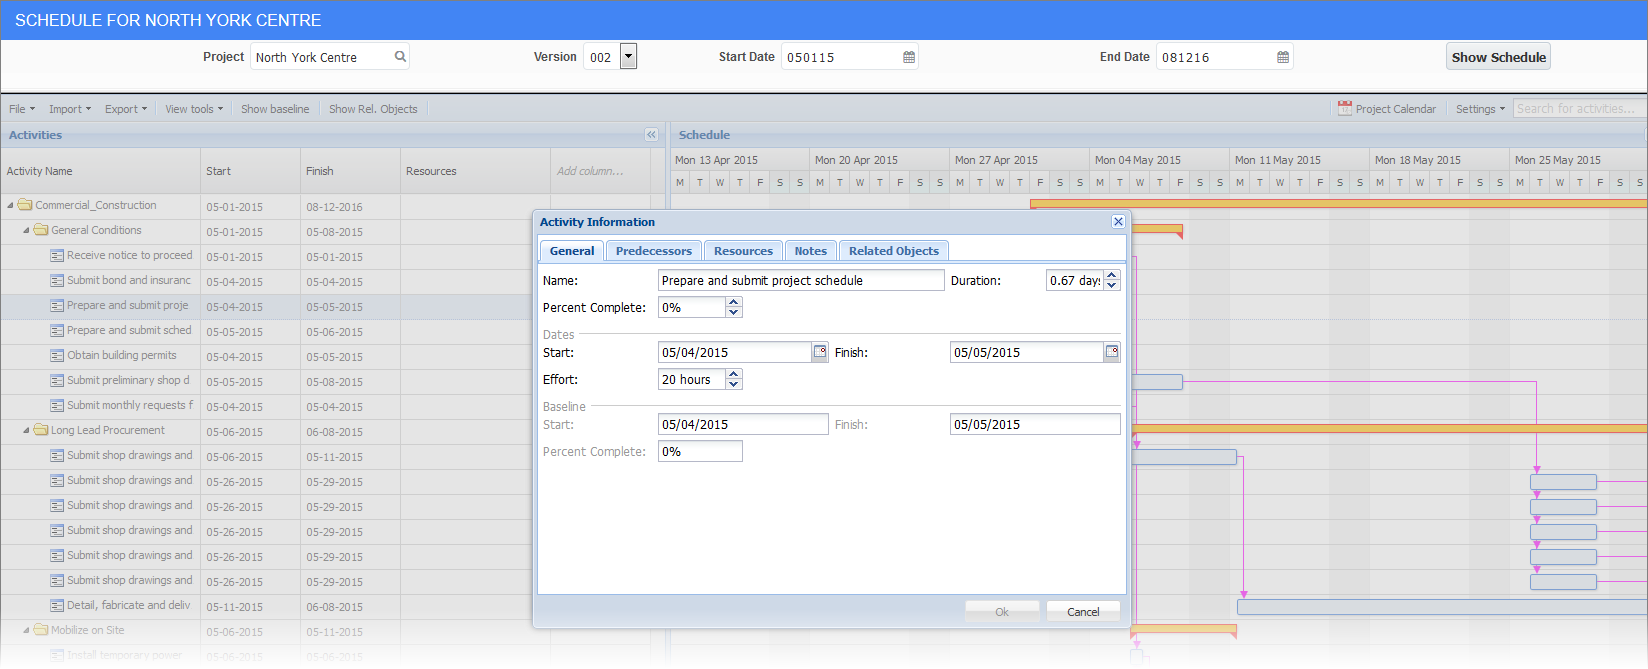
Changes can be made to the activity data, in this screen.
Milestone
This is a critical point (due date) on the schedule. It is represented by the icon  .
.
Sub-Activity
This adds a sub-activity below the selected activity.
Successor
This is a dependent activity tied to the end of the activity that it is dependent on.
Predecessor
This is a dependent activity which must occur before the activity that is dependent on it.
Additional Schedule features
-
In Activities, the red triangle indicator is used to highlight when changes are made. After saving and refreshing the schedule, it gets removed.
-
Summary tasks are highlighted in bright yellow and the other detailed tasks are indented. Summary tasks can be expanded and collapsed by clicking on them.
-
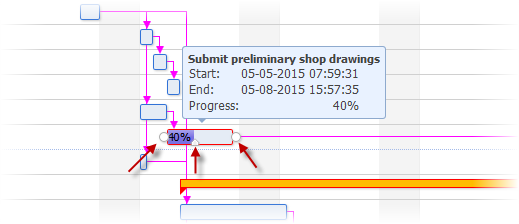
Hovering the cursor over an activity bar in the schedule will display the activity start and end delimiters and a pop-up window with information on the activity, namely the activity name, start and finish dates (including time), and progress (% Done):
-
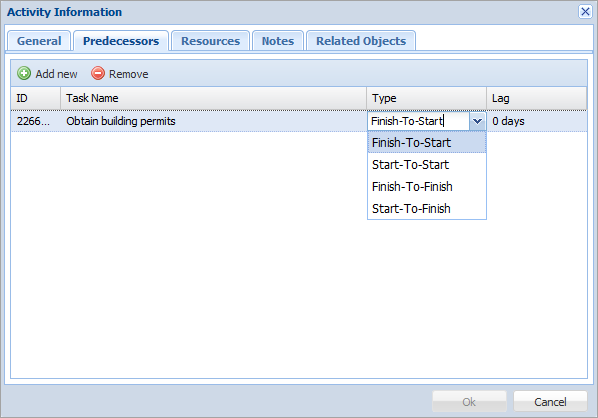
Double-click on an activity and click the Predecessors tab to create dependencies. The checkmark
 to the target means the action is allowed, otherwise,
 means it’s not a valid dependency.
 -
Dependency can be:
-
Start to Start (start of A begins at start of B)
-
Finish to Finish (end of A depends on end of B)
-
Start to Finish
-
Finish to Start
-
-
To Edit a dependency, the user must double-click on the blue activity box. The Type field can be changed and Lag field adjusted. Click [OK] to accept the changes. Click File > Save.
-
To delete a dependency, select the row click the [Remove] button in the Predecessors tab of the Activity Information pop-up window.